9 Breakfast Ideas for Stress-Free Mornings
You're about to discover how a little breakfast prep can transform your hectic mornings into smooth, stress-free starts. These nine make-ahead options combine convenience with nutrition, from protein-packed egg muffins to customizable overnight oats. Whether you've got just five minutes or prefer to meal prep on Sundays, there's a solution that'll fit your schedule and taste preferences. Let's explore how these practical breakfast ideas can help you say goodbye to morning chaos and hello to satisfying, energizing meals.
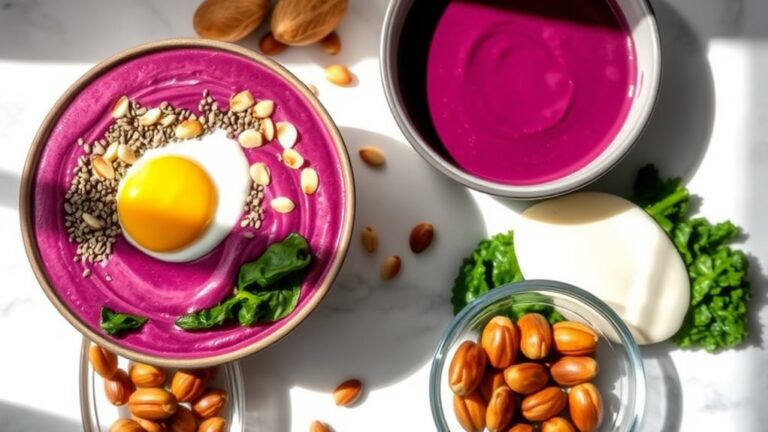
Overnight Oats With Mix-And-Match Toppings
Overnight oats have become increasingly popular as a convenient and nutritious breakfast option that requires minimal morning preparation. This versatile dish can be prepared in advance, allowing the oats to soften and develop a creamy consistency while you sleep.
The beauty of overnight oats lies in their adaptability, as they can be customized with countless topping combinations to suit different tastes and dietary preferences. From fresh fruits and nuts to seeds and nut butters, the possibilities are endless, making it an excellent choice for those who enjoy variety in their morning routine.
Ingredients:
- 1/2 cup old-fashioned rolled oats
- 1/2 cup milk (dairy or plant-based)
- 1/4 cup yogurt (plain or flavored)
- 1 tablespoon chia seeds
- 1 tablespoon maple syrup or honey
- 1/4 teaspoon vanilla extract
- Pinch of salt
In a mason jar or container with a lid, combine the rolled oats, milk, yogurt, and chia seeds. Add the maple syrup or honey, vanilla extract, and a pinch of salt. Stir all ingredients thoroughly to ensure the oats and chia seeds are well-distributed throughout the mixture.
Seal the container and refrigerate overnight or for at least 6 hours. During this time, the oats and chia seeds will absorb the liquid, creating a thick, pudding-like consistency. The longer the mixture sits, the softer and creamier it becomes.
When ready to serve, remove from the refrigerator and stir well. Add your chosen toppings such as fresh berries, sliced bananas, chopped nuts, seeds, nut butter, coconut flakes, or a drizzle of honey. The oats can be eaten cold straight from the refrigerator or gently warmed in the microwave if preferred.
For best results, prepare overnight oats in individual portions using containers with tight-fitting lids. The basic mixture will keep in the refrigerator for up to 5 days, making it perfect for batch preparation.
Add toppings just before serving to maintain their texture and freshness, and adjust the liquid ratio to achieve your preferred consistency – use more milk for a looser texture or less for a thicker result.
Freezer-Friendly Breakfast Burritos

Freezer-friendly breakfast burritos are the perfect solution for hectic mornings when you need a quick, satisfying meal. These handheld delights can be prepared in advance, stored in the freezer, and reheated in minutes, providing a wholesome breakfast option packed with protein and nutrients.
The beauty of these make-ahead burritos lies in their versatility and convenience. You can customize the fillings based on your preferences and what you have available, making them an excellent option for meal prep. When properly wrapped and stored, these burritos can last up to three months in the freezer without compromising taste or quality.
Ingredients:
- 12 large flour tortillas
- 12 large eggs
- 1 pound breakfast sausage
- 2 cups shredded cheddar cheese
- 3 medium potatoes, diced
- 1 red bell pepper, diced
- 1 onion, diced
- 2 tablespoons olive oil
- Salt and pepper to taste
- Hot sauce (optional)
- Aluminum foil for wrapping
Begin by cooking the diced potatoes in olive oil over medium heat until golden brown and tender, about 10-12 minutes. Add the diced onions and bell peppers to the same pan, cooking until the vegetables are softened. Remove the mixture from the pan and set aside.
In the same pan, cook the breakfast sausage until browned and crumbly. While the sausage cooks, whisk the eggs in a large bowl and season with salt and pepper. Once the sausage is done, drain excess fat if necessary, then add the beaten eggs to the pan. Scramble the eggs with the sausage until just set, as they'll continue cooking slightly when reheated.
Warm the tortillas slightly to make them more pliable. Place a tortilla flat and layer with the egg-sausage mixture, potato-vegetable mixture, and shredded cheese. Fold in the sides of the tortilla and roll tightly into a burrito. Wrap each burrito individually in aluminum foil, making sure they're sealed well to prevent freezer burn.
When you're ready to enjoy a burrito, remove it from the freezer and unwrap the foil. Wrap the burrito in a paper towel and microwave for 2-3 minutes, flipping halfway through. For better texture, you can also thaw the burrito overnight in the refrigerator and then heat it in a skillet over medium heat until crispy on both sides and heated through.
For the best results, avoid overfilling the burritos and squeeze out any excess air before wrapping them in foil. You can also experiment with different cheese varieties, add fresh herbs, or include additional vegetables to create your perfect breakfast combination.
Make-Ahead Egg and Cheese Muffins

These savory egg and cheese muffins are the perfect make-ahead breakfast solution for busy mornings. Simply reheat them in the microwave for 30 seconds, and you'll have a protein-rich breakfast ready to go.
They're also customizable with different cheese varieties and add-ins to keep breakfast interesting throughout the week. Made in a standard muffin tin, these portable breakfast bites can be stored in the refrigerator for up to 5 days or frozen for up to 3 months.
Each muffin is packed with protein from the eggs and cheese, making them an excellent option for keeping you satisfied until lunch time.
Ingredients:
- 12 large eggs
- 1/2 cup milk
- 1 cup shredded cheddar cheese
- 1/4 cup grated Parmesan cheese
- 1/2 teaspoon salt
- 1/4 teaspoon black pepper
- 1/4 teaspoon garlic powder
- 2 tablespoons chopped fresh chives
- Cooking spray
Preheat your oven to 350°F (175°C). Prepare a 12-cup muffin tin by coating it thoroughly with cooking spray. This step is crucial to ensure the egg muffins release easily after baking.
In a large bowl, whisk together the eggs and milk until well combined. Add the salt, pepper, and garlic powder, continuing to whisk until the seasonings are evenly distributed.
Stir in both types of cheese and the chopped chives, reserving a small amount of cheese for topping. Pour the egg mixture evenly into the prepared muffin cups, filling each about 3/4 full. Sprinkle the remaining cheese on top of each muffin.
Bake for 20-25 minutes, or until the eggs are set and the tops are lightly golden. Allow the muffins to cool in the pan for 5 minutes before removing them.
For best results, let the muffins cool completely before storing them in an airtight container. When reheating, wrap each muffin in a paper towel to prevent them from becoming rubbery in the microwave.
These muffins can be varied by adding different mix-ins such as diced bell peppers, spinach, or cooked bacon – just be sure any additional vegetables are well-drained to prevent excess moisture from affecting the texture.
5-Minute Protein Smoothie Packs
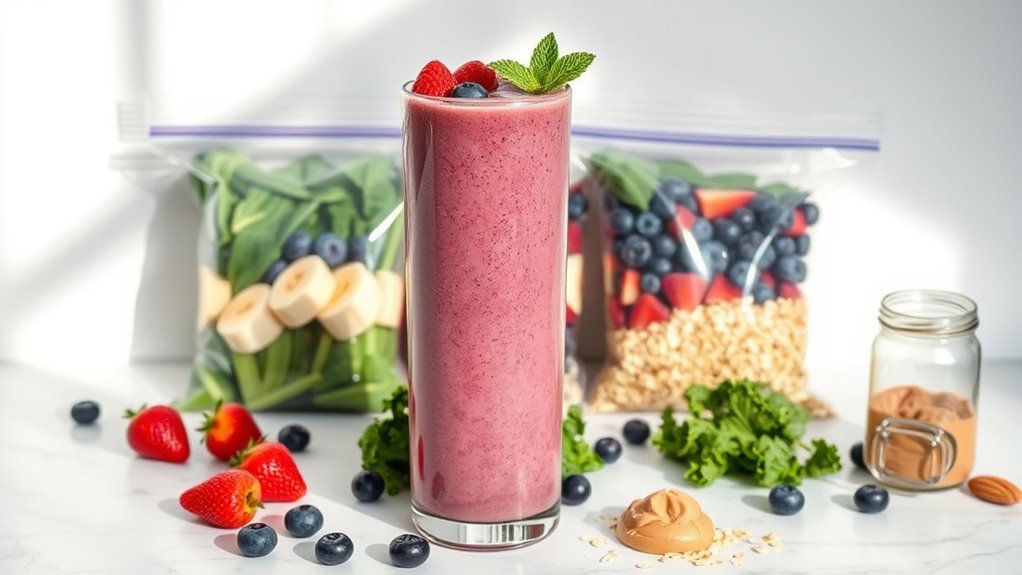
A protein smoothie pack is the ultimate solution for hectic mornings when time is precious but nutrition can't be compromised. These pre-portioned freezer bags contain all the essential ingredients needed for a wholesome breakfast smoothie, requiring minimal preparation when you're ready to blend.
By spending just 30 minutes on meal prep during the weekend, you can create multiple smoothie packs that will last for weeks in your freezer. Each pack is designed to provide a balanced mix of protein, healthy fats, and essential vitamins while keeping you satisfied until lunch.
Ingredients (per smoothie pack):
- 1 cup spinach or kale
- 1 banana, sliced
- 1/2 cup mixed berries
- 1 tablespoon chia seeds
- 1 tablespoon almond butter
- 1 scoop protein powder
- 1/2 cup Greek yogurt
- 1 cup almond milk
- 1 tablespoon honey
- 1/4 cup rolled oats
To prepare the smoothie packs, start by laying out several freezer-safe zip-top bags. Place the spinach or kale at the bottom of each bag, followed by the sliced banana, berries, and rolled oats.
Add the chia seeds and portion out the protein powder into small separate bags or containers (as this shouldn't be frozen).
When ready to prepare the smoothie, empty the frozen contents of one pack into a high-powered blender. Add the fresh almond milk, Greek yogurt, almond butter, honey, and the portioned protein powder.
Blend on high speed for 60-90 seconds until smooth and creamy. For optimal texture, let the frozen ingredients thaw for about 5 minutes before blending. This will help create a smoother consistency and prevent strain on your blender's motor.
If the mixture is too thick, gradually add more almond milk until reaching desired consistency.
When preparing smoothie packs, always squeeze out excess air from the freezer bags before sealing to prevent freezer burn. The packs can be stored for up to three months in the freezer, making them perfect for bulk preparation.
For best results, label each pack with the date and consume the oldest packs first. Adding a small piece of parchment paper between frozen fruit pieces can prevent them from sticking together, making it easier to blend later.
Sheet Pan Breakfast Meal Prep
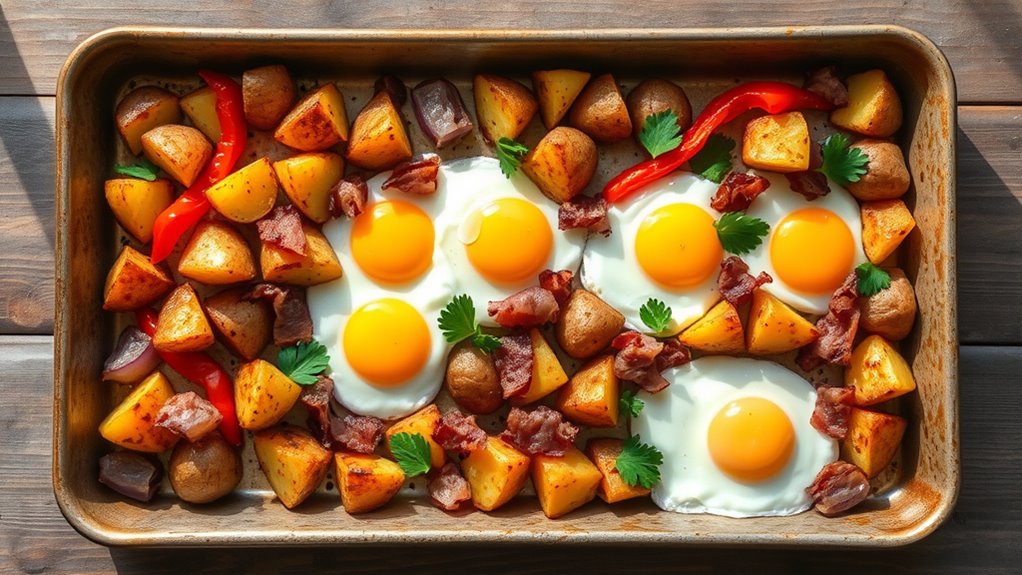
Sheet Pan Breakfast Meal Prep is a game-changer for busy weekday mornings. By spending just a little time on meal prep during the weekend, you can ensure nutritious, delicious breakfasts are ready to go when you need them. This method allows you to cook multiple breakfast components simultaneously while minimizing cleanup.
This recipe combines protein-rich eggs, seasoned potatoes, and colorful vegetables, all roasted to perfection on a single sheet pan. The portions can be divided into individual containers and refrigerated for up to four days, making it an ideal solution for those hectic morning schedules.
Ingredients:
- 2 pounds baby potatoes, quartered
- 2 bell peppers, sliced
- 1 red onion, sliced
- 12 large eggs
- 8 strips bacon
- 2 tablespoons olive oil
- 1 teaspoon garlic powder
- 1 teaspoon paprika
- 1 teaspoon dried thyme
- Salt and pepper to taste
- Optional garnish: fresh parsley
Preheat your oven to 400°F (200°C) and line a large sheet pan with parchment paper. In a large bowl, toss the quartered potatoes with olive oil, garlic powder, paprika, thyme, salt, and pepper until evenly coated. Spread the seasoned potatoes on one-third of the sheet pan.
Arrange the bacon strips on another third of the pan. On the remaining third of the pan, arrange the sliced bell peppers and onions. Season the vegetables with a light sprinkle of salt and pepper.
Place the sheet pan in the preheated oven and roast for 20 minutes. Remove the bacon once crispy, around the 15-minute mark, and continue cooking the potatoes and vegetables until the potatoes are tender.
Once the potatoes are cooked through (about 25-30 minutes total), remove the pan from the oven. Create four to six wells among the vegetables and crack eggs into each well. Return the pan to the oven and bake for an additional 5-7 minutes, or until the eggs reach your desired level of doneness. Crumble the reserved bacon and sprinkle it over the finished dish.
For best results, allow the food to cool completely before dividing into meal prep containers. When reheating, microwave in 30-second intervals to prevent the eggs from becoming rubbery. The potatoes can be par-boiled the night before to reduce cooking time, and vegetables can be pre-cut and stored in airtight containers until ready to use.
No-Bake Energy Balls for Busy Mornings
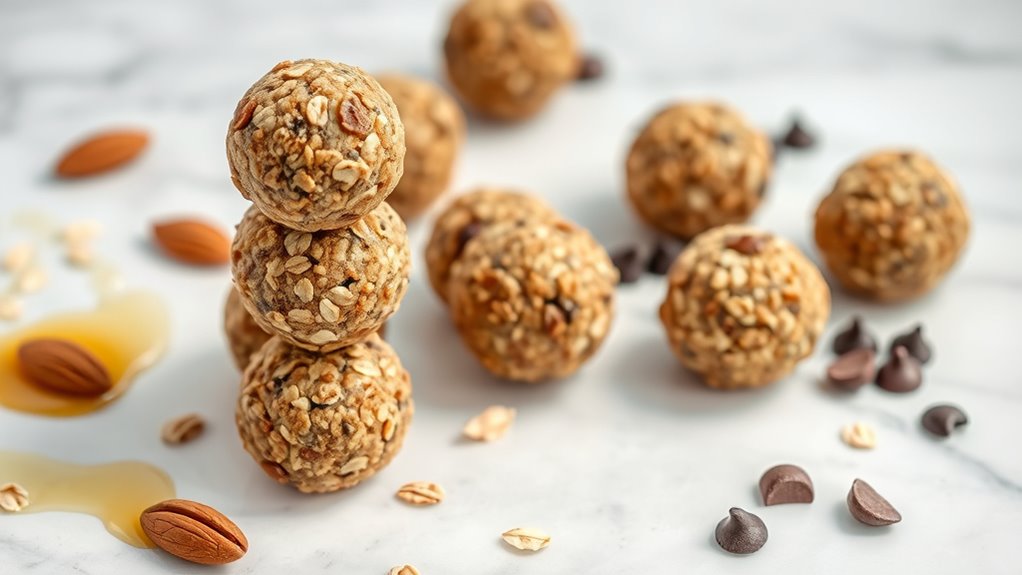
No-bake energy balls are the perfect grab-and-go breakfast solution for hectic mornings. These nutrient-dense bites combine protein, healthy fats, and complex carbohydrates to provide sustained energy throughout your morning routine.
These energy balls can be prepared in advance and stored for up to two weeks, making them an ideal meal prep option. The best part is that they require no cooking or baking, just a few minutes of mixing and rolling into bite-sized portions.
Ingredients:
- 1 cup old-fashioned oats
- 1/2 cup natural peanut butter
- 1/3 cup honey
- 1/4 cup ground flaxseed
- 1/4 cup mini dark chocolate chips
- 1/3 cup chopped almonds
- 1 teaspoon vanilla extract
- 1/2 teaspoon cinnamon
- Pinch of salt
In a large mixing bowl, combine the old-fashioned oats, ground flaxseed, and cinnamon. Stir these dry ingredients together until well mixed.
Add the peanut butter and honey to the bowl, followed by the vanilla extract and salt. Mix thoroughly until the ingredients start forming a sticky, uniform mixture.
Fold in the mini chocolate chips and chopped almonds, distributing them evenly throughout the mixture. If the mixture seems too wet, add a few more oats; if too dry, add a small amount of honey or peanut butter until you reach a consistency that holds together well when pressed.
Using clean hands or a small cookie scoop, roll the mixture into 1-inch balls. Place the formed balls on a parchment-lined baking sheet and refrigerate for at least 30 minutes to allow them to set.
Once firm, transfer the energy balls to an airtight container for storage. For best results, keep the mixture cold while rolling the balls, as this will prevent them from becoming too sticky.
You can also wet your hands slightly to prevent the mixture from sticking to them during rolling. Store the energy balls in the refrigerator for up to two weeks, or freeze them for up to three months in a freezer-safe container.
Mason Jar Yogurt Parfait Station
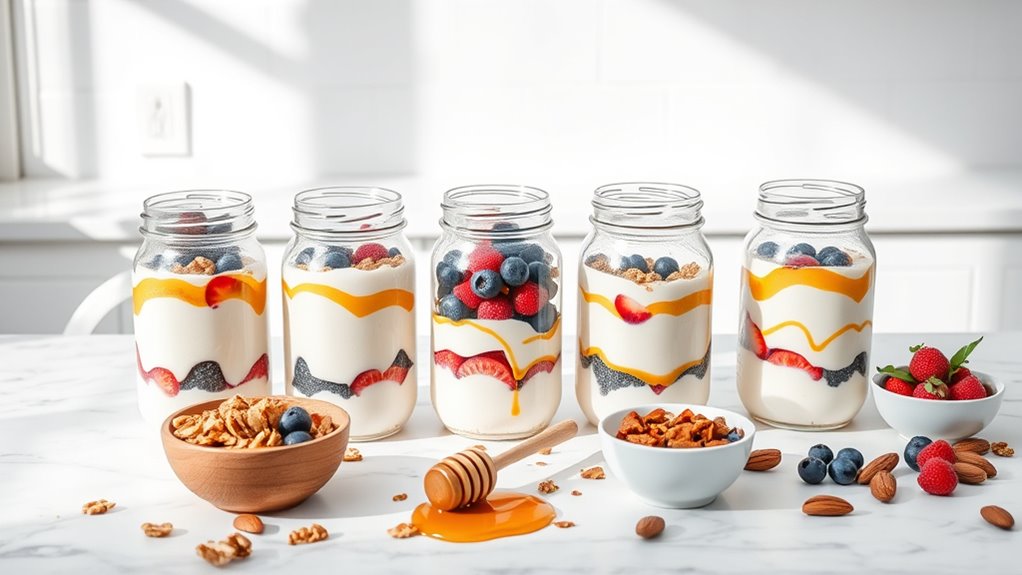
Mason jar yogurt parfaits are the ultimate make-ahead breakfast solution that combines convenience with nutrition. By setting up a parfait station with pre-portioned ingredients, you can quickly assemble beautiful layered breakfasts that stay fresh for several days in the refrigerator.
These portable breakfast parfaits are completely customizable and can be adapted to any dietary preference or restriction. The key is to layer ingredients properly to maintain freshness and prevent soggy elements, while creating a visually appealing presentation through the clear glass of mason jars.
Ingredients (for 4 servings):
- 4 16-oz mason jars with lids
- 3 cups plain or vanilla Greek yogurt
- 2 cups mixed berries (strawberries, blueberries, raspberries)
- 2 cups granola
- 1/2 cup honey
- 1 cup chopped nuts (almonds, walnuts, or pecans)
- 1 cup chia seeds or flax seeds (optional)
- 1 cup dried fruit (optional)
Start by washing and completely drying your mason jars. This step is crucial to prevent any moisture from compromising the freshness of your ingredients.
If using fresh berries, wash and dry them thoroughly, then slice any larger fruits like strawberries into bite-sized pieces.
Layer your parfaits strategically to maintain optimal texture. Begin with a layer of yogurt at the bottom (about 1/3 cup), followed by a drizzle of honey. Add a layer of berries, then another layer of yogurt.
Continue layering until you reach about 3/4 of the jar's capacity, leaving room at the top for granola and additional toppings.
Store the assembled jars in the refrigerator without the granola and nuts. These crunchy elements should be stored separately in airtight containers as part of your parfait station.
When ready to eat, simply top your parfait with a generous handful of granola, nuts, and any additional toppings like dried fruit or seeds.
For best results, prepare these parfaits no more than 3 days in advance, and always keep the dry ingredients separate until serving time.
If using frozen berries, place them in the middle layers to prevent excess moisture from making the granola soggy. Consider adding a small piece of parchment paper between the yogurt and granola layers when ready to serve to maintain the crispy texture longer.
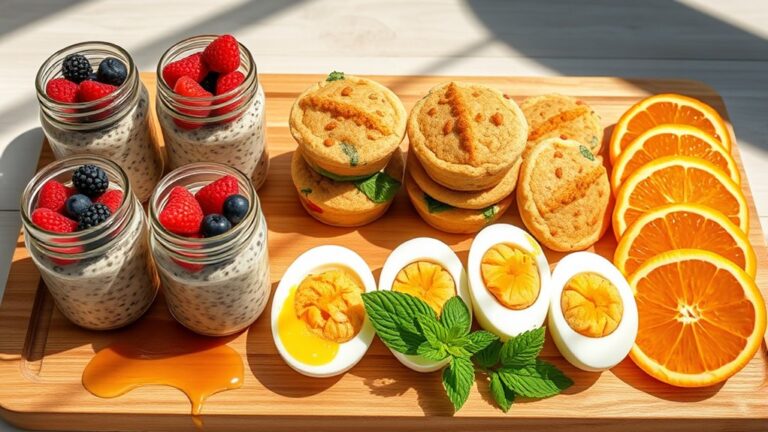
Grab-and-Go Breakfast Sandwiches

Make-Ahead Breakfast Sandwiches bring convenience and nutrition to busy mornings without sacrificing taste. These handheld meals combine protein-rich eggs, melted cheese, and your choice of meat on toasted English muffins, creating a satisfying breakfast that can be prepared in advance.
These sandwiches can be assembled in batches and frozen for up to a month, making them perfect for meal prep. When you're ready to eat, simply reheat in the microwave or toaster oven for a warm, restaurant-quality breakfast sandwich that beats anything from the drive-through.
Ingredients:
- 6 English muffins
- 6 large eggs
- 6 slices cheese (cheddar, American, or Swiss)
- 6 slices Canadian bacon or breakfast sausage patties
- Salt and pepper to taste
- Butter for cooking
- Optional: fresh spinach or sliced tomatoes
Preheat the oven to 350°F (175°C). Split the English muffins and place them on a baking sheet. Toast them in the oven until lightly golden, about 5 minutes.
Meanwhile, crack each egg into a greased muffin tin, breaking the yolk and seasoning with salt and pepper. Bake the eggs for 12-15 minutes until set but still slightly soft in the center.
While the eggs are baking, cook your chosen breakfast meat in a skillet over medium heat until heated through and slightly crispy. If using sausage patties, ensure they're cooked to the proper internal temperature. Set aside on paper towels to drain any excess grease.
Assembly is straightforward: Place a slice of cheese on the bottom half of each English muffin, followed by the cooked egg, breakfast meat, and any optional additions like spinach or tomato. Close the sandwiches with the top halves of the English muffins.
If freezing, wrap each sandwich individually in parchment paper, then aluminum foil, and place in a freezer bag.
For best results when reheating, remove the foil and parchment paper, wrap the sandwich loosely in a paper towel, and microwave for 1-1.5 minutes if frozen, or 30 seconds if refrigerated.
For crispier results, finish the reheated sandwich in a toaster oven for 2-3 minutes. Let the sandwich rest for 30 seconds before eating to allow the heat to distribute evenly and prevent burning.
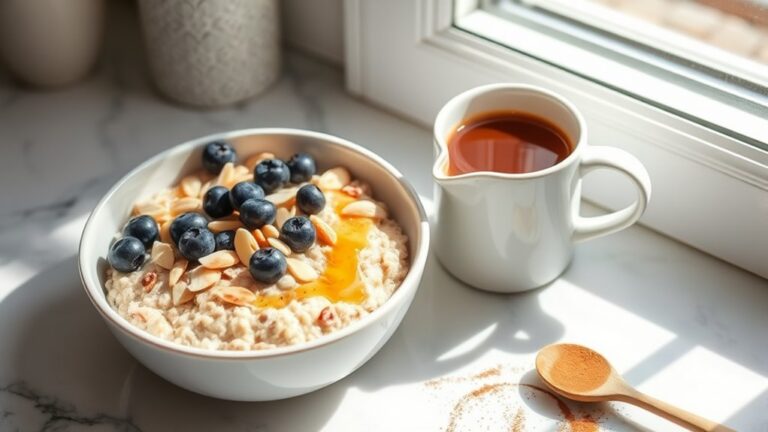
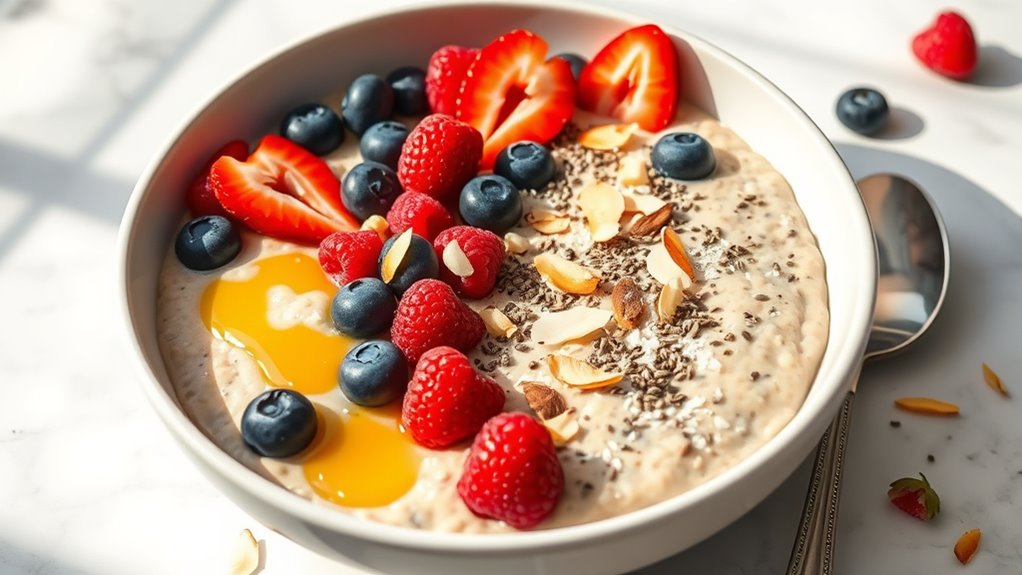
Quick Chia Seed Pudding Bowls
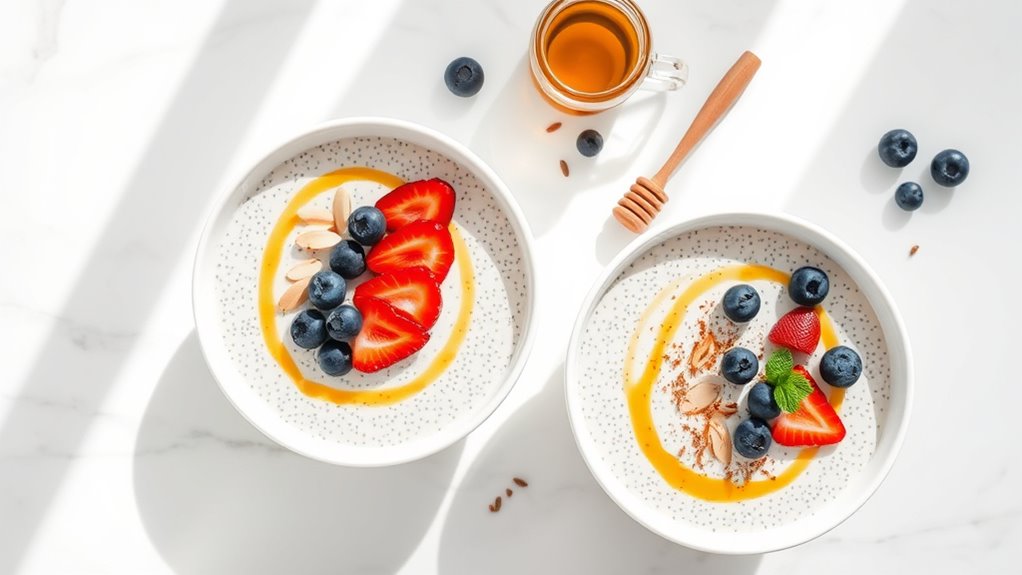
Chia seed pudding bowls have become increasingly popular as a nutritious make-ahead breakfast option. These versatile bowls are packed with omega-3 fatty acids, fiber, and protein, making them an excellent choice for sustained energy throughout the morning.
What makes chia pudding particularly appealing for stress-free mornings is that they can be prepared the night before, requiring minimal effort when you wake up. The basic recipe can be customized with various toppings and mix-ins to prevent breakfast monotony while maintaining its nutritional benefits.
Ingredients:
- 3 tablespoons chia seeds
- 1 cup plant-based milk (almond, coconut, or oat)
- 1 tablespoon maple syrup or honey
- ½ teaspoon vanilla extract
- Pinch of salt
- Fresh fruits for topping
- Nuts or granola for garnish
- Optional: cinnamon or cocoa powder
In a clean glass jar or container, combine the chia seeds, milk, sweetener, vanilla extract, and salt. Stir the mixture thoroughly, making sure there are no clumps of chia seeds stuck together. This initial mixing is crucial as it prevents the seeds from clumping together when they begin to gel.
Let the mixture sit for about 5 minutes, then stir again to break up any clusters that may have formed. This second mixing ensures an even distribution of the seeds throughout the liquid. Cover the container and refrigerate for at least 4 hours or overnight, allowing the chia seeds to absorb the liquid and create a pudding-like consistency.
When ready to serve, give the pudding a final stir and check the consistency. If it's too thick, add a splash of milk; if too thin, add more chia seeds and wait 10 minutes. Transfer to serving bowls and top with your chosen fruits, nuts, or granola. For added flavor dimensions, consider layering the pudding with fruit compote or nut butter.
For best results, consume the chia pudding within 5 days of preparation. The basic recipe can be doubled or tripled for meal prep purposes, and the toppings can be prepared and stored separately to maintain their freshness. If you prefer a smoother consistency, try blending the prepared pudding in a high-speed blender for a few seconds before serving.