15 Chicken Breast Recipes For Crazy Weeknights
You've had those hectic weeknights when cooking feels like climbing a mountain, but these chicken breast recipes will become your new go-to solutions. From the sweet-and-savory pan-seared honey garlic chicken that's ready in 20 minutes, to a simple sheet pan bruschetta chicken that practically cooks itself, you'll find options that fit your schedule and taste preferences. Let's explore how these 15 foolproof recipes can transform your busy evenings into stress-free dining experiences, starting with the most popular choice among home cooks.
Pan-Seared Honey Garlic Chicken Breast
Pan-Seared Honey Garlic Chicken Breast transforms ordinary chicken into a delectable weeknight dinner that combines sweet and savory flavors. The honey creates a beautiful caramelized glaze while the garlic adds depth and aromatics, resulting in a restaurant-quality dish that's surprisingly simple to prepare at home.
This recipe requires minimal ingredients but delivers maximum flavor, making it perfect for busy cooks who want to serve something impressive without spending hours in the kitchen. The chicken turns out juicy on the inside with a golden-brown crust on the outside, complemented by a glossy honey-garlic sauce that coats each piece perfectly.
- 4 boneless, skinless chicken breasts
- 3 tablespoons honey
- 4 cloves garlic, minced
- 2 tablespoons olive oil
- Salt
- Black pepper
Season both sides of the chicken breasts generously with salt and pepper. Place a large skillet over medium-high heat and add olive oil. Once the oil is hot, add the chicken breasts and cook for 5-6 minutes on each side until golden brown and nearly cooked through.
Reduce heat to medium and add minced garlic to the pan, stirring it around the chicken pieces. Cook for about 30 seconds until the garlic becomes fragrant, being careful not to let it burn. Pour honey over the chicken breasts and allow it to bubble and caramelize, turning the chicken pieces to coat them evenly in the honey-garlic mixture.
Continue cooking until the chicken reaches an internal temperature of 165°F (74°C) and the honey has formed a sticky glaze. Remove the chicken from the heat and let it rest for 5 minutes before serving to allow the juices to redistribute throughout the meat.
For optimal results, remove chicken from the refrigerator 15 minutes before cooking to ensure even cooking throughout. If the chicken breasts are very thick, butterfly them or pound them to an even thickness of approximately 1/2 inch.
Watch the honey carefully as it can burn quickly; if it starts to darken too fast, lower the heat immediately. The garlic should be added later in the cooking process to prevent it from burning and becoming bitter.
Creamy Parmesan Chicken Skillet
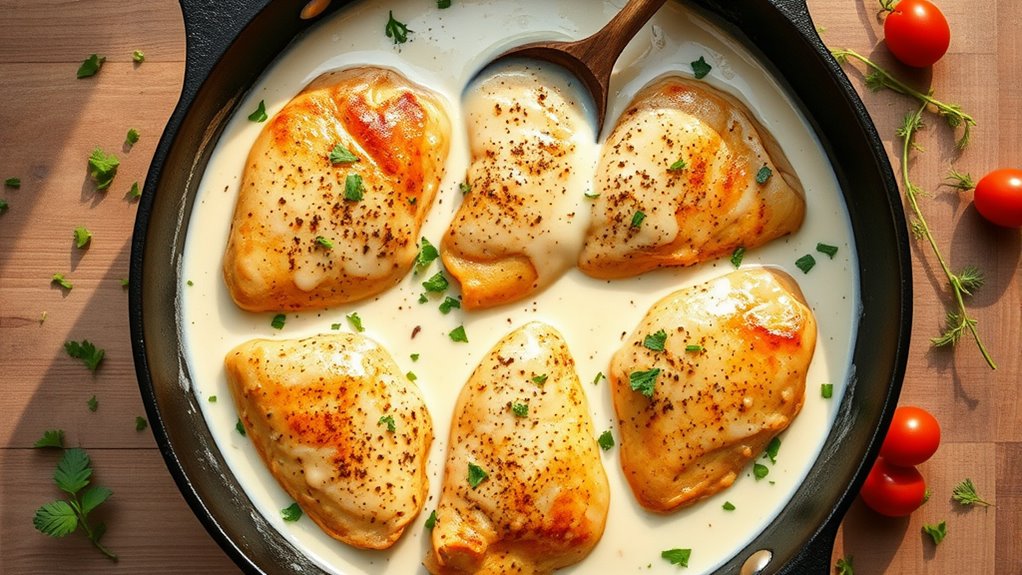
This luxurious one-pan dish combines tender chicken breasts with a rich, creamy sauce that's enhanced by the nutty flavor of Parmesan cheese. The combination creates a restaurant-quality meal that's surprisingly simple to prepare at home, making it perfect for both everyday dinners and special occasions.
The key to this recipe's success lies in building layers of flavor, starting with well-seasoned chicken and culminating in a velvety sauce that incorporates garlic, herbs, and plenty of freshly grated Parmesan. The entire dish comes together in under 30 minutes, making it an excellent choice for busy weeknights when you want something impressive yet achievable.
- 4 boneless, skinless chicken breasts
- 2 tablespoons olive oil
- 3 cloves garlic, minced
- 1 cup heavy cream
- 1 cup chicken broth
- 1 cup freshly grated Parmesan cheese
- 1 teaspoon Italian seasoning
- 1/2 teaspoon garlic powder
- Salt and black pepper to taste
- 2 tablespoons fresh parsley, chopped
- 2 tablespoons butter
Season chicken breasts generously with salt, pepper, and garlic powder. Heat olive oil in a large skillet over medium-high heat. Once hot, add the chicken breasts and cook for 5-7 minutes on each side until golden brown and cooked through. Remove chicken from the pan and set aside.
Reduce heat to medium and add butter to the same skillet. Once melted, add minced garlic and cook for 30 seconds until fragrant. Pour in the chicken broth and scrape up any browned bits from the bottom of the pan.
Add heavy cream and Italian seasoning, allowing the sauce to simmer for 3-4 minutes until it starts to thicken. Stir in the Parmesan cheese gradually until melted and smooth.
Return the chicken to the pan, spooning the sauce over the top. Let everything simmer together for 2-3 minutes until the chicken is heated through and the sauce has reached your desired consistency. Garnish with fresh parsley before serving.
For the best results, avoid using pre-grated Parmesan cheese as it doesn't melt as smoothly as freshly grated. If the sauce becomes too thick, thin it out with additional chicken broth.
To ensure even cooking, pound the chicken breasts to an even thickness or butterfly them before cooking. The sauce can be made ahead and reheated gently, adding a splash of cream if needed to restore its consistency.
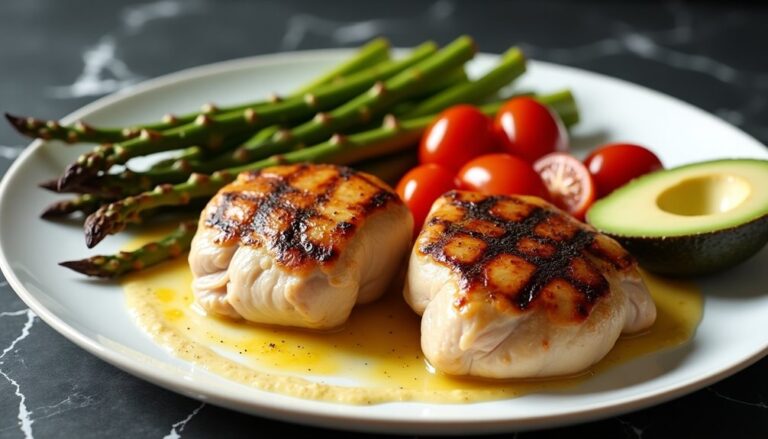
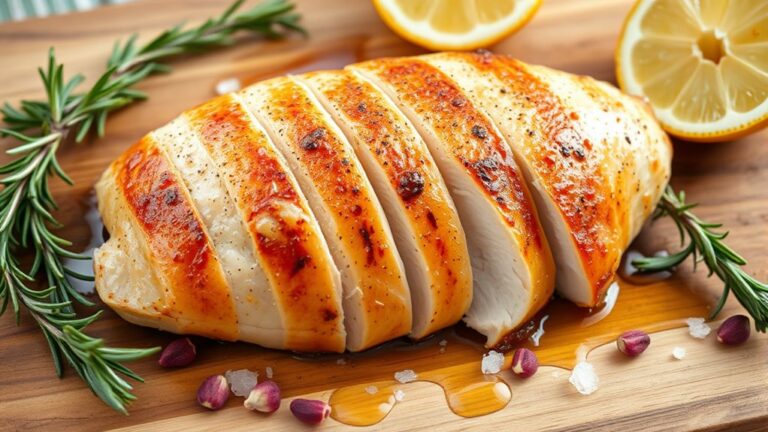
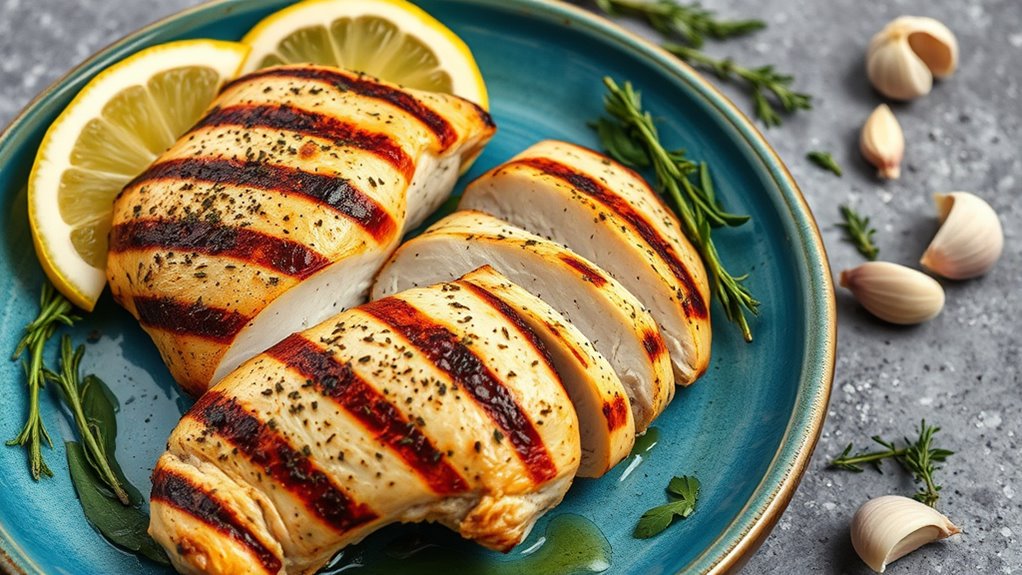
Lemon Herb Grilled Chicken Breast
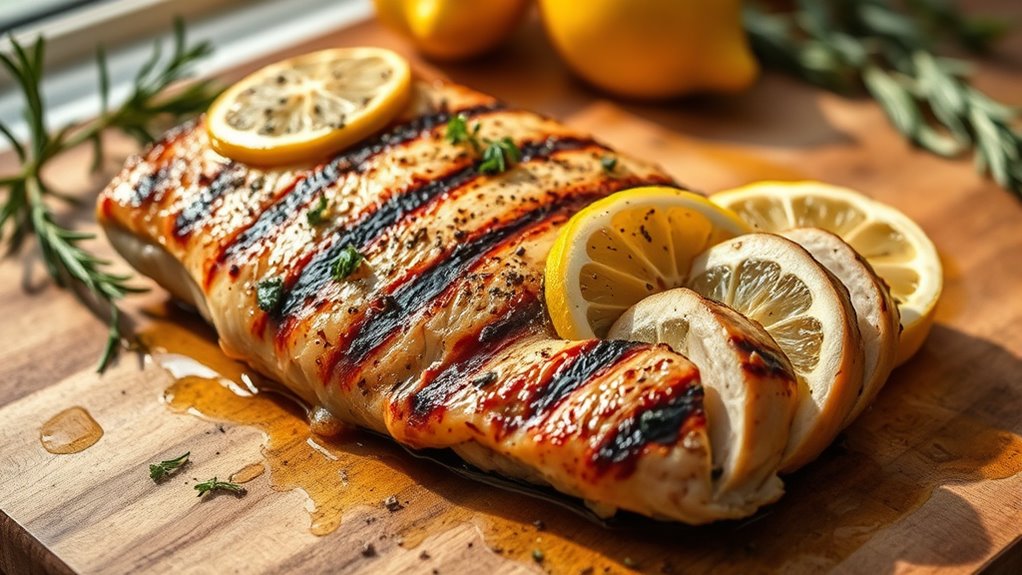
This bright and vibrant grilled chicken dish brings together the zesty flavors of fresh lemon with an aromatic blend of herbs. The citrus not only adds a refreshing taste but also helps tenderize the meat, resulting in juicy, flavorful chicken breasts that are perfect for summer grilling.
The combination of herbs like thyme, rosemary, and parsley creates a Mediterranean-inspired profile that elevates the simple chicken breast into an elegant entrée. This recipe works equally well for casual backyard barbecues or sophisticated dinner parties, and the leftovers make excellent salads or sandwiches.
- 4 boneless, skinless chicken breasts
- 2 lemons, juiced and zested
- 4 cloves garlic, minced
- 2 tablespoons fresh thyme leaves
- 2 tablespoons fresh rosemary, chopped
- 2 tablespoons fresh parsley, chopped
- 1/4 cup olive oil
- 1 teaspoon kosher salt
- 1/2 teaspoon black pepper
- 1 lemon, sliced for garnish
In a large bowl, combine lemon juice, lemon zest, minced garlic, thyme, rosemary, parsley, olive oil, salt, and pepper. Mix well to create the marinade. Add the chicken breasts to the marinade, ensuring each piece is well-coated. Cover and refrigerate for at least 2 hours, or up to 8 hours for maximum flavor.
Preheat your grill to medium-high heat (around 375-400°F). Remove the chicken from the marinade and discard the remaining liquid. Pat the chicken breasts dry with paper towels to ensure better grill marks and prevent sticking.
Grill the chicken breasts for 6-8 minutes per side, or until the internal temperature reaches 165°F. During the last 2 minutes of cooking, place lemon slices on the grill to caramelize them for garnish. Once done, remove the chicken from the grill and let it rest for 5-10 minutes before serving.
For optimal results, ensure chicken breasts are of uniform thickness by butterflying or pounding them before marinating. If grilling isn't possible, this recipe can be adapted for a grill pan or broiler. Avoid marinating for more than 8 hours, as the acid from the lemon can start to break down the meat's texture, resulting in a mushy consistency.
Quick Teriyaki Chicken Stir-Fry
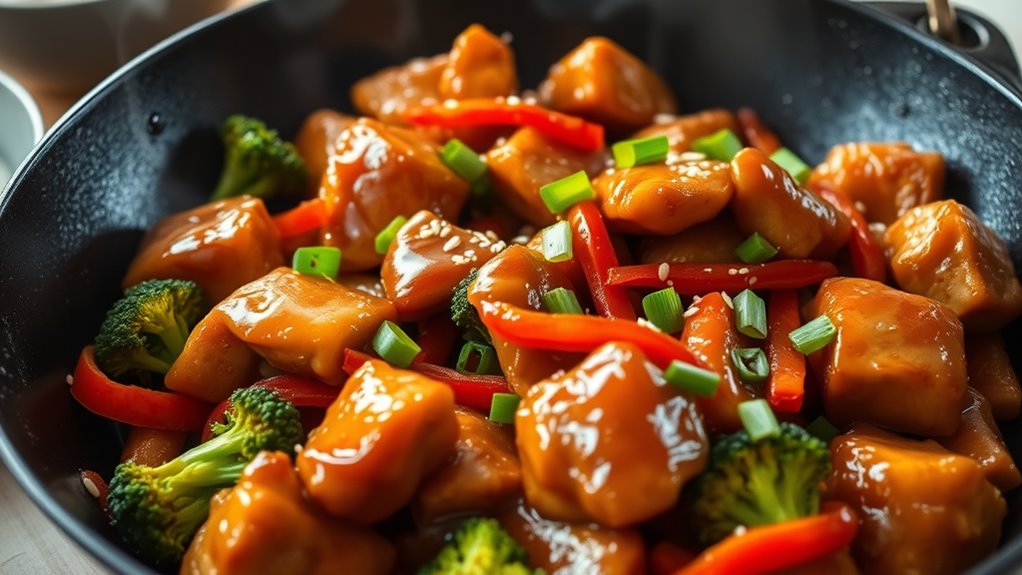
Quick Teriyaki Chicken Stir-Fry is a vibrant and flavorful dish that brings the beloved taste of Japanese cuisine to your kitchen in under 30 minutes. The tender chicken pieces are coated in a glossy teriyaki sauce, creating a perfect balance of sweet and savory flavors that pair beautifully with colorful vegetables.
This versatile stir-fry adapts well to whatever vegetables you have on hand, making it an excellent choice for busy weeknights when you need to clean out the refrigerator. The homemade teriyaki sauce comes together quickly and tastes far superior to store-bought versions, while requiring only basic pantry ingredients.
- 2 chicken breasts, cut into 1-inch pieces
- 1/2 cup soy sauce
- 1/4 cup mirin
- 2 tablespoons brown sugar
- 2 cloves garlic, minced
- 1 tablespoon ginger, grated
- 2 tablespoons vegetable oil
- 1 broccoli crown, cut into florets
- 1 red bell pepper, sliced
- 1 carrot, julienned
- 2 green onions, chopped
- 1 tablespoon cornstarch
- 2 tablespoons water
Begin by combining soy sauce, mirin, brown sugar, half of the minced garlic, and half of the grated ginger in a small bowl.
Mix the cornstarch with water in a separate small bowl to create a slurry. Set both mixtures aside.
Heat vegetable oil in a large wok or skillet over medium-high heat. Add the chicken pieces and cook until golden brown on all sides, about 5-6 minutes. Remove the chicken from the pan and set aside.
Add the remaining garlic and ginger to the pan, followed by the vegetables. Stir-fry for 3-4 minutes until the vegetables are crisp-tender.
Return the chicken to the pan, pour in the sauce mixture, and bring to a simmer. Add the cornstarch slurry and cook until the sauce thickens and coats the chicken and vegetables evenly, about 2-3 minutes.
For best results, prep all ingredients before starting to cook, as stir-frying moves quickly. Cut chicken and vegetables into similarly sized pieces to ensure even cooking.
If the sauce becomes too thick, thin it with a little chicken broth or water. For extra authenticity, serve over steamed rice and garnish with sesame seeds and additional chopped green onions.
Buffalo Ranch Chicken Tenders

These crispy, spicy chicken tenders combine the bold flavors of buffalo sauce with the cool, creamy notes of ranch seasoning. The result is a perfect balance of heat and tang that transforms ordinary chicken tenders into an irresistible meal that both kids and adults will love.
The beauty of this recipe is its versatility – serve these tenders as an appetizer, main course, or cut them up for salads and wraps.
The double coating process ensures a extra-crispy exterior while keeping the chicken juicy and tender on the inside, and the buffalo-ranch sauce creates a flavor explosion that will have everyone reaching for seconds.
- 2 pounds chicken tenderloins
- 2 cups all-purpose flour
- 2 tablespoons ranch seasoning mix
- 2 large eggs
- 1 cup buttermilk
- 1 cup buffalo sauce
- 1/4 cup melted butter
- Vegetable oil for frying
- Salt and pepper to taste
Begin by setting up your dredging station with three shallow dishes. In the first, combine flour, ranch seasoning, salt, and pepper. In the second, whisk together eggs and buttermilk. Place the remaining flour mixture in the third dish.
Pat the chicken tenders dry with paper towels. Dip each chicken tender first in the flour mixture, then the egg mixture, and finally in the second flour mixture, ensuring each piece is well-coated. Place the coated tenders on a wire rack and let them rest for 10 minutes to help the coating adhere better.
Meanwhile, heat oil in a large skillet or deep fryer to 350°F. Fry the chicken tenders in batches for 4-5 minutes per side until golden brown and cooked through (internal temperature should reach 165°F).
While the chicken is cooking, whisk together buffalo sauce and melted butter in a large bowl. As each batch of tenders finishes cooking, transfer them to paper towels to drain excess oil, then toss them in the buffalo-butter mixture until well coated.
For the crispiest results, don't overcrowd the pan when frying, and maintain oil temperature between 350-375°F. The tenders can be kept warm in a 200°F oven while cooking remaining batches.
For a healthier version, these can be baked at 400°F for 15-20 minutes, flipping halfway through, though they won't be quite as crispy as the fried version.
Mediterranean Stuffed Chicken Breast
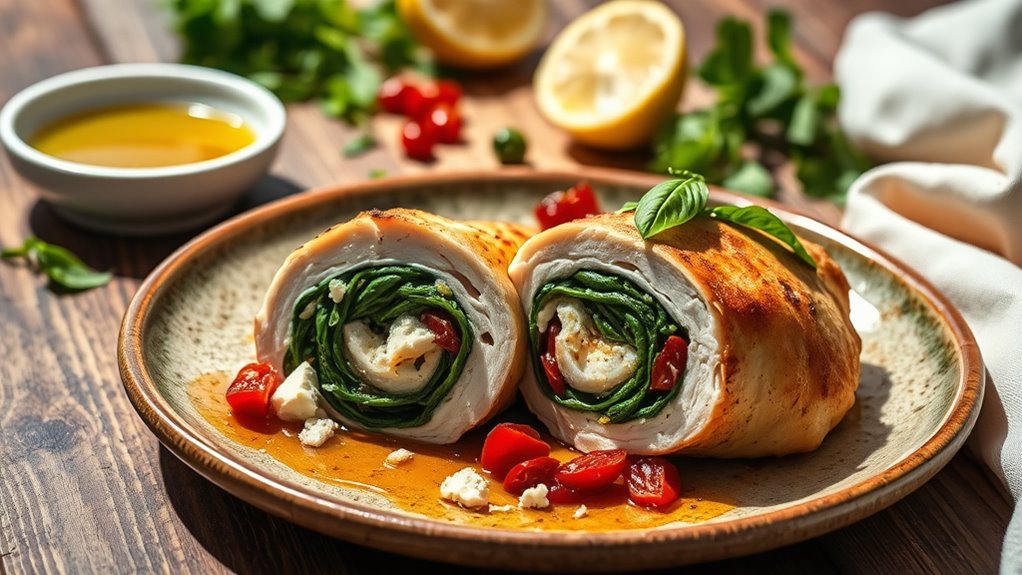
This elegant Mediterranean-inspired dish transforms ordinary chicken breasts into a gourmet meal by stuffing them with a savory mixture of spinach, feta cheese, sun-dried tomatoes, and herbs. The combination creates a vibrant flavor profile that brings the warmth and essence of Mediterranean cuisine to your dinner table.
The chicken remains remarkably juicy while the filling melts into a creamy, flavorful center that infuses the meat with Mediterranean flavors. This dish is perfect for both special occasions and elevated weeknight dinners, pairing beautifully with rice pilaf, roasted vegetables, or a simple Greek salad.
- 4 large chicken breasts
- 6 oz fresh spinach
- 4 oz feta cheese, crumbled
- 1/4 cup sun-dried tomatoes, chopped
- 3 cloves garlic, minced
- 2 tablespoons olive oil
- 1 teaspoon dried oregano
- 1 teaspoon dried basil
- 1/2 teaspoon black pepper
- 1 teaspoon salt
- 1/4 cup white wine (optional)
- 2 tablespoons lemon juice
Begin by butterflying each chicken breast horizontally, creating a pocket while keeping the opposite side attached. Place each breast between two pieces of plastic wrap and gently pound to even thickness. Season both sides with salt and pepper.
In a bowl, combine chopped spinach, crumbled feta, sun-dried tomatoes, minced garlic, dried oregano, and dried basil. Mix well until all ingredients are evenly distributed. Stuff each chicken breast pocket with the mixture, securing with toothpicks if necessary.
Heat olive oil in a large ovenproof skillet over medium-high heat. Sear the stuffed chicken breasts for 5-6 minutes on each side until golden brown. Add white wine and lemon juice to the pan, then transfer to a preheated 375°F (190°C) oven. Bake for 15-20 minutes or until the chicken reaches an internal temperature of 165°F (74°C).
For best results, allow the chicken breasts to rest at room temperature for 15 minutes before cooking. The filling can be prepared up to a day in advance and refrigerated. If the chicken breasts are browning too quickly during searing, reduce heat to medium. Let the cooked chicken rest for 5 minutes before serving to allow the juices to redistribute and the filling to set.
30-Minute Chicken Fajitas
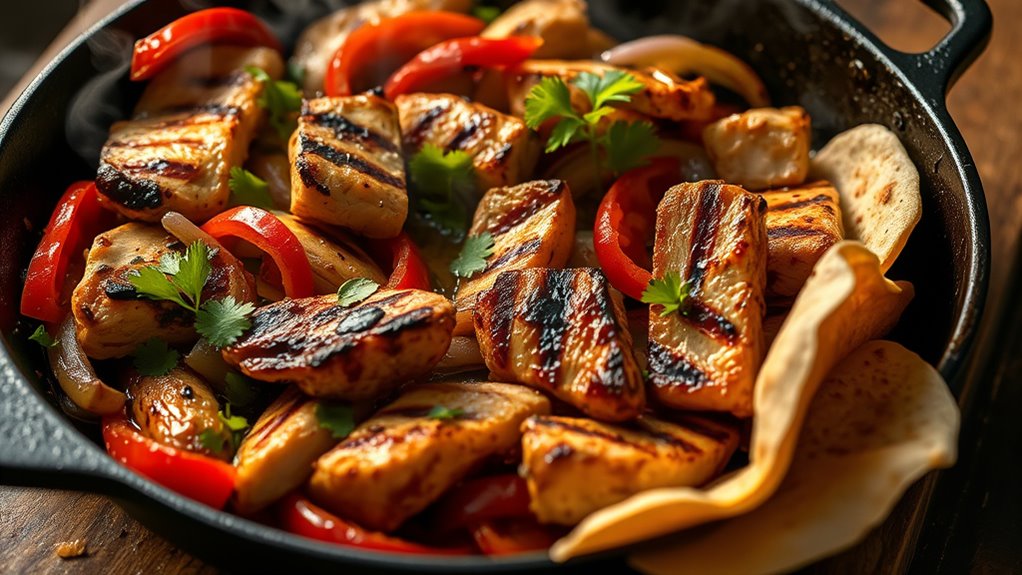
These quick and flavorful chicken fajitas bring the sizzling excitement of Mexican restaurants right to your kitchen. With colorful bell peppers, onions, and perfectly seasoned chicken strips, this recipe delivers authentic taste in a fraction of the time traditional fajitas require.
The key to these speedy fajitas lies in slicing the chicken and vegetables thinly, allowing them to cook quickly while maintaining their juicy tenderness. The combination of classic Mexican spices creates that distinctive fajita flavor that makes this dish a family favorite any night of the week.
- 1 pound chicken breasts, sliced into thin strips
- 2 bell peppers (any color), sliced
- 1 large onion, sliced
- 2 tablespoons vegetable oil
- 1 tablespoon chili powder
- 1 teaspoon ground cumin
- 1 teaspoon garlic powder
- 1 teaspoon paprika
- 1/2 teaspoon salt
- 1/4 teaspoon black pepper
- 8-10 flour tortillas
- Lime wedges for serving
Start by combining chili powder, cumin, garlic powder, paprika, salt, and pepper in a small bowl. Toss the chicken strips with half of the seasoning mixture until well coated. Heat 1 tablespoon of oil in a large skillet over high heat until shimmering.
Add the chicken strips and cook for 4-5 minutes, stirring occasionally, until chicken is cooked through and slightly charred. Remove chicken from the pan and set aside.
Add remaining oil to the skillet and throw in the sliced peppers and onions. Sprinkle with remaining seasoning mixture and cook for 3-4 minutes, stirring occasionally, until vegetables are crisp-tender and slightly charred on the edges.
Return the chicken to the pan and toss everything together to combine and heat through. Warm the tortillas either in the microwave wrapped in damp paper towels or quickly char them over an open flame on the stovetop.
Serve the fajita mixture with warm tortillas and lime wedges, allowing everyone to build their own fajitas.
For best results, slice the chicken against the grain and ensure all pieces are relatively the same size for even cooking. If time permits, let the seasoned chicken marinate for 30 minutes before cooking to enhance flavor.
To keep tortillas warm during serving, wrap them in foil or a clean kitchen towel. For additional toppings, consider having shredded cheese, sour cream, guacamole, or fresh cilantro available at the table.
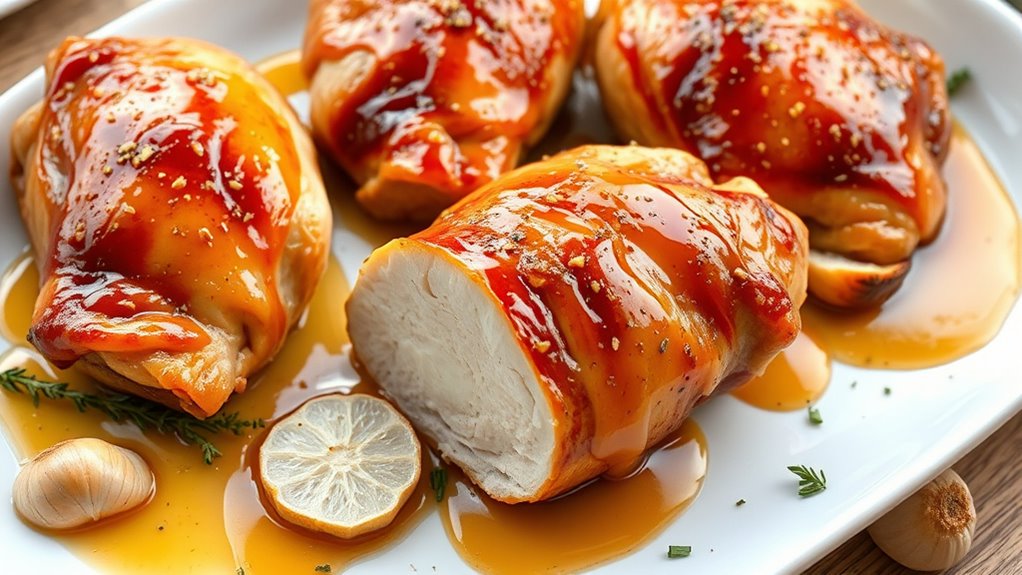
Baked BBQ Chicken Breast
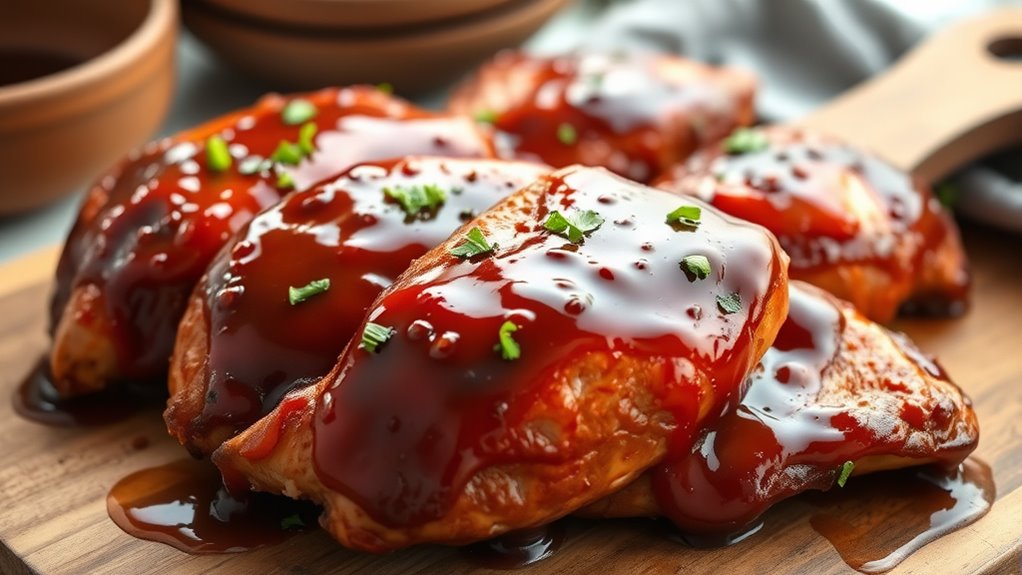
Baked BBQ chicken breast is a classic American comfort food that combines the convenience of oven cooking with the bold, sweet, and tangy flavors of barbecue sauce. This dish delivers tender, juicy chicken with a sticky, caramelized exterior that satisfies both kids and adults alike.
This recipe simplifies the traditional BBQ experience by bringing it indoors, making it perfect for any season. The low-and-slow baking method ensures the chicken stays moist while allowing the barbecue sauce to develop a rich, concentrated flavor as it bakes into the meat.
- 4 boneless, skinless chicken breasts
- 1 cup BBQ sauce
- 2 tablespoons olive oil
- 1 tablespoon brown sugar
- 1 teaspoon garlic powder
- 1 teaspoon paprika
- 1 teaspoon onion powder
- 1/2 teaspoon salt
- 1/2 teaspoon black pepper
Preheat the oven to 375°F (190°C). Mix the garlic powder, paprika, onion powder, salt, and pepper in a small bowl. Pat the chicken breasts dry with paper towels and rub them with olive oil. Season both sides of the chicken with the spice mixture.
Place the seasoned chicken breasts in a baking dish and bake for 20 minutes. Remove from the oven and brush each chicken breast generously with BBQ sauce mixed with brown sugar. Return to the oven and bake for an additional 10-15 minutes, or until the chicken reaches an internal temperature of 165°F (74°C).
During the final 5 minutes of cooking, brush the chicken with additional BBQ sauce and switch the oven to broil. Watch carefully as the sauce caramelizes and creates a glossy finish, about 2-3 minutes.
For optimal results, let the chicken rest for 5-10 minutes before serving to allow the juices to redistribute. If using thick chicken breasts, consider butterflying them or pounding to an even thickness to ensure even cooking. Choose a BBQ sauce that matches your preferred level of sweetness and heat, and avoid sauces with high sugar content as they can burn quickly under high heat.
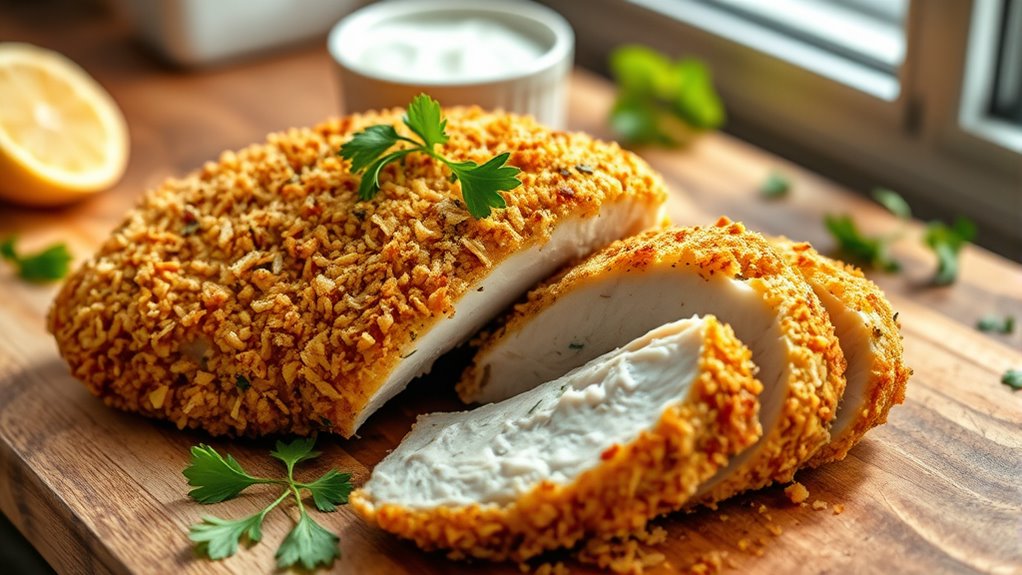
Crispy Chicken Cutlets
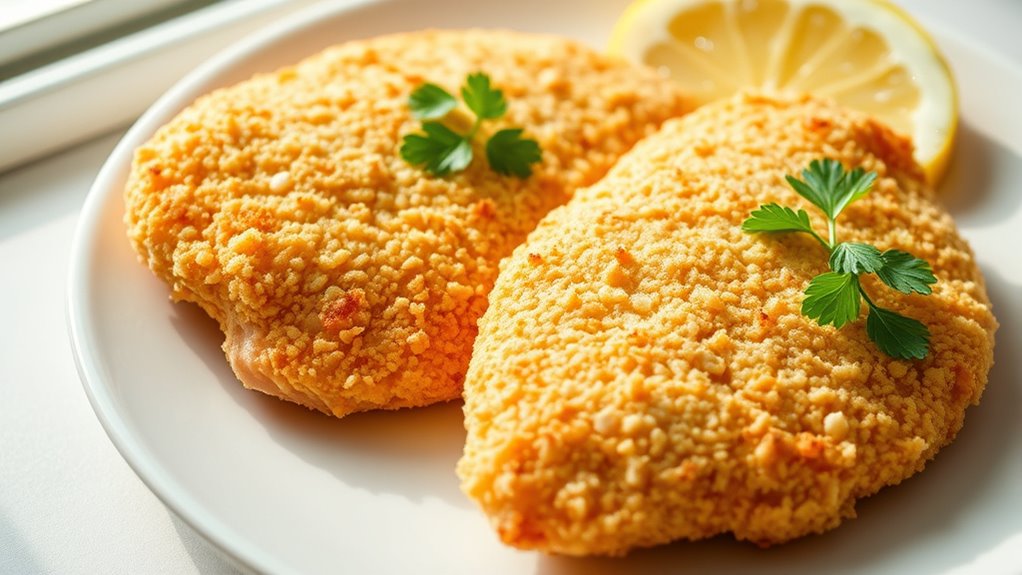
Crispy chicken cutlets are a versatile dish that brings the perfect combination of a golden-brown, crunchy exterior and tender, juicy meat inside. This classic preparation method transforms ordinary chicken breasts into an elevated meal that can be served on its own, topped with sauce, or used in sandwiches.
The key to achieving the perfect crispy cutlet lies in the three-step breading process and proper temperature control during frying. When done correctly, these cutlets develop a uniform, crispy coating that seals in the chicken's natural moisture while providing that satisfying crunch with every bite.
- 4 chicken breasts, butterflied and pounded thin
- 2 cups all-purpose flour
- 3 large eggs, beaten
- 2 cups seasoned breadcrumbs
- 1 teaspoon garlic powder
- 1 teaspoon onion powder
- 1 teaspoon salt
- 1/2 teaspoon black pepper
- Vegetable oil for frying
Begin by setting up your breading station with three shallow dishes: flour in the first, beaten eggs in the second, and seasoned breadcrumbs mixed with garlic powder, onion powder, salt, and pepper in the third.
Butterfly each chicken breast horizontally and pound between plastic wrap until approximately 1/4-inch thick.
Dredge each chicken cutlet first in flour, shaking off excess, then dip in the beaten eggs, allowing excess to drip off. Finally, coat thoroughly in the seasoned breadcrumb mixture, pressing gently to ensure even coverage.
Place the breaded cutlets on a clean plate or wire rack and let rest for 5 minutes to allow the coating to adhere properly.
Heat vegetable oil in a large skillet over medium-high heat until it reaches 350°F (175°C). Cook the cutlets for 3-4 minutes per side until golden brown and cooked through.
Work in batches to avoid overcrowding the pan, which would lower the oil temperature and result in greasy cutlets. Transfer cooked cutlets to a paper towel-lined plate to drain excess oil.
For the crispiest results, maintain consistent oil temperature throughout cooking and avoid pressing down on the cutlets with your spatula, which can break the coating.
Let the cutlets rest for 3-5 minutes before serving to help the crust set and the juices redistribute within the meat.
Leftover cutlets can be stored in an airtight container in the refrigerator and reheated in a 350°F oven until warmed through.
One-Pan Pesto Chicken and Vegetables

One-Pan Pesto Chicken and Vegetables brings Mediterranean flavors to your dinner table with minimal cleanup. This versatile dish combines tender chicken breasts with colorful roasted vegetables, all tied together with vibrant basil pesto that infuses every bite with rich, herbaceous notes.
Perfect for busy weeknights or meal prep, this recipe transforms simple ingredients into an impressive meal that looks and tastes like it took hours to prepare. The vegetables roast alongside the chicken, absorbing the pesto flavors while developing caramelized edges, creating a complete meal that's both nutritious and satisfying.
- 4 boneless, skinless chicken breasts
- 1/2 cup basil pesto
- 2 cups cherry tomatoes
- 2 medium zucchini, sliced
- 1 red bell pepper, chunked
- 1 red onion, cut into wedges
- 3 tablespoons olive oil
- Salt and black pepper to taste
- 4 cloves garlic, minced
- 1 lemon, sliced
Preheat the oven to 400°F (200°C).
Place chicken breasts in a large baking dish and spread 2 tablespoons of pesto over each breast, ensuring even coverage.
Arrange the prepared vegetables around the chicken breasts, then drizzle with olive oil and season everything with salt and pepper.
Scatter minced garlic over the vegetables and place lemon slices on top of the chicken.
Bake for 25-30 minutes, or until the chicken reaches an internal temperature of 165°F (74°C) and the vegetables are tender with slightly crispy edges.
Halfway through cooking, spoon some of the pan juices over the chicken and vegetables to keep everything moist and flavorful.
Remove from the oven and let the dish rest for 5 minutes before serving.
The resting period allows the juices to redistribute throughout the chicken, ensuring maximum tenderness.
If desired, drizzle additional fresh pesto over the finished dish just before serving.
For best results, choose vegetables that are cut to similar sizes to ensure even cooking.
If your chicken breasts are particularly thick, consider butterflying them or pounding them to an even thickness.
Store-bought pesto works perfectly fine, but if using homemade pesto, add it halfway through cooking to prevent the basil from becoming too dark.
The dish can be prepped ahead by marinating the chicken in pesto for up to 8 hours in the refrigerator.
Asian Sesame Ginger Chicken
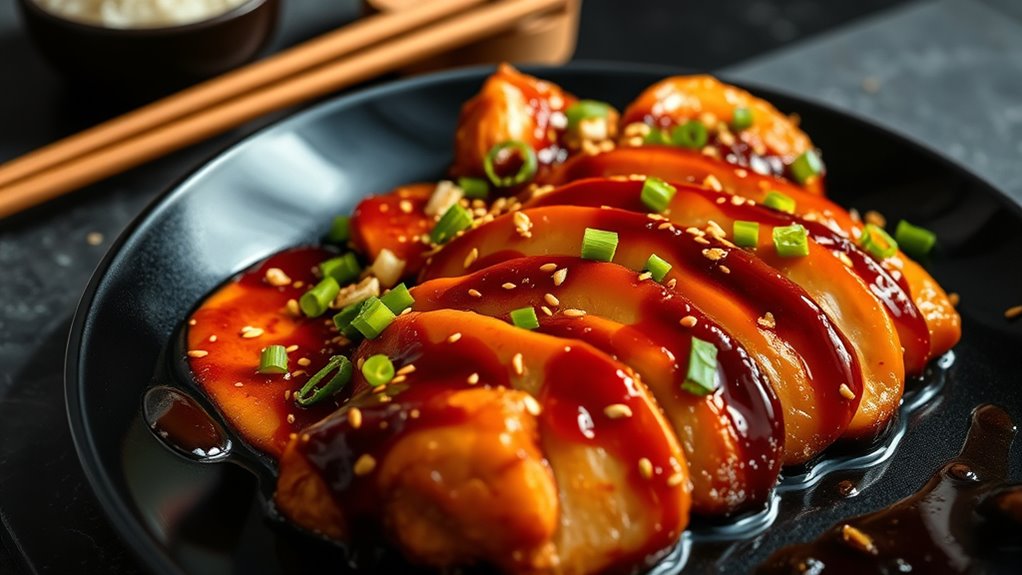
Asian Sesame Ginger Chicken brings together the vibrant flavors of East Asian cuisine in a quick and satisfying dish. The combination of aromatic ginger, nutty sesame oil, and savory soy sauce creates a perfectly balanced marinade that transforms ordinary chicken breasts into an exotic weeknight dinner.
This recipe delivers restaurant-quality results while requiring minimal prep time and basic ingredients found in most Asian-inspired pantries. The chicken turns out tender and juicy, with a rich mahogany glaze that's both sweet and savory, making it an excellent pairing for steamed rice or stir-fried vegetables.
- 4 boneless, skinless chicken breasts
- 1/4 cup soy sauce
- 2 tablespoons sesame oil
- 2 tablespoons honey
- 2 tablespoons fresh ginger, minced
- 4 cloves garlic, minced
- 2 tablespoons rice vinegar
- 1 tablespoon brown sugar
- 2 green onions, chopped
- 1 tablespoon toasted sesame seeds
- 1/2 teaspoon black pepper
In a bowl, combine soy sauce, sesame oil, honey, ginger, garlic, rice vinegar, and brown sugar. Mix well until the sugar dissolves.
Place chicken breasts in a shallow dish and pour the marinade over them, ensuring even coating. Let marinate for at least 30 minutes or up to 4 hours in the refrigerator.
Heat a large skillet over medium-high heat. Remove chicken from marinade, reserving the liquid. Place chicken in the hot skillet and cook for 5-6 minutes on each side until golden brown and cooked through. Transfer chicken to a plate and tent with foil to keep warm.
Pour the reserved marinade into the same skillet and bring to a boil. Reduce heat and simmer for 3-4 minutes until the sauce thickens slightly. Return chicken to the pan and coat with the reduced sauce. Sprinkle with chopped green onions and toasted sesame seeds before serving.
For best results, slice the chicken breasts in half horizontally if they're too thick, ensuring even cooking.
Always bring chicken to room temperature before cooking, and let it rest for 5 minutes after cooking to retain juices. If the sauce becomes too thick while reducing, add a tablespoon of water to reach desired consistency. The same marinade can be used for chicken thighs or tenders, adjusting cooking time accordingly.
Ranch-Crusted Chicken Breast
This versatile chicken dish combines the beloved flavors of ranch seasoning with a crispy, golden-brown crust that seals in the natural juices of the chicken. The ranch coating creates a flavorful exterior while keeping the meat tender and moist throughout the cooking process.
The beauty of ranch-crusted chicken breast lies in its adaptability and ease of preparation. Whether served as a main course with vegetables, sliced over a salad, or used in sandwiches, this recipe delivers consistent results with minimal effort, making it perfect for both family dinners and casual entertaining.
- 4 boneless, skinless chicken breasts
- 1 cup buttermilk
- 2 packets ranch seasoning mix
- 1 cup panko breadcrumbs
- 1/2 cup all-purpose flour
- 2 large eggs, beaten
- 2 tablespoons olive oil
- Salt and black pepper to taste
Begin by marinating the chicken breasts in buttermilk mixed with half a packet of ranch seasoning for at least 30 minutes or up to 4 hours in the refrigerator. This step ensures the meat stays moist and absorbs the ranch flavors throughout.
When ready to cook, set up a breading station with three shallow dishes: one with flour seasoned with salt and pepper, one with beaten eggs, and one with panko breadcrumbs mixed with the remaining ranch seasoning.
Remove chicken from buttermilk marinade and pat dry with paper towels. Dredge each piece first in flour, then egg, and finally in the ranch-seasoned panko mixture, pressing gently to ensure even coating.
Heat olive oil in a large skillet over medium heat. Place the breaded chicken breasts in the pan and cook for 6-7 minutes on each side, or until golden brown and cooked through to an internal temperature of 165°F (74°C).
If the breading browns too quickly, reduce heat to medium-low to ensure the chicken cooks completely without burning the crust. For optimal results, avoid overcrowding the pan, as this can lead to steaming rather than browning.
Let the chicken rest for 5 minutes before slicing to allow the juices to redistribute throughout the meat. The panko coating can be enhanced with additional seasonings such as garlic powder, onion powder, or dried herbs for extra flavor complexity.
Spicy Cajun Chicken Breast
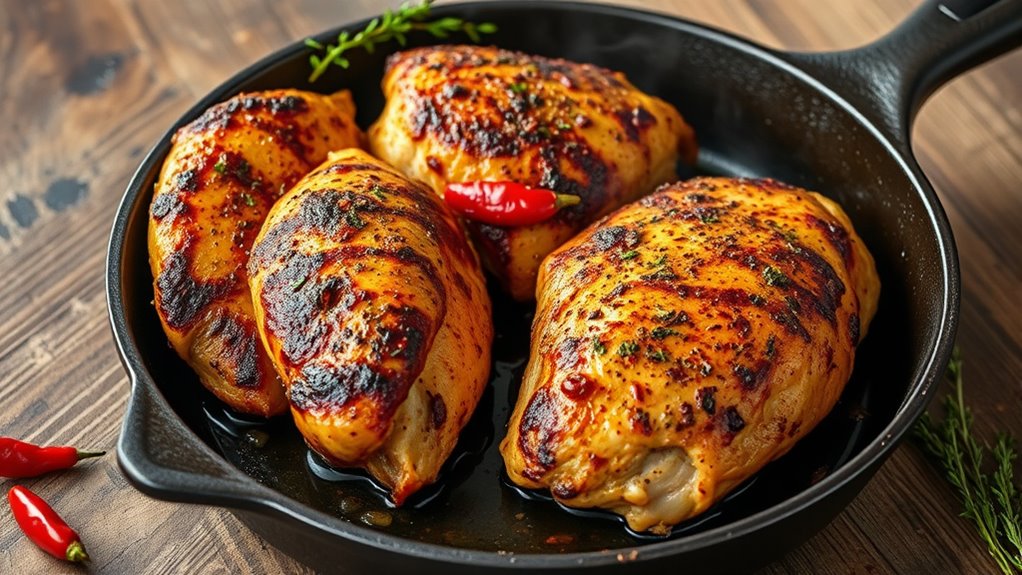
This vibrant and zesty chicken dish brings the bold flavors of Louisiana cuisine right to your dinner table. The signature Cajun seasoning blend, featuring paprika, cayenne, oregano, and other aromatic spices, creates a perfectly seasoned crust on the outside while keeping the chicken tender and juicy on the inside.
What makes this recipe special is its versatility and the way it captures authentic Cajun flavors without requiring complicated techniques. The chicken can be served on its own, sliced over salads, or paired with classic Southern sides like dirty rice or cornbread, making it a fantastic option for both casual family dinners and entertaining guests.
- 4 boneless, skinless chicken breasts
- 2 tablespoons Cajun seasoning
- 1 teaspoon paprika
- 1 teaspoon dried oregano
- 1/2 teaspoon cayenne pepper
- 1/2 teaspoon garlic powder
- 1/2 teaspoon onion powder
- 3 tablespoons vegetable oil
- Salt to taste
Begin by patting the chicken breasts dry with paper towels. In a small bowl, combine the Cajun seasoning, paprika, oregano, cayenne pepper, garlic powder, and onion powder.
Season the chicken breasts generously with the spice mixture on both sides, pressing the seasonings into the meat to ensure they adhere well.
Heat vegetable oil in a large skillet over medium-high heat until shimmering. Place the seasoned chicken breasts in the hot pan and cook for 6-7 minutes on each side, or until the internal temperature reaches 165°F (74°C). The outside should develop a dark, spicy crust while the inside remains moist.
Once cooked, remove the chicken from the pan and let it rest for 5 minutes before slicing. This resting period allows the juices to redistribute throughout the meat, ensuring maximum flavor and tenderness.
For best results, adjust the amount of cayenne pepper according to your heat preference, and consider bringing the chicken to room temperature before cooking to ensure even cooking throughout.
If the chicken breasts are particularly thick, butterfly them or pound them to an even thickness to help them cook more uniformly. The chicken can be seasoned up to 8 hours in advance and refrigerated, which will allow the flavors to penetrate deeper into the meat.
Greek Yogurt Marinated Chicken
This Mediterranean-inspired chicken dish uses Greek yogurt as a tenderizing marinade, resulting in incredibly moist and flavorful chicken breasts. The natural enzymes and lactic acid in yogurt break down the proteins in the meat, creating a tender texture while infusing it with a subtle tangy flavor.
The marinade combines classic Greek flavors like lemon, garlic, and Mediterranean herbs with creamy yogurt to create a versatile dish that can be served on its own, in salads, or wrapped in pita bread. This preparation method ensures the chicken stays juicy throughout the cooking process while developing a beautiful golden crust when cooked.
- 4 boneless, skinless chicken breasts
- 1 cup plain Greek yogurt
- 3 cloves garlic, minced
- 1 lemon, juiced and zested
- 2 tablespoons olive oil
- 1 tablespoon dried oregano
- 1 teaspoon dried thyme
- 1 teaspoon kosher salt
- 1/2 teaspoon black pepper
- 1/4 teaspoon ground paprika
In a large bowl, combine Greek yogurt, minced garlic, lemon juice, lemon zest, olive oil, oregano, thyme, salt, pepper, and paprika. Whisk until all ingredients are well incorporated.
Add the chicken breasts to the marinade, ensuring each piece is well coated. Cover the bowl with plastic wrap and refrigerate for at least 2 hours, or ideally overnight.
Remove the chicken from the refrigerator 30 minutes before cooking to allow it to come to room temperature. Preheat the grill or a large skillet over medium-high heat. Remove the chicken from the marinade, gently wiping off excess (but not all) of the marinade.
If grilling, cook the chicken for 6-7 minutes per side, or until the internal temperature reaches 165°F (74°C). If using a skillet, heat 1 tablespoon of olive oil and cook for 5-6 minutes per side until golden brown and cooked through. Let the chicken rest for 5 minutes before slicing to allow the juices to redistribute.
For best results, avoid using nonfat Greek yogurt as the fat content helps keep the chicken moist during cooking. If cooking indoors, ensure proper ventilation as the yogurt marinade can create some smoke when cooking.
The chicken can be marinated for up to 24 hours, but avoiding longer marination times as the meat can become too soft.
Sheet Pan Bruschetta Chicken
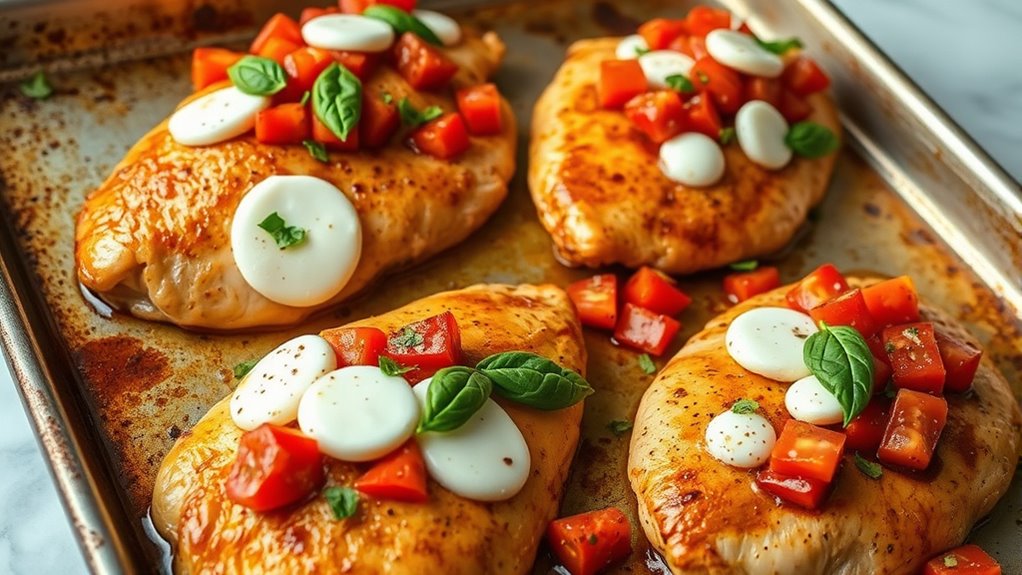
This Italian-inspired sheet pan dish combines the fresh flavors of classic bruschetta with perfectly baked chicken breasts. The juicy tomatoes, aromatic basil, and melted mozzarella create a light yet satisfying meal that captures the essence of Mediterranean cuisine.
A healthier alternative to traditional bruschetta, this version uses chicken as the base instead of bread, making it a protein-rich, low-carb option. The entire meal comes together on one sheet pan, minimizing cleanup while maximizing flavor as the tomatoes release their juices and blend with the seasonings during baking.
- 4 boneless, skinless chicken breasts
- 4 Roma tomatoes, diced
- 3 cloves garlic, minced
- 1/4 cup fresh basil leaves, chopped
- 2 tablespoons olive oil
- 1 tablespoon balsamic vinegar
- 1 cup shredded mozzarella cheese
- 1 teaspoon Italian seasoning
- Salt and pepper to taste
Preheat the oven to 400°F (200°C). Place chicken breasts on a lightly oiled sheet pan and season with salt, pepper, and Italian seasoning. Drizzle with 1 tablespoon of olive oil. Bake for 20-25 minutes, until the chicken is almost cooked through.
While the chicken bakes, combine diced tomatoes, minced garlic, chopped basil, remaining olive oil, and balsamic vinegar in a bowl. Season the mixture with salt and pepper to taste, then let it sit to allow the flavors to meld together.
Remove the sheet pan from the oven and top each chicken breast with the tomato mixture. Sprinkle mozzarella cheese over the top and return to the oven for an additional 5-7 minutes, or until the cheese is melted and bubbly, and the chicken reaches an internal temperature of 165°F (74°C).
For best results, choose chicken breasts of similar size and thickness to ensure even cooking. If the breasts are particularly thick, consider butterflying them or pounding them to an even thickness.
The tomato mixture can be prepared up to 2 hours in advance and kept at room temperature to develop more flavor. Pat the tomatoes dry before dicing to prevent excess liquid on the sheet pan.