8 Chicken Breast Recipes for Picky Eaters
Just like finding the perfect pair of jeans, discovering chicken recipes that please picky eaters can feel like an endless quest. You'll be glad to know there's a selection of foolproof chicken breast recipes that won't raise eyebrows at the dinner table. From classic pan-seared cuts to honey-glazed favorites, these eight dishes strike the right balance between familiar and flavorful. Let's explore how simple ingredients and straightforward techniques can transform plain chicken into meals your whole family will actually request.
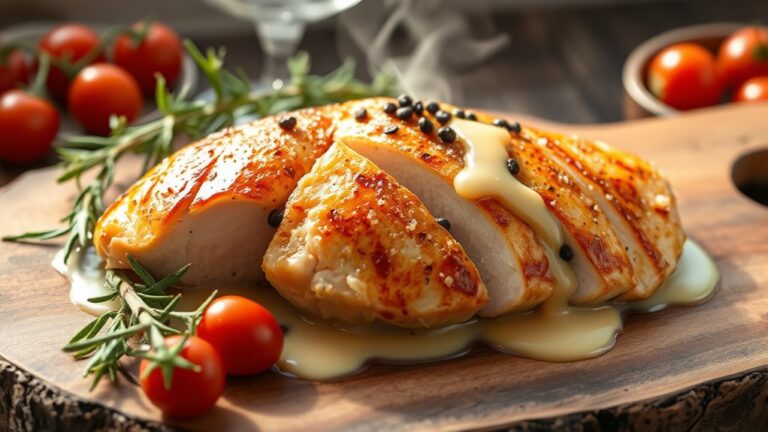
Classic Pan-Seared Chicken Breasts
Classic pan-seared chicken breasts are a fundamental dish that belongs in every home cook's repertoire. The simplicity of this preparation method allows the natural flavors of the chicken to shine while creating a satisfying, golden-brown exterior and juicy interior.
This recipe focuses on achieving the perfect sear while maintaining moisture, using just a handful of basic seasonings that complement rather than overwhelm the chicken. The result is a versatile main dish that can please even the most particular eaters and serve as a foundation for countless meal variations.
- 4 boneless, skinless chicken breasts
- 2 tablespoons olive oil
- 1 teaspoon salt
- 1 teaspoon black pepper
- 1 teaspoon garlic powder
- Paper towels for drying
Begin by patting the chicken breasts completely dry with paper towels, as excess moisture will prevent proper searing. Season both sides of each breast evenly with salt, pepper, and garlic powder, ensuring complete coverage.
Place a large skillet over medium-high heat and add the olive oil. Allow the pan to heat thoroughly – you'll know it's ready when the oil shimmers but isn't smoking. Place the seasoned chicken breasts in the pan, being careful not to overcrowd them, and cook for 5-7 minutes on the first side until golden brown.
Flip the chicken breasts and continue cooking for another 5-7 minutes, or until the internal temperature reaches 165°F (74°C) when checked with a meat thermometer. Once cooked, transfer the chicken to a cutting board and let it rest for 5 minutes before slicing or serving. This resting period allows the juices to redistribute throughout the meat, ensuring maximum tenderness.
For optimal results, consider butterflying or pounding thicker chicken breasts to an even thickness of about ½ inch. This ensures uniform cooking and prevents the outside from becoming overcooked while the interior remains raw. Additionally, avoid moving the chicken around too much while it cooks – allowing it to remain in contact with the pan creates that desirable golden crust.
Three-Ingredient Honey Garlic Chicken
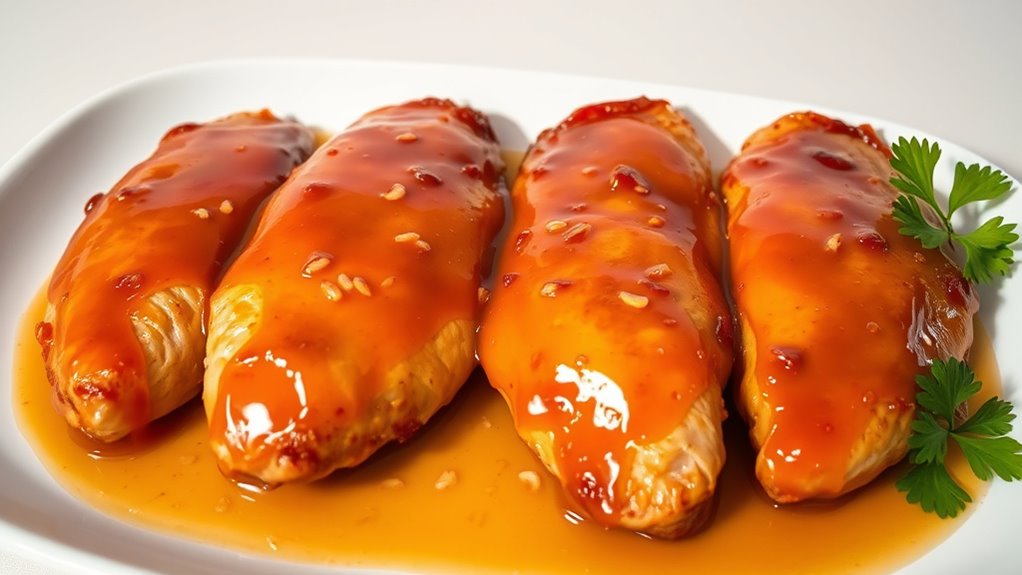
Three-ingredient honey garlic chicken offers a perfect balance of sweet and savory flavors that appeal to picky eaters while keeping the ingredient list remarkably simple. The natural sweetness of honey combined with the familiar taste of garlic creates a crowd-pleasing combination that transforms plain chicken into something special.
This recipe builds upon the basic pan-seared chicken technique while adding a glossy, flavorful sauce that doesn't overwhelm the palate. The minimal ingredients make it an excellent choice for busy weeknights when you need a reliable dish that will satisfy even the most particular family members.
- 4 boneless, skinless chicken breasts
- 1/3 cup honey
- 4 cloves garlic, minced
- Salt and pepper to taste
- 2 tablespoons olive oil
Season chicken breasts with salt and pepper on both sides. Heat olive oil in a large skillet over medium-high heat. Once the pan is hot, add the chicken breasts and cook for 5-7 minutes on each side until golden brown and cooked through (internal temperature should reach 165°F/74°C).
Remove the chicken from the pan and set aside. In the same pan, reduce heat to medium-low and add minced garlic. Cook for 30 seconds until fragrant, being careful not to burn it.
Add honey to the pan and stir to combine with the garlic, allowing the mixture to bubble gently for about 1 minute until it starts to thicken slightly.
Return the chicken breasts to the pan and turn them to coat evenly with the honey garlic sauce. Cook for an additional 1-2 minutes, occasionally spooning the sauce over the chicken until it's well-glazed and heated through.
For best results, allow the chicken to rest at room temperature for 10-15 minutes before cooking to ensure even cooking. If your chicken breasts are particularly thick, consider butterflying them or pounding them to an even thickness of about 1/2 inch. This will help them cook more evenly and allow better sauce coverage.
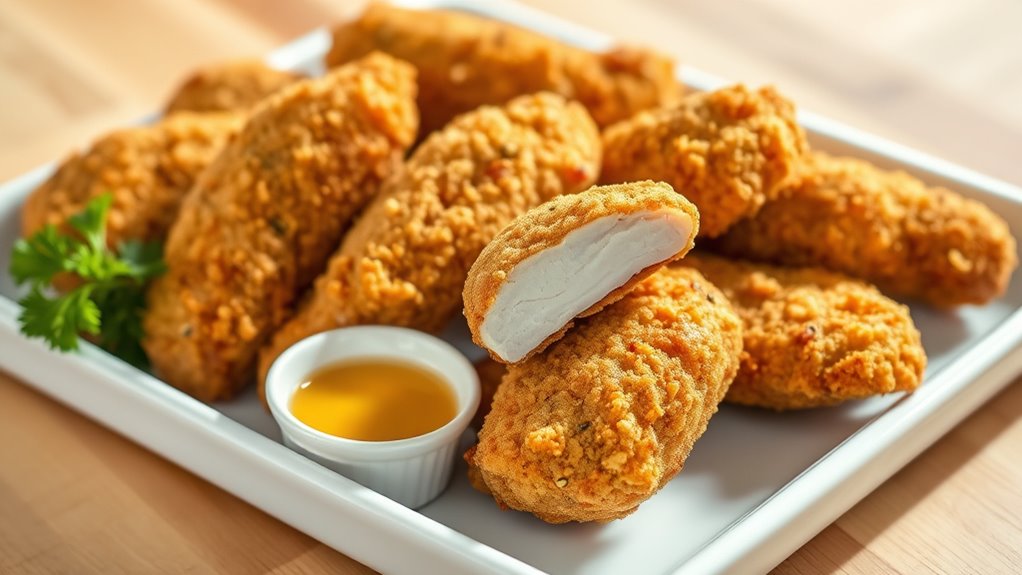
Simple Breaded Chicken Cutlets
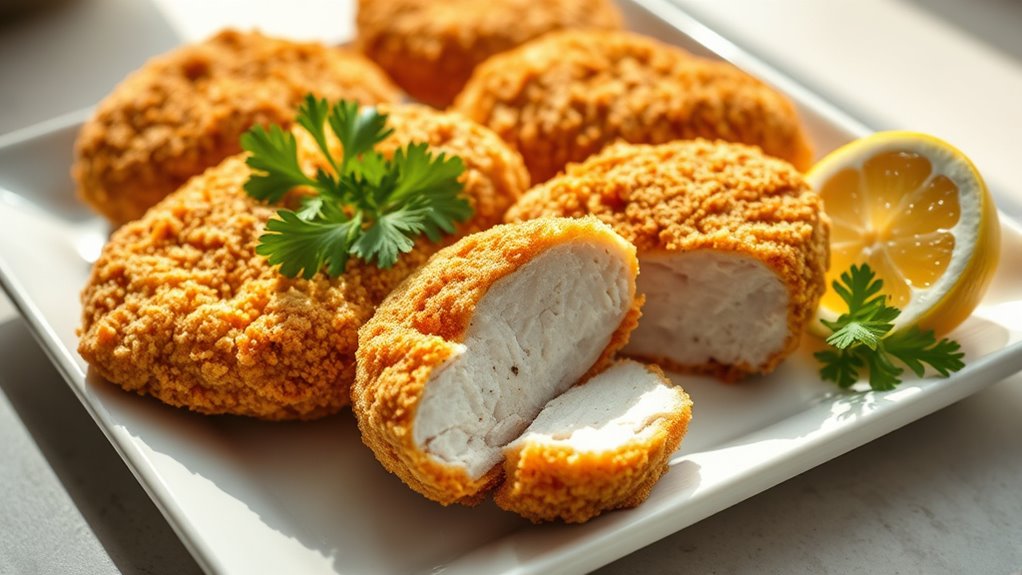
Simple breaded chicken cutlets are a classic comfort food that appeals to even the most selective eaters. The crispy exterior combined with tender, juicy meat inside creates a satisfying texture contrast that children and adults alike enjoy.
This version keeps the seasoning straightforward while delivering the satisfying crunch that makes breaded chicken so appealing. The preparation method ensures a golden-brown coating that stays firmly attached to the chicken, preventing the frustration of breading that falls off during cooking.
- 4 chicken breasts, halved horizontally
- 2 large eggs
- 1 cup all-purpose flour
- 2 cups plain breadcrumbs
- 1 teaspoon salt
- 1 teaspoon black pepper
- 1 teaspoon garlic powder
- Vegetable oil for frying
Begin by preparing your breading station with three shallow dishes. In the first, combine flour with half the salt and pepper. In the second, beat the eggs until well mixed. In the third, combine breadcrumbs with remaining salt, pepper, and garlic powder.
Working with one piece at a time, dredge the chicken in flour, shaking off excess. Dip into beaten egg, allowing extra to drip off, then coat thoroughly in seasoned breadcrumbs, pressing gently to ensure even coverage. Place breaded pieces on a clean plate or baking sheet.
Heat approximately ¼ inch of vegetable oil in a large skillet over medium heat until shimmering. Cook the breaded cutlets for 4-5 minutes per side until golden brown and cooked through (internal temperature should reach 165°F). Work in batches to avoid overcrowding the pan, adding more oil as needed.
For optimal results, pound the chicken pieces to an even thickness of about ¼ inch before breading. This helps ensure uniform cooking and prevents the breading from burning before the chicken is fully cooked.
Allow the cooked cutlets to rest on paper towels to drain excess oil, and serve immediately while the coating is at its crispiest.
Basic Baked Parmesan Chicken
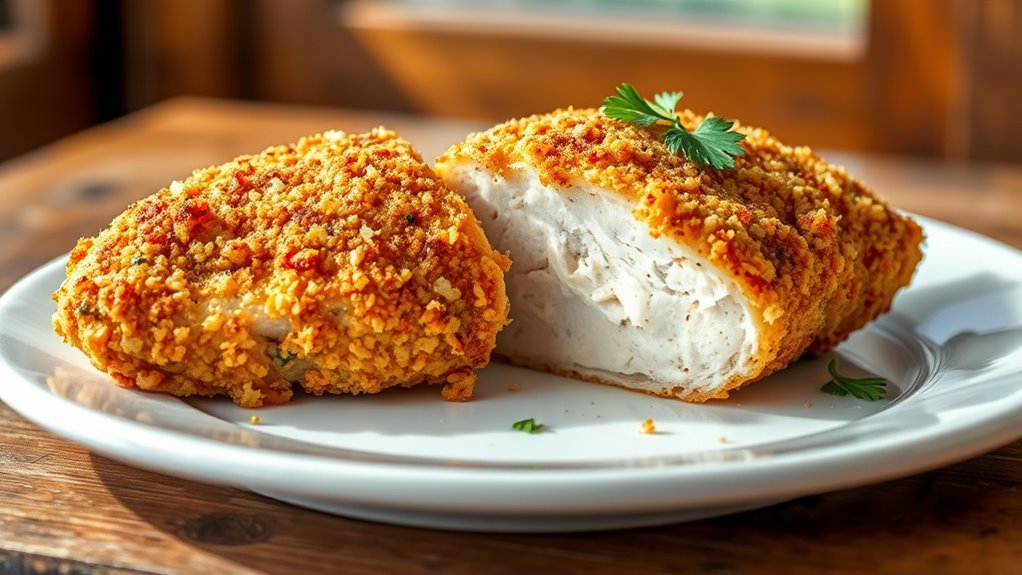
Basic Baked Parmesan Chicken is a crowd-pleasing variation on traditional chicken breast that appeals to picky eaters while adding a delightful crispy coating. The familiar taste of Parmesan cheese combined with simple seasonings creates a dish that's both comforting and flavorful without being overwhelming.
This recipe transforms ordinary chicken breasts into a crispy, cheesy delight while maintaining the moisture of the meat. The straightforward preparation method and common ingredients make it an excellent choice for busy weeknight dinners, and the golden-brown crust adds an appealing texture that even selective eaters will appreciate.
- 4 boneless, skinless chicken breasts
- 1 cup grated Parmesan cheese
- 1 cup plain breadcrumbs
- 1 teaspoon garlic powder
- 1 teaspoon Italian seasoning
- 1/2 teaspoon salt
- 1/4 teaspoon black pepper
- 2 large eggs
- 2 tablespoons olive oil
Preheat the oven to 400°F (200°C) and line a baking sheet with parchment paper. Pat the chicken breasts dry with paper towels and, if necessary, pound them to an even thickness of about 1/2 inch.
In a shallow dish, combine the Parmesan cheese, breadcrumbs, garlic powder, Italian seasoning, salt, and pepper. In a separate shallow dish, beat the eggs until well combined. Dip each chicken breast first in the beaten eggs, then coat thoroughly in the Parmesan-breadcrumb mixture, pressing gently to help the coating adhere.
Place the coated chicken breasts on the prepared baking sheet and drizzle with olive oil. Bake for 20-25 minutes, or until the coating is golden brown and crispy, and the internal temperature reaches 165°F (74°C). Let the chicken rest for 5 minutes before serving.
For best results, avoid using pre-shredded Parmesan cheese, as freshly grated Parmesan will provide better flavor and texture. If the coating starts to brown too quickly while baking, tent the chicken loosely with aluminum foil to prevent burning while allowing the meat to cook through completely.
Kid-Friendly Chicken Tenders
Kid-friendly chicken tenders are a classic favorite that can win over even the most selective young eaters. The crispy exterior combined with juicy, tender chicken inside creates a satisfying texture that children love, while the simple flavors keep it within their comfort zone.
This recipe uses basic pantry ingredients to create homemade chicken tenders that are healthier than their fast-food counterparts. By controlling the ingredients and cooking method, parents can ensure their children are getting quality protein while still enjoying a meal that feels like a special treat.
- 2 pounds chicken tenderloins (or chicken breasts cut into strips)
- 2 cups all-purpose flour
- 2 large eggs
- 1 cup milk
- 2 teaspoons salt
- 1 teaspoon black pepper
- 1 teaspoon garlic powder
- Vegetable oil for frying
Begin by setting up your breading station with three shallow dishes. In the first dish, combine flour, salt, pepper, and garlic powder. In the second dish, whisk together eggs and milk until well combined. Leave the third dish with the remaining flour mixture for the final coating.
Working with one piece at a time, dredge the chicken in the seasoned flour, then dip in the egg mixture, allowing excess to drip off. Finally, coat with the remaining flour mixture, pressing gently to ensure the coating adheres well. Place the breaded tenders on a wire rack and let them rest for 5 minutes to help the coating stick better.
Heat vegetable oil in a large skillet over medium heat until it reaches 350°F (175°C). Cook the chicken tenders for 4-5 minutes per side until golden brown and cooked through to an internal temperature of 165°F (74°C). Work in batches to avoid overcrowding the pan, which can lead to soggy coating.
Place cooked tenders on a paper towel-lined plate to drain excess oil. For best results, maintain consistent oil temperature throughout cooking and don't flip the tenders too frequently. If the oil becomes too hot and the coating browns too quickly, reduce the heat slightly.
Consider keeping finished tenders warm in a 200°F (95°C) oven while completing the remaining batches. The chicken can be served immediately with favorite dipping sauces or stored in an airtight container in the refrigerator for up to three days.
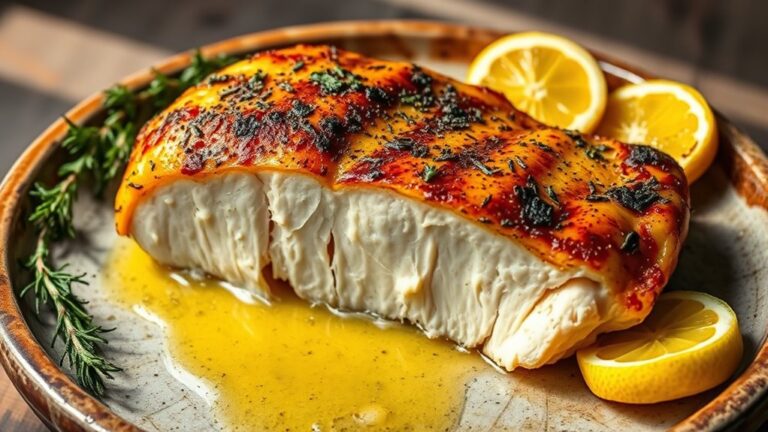
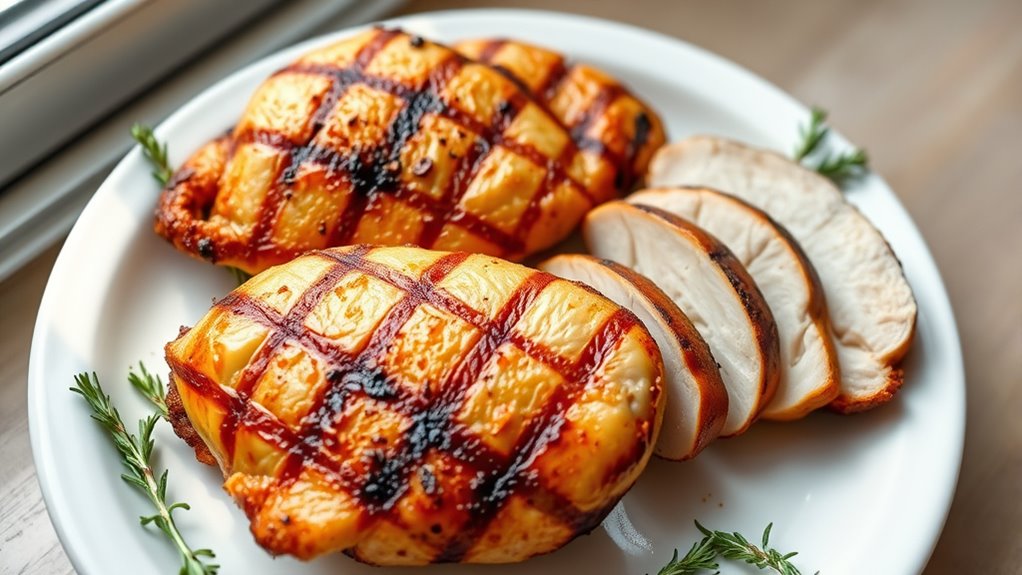
Plain Grilled Chicken Breast
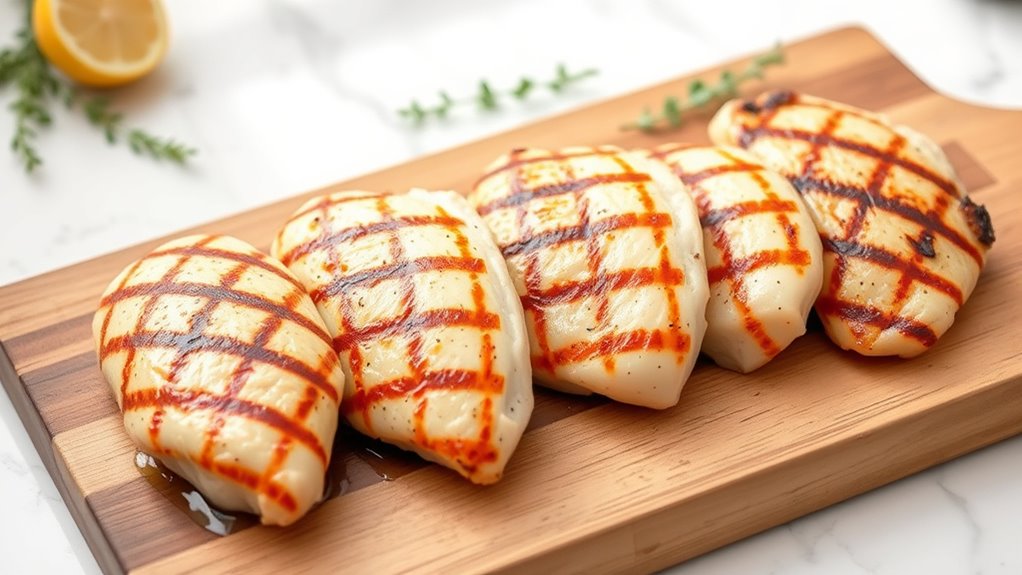
Plain grilled chicken breast offers a simple yet satisfying option for those who prefer their food without complex seasonings or sauces. The natural flavors of the chicken shine through when prepared on the grill, creating a meal that appeals to even the most particular eaters.
The key to successful grilled chicken breast lies in proper preparation and cooking technique to ensure the meat stays juicy and tender. This straightforward approach uses minimal seasonings while achieving a perfectly cooked result with appealing grill marks and a slightly smoky flavor.
- 4 boneless, skinless chicken breasts
- 2 tablespoons olive oil
- 1 teaspoon salt
- 1/2 teaspoon black pepper
- 1 teaspoon garlic powder
Begin by preparing the chicken breasts. Pat them dry with paper towels and check for even thickness. If needed, place the chicken between two sheets of plastic wrap and gently pound thicker areas to create uniform thickness. This ensures even cooking throughout.
Brush the chicken breasts with olive oil and season both sides evenly with salt, pepper, and garlic powder. Preheat your grill to medium-high heat (around 375-450°F). Clean and oil the grates to prevent sticking.
Place the chicken breasts on the preheated grill and cook for 6-8 minutes on the first side. Flip the chicken and continue cooking for another 6-8 minutes, or until the internal temperature reaches 165°F when checked with a meat thermometer.
Remove from the grill and let rest for 5-10 minutes before serving to allow the juices to redistribute throughout the meat.
For optimal results, avoid moving the chicken around too much while cooking except for the one flip. This helps develop better grill marks and prevents the meat from sticking to the grates. Keep the grill lid closed as much as possible to maintain consistent temperature and create an even cooking environment.
If flames flare up, move the chicken to a cooler part of the grill until the flames subside.
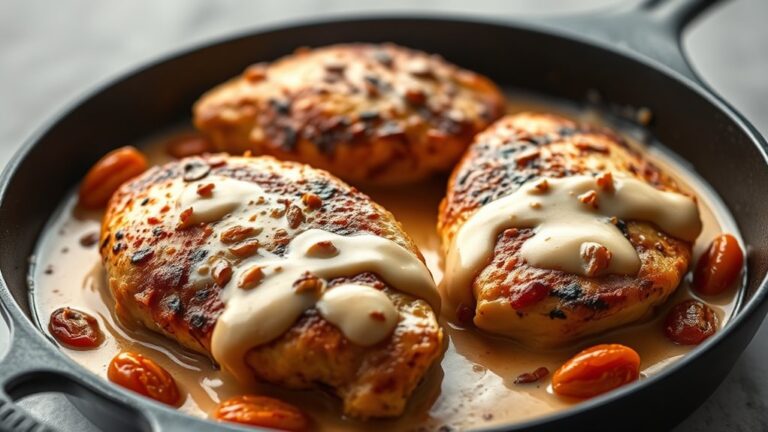
Buttery Ranch Chicken
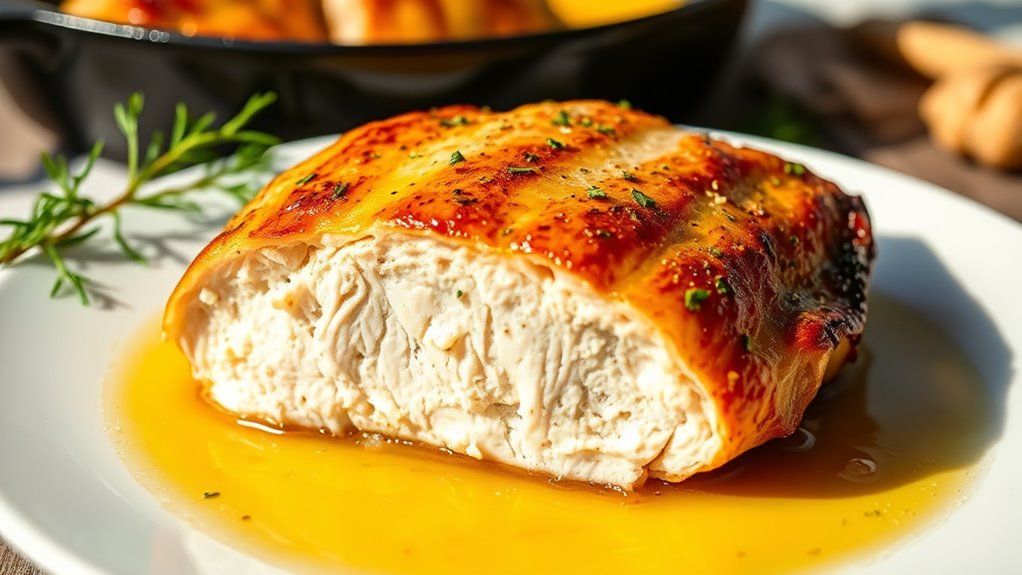
Buttery Ranch Chicken is a delicious twist on traditional pan-seared chicken breasts that appeals to picky eaters who enjoy the familiar taste of ranch seasoning. The combination of butter and ranch creates a rich, creamy flavor profile that transforms ordinary chicken into a crowd-pleasing entrée.
This recipe maintains the simplicity of basic chicken preparation while incorporating ranch seasoning, which is a widely accepted and beloved flavor among selective eaters. The butter helps create a golden-brown exterior while keeping the chicken moist and tender throughout the cooking process.
- 4 boneless, skinless chicken breasts
- 4 tablespoons butter, divided
- 2 tablespoons ranch seasoning mix
- 1 teaspoon garlic powder
- 1/2 teaspoon black pepper
- 1/2 teaspoon salt
- 2 tablespoons olive oil
Pat the chicken breasts dry with paper towels. In a small bowl, combine the ranch seasoning, garlic powder, black pepper, and salt. Season both sides of each chicken breast generously with the mixture, pressing the seasoning into the meat to help it adhere.
Heat olive oil and 2 tablespoons of butter in a large skillet over medium heat until the butter is melted and begins to bubble. Add the chicken breasts to the pan and cook for 6-7 minutes on the first side until golden brown.
Add the remaining 2 tablespoons of butter to the pan as you flip the chicken to the second side. Continue cooking for another 5-7 minutes, or until the internal temperature reaches 165°F (74°C). Occasionally spoon the melted butter over the chicken as it cooks. Remove from heat and let the chicken rest for 5 minutes before serving, during which time you can spoon any remaining butter sauce over the top.
For optimal results, bring the chicken breasts to room temperature 15-20 minutes before cooking, and ensure they're of even thickness by gently pounding them if necessary. If the butter begins to brown too quickly, reduce the heat to medium-low.
The ranch seasoning can be adjusted according to taste preferences, and for extra richness, you can add an additional tablespoon of butter during the resting period.
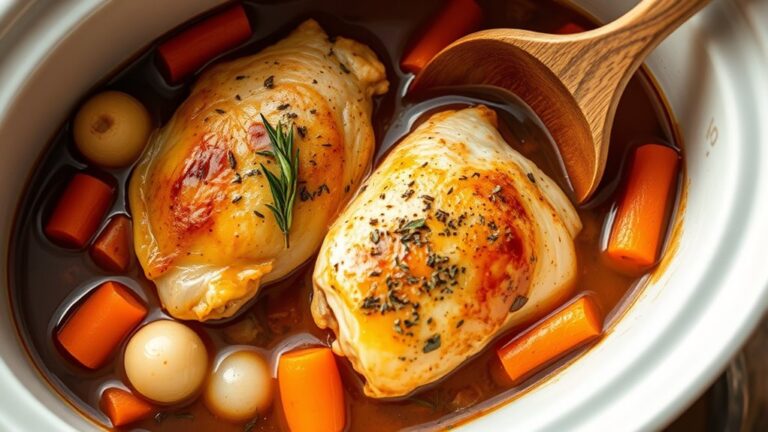
Easy Chicken and Rice Skillet
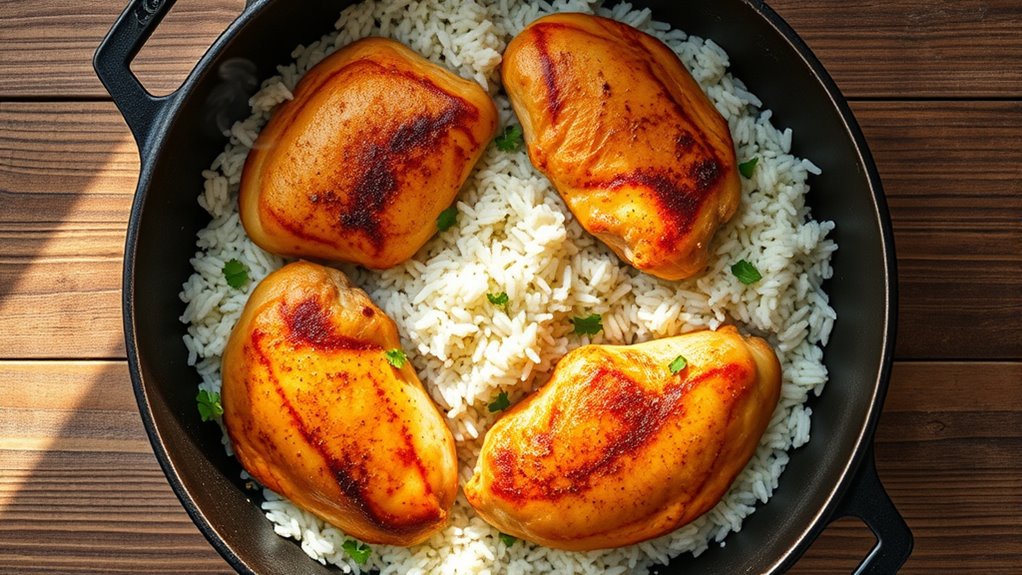
Easy Chicken and Rice Skillet combines two comfort food favorites that appeal to picky eaters – tender pan-seared chicken breast and fluffy white rice. This one-pan meal keeps things simple while delivering familiar flavors that won't overwhelm sensitive palates.
The dish comes together in about 30 minutes, making it perfect for busy weeknight dinners. The chicken and rice cook in the same skillet, allowing the rice to absorb the savory flavors while maintaining its mild, appealing taste that picky eaters prefer.
- 4 boneless, skinless chicken breasts
- 1½ cups long-grain white rice
- 3 cups chicken broth
- 2 tablespoons olive oil
- 1 teaspoon salt
- 1 teaspoon black pepper
- 1 teaspoon garlic powder
- 1 tablespoon butter
Season chicken breasts on both sides with salt, pepper, and garlic powder. Heat olive oil in a large skillet over medium-high heat. Add the chicken breasts and cook for 5-7 minutes on each side until golden brown. Remove the chicken from the skillet and set aside.
Add butter to the same skillet and let it melt. Pour in the rice and stir to coat with the pan drippings and butter. Add chicken broth and bring to a boil. Reduce heat to low, cover the skillet, and let the rice simmer for 15 minutes.
Return the chicken breasts to the skillet, placing them on top of the partially cooked rice. Cover and continue cooking for an additional 5-7 minutes, or until the rice is tender and the chicken is cooked through (internal temperature should reach 165°F/74°C).
For best results, use a skillet with a tight-fitting lid to ensure proper rice cooking. If the rice seems too dry during cooking, add an additional ¼ cup of hot chicken broth.
Allow the dish to rest for 5 minutes before serving to let the rice fully absorb the liquid and the chicken juices to redistribute.