7 Chicken Breast Recipes Kids Actually Eat
Is your family dinner turning into a nightly battle over bland chicken breasts? You're not alone in the struggle to serve poultry that pleases picky eaters. Whether your kids push away their plates or declare "chicken again?" with a dramatic sigh, there's hope for turning those boring breasts into dishes they'll actually request. These seven kid-tested recipes transform plain chicken into crispy, cheesy, and sweet options that'll have them asking for seconds – and you'll want to discover exactly how they work their magic.
Why Kids Turn Down Chicken (And How to Fix It)

Kids often reject chicken breast because of its bland taste and sometimes dry texture. When not properly prepared, chicken can become tough and unappetizing, leading children to push it away at mealtime.
This kid-friendly lemon garlic chicken recipe solves these common issues by creating juicy, flavorful chicken that appeals to young taste buds. The combination of familiar garlic and bright lemon creates an enjoyable flavor profile without being too complex or spicy for children.
- 4 boneless, skinless chicken breasts
- 3 cloves garlic, minced
- 2 tablespoons olive oil
- 1 lemon
- 1 teaspoon salt
- Optional: black pepper to taste
Start by examining the chicken breasts and gently pound any thicker sections to create uniform thickness throughout. This ensures even cooking and prevents dry spots.
Season the chicken breasts with salt and let them rest at room temperature for 5 minutes to allow the seasoning to penetrate the meat.
Heat olive oil in a large skillet over medium heat. Once the oil is shimmering, add the minced garlic and cook for 30 seconds, stirring constantly to prevent burning.
Place the chicken breasts in the pan and cook for 6-7 minutes on the first side until golden brown. While cooking, squeeze half the lemon over the chicken.
Flip the chicken breasts and cook for another 6-7 minutes on the second side. Once the chicken is cooked through (internal temperature should reach 165°F), remove from heat and squeeze the remaining lemon juice over the top.
Let the chicken rest for 5 minutes before cutting to keep the juices inside. For optimal results with picky eaters, consider cutting the chicken into bite-sized pieces before serving, and offer extra lemon wedges on the side.
The chicken can be stored in an airtight container in the refrigerator for up to 3 days. When reheating, add a splash of water or chicken broth to maintain moisture, and heat gently to prevent the meat from becoming tough.
Lemon Garlic Chicken That Kids Love
Lemon garlic chicken is a fantastic way to introduce children to flavorful yet familiar dishes. The combination of bright citrus and mild garlic creates an appealing taste that isn't overwhelming, making it an excellent choice for young eaters who might be hesitant to try new foods.
This recipe transforms ordinary chicken breasts into a juicy, tender meal that kids actually look forward to eating. The simple preparation method ensures the chicken stays moist while developing a golden-brown exterior that locks in all the delicious flavors.
- 4 boneless, skinless chicken breasts
- 3 cloves garlic, minced
- 2 tablespoons olive oil
- 1 whole lemon
- 1 teaspoon salt
- 1/4 teaspoon black pepper (optional)
Begin by patting the chicken breasts dry with paper towels and seasoning them evenly with salt on both sides. Let them rest at room temperature for 5 minutes to allow the seasoning to penetrate the meat. If the chicken breasts are uneven in thickness, gently pound the thicker parts with a meat mallet to ensure uniform cooking.
Heat olive oil in a large skillet over medium heat until it shimmers. Add the minced garlic and cook for 30 seconds, stirring constantly to prevent burning. Place the chicken breasts in the pan and cook for 6-7 minutes on the first side until golden brown.
While cooking, squeeze half the lemon over the chicken. Flip the chicken breasts and cook for another 6-7 minutes on the second side, or until the internal temperature reaches 165°F (74°C). Remove from heat, squeeze the remaining lemon juice over the chicken, and let it rest for 5 minutes before slicing to keep the juices locked in.
To ensure the best results, avoid overcrowding the pan when cooking the chicken breasts. If cooking for younger children, consider cutting the chicken into bite-sized pieces after cooking.
The chicken can be stored in an airtight container in the refrigerator for up to three days, and leftovers can be reheated in a covered skillet over low heat or in the microwave at 50% power to maintain moisture.
Crispy Parmesan-Crusted Chicken Tenders
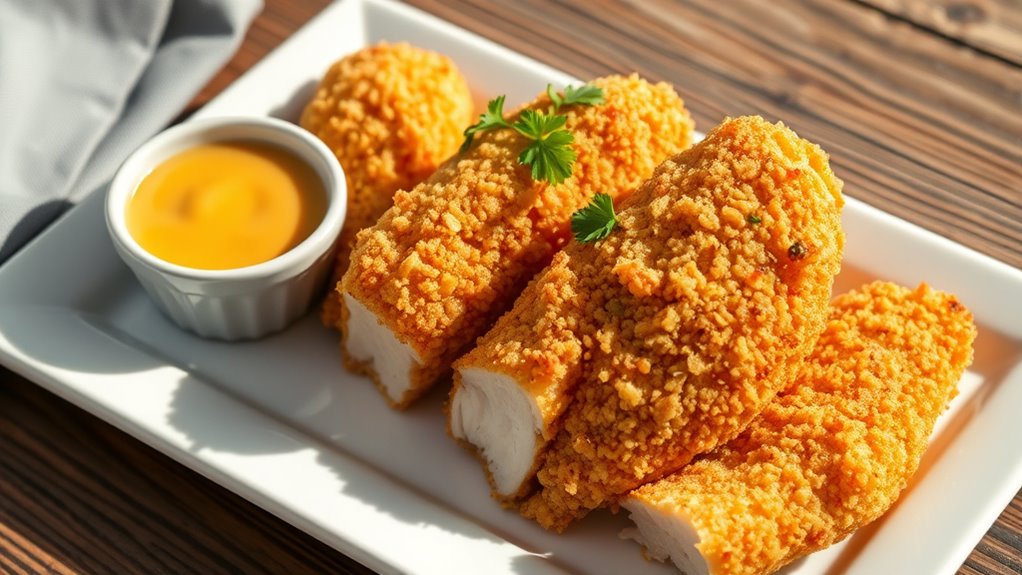
Crispy Parmesan-crusted chicken tenders are a kid-friendly twist on classic chicken strips that elevate the traditional breading with rich, savory cheese. The combination of Parmesan cheese and seasoned breadcrumbs creates a perfectly crunchy exterior while keeping the chicken tender and juicy inside.
This recipe transforms ordinary chicken into an irresistible meal that even the pickiest eaters will love. The double-coating process ensures the breading stays intact during cooking, resulting in restaurant-quality chicken tenders that are both crispy and flavorful, without the need for deep frying.
- 1½ pounds chicken tenderloins (or chicken breast cut into strips)
- 1 cup all-purpose flour
- 2 large eggs
- 1 cup Italian-seasoned breadcrumbs
- ¾ cup grated Parmesan cheese
- 1 teaspoon garlic powder
- ½ teaspoon salt
- ¼ teaspoon black pepper
- 3 tablespoons olive oil
Set up a breading station with three shallow dishes. In the first dish, combine flour with half the salt and pepper. In the second dish, beat the eggs until well combined. In the third dish, mix breadcrumbs, Parmesan cheese, garlic powder, and remaining salt and pepper.
Pat the chicken tenders dry with paper towels. Dredge each piece first in the flour mixture, then dip in beaten egg, and finally coat thoroughly in the Parmesan-breadcrumb mixture, pressing gently to ensure the coating adheres well.
Heat olive oil in a large skillet over medium heat. Once hot, cook the chicken tenders in batches for 4-5 minutes per side until golden brown and cooked through (internal temperature should reach 165°F). Avoid overcrowding the pan to ensure even cooking and maximum crispiness.
For best results, place the cooked tenders on a wire rack rather than paper towels to maintain their crispiness. The breading can be customized by adding dried herbs like basil or oregano to the breadcrumb mixture.
If preparing in advance, the chicken can be breaded and refrigerated for up to 4 hours before cooking, and leftovers can be reheated in a 350°F oven for 10-12 minutes to restore crispiness.
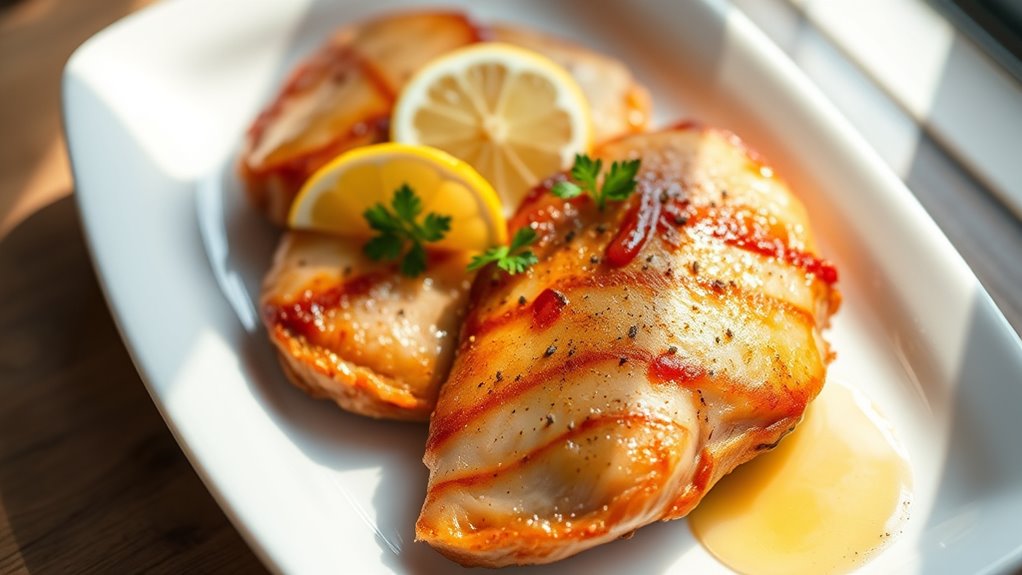
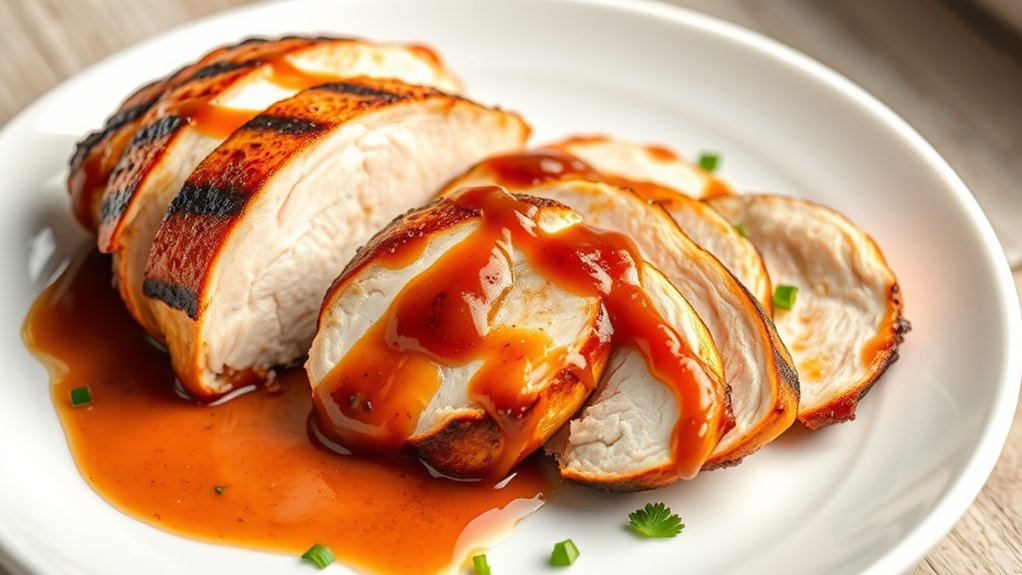
Sweet and Tangy Honey Mustard Chicken
Sweet and tangy honey mustard chicken transforms ordinary chicken breasts into an irresistible dish that appeals to children's natural preference for sweeter flavors. The combination of honey's natural sweetness with mustard's mild tanginess creates a perfectly balanced taste that kids love while still incorporating healthy protein into their diet.
This recipe takes the traditional honey mustard flavor profile and adapts it specifically for chicken breasts, ensuring the meat stays moist while being enveloped in a sticky, delicious sauce. The cooking method allows the sauce to caramelize slightly, creating a glaze that locks in the chicken's natural juices and provides an appealing golden-brown color.
- 4 boneless, skinless chicken breasts
- 1/4 cup honey
- 1/4 cup Dijon mustard
- 2 tablespoons whole grain mustard
- 2 tablespoons olive oil
- 1 teaspoon garlic powder
- 1/2 teaspoon salt
- 1/4 teaspoon black pepper
Start by mixing honey, Dijon mustard, and whole grain mustard in a bowl until well combined. Season the chicken breasts with salt, pepper, and garlic powder, ensuring even coverage on all sides.
Set aside half of the honey mustard mixture for serving, and use the remaining half to coat the chicken breasts thoroughly.
Heat olive oil in a large skillet over medium heat. Once hot, add the coated chicken breasts and cook for 6-7 minutes on each side, or until the internal temperature reaches 165°F (74°C). As the chicken cooks, the honey in the sauce will begin to caramelize, creating a golden-brown exterior. If the sauce starts to darken too quickly, reduce the heat slightly.
During the final 2 minutes of cooking, brush the reserved honey mustard mixture over the chicken, allowing it to create a final layer of glaze.
Remove from heat and let the chicken rest for 5 minutes before serving to ensure the juices redistribute throughout the meat.
For best results, bring chicken breasts to room temperature before cooking and ensure they're of similar thickness by gently pounding thicker parts. The sauce can be made ahead and stored in the refrigerator for up to a week, and leftover chicken can be stored in an airtight container for up to 3 days.
For a milder version suitable for very young children, reduce the amount of whole grain mustard and increase the honey slightly.
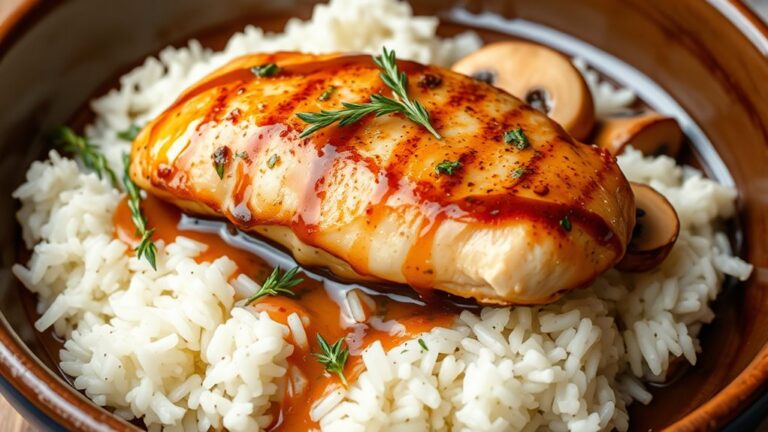
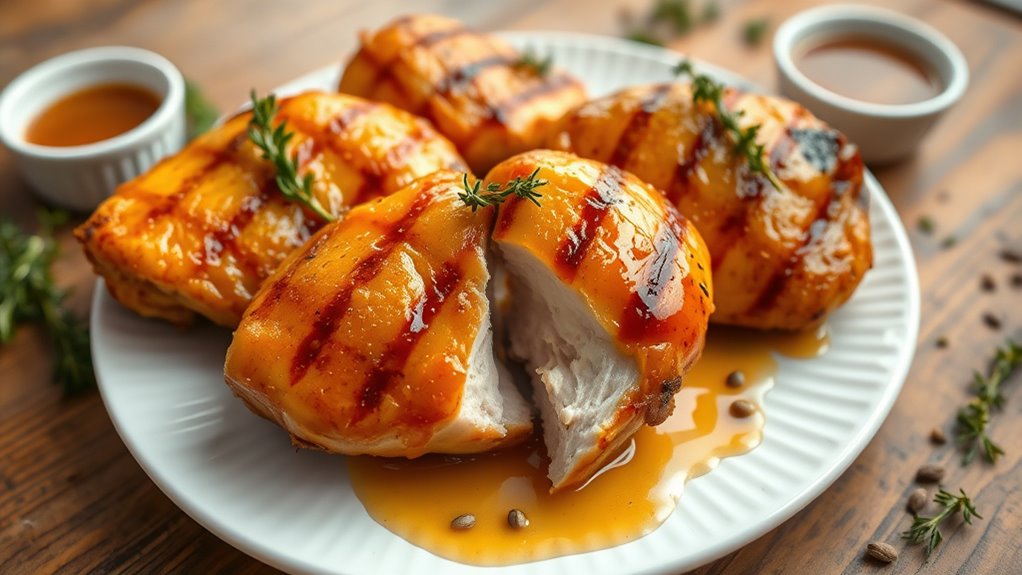
Kid-Friendly BBQ Ranch Chicken
BBQ Ranch Chicken transforms ordinary chicken breasts into a kid-pleasing meal by combining two beloved flavors that children naturally gravitate towards. The sweet and tangy BBQ sauce paired with creamy ranch creates a perfect balance that masks the typical blandness of chicken breast while keeping the dish familiar and appealing.
This recipe takes advantage of the fact that most children already enjoy both BBQ sauce and ranch dressing separately, making it an easy transition to this combined flavor profile. The cooking method ensures the chicken stays moist and tender, while the sauce creates a slightly crispy exterior that adds an enjoyable texture dimension.
- 4 boneless, skinless chicken breasts
- 1 cup BBQ sauce
- 1/2 cup ranch dressing
- 1 teaspoon garlic powder
- 1 teaspoon onion powder
- 1/2 teaspoon salt
- 2 tablespoons olive oil
- 1/4 cup chopped fresh parsley (optional)
In a medium bowl, mix together the BBQ sauce and ranch dressing until well combined. Set aside half of the sauce mixture for serving.
Place the chicken breasts in a shallow dish and season with garlic powder, onion powder, and salt. Pour the remaining sauce mixture over the chicken, ensuring each piece is well coated. Let marinate for at least 30 minutes at room temperature, or up to 4 hours in the refrigerator.
Heat olive oil in a large skillet over medium heat. Remove chicken from marinade, letting excess drip off. Place chicken in the skillet and cook for 6-7 minutes on each side, or until the internal temperature reaches 165°F (74°C).
During the last 2 minutes of cooking, brush the chicken with some of the reserved sauce mixture. Remove chicken from the skillet and let rest for 5 minutes before slicing. Serve with the remaining sauce mixture drizzled over top and garnish with chopped parsley if desired.
For best results, bring marinated chicken to room temperature before cooking if it has been refrigerated. To ensure even cooking, pound chicken breasts to an even thickness of about 1/2 inch.
This dish can be made ahead and stored in an airtight container in the refrigerator for up to 3 days. When reheating, add a splash of water and cover to prevent the chicken from drying out.
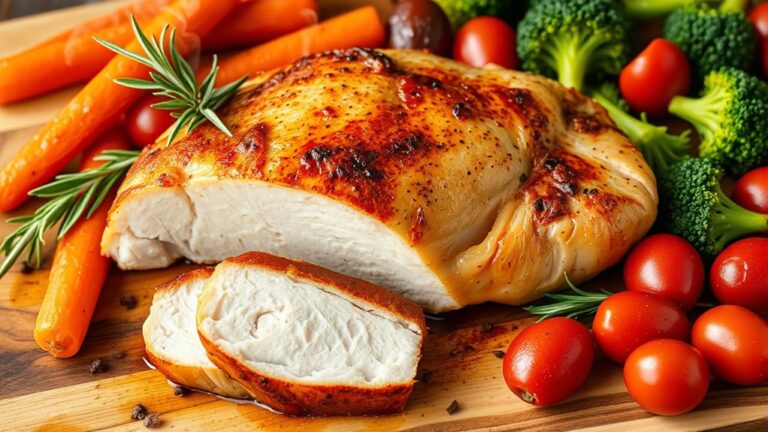
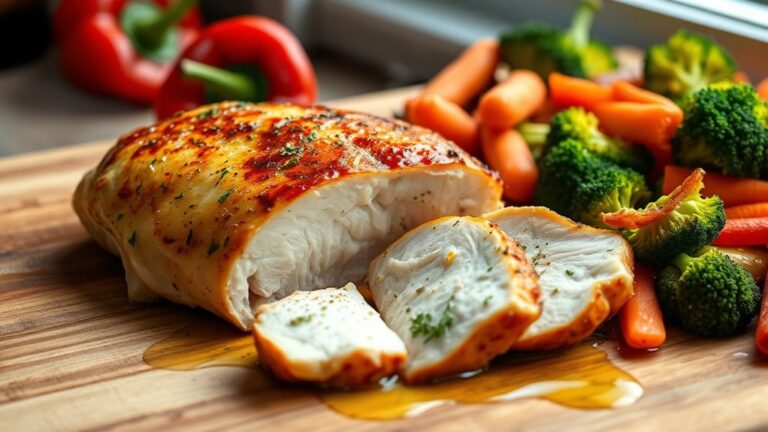
Cheesy Pizza-Style Chicken Breast
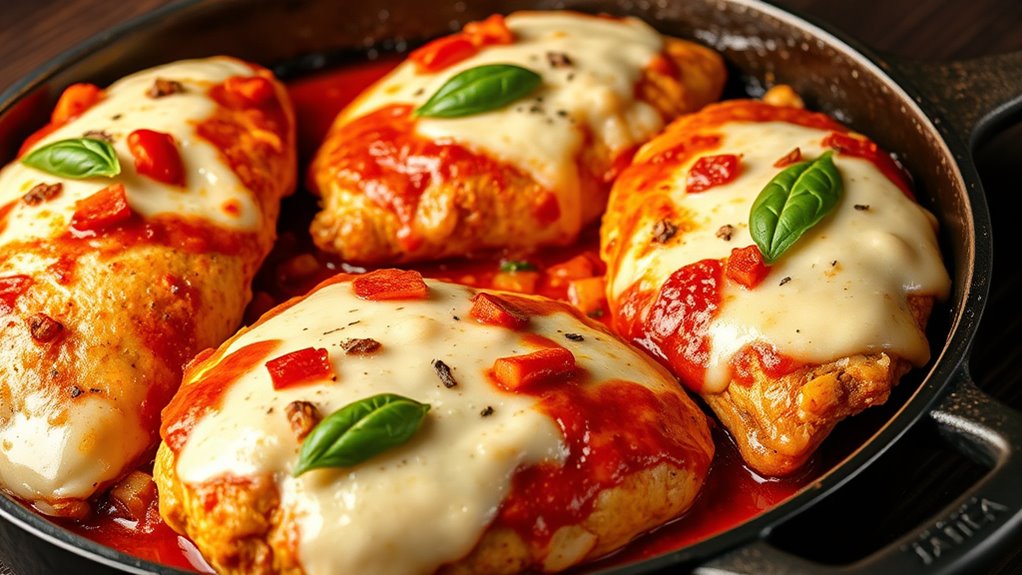
Cheesy Pizza-Style Chicken Breast transforms ordinary chicken into an exciting meal that combines kids' love of pizza with the nutritional benefits of lean protein.
The familiar pizza flavors make this dish instantly appealing to children while providing a healthier alternative to traditional pizza.
This recipe takes boneless chicken breasts and tops them with marinara sauce, melted mozzarella, and favorite pizza toppings. The result is a dish that satisfies pizza cravings while keeping the meal lighter and protein-focused, perfect for growing children who might be hesitant to eat plain chicken.
- 4 boneless, skinless chicken breasts
- 1 cup marinara sauce
- 2 cups shredded mozzarella cheese
- 1 teaspoon Italian seasoning
- 1/2 teaspoon garlic powder
- 1/2 teaspoon salt
- 1/4 teaspoon black pepper
- 2 tablespoons olive oil
- Optional toppings: pepperoni, mushrooms, bell peppers
Preheat the oven to 375°F (190°C).
Season chicken breasts with salt, pepper, garlic powder, and Italian seasoning.
Heat olive oil in an oven-safe skillet over medium-high heat and cook the chicken for 5-6 minutes on each side until golden brown.
Spread marinara sauce evenly over each chicken breast, then sprinkle generously with mozzarella cheese. Add any desired pizza toppings.
Transfer the skillet to the preheated oven and bake for 10-12 minutes, or until the cheese is melted and bubbly, and the chicken reaches an internal temperature of 165°F (74°C).
Let the chicken rest for 5 minutes before serving to allow the cheese to set slightly and the juices to redistribute throughout the meat. This also prevents the hot cheese from burning little mouths.
For best results, choose chicken breasts of similar size and thickness, or pound them to even thickness before cooking.
The dish can be customized with different cheese blends or toppings based on children's preferences.
To make ahead, prepare the chicken up to the point of adding toppings, then refrigerate and finish in the oven just before serving.
Golden Baked Chicken Nuggets

These homemade chicken nuggets offer a healthier alternative to fast food versions while maintaining the crispy, golden exterior that kids love. By baking instead of frying, the nuggets retain their juicy interior while developing a satisfying crunch that appeals to young eaters.
The secret to these nuggets lies in the seasoned breadcrumb coating and a quick preparation method that keeps the chicken tender. The familiar shape and size make them perfect for little hands, while parents can feel good about serving a wholesome meal made from recognizable ingredients.
- 2 pounds boneless, skinless chicken breasts
- 2 cups plain breadcrumbs
- 1/2 cup grated parmesan cheese
- 1 teaspoon garlic powder
- 1 teaspoon onion powder
- 1 teaspoon salt
- 2 large eggs
- 1/4 cup milk
- Cooking spray
Preheat the oven to 400°F (200°C) and line a large baking sheet with parchment paper. Cut the chicken breasts into 1.5-inch pieces, aiming for uniform size to ensure even cooking.
In a shallow bowl, combine breadcrumbs, parmesan cheese, garlic powder, onion powder, and salt. In a separate bowl, whisk together eggs and milk.
Dip each piece of chicken first in the egg mixture, then coat thoroughly in the breadcrumb mixture, pressing gently to help the coating adhere. Place the coated nuggets on the prepared baking sheet, leaving space between each piece.
Lightly spray the nuggets with cooking spray to help achieve a golden color. Bake for 15-18 minutes, flipping halfway through, until the coating is crispy and golden brown and the internal temperature reaches 165°F (74°C). Let rest for 5 minutes before serving.
For best results, avoid overcrowding the baking sheet as this can lead to steaming rather than crisping. These nuggets can be frozen after cooling completely – arrange them on a baking sheet, freeze until solid, then transfer to a freezer bag.
Reheat frozen nuggets in a 375°F (190°C) oven for 10-12 minutes until heated through.