15 Chicken Breast Recipes That Never Dry Out
Tired of serving up less-than-perfect chicken breasts? You're not alone in the quest for juicy, flavorful results. Whether you've mastered the basics or you're just starting out, these 15 foolproof techniques will transform your chicken from mundane to magnificent. From the silky results of buttermilk brining to the precision of sous vide cooking, each method ensures your chicken stays moist and tender. Let's explore how simple adjustments to your cooking approach can make every bite worth savoring.
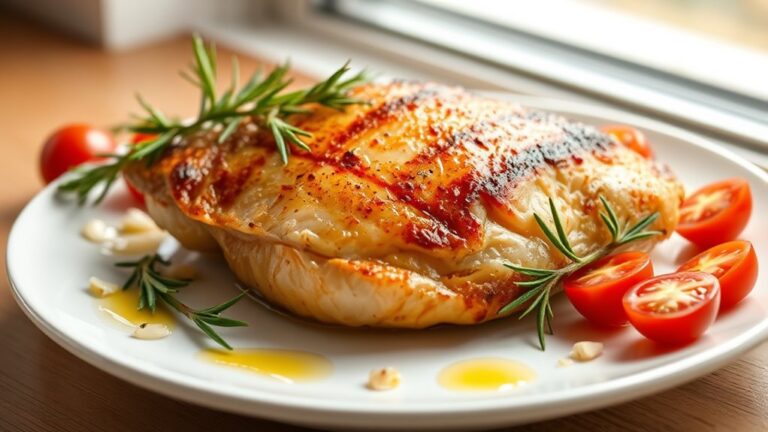
Juicy Pan-Seared Chicken With Herb Butter
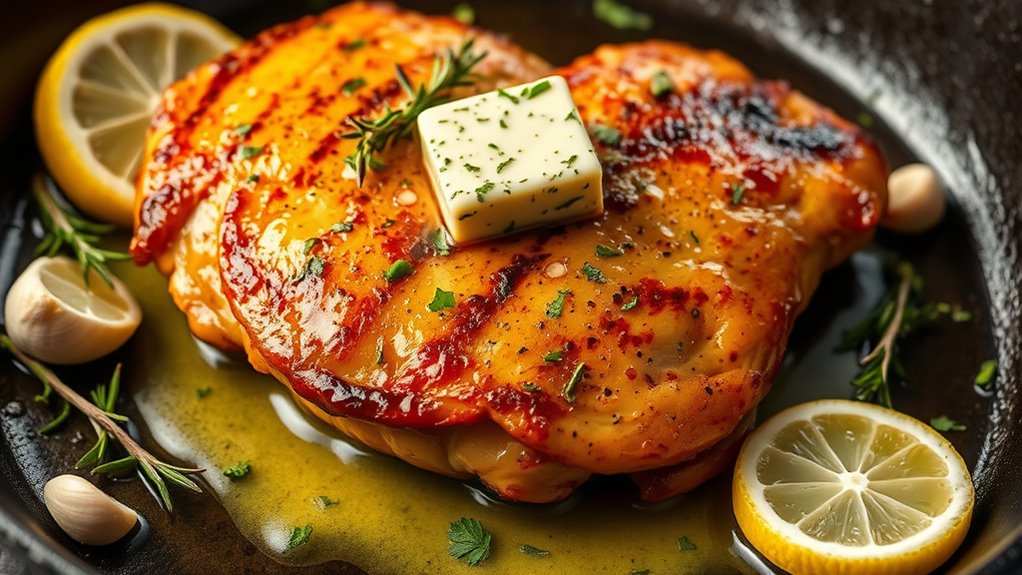
Pan-seared chicken breast with herb butter offers a delightful combination of crispy exterior and juicy interior, elevated by the richness of compound butter infused with fresh herbs. This classic preparation method transforms an ordinary chicken breast into a restaurant-quality dish that's both elegant and satisfying.
The success of this dish relies on proper temperature control and timing, allowing the chicken to develop a golden crust while remaining tender inside. The herb butter not only adds flavor but also creates a luxurious sauce as it melts over the hot chicken, keeping the meat moist and adding an extra layer of complexity to each bite.
- 2 boneless, skinless chicken breasts
- 2 tablespoons olive oil
- 1 teaspoon kosher salt
- 1/2 teaspoon black pepper
- 4 tablespoons unsalted butter, softened
- 2 cloves garlic, minced
- 1 tablespoon fresh parsley, finely chopped
- 1 teaspoon fresh thyme leaves
- 1 teaspoon fresh rosemary, finely chopped
- 1/2 teaspoon lemon zest
Begin by preparing the herb butter. Mix the softened butter with minced garlic, parsley, thyme, rosemary, and lemon zest in a small bowl. Form the mixture into a log using plastic wrap and refrigerate until firm, about 30 minutes.
Pat the chicken breasts dry with paper towels and allow them to come to room temperature for 15-20 minutes. Season generously with salt and pepper on both sides.
Heat olive oil in a large skillet over medium-high heat until shimmering. Place the chicken breasts in the pan and cook for 5-7 minutes on the first side until golden brown.
Flip the chicken breasts and continue cooking for another 5-7 minutes. During the last 2 minutes of cooking, add a tablespoon of the prepared herb butter to the pan for each breast. Continuously baste the chicken with the melting butter until the internal temperature reaches 165°F (74°C). Remove from heat and let rest for 5-10 minutes before slicing. Top each chicken breast with an additional pat of herb butter while resting.
For optimal results, choose chicken breasts of similar size and thickness, or pound them to an even thickness before cooking. The remaining herb butter can be stored in the refrigerator for up to a week and used for other dishes or to add extra flavor to vegetables or grilled meats.
Avoid overcrowding the pan, as this will prevent proper browning and could lead to uneven cooking.
Buttermilk-Brined Chicken Breast
Buttermilk brine transforms ordinary chicken breasts into exceptionally tender, flavorful cuts of meat. The lactic acid in buttermilk helps break down proteins while also infusing the chicken with moisture, ensuring each bite remains succulent throughout the cooking process.
This brining method, combined with proper cooking technique, creates chicken that's noticeably more tender than standard preparations. The subtle tanginess from the buttermilk adds depth to the meat's flavor profile, while aromatics in the brine contribute additional layers of taste without overpowering the natural chicken flavor.
- 2 boneless, skinless chicken breasts
- 2 cups buttermilk
- 2 cloves garlic, crushed
- 1 tablespoon kosher salt
- 1 teaspoon black pepper
- 1 teaspoon dried herbs (thyme, rosemary, or sage)
- 2 tablespoons olive oil
- 1 tablespoon butter
In a large bowl, combine buttermilk, crushed garlic, kosher salt, black pepper, and dried herbs. Submerge chicken breasts in the mixture, cover with plastic wrap, and refrigerate for 4-12 hours. Avoid brining longer than 12 hours, as the meat can become too soft.
Remove chicken from brine and pat completely dry with paper towels. Discard the brine. Let chicken rest at room temperature for 15-20 minutes before cooking. Season lightly with additional salt and pepper, remembering that the brine has already provided significant seasoning.
Heat olive oil in a large skillet over medium-high heat. Once the oil is shimmering, add the chicken breasts and cook for 5-6 minutes on each side until golden brown. Add butter during the final 2 minutes of cooking, basting the chicken continuously. Remove from heat when internal temperature reaches 165°F (74°C). Let rest for 5-10 minutes before slicing.
For optimal results, maintain consistent thickness in your chicken breasts by gently pounding them before brining. If you're short on time, even a 2-hour brine will improve the meat's texture and flavor. Always avoid reusing brine and ensure your cooking surface is hot enough to achieve proper browning without overcooking the meat.
Mediterranean Stuffed Chicken Breast
Mediterranean Stuffed Chicken Breast transforms ordinary chicken into an elegant dish bursting with the vibrant flavors of the Mediterranean region. Sun-dried tomatoes, feta cheese, and fresh spinach create a colorful and flavorful filling that keeps the chicken moist while cooking.
This recipe elevates traditional chicken breast by incorporating classic Mediterranean ingredients into a stuffed presentation that's both impressive and surprisingly simple to prepare. The combination of briny feta, sweet tomatoes, and earthy spinach infuses the chicken with flavor from the inside out, while a golden-brown exterior seals in the juices.
- 2 large boneless, skinless chicken breasts
- 4 ounces feta cheese, crumbled
- 1/2 cup sun-dried tomatoes, chopped
- 2 cups fresh spinach leaves
- 3 cloves garlic, minced
- 2 tablespoons olive oil
- 1 teaspoon dried oregano
- 1/2 teaspoon dried basil
- 1 teaspoon kosher salt
- 1/2 teaspoon black pepper
- Kitchen twine or toothpicks
Butterfly each chicken breast by cutting horizontally through the middle, creating a pocket, but don't cut all the way through. Open the chicken like a book and pound to even thickness. Season both sides with salt, pepper, oregano, and basil.
In a bowl, combine the crumbled feta, chopped sun-dried tomatoes, spinach, and minced garlic. Divide this mixture between the two chicken breasts, spreading it evenly on one side of each opened breast. Fold the top half over the filling and secure with kitchen twine or toothpicks.
Heat olive oil in a large oven-safe skillet over medium-high heat. Sear the stuffed chicken breasts for 4-5 minutes on each side until golden brown. Transfer the skillet to a preheated 375°F (190°C) oven and bake for 15-20 minutes, or until the internal temperature reaches 165°F (74°C). Let rest for 5-10 minutes before removing twine or toothpicks and slicing.
For best results, avoid overstuffing the chicken breasts as this can cause the filling to leak during cooking. If the filling starts to escape while cooking, don't worry – these ingredients will create a delicious sauce in the pan. Consider serving any escaped filling over the sliced chicken for extra flavor.
Sous Vide Chicken With Fresh Herbs
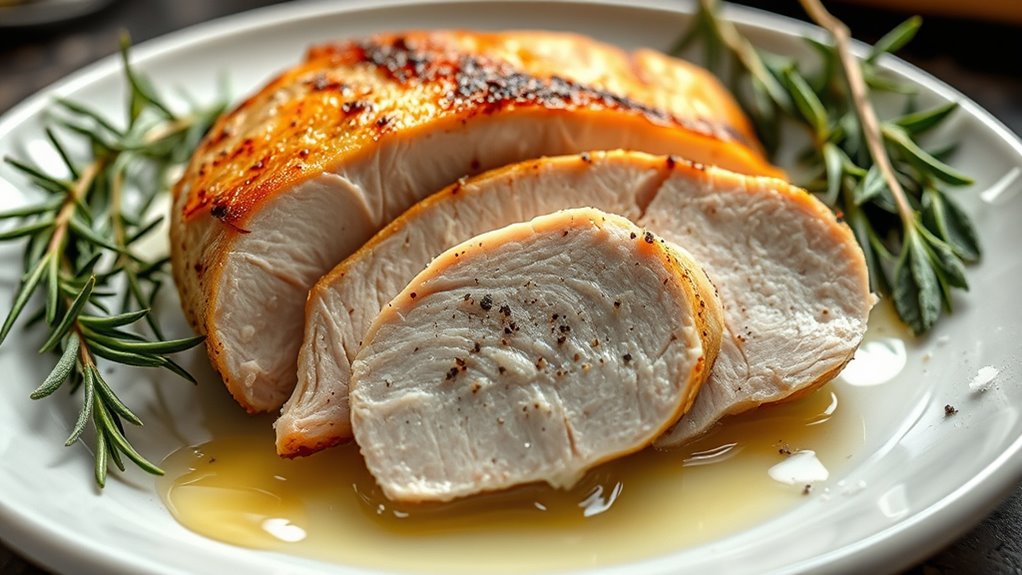
Sous vide cooking has revolutionized the way we prepare chicken breast, offering unparalleled control over temperature and texture. By cooking chicken in a precisely controlled water bath, this method ensures perfectly cooked, juicy meat every time, while the addition of fresh herbs infuses the chicken with delicate, aromatic flavors throughout.
The beauty of sous vide chicken lies in its foolproof nature and the ability to achieve restaurant-quality results at home. Unlike traditional cooking methods, sous vide eliminates the risk of overcooking, as the chicken can't exceed the temperature of the water bath, resulting in consistently tender and moist meat that's infused with herbaceous notes.
- 2 boneless, skinless chicken breasts
- 2 sprigs fresh rosemary
- 4 sprigs fresh thyme
- 2 sprigs fresh sage
- 2 cloves garlic, lightly crushed
- 2 tablespoons olive oil
- 1 teaspoon kosher salt
- 1/2 teaspoon black pepper
- 2 tablespoons butter (for finishing)
Fill your sous vide container with water and preheat to 145°F (63°C). Pat the chicken breasts dry with paper towels and season generously with salt and pepper.
Place each chicken breast in a separate sous vide bag or zip-lock freezer bag, adding equal portions of herbs, crushed garlic, and a tablespoon of olive oil to each. Using the water displacement method or a vacuum sealer, remove all air from the bags and seal tightly.
Once the water has reached the target temperature, submerge the sealed bags, ensuring the chicken is fully underwater. Cook for 1.5 to 2 hours, maintaining the water temperature throughout the cooking process.
After cooking, remove the bags from the water bath. Take the chicken out of the bags and pat dry with paper towels.
Heat a skillet over high heat and add butter. Once the butter is foaming, sear the chicken breasts for 30-45 seconds on each side until golden brown, being careful not to overcook. Let the chicken rest for 5 minutes before slicing.
For optimal results, ensure your sous vide bags are properly sealed to prevent any water from entering during cooking. While the cooking time is flexible (the chicken can remain in the bath for up to 4 hours without loss of quality), avoid cooking longer than this as the texture may become too soft.
If cooking chicken breasts of different thicknesses, adjust cooking time accordingly, adding 30 minutes for particularly thick pieces.
Creamy Mushroom-Smothered Chicken

Creamy Mushroom-Smothered Chicken transforms basic pan-seared chicken breasts into an elegant and satisfying meal. The combination of earthy mushrooms, aromatic garlic, and rich cream sauce creates a restaurant-quality dish that's surprisingly simple to prepare at home.
This recipe builds upon the fundamental technique of properly searing chicken breasts while incorporating classic French cooking elements. The mushrooms are cooked to a golden brown before being combined with herbs and cream, resulting in a velvety sauce that perfectly complements the tender chicken.
- 2 boneless, skinless chicken breasts
- 8 oz mushrooms, sliced
- 3 cloves garlic, minced
- 1 cup heavy cream
- 1/2 cup chicken broth
- 2 tablespoons olive oil
- 2 tablespoons butter
- 1 teaspoon fresh thyme
- 1 teaspoon kosher salt
- 1/2 teaspoon black pepper
- 1/4 cup white wine (optional)
Season chicken breasts with salt and pepper, then heat olive oil in a large skillet over medium-high heat. Sear the chicken for 5-7 minutes on each side until golden brown. Remove chicken from the pan and set aside.
Add butter to the same pan and sauté mushrooms until golden brown, about 5-7 minutes. Add minced garlic and thyme, cooking for another minute until fragrant. If using wine, add it now and scrape up any browned bits from the bottom of the pan.
Pour in the chicken broth and heavy cream, stirring to combine. Return the chicken to the pan, reduce heat to medium-low, and simmer for 8-10 minutes until the sauce thickens and the chicken is cooked through to 165°F (74°C).
During the last few minutes, spoon the sauce over the chicken repeatedly to coat it well.
For the best results, avoid using pre-sliced mushrooms as they often lack flavor and freshness. The sauce can be adjusted for thickness by simmering longer for a thicker consistency or adding more broth for a thinner sauce. If the sauce becomes too thick, thin it with additional chicken broth rather than cream to maintain the proper flavor balance.
Pesto-Crusted Chicken Breast
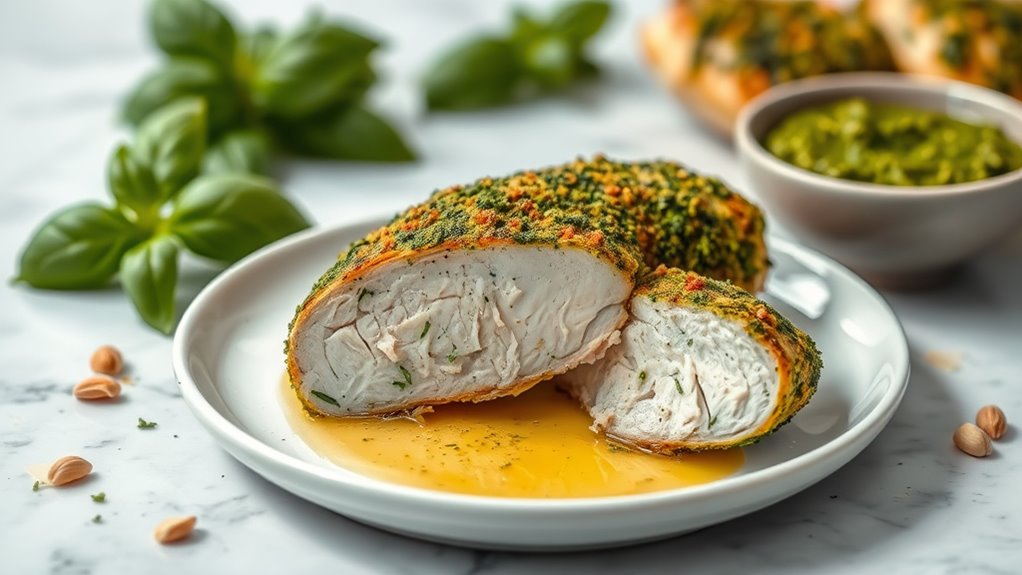
Pesto-crusted chicken breast transforms an ordinary protein into a vibrant, Italian-inspired dish that's both elegant and easy to prepare. The bright, herbaceous coating creates a flavorful crust while helping to seal in moisture, resulting in a tender and succulent chicken breast.
This recipe combines the tried-and-true method of pan-searing with the rich flavors of traditional basil pesto. When the pesto meets the heat of the pan, it creates a golden-brown crust that's packed with the distinctive tastes of fresh herbs, garlic, pine nuts, and Parmesan cheese.
- 2 boneless, skinless chicken breasts
- 1/2 cup prepared basil pesto
- 1/4 cup grated Parmesan cheese
- 1/3 cup panko breadcrumbs
- 2 tablespoons olive oil
- 1 teaspoon kosher salt
- 1/2 teaspoon black pepper
- 1 tablespoon butter
Pat the chicken breasts dry with paper towels and allow them to rest at room temperature for 15 minutes. Season both sides with salt and pepper.
Mix the pesto, Parmesan cheese, and panko breadcrumbs in a shallow dish until well combined. Press the chicken breasts firmly into the pesto mixture, ensuring an even coating on both sides.
Heat olive oil in a large skillet over medium heat. Once the oil is shimmering, carefully place the coated chicken breasts in the pan. Cook for 5-6 minutes on each side, or until the crust becomes golden brown and crispy.
Add butter during the final 2 minutes of cooking, basting the chicken to keep it moist. Remove the chicken from the pan when the internal temperature reaches 165°F (74°C). Let the chicken rest for 5-10 minutes before slicing to allow the juices to redistribute throughout the meat.
The pesto crust should be crispy on the outside while the chicken remains juicy on the inside. For optimal results, choose chicken breasts of similar size or pound them to an even thickness of about 1/2 inch.
If the pesto mixture begins to brown too quickly in the pan, reduce the heat to medium-low. The panko breadcrumbs can be substituted with regular breadcrumbs, though the crust won't be quite as crispy.
Store any leftover pesto-crusted chicken in an airtight container in the refrigerator for up to 3 days.
Citrus-Marinated Grilled Chicken
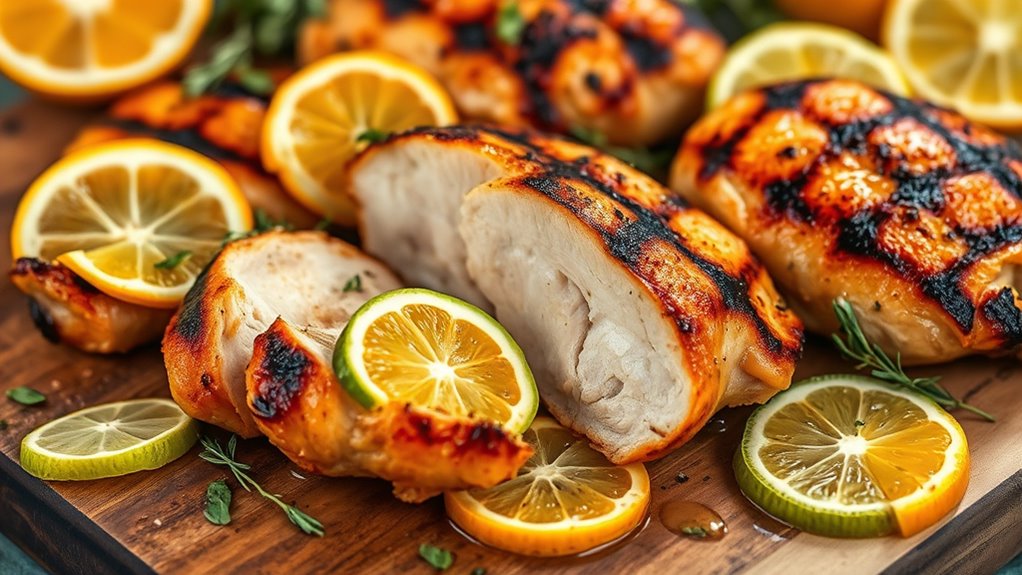
A citrus-based marinade transforms ordinary chicken breasts into a vibrant, flavorful dish that's perfect for grilling. The combination of different citrus juices not only adds brightness but also helps tenderize the meat, ensuring juicy results every time.
The key to this recipe lies in allowing enough time for the marinade to work its magic, but not so long that the acid begins to break down the protein structure of the meat. Fresh citrus juices, aromatic herbs, and a touch of honey create a perfect balance of flavors that complement the natural taste of the chicken.
- 4 boneless, skinless chicken breasts
- 1/4 cup orange juice
- 1/4 cup lime juice
- 2 tablespoons lemon juice
- 3 cloves garlic, minced
- 2 tablespoons olive oil
- 1 tablespoon honey
- 1 teaspoon dried oregano
- 1 teaspoon ground cumin
- 1 teaspoon kosher salt
- 1/2 teaspoon black pepper
- Zest of 1 orange
- Zest of 1 lime
Combine all marinade ingredients in a large bowl or zip-top bag. Add the chicken breasts and ensure they're well-coated with the marinade. Refrigerate for 2-4 hours, turning the chicken occasionally to ensure even distribution of the marinade.
Remove the chicken from the refrigerator 30 minutes before grilling to allow it to come to room temperature. Preheat your grill to medium-high heat (around 375-400°F). Oil the grates to prevent sticking.
Grill the chicken for 6-7 minutes per side, or until the internal temperature reaches 165°F at the thickest part. Avoid moving the chicken frequently during cooking to achieve nice grill marks. Once done, transfer to a plate and tent with foil. Let rest for 5-10 minutes before slicing to allow the juices to redistribute.
For optimal results, choose chicken breasts of similar size and thickness, or pound them to an even thickness before marinating. Avoid marinating longer than 4 hours, as the citrus acids can start to toughen the meat.
If preparing ahead, you can mix the marinade up to 24 hours in advance and store it separately until ready to use.
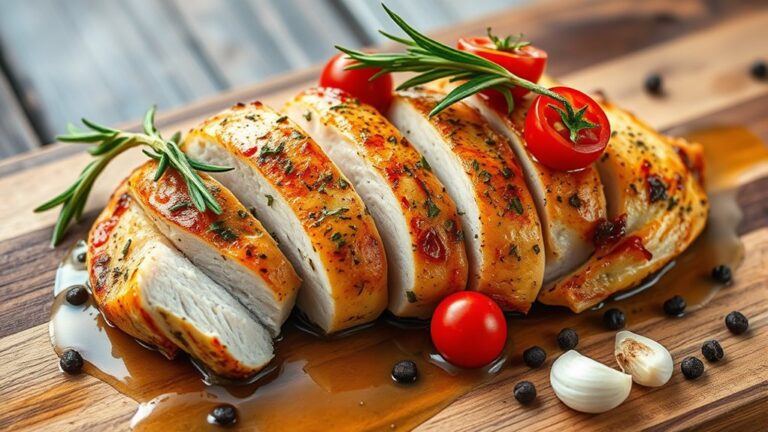
Greek Yogurt Baked Chicken
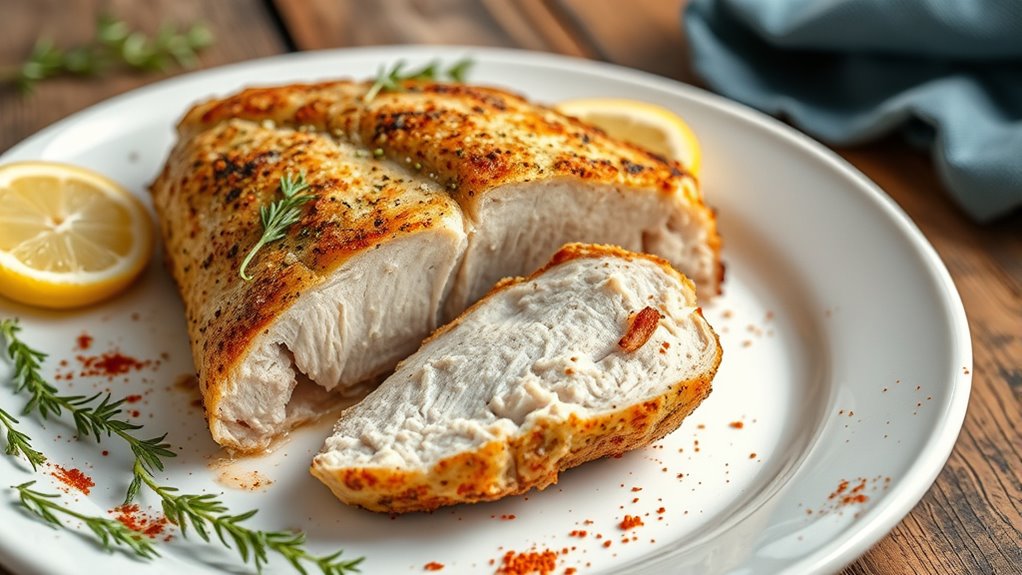
Greek yogurt marinated chicken breast combines tangy dairy with aromatic herbs to create a tender, flavorful dish that stays remarkably moist during the baking process. The lactic acid in Greek yogurt acts as a natural tenderizer, breaking down proteins in the chicken while infusing it with flavor.
This Mediterranean-inspired preparation method results in chicken that's not only juicy but also carries subtle notes of garlic, lemon, and herbs throughout each bite. The yogurt coating creates a protective layer that helps seal in moisture during baking, while also forming a delicious crust on the exterior.
- 2 large boneless, skinless chicken breasts
- 1 cup plain Greek yogurt
- 3 cloves garlic, minced
- 1 lemon, juiced
- 2 tablespoons olive oil
- 1 tablespoon dried oregano
- 1 teaspoon dried thyme
- 1 teaspoon kosher salt
- 1/2 teaspoon black pepper
- 1/4 teaspoon paprika
In a medium bowl, combine Greek yogurt, minced garlic, lemon juice, olive oil, oregano, thyme, salt, pepper, and paprika. Mix thoroughly until all ingredients are well incorporated.
Place chicken breasts in the yogurt mixture, ensuring they're completely coated. Cover the bowl with plastic wrap and refrigerate for at least 2 hours, preferably overnight.
Preheat the oven to 375°F (190°C). Remove the chicken from the refrigerator 30 minutes before cooking to allow it to come to room temperature.
Line a baking dish with parchment paper and transfer the chicken breasts to the dish, keeping some of the yogurt mixture coating the meat. Discard the remaining marinade.
Bake the chicken for 25-30 minutes, or until the internal temperature reaches 165°F (74°C) when tested with a meat thermometer. Let the chicken rest for 5-10 minutes before slicing to allow the juices to redistribute throughout the meat.
For optimal results, ensure chicken breasts are of even thickness by pounding them if necessary. If the yogurt coating begins to brown too quickly during baking, tent the dish with aluminum foil to prevent burning.
This recipe can be scaled up for larger portions, but avoid overcrowding the baking dish as this can lead to uneven cooking.
Wine-Braised Chicken With Vegetables
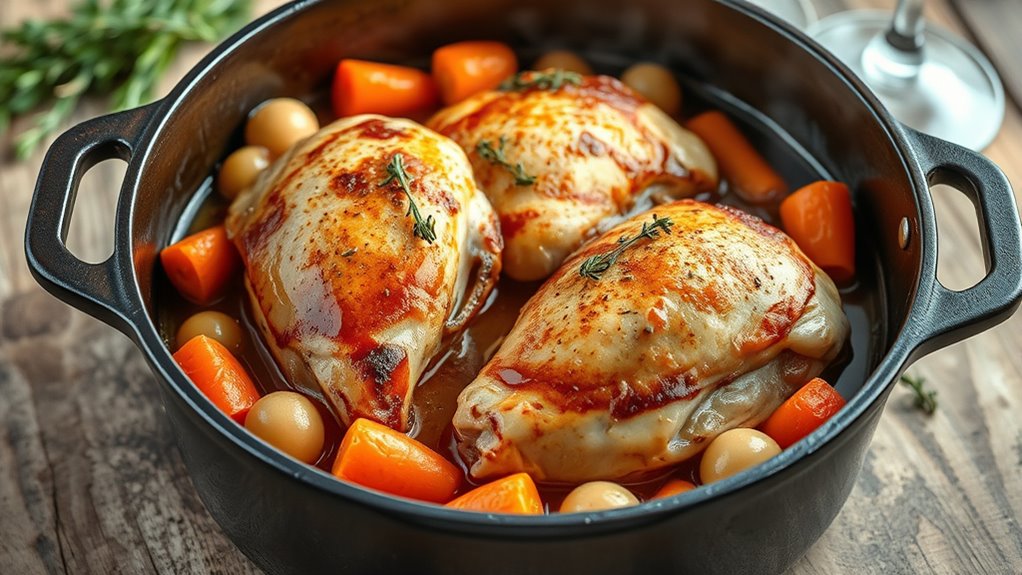
Wine-braised chicken with vegetables transforms simple chicken breasts into an elegant, flavorful dish that's perfect for both weeknight dinners and special occasions. The combination of wine, aromatic vegetables, and herbs creates a rich, sophisticated sauce while keeping the chicken moist and tender.
This classic cooking method uses a technique called braising, where the meat is first seared to develop a golden crust, then slowly cooked in liquid with vegetables. The result is fork-tender chicken infused with complex flavors, accompanied by vegetables that have absorbed the essence of both the wine and the meat's natural juices.
- 4 chicken breasts, bone-in with skin
- 2 carrots, cut into 2-inch pieces
- 2 celery stalks, chopped
- 1 large onion, diced
- 3 garlic cloves, minced
- 2 cups dry white wine
- 2 cups chicken broth
- 2 tablespoons olive oil
- 2 tablespoons butter
- 2 sprigs fresh thyme
- 2 bay leaves
- Salt and black pepper to taste
- 1 tablespoon all-purpose flour
Season chicken breasts generously with salt and pepper. Heat olive oil in a large Dutch oven over medium-high heat. Place chicken skin-side down and sear until golden brown, about 5-7 minutes per side. Remove chicken and set aside.
Add butter to the same pot and reduce heat to medium. Add onions, carrots, and celery to the pot, cooking until the vegetables begin to soften, about 5 minutes. Add garlic and cook for another minute. Sprinkle flour over the vegetables and stir to coat.
Pour in wine and chicken broth, scraping the bottom of the pot to release any browned bits. Add thyme sprigs and bay leaves. Return chicken to the pot, partially submerging it in the liquid. Bring to a simmer, then reduce heat to low. Cover and cook for 45-50 minutes, or until chicken is cooked through and tender.
Remove chicken and increase heat to medium-high, cooking the sauce until it reduces and thickens slightly, about 5-7 minutes. For the best results, choose a good quality dry white wine that you'd enjoy drinking, such as Sauvignon Blanc or Chardonnay. Avoid cooking wines, as they can be overly salty and lack the complexity needed for this dish.
The chicken can be made ahead and reheated gently, as the flavors often improve after a day in the refrigerator.
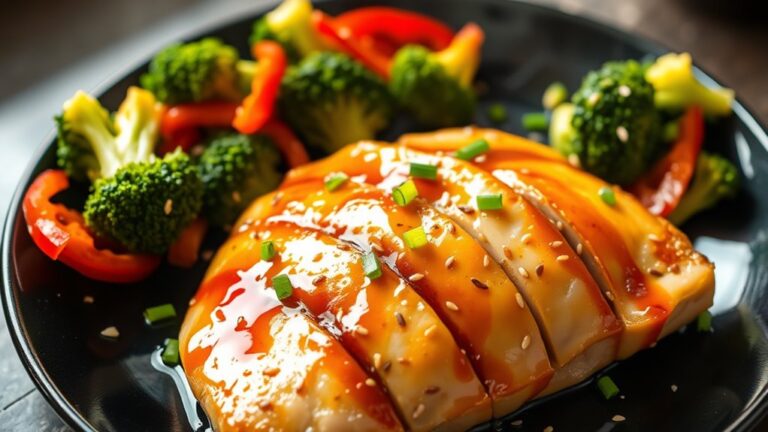
Asian-Style Glazed Chicken Breast
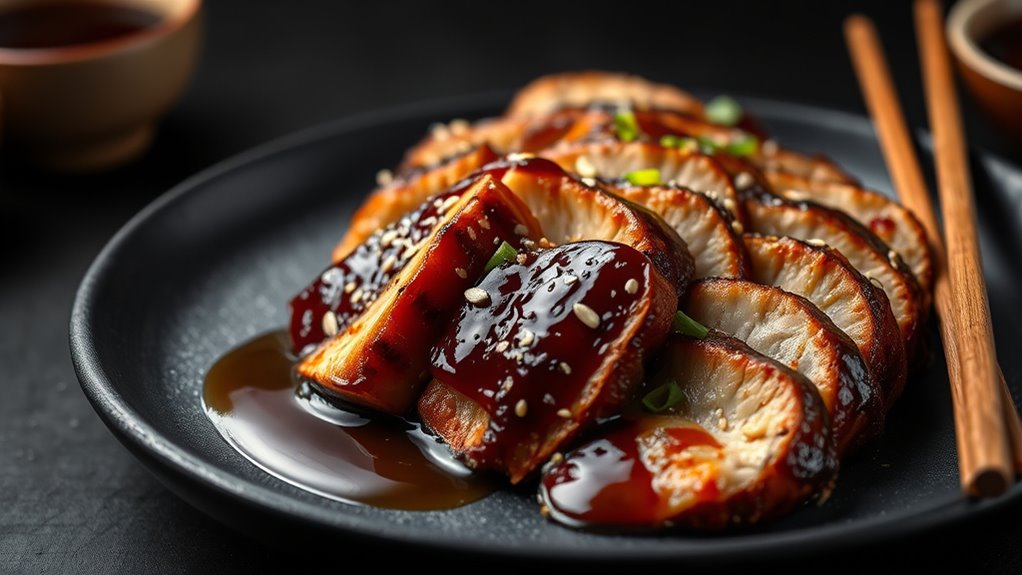
Asian-Style Glazed Chicken Breast transforms ordinary chicken into a savory-sweet masterpiece, combining traditional Asian flavors like soy sauce, ginger, and honey. The glaze creates a stunning mahogany coating that seals in moisture while providing a delectable combination of umami and subtle sweetness.
The success of this dish relies on properly reducing the glaze to achieve the right consistency and allowing it to caramelize slightly on the chicken's surface. This method builds layers of flavor while ensuring the meat stays juicy and tender, making it perfect for both family dinners and elegant entertaining.
- 2 boneless, skinless chicken breasts
- 1/4 cup soy sauce
- 3 tablespoons honey
- 2 tablespoons rice vinegar
- 2 tablespoons vegetable oil
- 2 cloves garlic, minced
- 1 tablespoon fresh ginger, grated
- 1 teaspoon sesame oil
- 1/2 teaspoon black pepper
- 2 green onions, sliced (for garnish)
- 1 tablespoon sesame seeds (for garnish)
Pat the chicken breasts dry and allow them to reach room temperature for 15 minutes. Meanwhile, prepare the glaze by combining soy sauce, honey, rice vinegar, garlic, ginger, and sesame oil in a small bowl. Reserve half of the mixture for basting, and use the remainder to marinate the chicken for 20 minutes.
Heat vegetable oil in a large skillet over medium-high heat. Remove chicken from marinade and discard the used marinade. Place chicken in the hot pan and cook for 5-6 minutes on each side until golden brown.
Reduce heat to medium-low and begin basting with the reserved glaze mixture, turning occasionally to coat evenly. Continue cooking and basting for an additional 5-7 minutes, or until the chicken reaches an internal temperature of 165°F (74°C) and the glaze has thickened and caramelized.
Remove from heat and let rest for 5 minutes before slicing. Garnish with sliced green onions and sesame seeds.
For optimal results, avoid using a nonstick pan as it won't achieve the same level of caramelization. If the glaze begins to darken too quickly, reduce the heat immediately to prevent burning. The chicken can be marinated for up to 4 hours in the refrigerator for more intense flavor, but avoid marinating longer as the acid in the vinegar can affect the meat's texture.
Parmesan-Crusted Chicken Cutlets
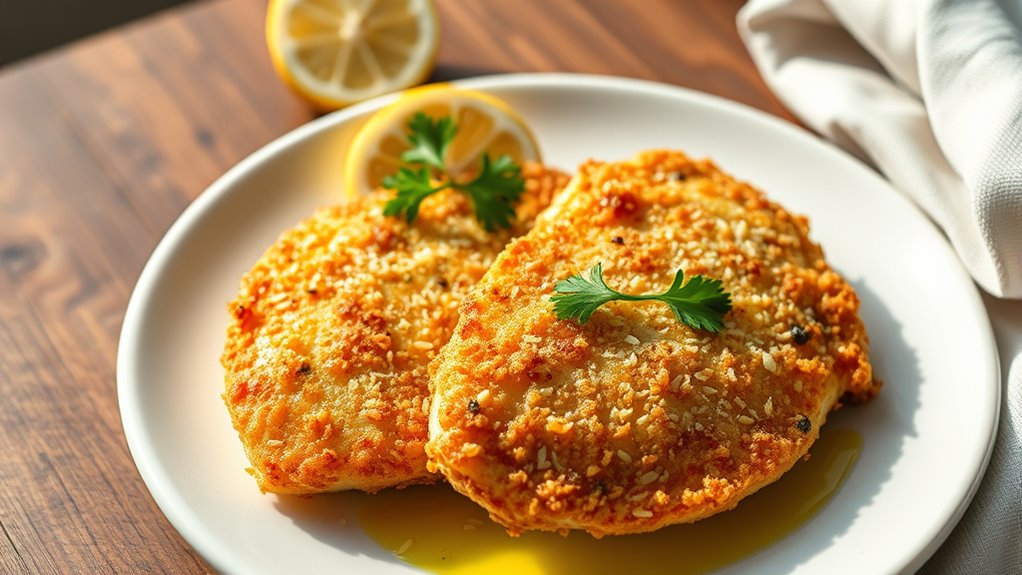
Parmesan-crusted chicken cutlets transform ordinary chicken breasts into a crispy, flavorful main dish that's both elegant and satisfying. The combination of seasoned breadcrumbs and freshly grated Parmesan cheese creates a golden, crunchy exterior while keeping the meat tender and juicy inside.
This Italian-inspired dish relies on proper breading technique and careful temperature control during cooking. The three-step breading process – flour, egg wash, and cheese-breadcrumb mixture – ensures the coating adheres properly to the chicken and creates that signature crispy crust that makes this dish so appealing.
- 2 large chicken breasts, butterflied and pounded thin
- 1 cup all-purpose flour
- 2 large eggs
- 1 cup Italian-seasoned breadcrumbs
- 1/2 cup freshly grated Parmesan cheese
- 1 teaspoon garlic powder
- 1 teaspoon dried oregano
- 1/2 teaspoon salt
- 1/4 teaspoon black pepper
- 1/3 cup olive oil
- 2 tablespoons butter
Begin by setting up your breading station with three shallow dishes. In the first dish, place the flour. In the second dish, beat the eggs with 1 tablespoon of water. In the third dish, combine the breadcrumbs, Parmesan cheese, garlic powder, oregano, salt, and pepper.
Working with one piece at a time, dredge the chicken in flour, shaking off excess. Dip into the egg mixture, allowing extra to drip off, then press firmly into the breadcrumb mixture, ensuring even coverage on both sides. Place the breaded cutlets on a clean plate and let them rest for 5 minutes to help the coating adhere better.
Heat olive oil and butter in a large skillet over medium heat until shimmering. Add the breaded cutlets and cook for 4-5 minutes on each side until golden brown and cooked through. The internal temperature should reach 165°F (74°C). Transfer to a paper towel-lined plate to drain excess oil.
For the best results, avoid overcrowding the pan when frying the cutlets, as this will lower the oil temperature and result in soggy breading. It's also important to pound the chicken to an even thickness of about 1/4 inch to ensure consistent cooking and prevent the coating from burning before the chicken is fully cooked.
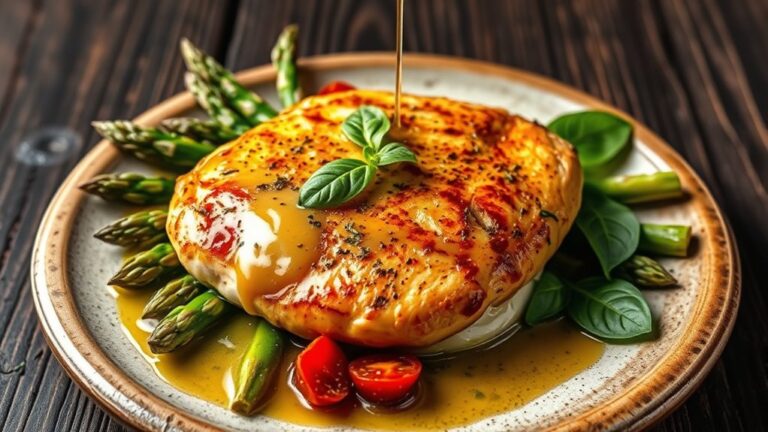
Honey-Mustard Baked Chicken
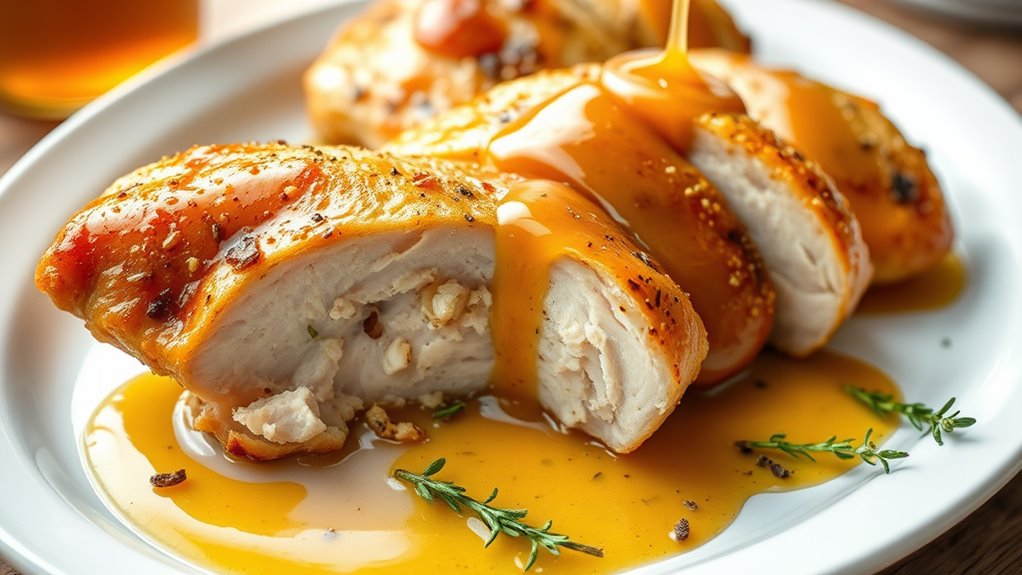
Honey-mustard baked chicken breast combines sweet and tangy flavors in a deliciously moist preparation. The natural sugars in honey create a beautiful caramelized exterior while keeping the chicken tender and juicy throughout the baking process.
This easy-to-prepare dish requires minimal hands-on time, making it perfect for busy weeknight dinners. The honey-mustard sauce not only flavors the chicken but also creates a protective coating that helps seal in moisture during baking.
- 4 boneless, skinless chicken breasts
- 1/3 cup honey
- 1/4 cup Dijon mustard
- 2 tablespoons whole grain mustard
- 3 tablespoons olive oil
- 2 cloves garlic, minced
- 1 teaspoon kosher salt
- 1/2 teaspoon black pepper
- 1 teaspoon dried thyme
- 1/2 teaspoon paprika
Preheat the oven to 375°F (190°C). In a medium bowl, whisk together honey, both mustards, olive oil, minced garlic, salt, pepper, thyme, and paprika until well combined.
Pat the chicken breasts dry with paper towels and place them in a baking dish.
Pour the honey-mustard mixture over the chicken breasts, ensuring each piece is well coated. Turn the chicken pieces to coat both sides evenly. Allow the chicken to marinate in the sauce for 10-15 minutes at room temperature before baking.
Bake the chicken for 25-30 minutes, or until the internal temperature reaches 165°F (74°C). Halfway through cooking, baste the chicken with the pan juices to maintain moisture and enhance flavor.
Once done, let the chicken rest for 5-10 minutes before serving, spooning additional pan sauce over the top.
For best results, choose chicken breasts of similar size or pound them to even thickness before cooking. The sauce can be prepared up to 24 hours in advance and stored in the refrigerator.
If the chicken starts to brown too quickly, cover the baking dish with aluminum foil to prevent the honey from burning while the chicken finishes cooking.
Slow-Cooker Shredded Chicken

Slow-cooker shredded chicken is a versatile dish that can be used in countless recipes, from tacos and enchiladas to sandwiches and salads. The low and slow cooking method ensures tender, juicy meat that pulls apart effortlessly while requiring minimal hands-on preparation time.
This method of cooking chicken allows the meat to retain its moisture while absorbing the flavors of the seasonings and aromatics. The gentle, consistent heat of a slow cooker breaks down the muscle fibers gradually, resulting in perfectly shreddable chicken that's never dry or tough.
- 2 lbs boneless, skinless chicken breasts
- 1 cup chicken broth
- 1 onion, diced
- 3 garlic cloves, minced
- 1 teaspoon salt
- 1/2 teaspoon black pepper
- 1 teaspoon dried oregano
- 1 bay leaf
- 2 tablespoons olive oil
Place the chicken breasts in the slow cooker and drizzle with olive oil. Season with salt, pepper, and oregano, then add the diced onion and minced garlic, distributing them evenly around the chicken. Pour the chicken broth into the slow cooker, being careful not to wash away the seasonings, and add the bay leaf.
Cover the slow cooker and set to LOW for 6-8 hours or HIGH for 3-4 hours. The chicken is done when it reaches an internal temperature of 165°F (74°C) and shreds easily with two forks.
Remove the chicken from the slow cooker and let it rest for 5 minutes.
Using two forks, shred the chicken while it's still warm. Return the shredded meat to the slow cooker and stir it into the cooking liquid to absorb the flavors and maintain moisture. Let it sit in the warm liquid for an additional 10 minutes before serving.
For optimal results, avoid lifting the slow cooker lid during cooking as this releases accumulated heat and moisture.
The chicken can be stored in its cooking liquid in an airtight container for up to 4 days in the refrigerator, or frozen for up to 3 months. When reheating, adding a splash of chicken broth helps maintain moisture.
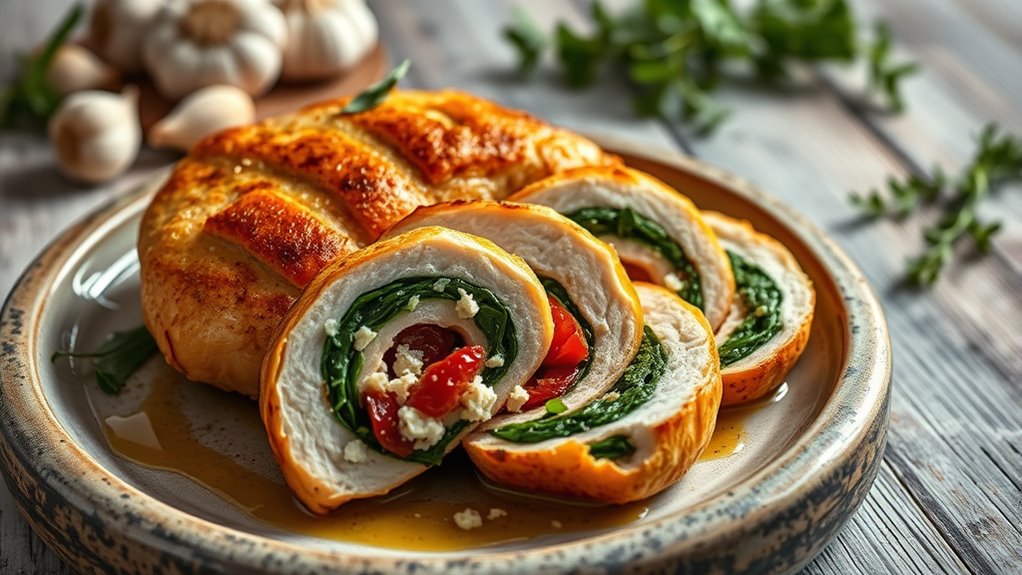
Spinach and Feta Stuffed Chicken
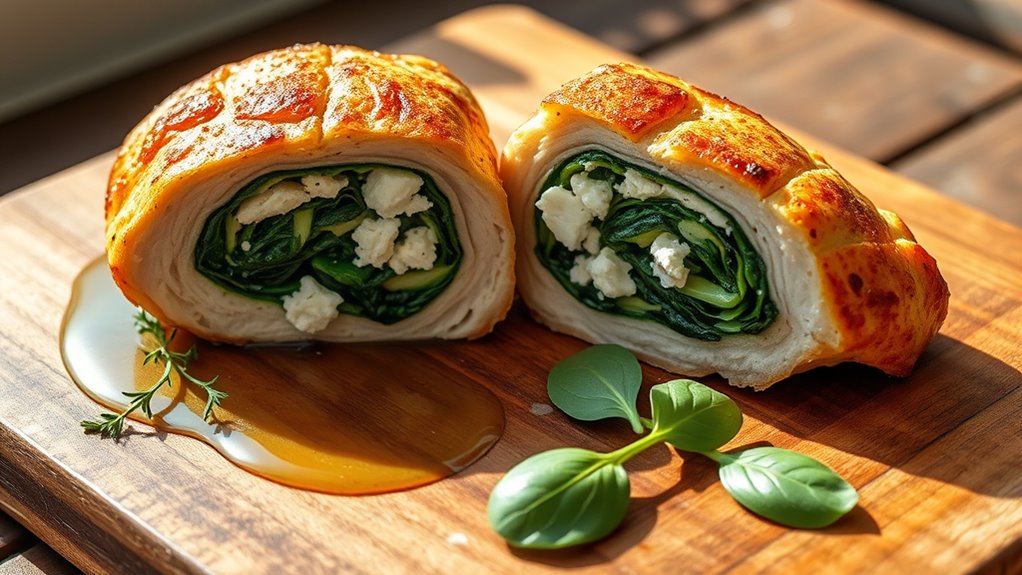
Spinach and feta stuffed chicken breast transforms an ordinary chicken dinner into an elegant Mediterranean-inspired meal. The combination of salty feta cheese, fresh spinach, and perfectly seasoned chicken creates a harmonious blend of flavors that remain juicy and delicious.
This recipe takes the foundation of a well-cooked chicken breast and elevates it by creating a pocket filled with nutritious spinach and tangy feta cheese. The stuffing not only adds flavor but helps maintain moisture throughout the cooking process, resulting in a restaurant-quality dish that's surprisingly simple to prepare at home.
- 2 large boneless, skinless chicken breasts
- 2 cups fresh spinach, chopped
- 4 ounces feta cheese, crumbled
- 2 cloves garlic, minced
- 1 tablespoon olive oil
- 1 teaspoon dried oregano
- 1/2 teaspoon salt
- 1/4 teaspoon black pepper
- 1 tablespoon butter
- Kitchen twine or toothpicks
Begin by creating a pocket in each chicken breast. Place your hand flat on top of the chicken breast and, using a sharp knife, carefully slice horizontally through the thickest part, being careful not to cut all the way through. Open the chicken breast like a book and gently pound to even thickness if needed.
In a bowl, combine the chopped spinach, crumbled feta, minced garlic, and dried oregano. Season the inside of each chicken breast with salt and pepper, then divide the spinach-feta mixture between them, stuffing it into the pocket. Secure the opening with kitchen twine or toothpicks to keep the filling in place during cooking.
Heat olive oil in a large skillet over medium-high heat. Once hot, place the stuffed chicken breasts in the pan and cook for 6-7 minutes on each side. Add butter during the last few minutes of cooking, basting the chicken to keep it moist. Cook until the internal temperature reaches 165°F (74°C) and the chicken is golden brown on both sides.
Let rest for 5-10 minutes before removing the twine or toothpicks and slicing.
For best results, avoid overstuffing the chicken breasts as this can lead to filling falling out during cooking. If the chicken breasts are cooking too quickly on the outside before the center is done, reduce heat to medium and cover the pan for a few minutes to ensure even cooking. The spinach can be substituted with other leafy greens, and the feta can be mixed with cream cheese for a milder flavor profile.
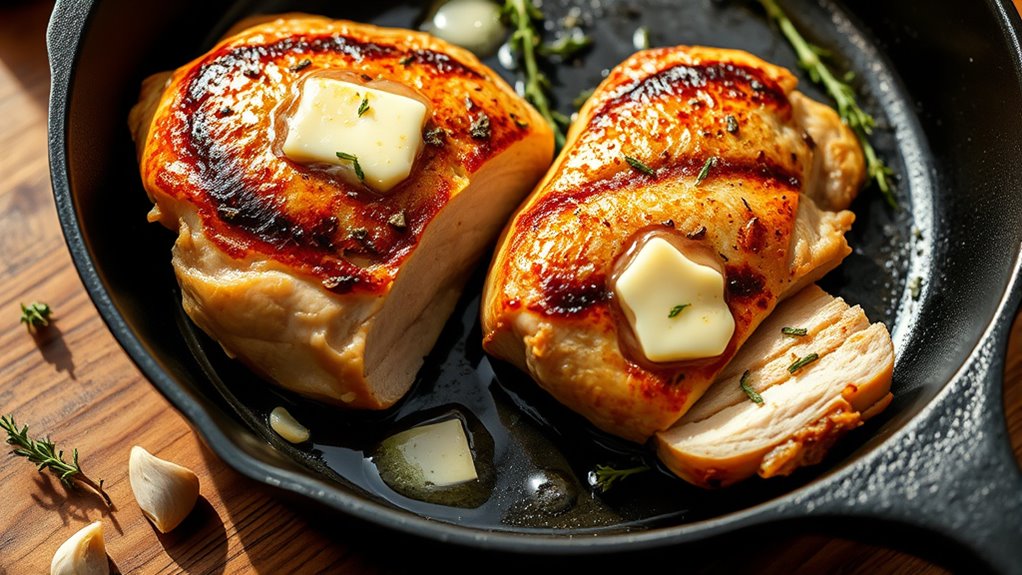
Air Fryer Chicken With Garlic Butter
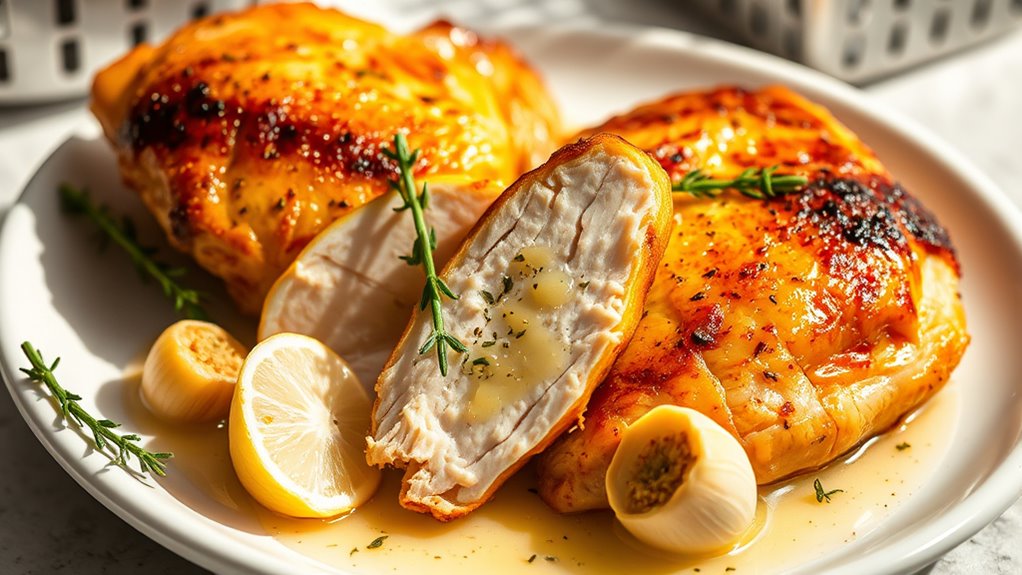
Air fryer chicken breast with garlic butter delivers a perfectly cooked, juicy result while being easier and more hands-off than traditional pan-searing methods. The controlled hot air circulation in an air fryer creates an evenly golden exterior while sealing in the natural juices of the chicken.
The combination of garlic-infused butter adds rich flavor to the lean meat, while the air fryer's efficiency reduces cooking time compared to conventional oven methods. This recipe maintains the chicken's moisture through a quick cooking process and the protective layer of compound butter.
- 2 boneless, skinless chicken breasts
- 4 tablespoons butter, softened
- 4 cloves garlic, minced
- 1 teaspoon Italian herbs
- 1 teaspoon kosher salt
- 1/2 teaspoon black pepper
- 1 tablespoon olive oil
Pat chicken breasts dry with paper towels and let them come to room temperature for about 15 minutes. Meanwhile, prepare the garlic butter by mixing softened butter with minced garlic and Italian herbs in a small bowl. Set aside.
Rub chicken breasts with olive oil and season both sides with salt and pepper. Preheat the air fryer to 375°F (190°C). Place the chicken breasts in the air fryer basket, ensuring they don't overlap.
Cook for 5-6 minutes, then flip the chicken breasts. Top each piece with half of the prepared garlic butter mixture. Continue cooking for another 5-7 minutes, or until the internal temperature reaches 165°F (74°C).
Remove from the air fryer and let rest for 5 minutes before slicing.
For optimal results, choose chicken breasts of similar size or pound them to even thickness before cooking. If the chicken breasts are particularly large, increase cooking time by 2-3 minutes per side.
The garlic butter can be prepared in advance and refrigerated, but should be brought to room temperature before using for even melting.