7 Chicken Breast Recipes That Replace Takeout
Just like a skilled chef turning simple ingredients into culinary masterpieces, you're about to transform basic chicken breasts into restaurant-worthy dishes. You'll discover how to elevate this versatile protein with vibrant flavors from around the world, from zesty Mediterranean herbs to sweet Asian glazes. Whether you're craving comfort food or exotic fare, these seven recipes will help you break free from takeout habits while saving money and boosting your cooking confidence. Let's explore how each dish brings something special to your weeknight dinner rotation.
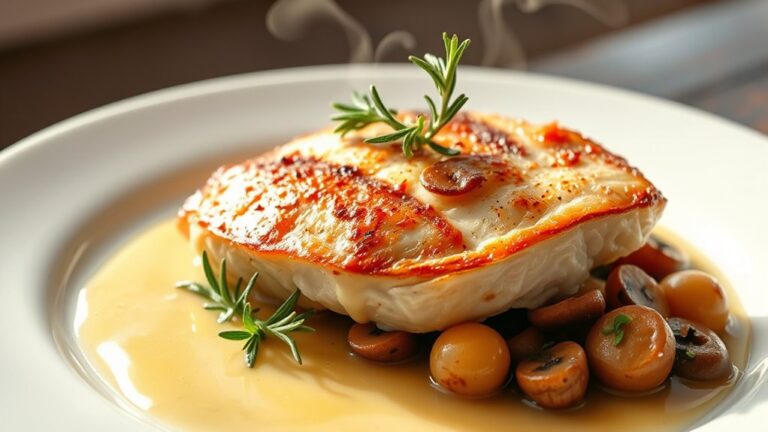
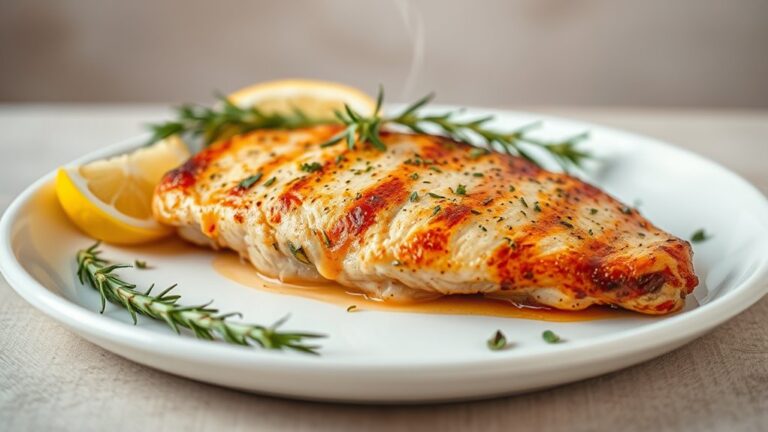
Lemon Garlic Chicken Breast
This classic preparation of chicken breast combines the bright, zesty flavors of fresh lemon with aromatic garlic to create a dish that's both elegant and satisfying. The result is tender, juicy chicken that's perfect for any occasion, from casual family dinners to more formal entertaining.
The secret to this recipe's success lies in properly preparing the chicken breasts and maintaining the right cooking temperature. When executed correctly, this straightforward method produces restaurant-quality results while requiring minimal ingredients and preparation time.
- 4 boneless, skinless chicken breasts
- 3 cloves garlic, minced
- 1 fresh lemon
- 2 tablespoons olive oil
- 1 teaspoon salt
- Fresh ground black pepper to taste
Begin by placing the chicken breasts between two sheets of plastic wrap. Using a meat mallet or rolling pin, pound the chicken to an even thickness of about ½ inch. This ensures uniform cooking throughout. Season both sides of the chicken breasts with salt and pepper.
Heat olive oil in a large skillet over medium-high heat until shimmering. Add the chicken breasts to the pan and cook for 5-6 minutes on each side until golden brown. When flipping the chicken, add the minced garlic to the pan, being careful not to let it burn. Once the garlic becomes fragrant (about 30 seconds), squeeze the fresh lemon juice over the chicken.
Reduce the heat to low, cover the skillet, and continue cooking for an additional 5 minutes, or until the chicken reaches an internal temperature of 165°F at its thickest point. Remove from heat and let the chicken rest for 5 minutes before slicing to allow the juices to redistribute throughout the meat.
For optimal results, remove the chicken from the refrigerator 15 minutes before cooking to ensure even cooking. If the chicken breasts are particularly thick, butterfly them before pounding. The garlic should be added later in the cooking process to prevent burning, which can create bitter flavors.
Leftover chicken can be stored in an airtight container in the refrigerator for up to three days, though it's best enjoyed fresh off the stove.
Honey Sesame Chicken Stir-Fry
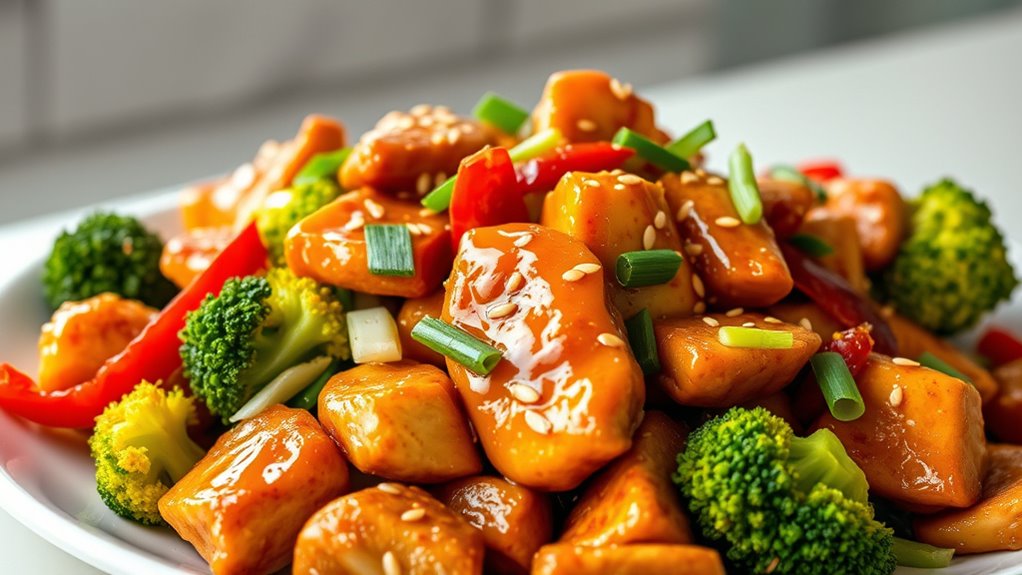
Honey Sesame Chicken Stir-Fry transforms simple chicken breast into an Asian-inspired dish that perfectly balances sweet, savory, and nutty flavors. The combination of honey and sesame creates a glossy sauce that coats tender pieces of chicken, while fresh vegetables add color, texture, and nutritional value.
This quick-cooking dish delivers restaurant-quality results in under 30 minutes, making it an excellent choice for busy weeknights when you want something more exciting than basic chicken. The key to success lies in preparing all ingredients before starting to cook, as stir-frying moves quickly once you begin.
- 1 pound chicken breast, cut into 1-inch pieces
- 3 tablespoons soy sauce
- 2 tablespoons honey
- 1 tablespoon sesame oil
- 2 tablespoons vegetable oil
- 2 cloves garlic, minced
- 1 tablespoon ginger, grated
- 1 red bell pepper, sliced
- 2 cups broccoli florets
- 2 tablespoons sesame seeds
- 2 green onions, sliced
- 1 tablespoon cornstarch
- ¼ cup water
In a medium bowl, combine cornstarch with soy sauce and honey. Add the chicken pieces and toss to coat evenly. Let marinate for 15 minutes while preparing the vegetables. During this time, mix the cornstarch and water in a small bowl to create a slurry for thickening the sauce later.
Heat vegetable oil in a large wok or skillet over high heat. Add the marinated chicken pieces, working in batches if necessary to avoid overcrowding. Cook for 4-5 minutes until golden brown and nearly cooked through. Remove chicken from the pan and set aside.
Add sesame oil to the same pan, then stir-fry garlic and ginger for 30 seconds. Add bell pepper and broccoli, cooking for 2-3 minutes until crisp-tender. Return chicken to the pan, add the cornstarch slurry, and cook for another 2 minutes until the sauce thickens and coats everything evenly.
Sprinkle with sesame seeds and green onions before serving.
For best results, ensure all ingredients are at room temperature before cooking to promote even heating. Cut chicken pieces uniformly to ensure consistent cooking times, and don't overcrowd the pan when stir-frying as this will cause steaming instead of browning.
The dish can be stored in an airtight container in the refrigerator for up to three days and reheated gently in a skillet or microwave.
Classic Chicken Parmesan
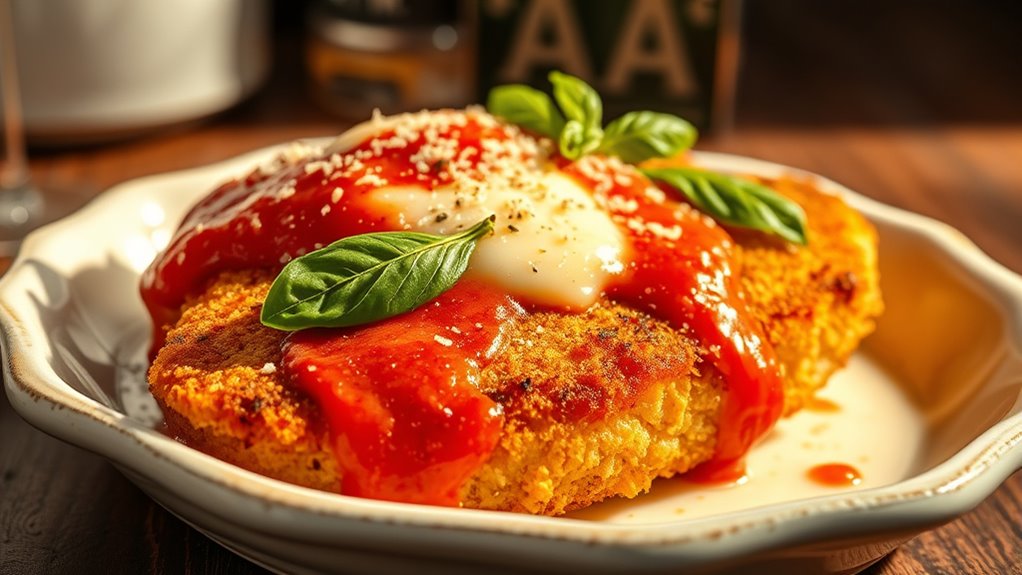
Chicken Parmesan is a beloved Italian-American dish that combines the crispy texture of breaded chicken with the rich flavors of marinara sauce and melted cheese. This classic comfort food has become a staple in restaurants and homes alike, offering a perfect balance of protein, sauce, and cheese that satisfies even the most discerning palates.
When properly prepared, Chicken Parmesan delivers a satisfying crunch from its golden-brown coating, while maintaining a tender, juicy interior. The combination of traditional Italian seasonings, vibrant marinara sauce, and a generous layer of melted mozzarella and Parmesan cheese creates a dish that's both impressive and comforting.
- 4 chicken breasts
- 2 cups Italian-seasoned breadcrumbs
- 2 large eggs
- 1/2 cup all-purpose flour
- 2 cups marinara sauce
- 2 cups shredded mozzarella cheese
- 1/2 cup grated Parmesan cheese
- 1/4 cup olive oil
- 1 teaspoon salt
- 1/2 teaspoon black pepper
Place chicken breasts between plastic wrap and pound to an even 1/4-inch thickness. Set up three shallow dishes: one with flour seasoned with salt and pepper, one with beaten eggs, and one with breadcrumbs. Dredge each chicken breast in flour, then egg, and finally coat with breadcrumbs, pressing gently to adhere.
Heat olive oil in a large skillet over medium-high heat. Cook chicken for 4-5 minutes on each side until golden brown and cooked through. Transfer the chicken to a baking dish and top each piece with marinara sauce, followed by mozzarella and Parmesan cheese.
Place under a preheated broiler for 2-3 minutes, until the cheese is melted and bubbly with light golden spots. Let rest for 5 minutes before serving to allow the cheese to set slightly and the chicken to retain its juices.
For the best results, use fresh mozzarella and high-quality marinara sauce. The chicken can be breaded up to 4 hours in advance and stored in the refrigerator. To prevent the breading from becoming soggy, avoid stacking the breaded cutlets and ensure the oil is hot enough before frying. If making ahead, wait to add the sauce and cheese until just before broiling.
Thai Basil Chicken With Rice
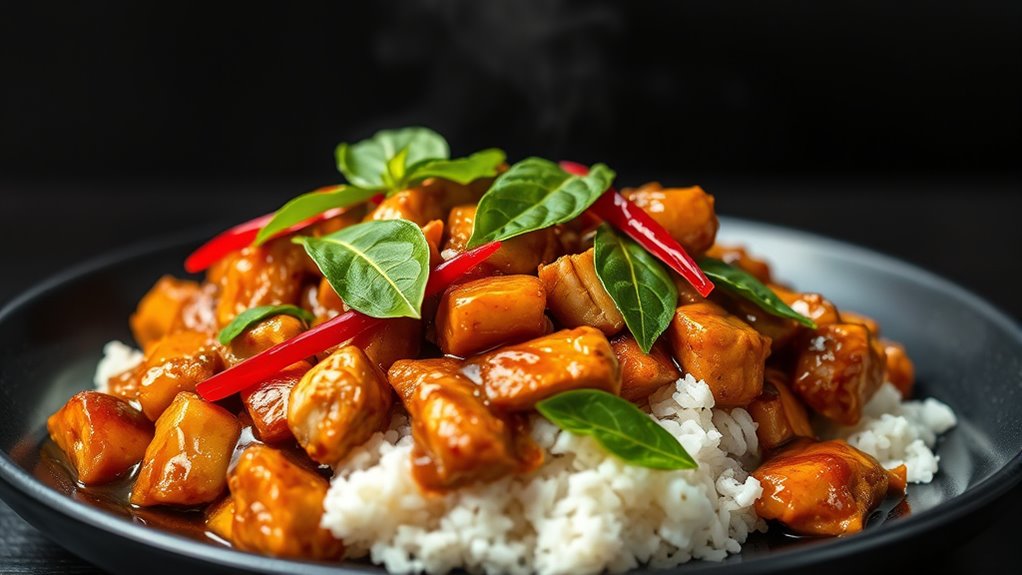
Thai Basil Chicken With Rice is a vibrant, aromatic dish that brings the bustling streets of Bangkok right to your dinner table. The combination of fragrant Thai basil, spicy chilies, and savory sauce creates a perfect harmony of flavors that coat tender pieces of chicken and complement steamy white rice.
This street food favorite transforms simple ingredients into an explosion of taste, where sweet, salty, and spicy elements dance together in perfect balance. The key to authentic Thai Basil Chicken lies in the proper ratio of sauce ingredients and the timing of adding the fresh basil leaves, ensuring they retain their essential oils and distinctive flavor.
- 1 pound boneless chicken thighs, cut into bite-sized pieces
- 4 cloves garlic, minced
- 4-6 Thai chilies, sliced
- 2 cups Thai holy basil leaves
- 3 tablespoons oyster sauce
- 2 tablespoons soy sauce
- 1 tablespoon fish sauce
- 1 teaspoon sugar
- 2 tablespoons vegetable oil
- 2 cups cooked jasmine rice
Heat vegetable oil in a wok or large skillet over high heat until smoking. Add minced garlic and Thai chilies, stir-frying quickly for 30 seconds until fragrant but not burned.
Immediately add the chicken pieces and stir-fry for 4-5 minutes until they begin to brown and are nearly cooked through.
Add the oyster sauce, soy sauce, fish sauce, and sugar to the pan. Continue stir-frying for another 2-3 minutes until the sauce begins to thicken and coat the chicken pieces evenly. The chicken should be completely cooked through at this point.
Turn off the heat and toss in the Thai basil leaves, stirring quickly to incorporate them into the dish. The residual heat will wilt the basil and release its aromatic oils. Serve immediately over hot jasmine rice.
For the most authentic flavor, seek out Thai holy basil (bai gaprow), which has a distinct taste from regular sweet basil. If Thai holy basil is unavailable, regular Thai basil or even Italian sweet basil can be used as a substitute, though the flavor profile will be slightly different.
The dish is best served immediately while the basil is fresh and aromatic, and the sauce is still hot and glossy.
Crispy Buffalo Chicken Tenders
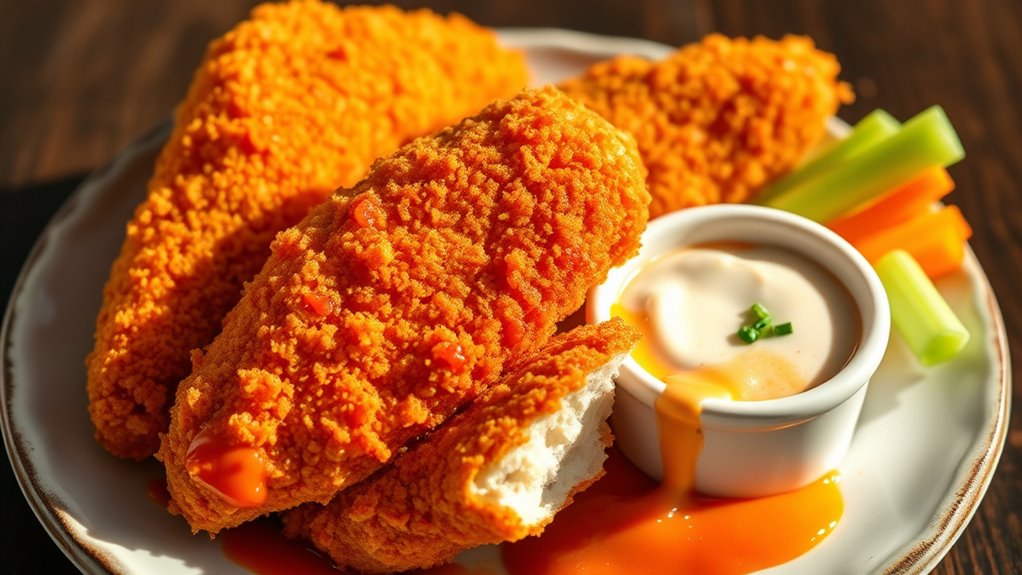
Crispy Buffalo chicken tenders combine the irresistible crunch of breaded chicken strips with the bold, spicy kick of classic buffalo sauce. This crowd-pleasing dish brings the sports bar favorite right to your kitchen, offering a perfect balance of textures and flavors that both kids and adults will love.
The secret to achieving the perfect crispiness lies in a double-coating process and proper oil temperature control. When paired with cool ranch or blue cheese dipping sauce, these tenders deliver that characteristic buffalo heat while maintaining their satisfying crunch, making them ideal for game day snacking or casual dinners.
- 2 pounds chicken tenders (or chicken breasts cut into strips)
- 2 cups all-purpose flour
- 2 eggs, beaten
- 1 cup buttermilk
- 1 cup buffalo sauce
- 1 teaspoon garlic powder
- 1 teaspoon paprika
- 1 teaspoon salt
- 1/2 teaspoon black pepper
- Vegetable oil for frying
Begin by patting the chicken tenders dry with paper towels. In one shallow dish, combine flour, garlic powder, paprika, salt, and pepper. In another dish, whisk together the eggs and buttermilk.
Dip each chicken tender in the flour mixture, then the egg mixture, and again in the flour mixture, creating a double coating.
Heat vegetable oil in a large, heavy-bottomed skillet or deep fryer to 350°F. Working in batches to avoid overcrowding, fry the coated tenders for 4-5 minutes per side until golden brown and cooked through. The internal temperature should reach 165°F.
Transfer to a wire rack set over a baking sheet to maintain crispiness. While the chicken is still hot, toss the tenders in buffalo sauce until evenly coated. For extra-crispy results, you can return the sauced tenders to a 400°F oven for 2-3 minutes to help the sauce adhere and maintain the crispy exterior.
For best results, maintain oil temperature between 350-375°F throughout frying, as oil that's too cool will result in greasy tenders, while too-hot oil will burn the coating before cooking the chicken through.
The tenders can be kept warm in a 200°F oven for up to 30 minutes before serving, though they're best enjoyed immediately. Leftover tenders can be reheated in a 375°F oven for 10-12 minutes to restore crispiness.
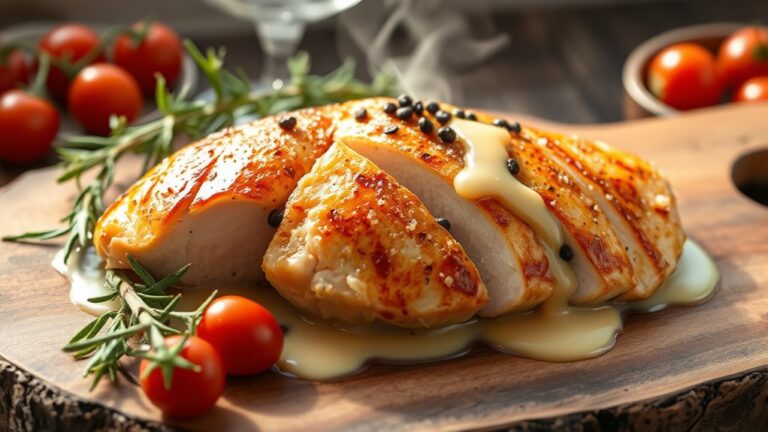
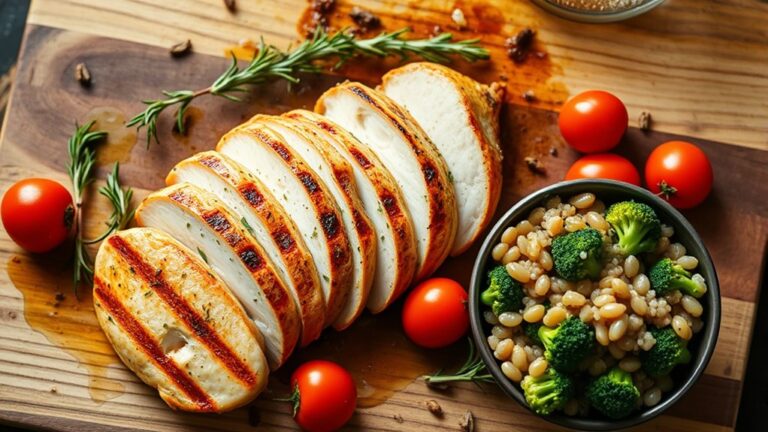
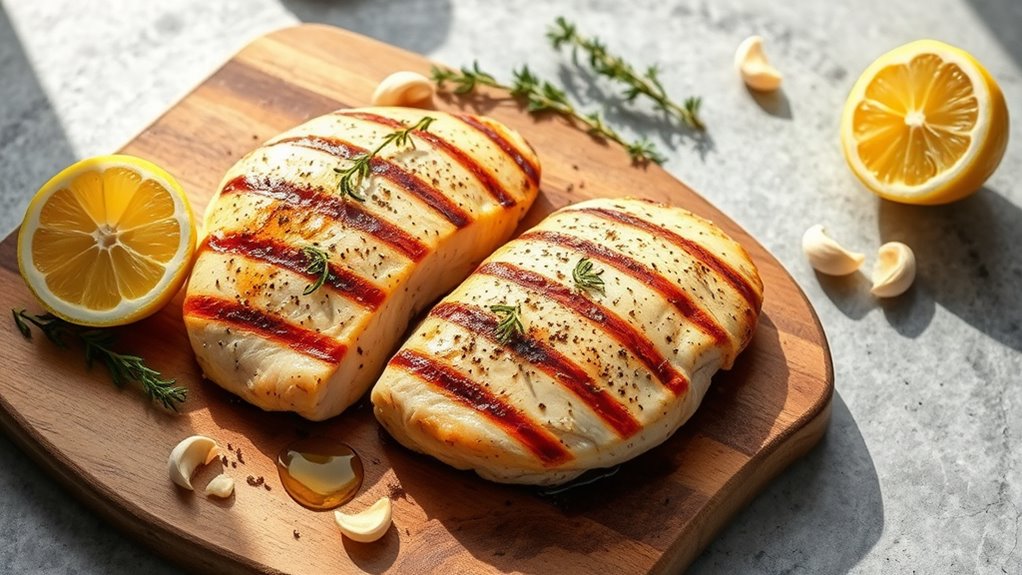
Mediterranean Grilled Chicken
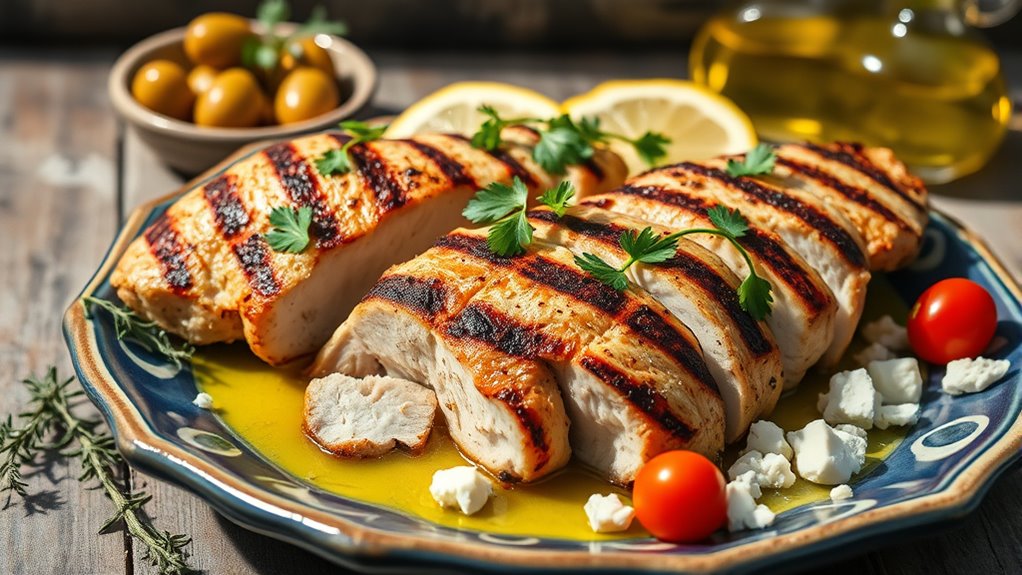
Mediterranean Grilled Chicken transforms ordinary chicken breasts into a vibrant, flavor-packed dish that captures the essence of coastal Mediterranean cuisine. The combination of olive oil, lemon, garlic, and classic Mediterranean herbs creates a marinade that infuses the meat with bright, aromatic flavors while keeping it tender and juicy.
This grilled chicken recipe offers a healthful and delicious alternative to standard chicken preparations, drawing inspiration from Greek and Italian cooking traditions. The marinade not only enhances the flavor but also helps prevent the chicken from drying out during grilling, resulting in perfectly cooked, restaurant-quality chicken every time.
- 4 boneless, skinless chicken breasts
- 1/4 cup extra virgin olive oil
- 3 cloves garlic, minced
- 2 lemons, juiced
- 2 tablespoons dried oregano
- 1 tablespoon dried basil
- 1 teaspoon dried thyme
- 1 teaspoon salt
- 1/2 teaspoon black pepper
- 1 tablespoon fresh parsley, chopped
In a large bowl, combine olive oil, lemon juice, minced garlic, oregano, basil, thyme, salt, and pepper. Whisk thoroughly to create the marinade.
Place chicken breasts in the bowl and coat evenly with the marinade. Cover with plastic wrap and refrigerate for at least 2 hours, or ideally overnight.
Remove the chicken from the refrigerator 30 minutes before cooking to allow it to come to room temperature. Preheat your grill to medium-high heat (around 375-400°F). Clean and oil the grill grates to prevent sticking.
Place the chicken breasts on the preheated grill and cook for 6-7 minutes per side, or until the internal temperature reaches 165°F when checked with a meat thermometer.
Once cooked, transfer the chicken to a clean plate, tent with foil, and let rest for 5 minutes before slicing. Garnish with fresh parsley before serving.
For optimal results, pound the chicken breasts to an even thickness of about 1/2 inch before marinating to ensure uniform cooking.
If grilling isn't possible, this recipe can be adapted for a grill pan or cast-iron skillet on the stovetop. The leftover chicken can be stored in an airtight container in the refrigerator for up to 3 days and is excellent served cold in salads or sandwiches.
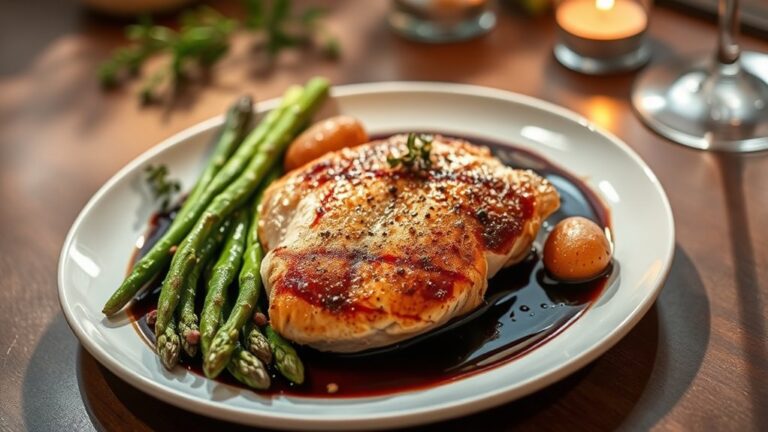
Orange Ginger Glazed Chicken
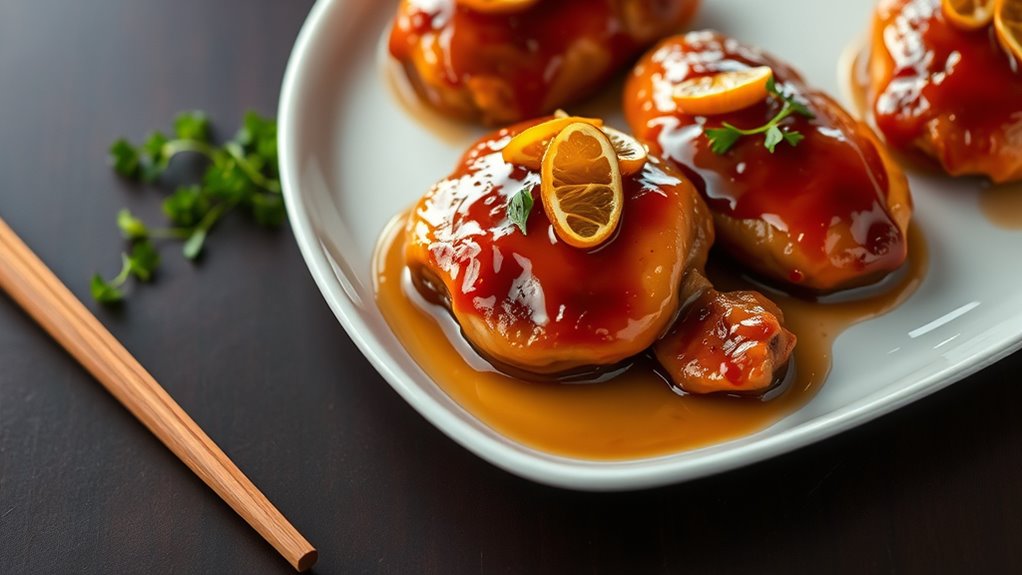
Orange Ginger Glazed Chicken transforms ordinary chicken breasts into an Asian-inspired culinary delight.
The combination of sweet citrus and zesty ginger creates a glossy, flavorful glaze that coats the chicken perfectly, delivering a restaurant-quality dish that's surprisingly easy to prepare at home.
This recipe strikes an ideal balance between sweet and savory flavors, while the fresh ginger adds a subtle heat that complements the orange beautifully.
The glaze reduces to a sticky consistency that locks in moisture and ensures each bite of chicken remains tender and juicy.
- 4 boneless, skinless chicken breasts
- 1 cup fresh orange juice
- 3 tablespoons honey
- 2 tablespoons soy sauce
- 2 tablespoons fresh ginger, minced
- 3 cloves garlic, minced
- 1 tablespoon cornstarch
- 2 tablespoons vegetable oil
- 1 orange, sliced for garnish
- Salt and pepper to taste
Season chicken breasts with salt and pepper.
Heat vegetable oil in a large skillet over medium-high heat.
Add chicken breasts and cook for 5-6 minutes per side until golden brown.
Remove chicken from the pan and set aside.
In the same pan, combine orange juice, honey, soy sauce, minced ginger, and garlic.
Bring to a simmer, stirring occasionally.
In a small bowl, whisk cornstarch with 2 tablespoons of water until smooth.
Add the cornstarch mixture to the pan and stir continuously until the sauce begins to thicken.
Return the chicken to the pan, coating each piece with the glaze.
Reduce heat to low, cover, and cook for an additional 5-7 minutes until the chicken is cooked through and registers 165°F on a meat thermometer.
Garnish with orange slices before serving.
For the best results, ensure the ginger and garlic are freshly minced, as this will provide the most robust flavor.
The glaze can be made thicker or thinner by adjusting the cornstarch amount.
If preparing in advance, the glaze can be made separately and stored in the refrigerator for up to 3 days – simply reheat and add to freshly cooked chicken when ready to serve.