8 Easy Air Fryer Dinner Recipes
You're about to discover how your air fryer can transform everyday ingredients into restaurant-quality dinners in 20 minutes or less. Whether you're craving the crunch of Parmesan-crusted pork chops or the sweet-savory glaze of honey garlic salmon, these eight recipes deliver maximum flavor with minimal effort. From protein-packed classics to creative vegetarian options, each dish has been tested and perfected to ensure crispy exteriors and juicy centers. Let's explore how you can master these foolproof recipes, starting with a family favorite that'll make you rethink traditional pork chops.
Crispy Parmesan-Crusted Pork Chops
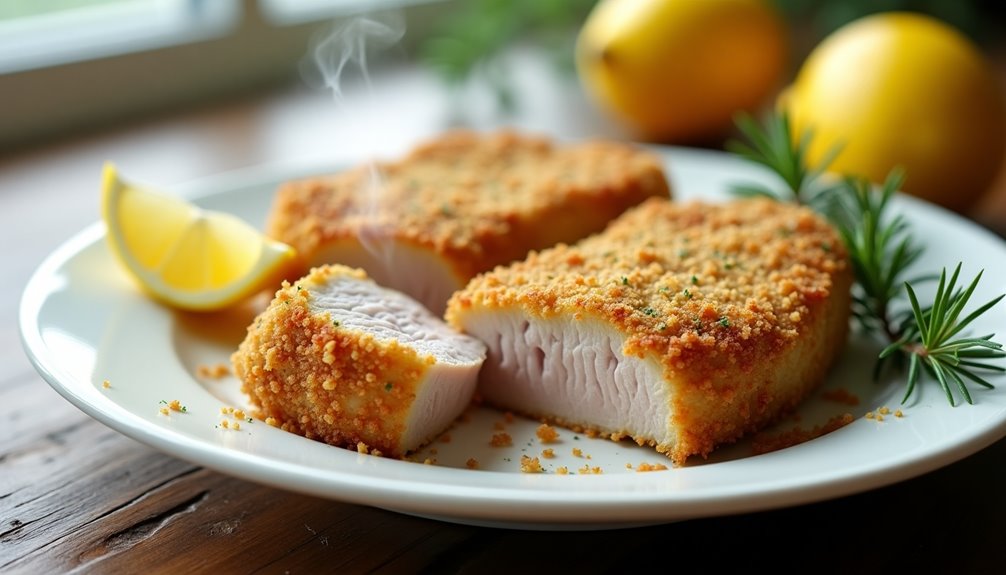
Parmesan-crusted pork chops in the air fryer deliver a perfect combination of crispy exterior and juicy interior, all while using significantly less oil than traditional frying methods. The secret lies in the seasoned breadcrumb and Parmesan coating, which creates a golden-brown crust that seals in the natural flavors of the meat.
This quick and easy dinner option transforms ordinary pork chops into a restaurant-quality meal in under 20 minutes. The air fryer's rapid air circulation ensures even cooking and eliminates the need for constant flipping, making it an ideal choice for busy weeknight meals.
- 4 boneless pork chops (1-inch thick)
- 1 cup Italian-seasoned breadcrumbs
- 1/2 cup grated Parmesan cheese
- 1 teaspoon garlic powder
- 1 teaspoon paprika
- 1/2 teaspoon black pepper
- 1/2 teaspoon salt
- 2 large eggs, beaten
- Olive oil spray
Preheat the air fryer to 375°F (190°C). In a shallow bowl, combine the breadcrumbs, Parmesan cheese, garlic powder, paprika, salt, and pepper. Dip each pork chop into the beaten eggs, then coat thoroughly with the breadcrumb mixture, pressing gently to ensure the coating adheres well.
Lightly spray the air fryer basket with olive oil spray. Place the coated pork chops in the basket, ensuring they don't overlap. Spray the tops of the pork chops with olive oil spray. Cook for 12-14 minutes, flipping halfway through, until the internal temperature reaches 145°F (63°C) and the coating is golden brown and crispy.
For best results, let the pork chops rest for 5 minutes before cutting to allow the juices to redistribute. Avoid overcrowding the air fryer basket, as this can prevent proper crisping. If the pork chops are thicker than 1 inch, you may need to add 2-3 minutes to the cooking time. To maintain the coating's crispiness, avoid stacking the cooked pork chops when serving.
Honey Garlic Glazed Salmon
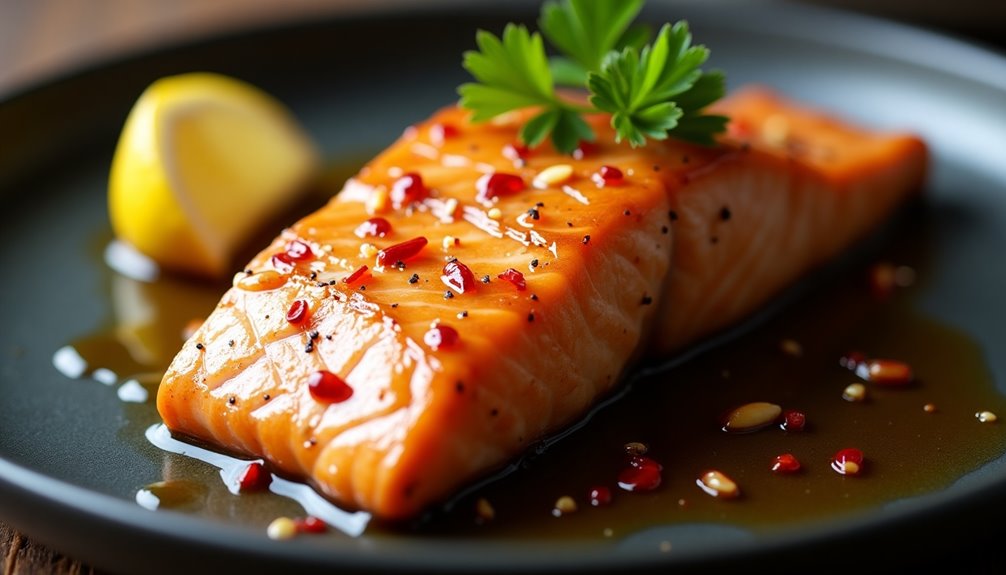
Honey garlic glazed salmon in the air fryer is a perfect weeknight dinner that combines sweet, savory, and garlicky flavors into one delicious dish. The air fryer creates a perfectly cooked, flaky salmon with a sticky, caramelized glaze while keeping the inside moist and tender.
This recipe takes only 15 minutes from start to finish and requires minimal preparation, making it an excellent choice for busy families or anyone looking for a quick yet impressive meal. The honey garlic glaze creates a beautiful golden-brown crust on the salmon while infusing it with rich flavors.
- 4 (6 oz) salmon fillets
- 4 tablespoons honey
- 3 cloves garlic, minced
- 2 tablespoons soy sauce
- 1 tablespoon olive oil
- 1 tablespoon rice vinegar
- ½ teaspoon black pepper
- ¼ teaspoon red pepper flakes
- Salt to taste
Pat the salmon fillets dry with paper towels and season with salt and pepper. In a small bowl, whisk together honey, minced garlic, soy sauce, olive oil, and rice vinegar. Brush half of the glaze mixture over the salmon fillets.
Preheat the air fryer to 400°F (200°C). Place the salmon fillets in the air fryer basket, skin-side down, making sure they don't overlap. Cook for 7-9 minutes, depending on the thickness of the fillets. During the last 2 minutes of cooking, brush the remaining glaze over the salmon and continue cooking until the internal temperature reaches 145°F (63°C).
For best results, let the salmon rest at room temperature for 15-20 minutes before cooking, and avoid overcrowding the air fryer basket. The cooking time may vary depending on the thickness of your salmon fillets and your specific air fryer model, so keep an eye on them during the first attempt at this recipe. To prevent sticking, you can line the air fryer basket with parchment paper, but make sure to cut it smaller than the basket to allow proper air circulation.
Mediterranean Stuffed Chicken Breast
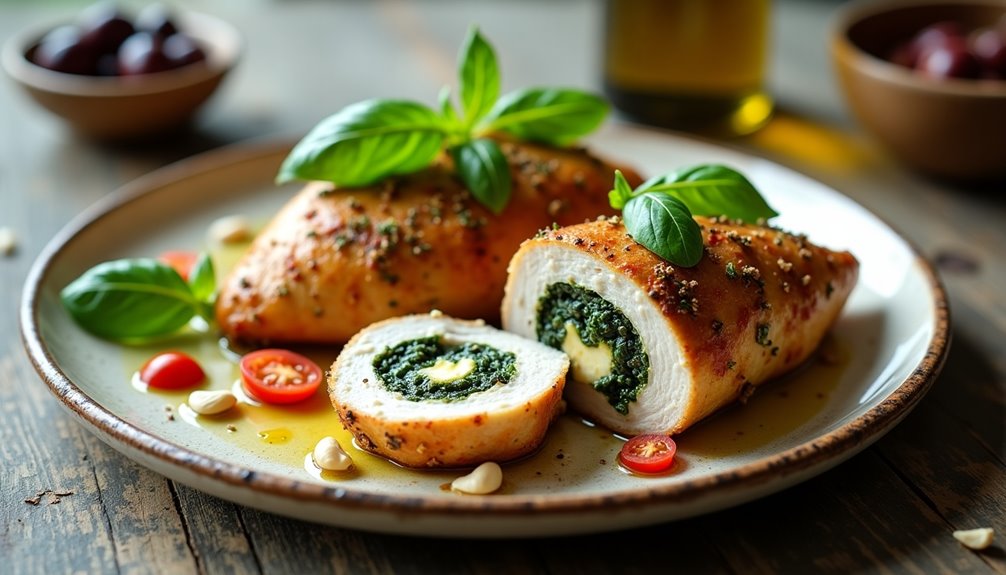
Mediterranean Stuffed Chicken Breast combines the vibrant flavors of the Mediterranean region with tender, juicy chicken. The filling features a blend of sun-dried tomatoes, spinach, feta cheese, and herbs that create a burst of flavor in every bite, while the air fryer ensures a perfectly cooked exterior with minimal oil usage.
This dish transforms ordinary chicken breast into an elegant main course that's surprisingly easy to prepare. The chicken stays moist thanks to the stuffing and cooking method, while the exterior develops a golden-brown crust. The Mediterranean ingredients not only provide excellent flavor but also add nutritional benefits to the meal.
Ingredients:
- 4 chicken breasts, boneless and skinless
- 4 oz feta cheese, crumbled
- 2 cups fresh spinach, chopped
- 1/2 cup sun-dried tomatoes, chopped
- 2 cloves garlic, minced
- 1 tbsp olive oil
- 1 tsp dried oregano
- 1 tsp dried basil
- 1/2 tsp black pepper
- 1 tsp salt
- 1/4 cup kalamata olives, chopped
- 2 tbsp pine nuts (optional)
Create a pocket in each chicken breast by cutting horizontally through the thickest part, being careful not to cut all the way through. Mix the feta, spinach, sun-dried tomatoes, garlic, olives, and pine nuts in a bowl. Season this mixture with half of the herbs and spices. Stuff each chicken breast with the mixture and secure with toothpicks if needed. Brush the outside with olive oil and season with remaining herbs, salt, and pepper.
Preheat the air fryer to 375°F (190°C). Place the stuffed chicken breasts in the air fryer basket, ensuring they don't overlap. Cook for 15-18 minutes, flipping halfway through, until the internal temperature reaches 165°F (74°C). Let rest for 5 minutes before serving.
For best results, bring the chicken to room temperature 30 minutes before cooking. If the chicken breasts are very thick, consider pounding them slightly before stuffing to ensure even cooking. The stuffing can be prepared up to a day in advance and refrigerated. To prevent the filling from leaking, avoid overstuffing the chicken and ensure the pocket is sealed well with toothpicks.
Sesame Ginger Tofu With Vegetables

Sesame ginger tofu with vegetables is a flavorful and healthy dish that brings together Asian-inspired flavors with the convenience of air fryer cooking. The combination of crispy tofu, tender-crisp vegetables, and a savory sesame ginger sauce creates a satisfying meat-free meal that's perfect for busy weeknights.
This recipe transforms traditionally deep-fried tofu into a healthier version using minimal oil while maintaining a delightfully crispy exterior. The air fryer ensures even cooking and creates the perfect texture, while the vegetables retain their nutrients and natural sweetness.
- 1 block (14 oz) extra-firm tofu, pressed and cubed
- 2 tablespoons cornstarch
- 2 tablespoons sesame oil
- 3 tablespoons soy sauce
- 2 tablespoons rice vinegar
- 1 tablespoon grated fresh ginger
- 3 cloves garlic, minced
- 2 tablespoons honey
- 1 tablespoon sesame seeds
- 2 cups broccoli florets
- 1 red bell pepper, sliced
- 1 cup snap peas
- 1 medium carrot, julienned
Press the tofu for 30 minutes to remove excess moisture, then cut into 1-inch cubes. Toss the tofu in cornstarch until evenly coated. Preheat the air fryer to 400°F (200°C). Place the tofu in the air fryer basket in a single layer and cook for 15 minutes, shaking the basket halfway through.
While the tofu cooks, whisk together sesame oil, soy sauce, rice vinegar, ginger, garlic, and honey in a bowl.
Once the tofu is crispy, remove it from the air fryer and set aside. Add the vegetables to the air fryer basket and cook for 6-8 minutes until tender-crisp. Return the tofu to the basket with the vegetables, pour the sauce over everything, and cook for an additional 2-3 minutes until the sauce is heated through and slightly caramelized. Sprinkle with sesame seeds before serving.
For best results, ensure the tofu is well-pressed and thoroughly dried before coating with cornstarch. The cornstarch coating is crucial for achieving a crispy exterior. If your air fryer is small, cook in batches to avoid overcrowding, which can lead to uneven cooking. Store any leftovers in an airtight container in the refrigerator for up to 3 days, though the tofu may lose some crispiness upon reheating.
Spicy Buffalo Cauliflower Steaks
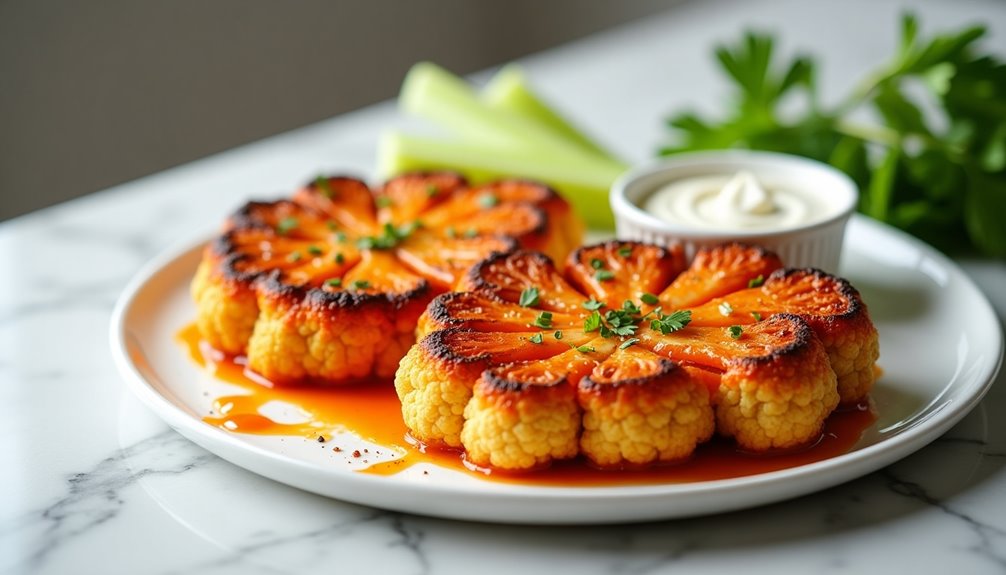
Air fryer buffalo cauliflower steaks offer a vegetarian twist on the classic buffalo wings, delivering the same bold, spicy flavors but with a fraction of the calories. These hearty cauliflower slices develop a crispy exterior while maintaining a tender interior, making them perfect as a main course or a crowd-pleasing appetizer.
The key to perfect cauliflower steaks lies in the careful cutting technique and the double coating process. First, the steaks are seasoned and air fried to develop their initial crispiness, then coated with buffalo sauce and air fried again to create that signature buffalo finish that clings perfectly to the cauliflower's surface.
- 1 large head of cauliflower
- 2 tablespoons olive oil
- 1 teaspoon garlic powder
- 1 teaspoon paprika
- 1/2 teaspoon salt
- 1/4 teaspoon black pepper
- 3/4 cup buffalo sauce
- 2 tablespoons melted butter
- 1 tablespoon cornstarch
- Ranch or blue cheese dressing for serving
- Celery sticks for serving
Remove the leaves from the cauliflower and trim the stem, keeping the core intact. Place the cauliflower head stem-side down and cut through the middle to create 1-inch thick steaks. Mix olive oil with garlic powder, paprika, salt, and pepper, then brush both sides of the cauliflower steaks with this seasoned oil. Preheat the air fryer to 375°F and arrange the steaks in a single layer, working in batches if necessary. Cook for 12 minutes, flipping halfway through.
While the cauliflower cooks, whisk together buffalo sauce, melted butter, and cornstarch until smooth. After the initial cooking, brush both sides of the steaks generously with the buffalo sauce mixture. Return to the air fryer for an additional 5 minutes until the sauce is set and slightly caramelized.
For best results, choose a large, firm head of cauliflower with tight florets. You may only get 2-3 full steaks from each head, but the remaining florets can be cooked the same way. If the cauliflower starts to brown too quickly, lower the temperature to 350°F and continue cooking until tender. Store any leftovers in an airtight container for up to 3 days, reheating in the air fryer for 2-3 minutes to restore crispiness.
Herb-Crusted Turkey Meatballs

Air fryer turkey meatballs offer a healthier alternative to traditional fried meatballs while maintaining a deliciously crispy exterior and juicy interior. The herb crust adds an aromatic dimension that transforms these meatballs from simple to sophisticated, making them perfect for both family dinners and entertaining guests.
The beauty of this recipe lies in its versatility – these meatballs can be served over pasta, tucked into sandwiches, or presented as appetizers. The air fryer not only reduces the amount of oil needed but also creates an even, golden-brown crust while keeping the inside perfectly moist.
- 1 pound ground turkey
- 1/2 cup breadcrumbs
- 1 large egg
- 1/4 cup grated Parmesan cheese
- 3 cloves garlic, minced
- 1 tablespoon fresh parsley, chopped
- 1 tablespoon fresh basil, chopped
- 1 teaspoon fresh thyme leaves
- 1 teaspoon dried oregano
- 1/2 teaspoon salt
- 1/4 teaspoon black pepper
- 1 tablespoon olive oil
- 2 tablespoons fresh herbs (mixed) for coating
Combine ground turkey with breadcrumbs, egg, Parmesan, garlic, and herbs in a large bowl. Mix gently until just combined, being careful not to overmix. Form the mixture into 1.5-inch meatballs, then roll each one in the fresh herb mixture for coating.
Preheat the air fryer to 375°F (190°C). Lightly brush or spray the air fryer basket with oil. Place the meatballs in the basket, leaving space between each for proper air circulation. Cook for 12-14 minutes, gently turning halfway through, until the internal temperature reaches 165°F (74°C).
For best results, avoid overcrowding the air fryer basket as this can lead to uneven cooking. If making a large batch, cook in multiple rounds rather than cramming them all in at once. The meatballs can be made ahead and stored in the refrigerator for up to 24 hours before cooking, which allows the flavors to develop further.
Lemon Pepper Tilapia With Asparagus
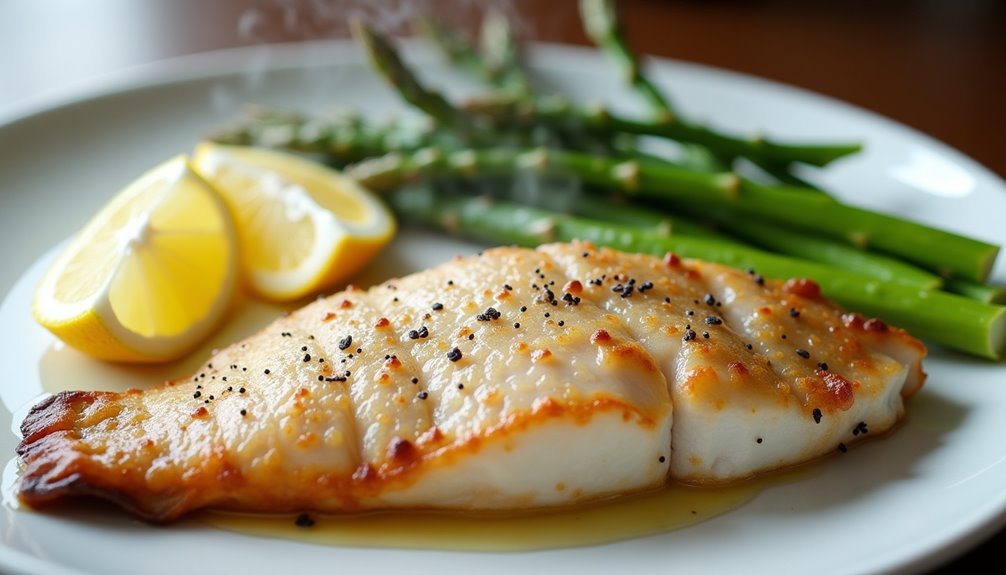
This light and flavorful air fryer recipe combines the delicate taste of tilapia with bright lemon pepper seasoning and crisp asparagus. The dish comes together quickly, making it perfect for busy weeknight dinners while still delivering restaurant-quality results.
The air fryer's circulating heat creates a perfectly cooked fish with a slightly crispy exterior while keeping the inside moist and tender. The asparagus cooks alongside the fish, absorbing the citrusy flavors while maintaining its natural crunch.
- 4 tilapia fillets (6 oz each)
- 1 bunch fresh asparagus, trimmed
- 2 tablespoons olive oil
- 2 tablespoons lemon pepper seasoning
- 1 teaspoon garlic powder
- 1 fresh lemon
- 1/2 teaspoon salt
- 1/4 teaspoon black pepper
Pat the tilapia fillets dry with paper towels and brush both sides with olive oil. Season generously with lemon pepper seasoning and garlic powder. Toss the trimmed asparagus with remaining olive oil, salt, and pepper. Preheat the air fryer to 380°F (193°C).
Place the seasoned tilapia fillets in the air fryer basket, ensuring they don't overlap. Arrange the asparagus spears around the fish, keeping them in a single layer. Cook for 8-10 minutes, or until the fish flakes easily with a fork and the asparagus is tender-crisp. Squeeze fresh lemon juice over the dish just before serving.
For best results, avoid overcrowding the air fryer basket as this can lead to uneven cooking. If cooking for more than two people, consider cooking in batches to maintain proper air circulation. The thickness of your tilapia fillets will affect cooking time, so adjust accordingly – thinner fillets may only need 6-7 minutes, while thicker ones could require up to 12 minutes.
Garlic Shrimp With Roasted Broccoli
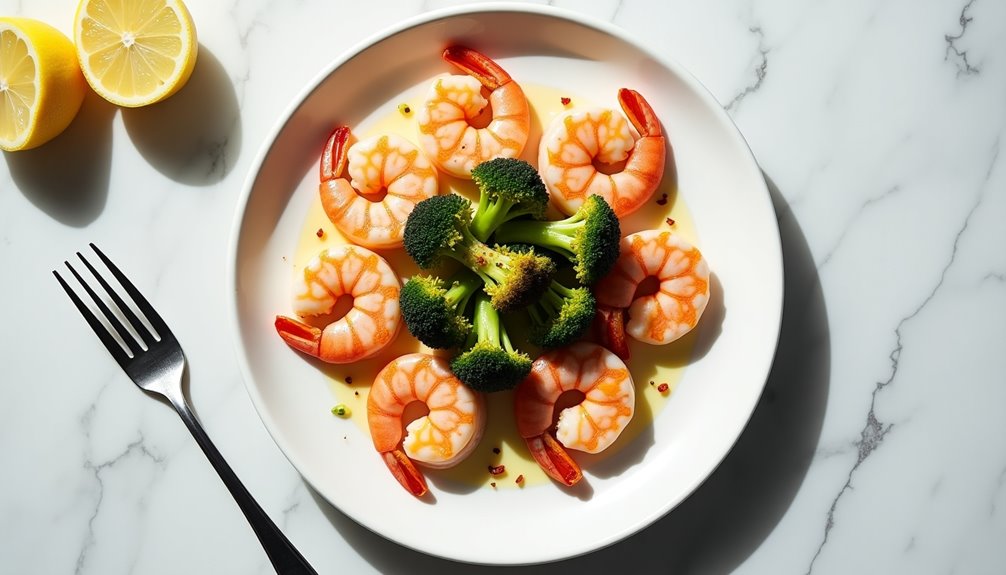
Air fryer garlic shrimp with roasted broccoli combines succulent seafood with crispy vegetables in a simple yet flavorful dish. The high-heat circulation of the air fryer creates perfectly cooked shrimp with a slight char while maintaining their juicy interior, while simultaneously crisping the broccoli edges to perfection.
This quick and healthy meal takes less than 15 minutes to prepare and cook, making it an ideal weeknight dinner option. The garlic-infused shrimp pairs naturally with the slightly charred broccoli florets, creating a balanced meal that's both protein-rich and loaded with nutrients.
Ingredients:
- 1 pound large shrimp, peeled and deveined
- 4 cups broccoli florets
- 4 cloves garlic, minced
- 3 tablespoons olive oil
- 1 teaspoon paprika
- 1/2 teaspoon red pepper flakes
- 1 lemon
- Salt and black pepper to taste
- Cooking spray
Preheat the air fryer to 380°F (193°C). In a bowl, toss broccoli florets with 2 tablespoons olive oil, salt, and pepper. Place in the air fryer basket and cook for 6-8 minutes, shaking halfway through. While the broccoli cooks, combine shrimp with remaining olive oil, minced garlic, paprika, red pepper flakes, salt, and pepper in a bowl.
Once the broccoli is nearly done, push it to one side of the basket and add the seasoned shrimp in a single layer to the other side. Cook for an additional 4-5 minutes until the shrimp turn pink and opaque. Squeeze fresh lemon juice over both the shrimp and broccoli before serving.
For best results, avoid overcrowding the air fryer basket as this can lead to uneven cooking. If cooking for more than two people, consider preparing the dish in batches. The shrimp can be marinated up to 2 hours in advance for enhanced flavor, but avoid marinating longer as the acidity can affect the texture. When checking for doneness, the shrimp should be curled into a loose "C" shape – if they're curled into a tight "O" shape, they're overcooked.