15 Easy College Recipes
As a college student, you'll find that managing your time and budget in the kitchen doesn't have to be stressful. These 15 easy recipes require minimal equipment, affordable ingredients, and basic cooking skills you already have. From quick breakfast options you can make between classes to satisfying dinner solutions that won't break the bank, you're about to discover how to transform simple ingredients into meals that'll keep you energized throughout your busy schedule. Let's start with the breakfast options that'll revolutionize your morning routine.
Five-Minute Breakfast Burrito

This version uses basic ingredients commonly found in a college kitchen or mini-fridge, and requires minimal cooking skills. The entire process can be completed using just a microwave and a few basic utensils, making it ideal for dorm room cooking.
- 2 large eggs
- 1 flour tortilla (8-inch)
- 1/4 cup shredded cheese
- 1/4 cup pre-cooked black beans
- 2 tablespoons salsa
- Salt and pepper to taste
- Optional: hot sauce
- Optional: pre-cooked breakfast potatoes
Crack the eggs into a microwave-safe bowl and whisk with a fork until well beaten. Add salt and pepper, then microwave for 60-90 seconds, stirring halfway through, until eggs are fully cooked. Warm the tortilla in the microwave for 15 seconds to make it more pliable.
Place the warm tortilla on a plate and layer the scrambled eggs in the center. Top with cheese, black beans, and salsa. Fold the bottom of the tortilla up slightly, then fold in the sides and roll tightly from bottom to top, creating a secure burrito.
For best results, heat ingredients separately before assembling to ensure everything is warm. The burrito can be wrapped in foil to keep warm or to eat on the go. Leftover ingredients can be stored in the refrigerator for up to three days to make additional burritos throughout the week.
One-Pan Cheesy Quesadillas

This recipe focuses on the classic cheese quesadilla but leaves room for customization based on your preferences and available ingredients. The key lies in achieving the perfect golden-brown tortilla exterior while ensuring the cheese melts completely, creating that coveted stretchy texture when pulled apart.
Ingredients:
- 4 large flour tortillas
- 2 cups shredded Mexican cheese blend
- 1 tablespoon butter or oil
- Salt to taste
- Optional: diced tomatoes, onions, bell peppers
- Optional: cooked chicken, beef, or beans
Heat a large skillet or flat griddle over medium heat. Place one tortilla in the pan and sprinkle an even layer of cheese over half of the tortilla, leaving a small border around the edge. If using additional ingredients, add them now on top of the cheese. Fold the empty half over the cheese-covered half, creating a half-moon shape. Cook for 2-3 minutes until golden brown, then carefully flip and cook the other side for an additional 1-2 minutes until the cheese is fully melted and both sides are crispy.
For best results, use freshly shredded cheese rather than pre-packaged varieties, as it melts more smoothly. Keep the heat at medium to prevent burning the tortilla before the cheese melts. If adding vegetables or meat, ensure they're pre-cooked or finely diced to heat through quickly. Cut the finished quesadilla into triangles and serve immediately with salsa, sour cream, or guacamole.
No-Cook Mediterranean Sandwich

The beauty of this sandwich lies in its simplicity and nutritional value. Rich in protein from the hummus and feta, fiber from the vegetables, and healthy fats from the olive oil, it makes an ideal lunch option that can be assembled in minutes using readily available ingredients from any grocery store.
Ingredients:
- 2 slices whole grain bread
- 1/4 cup hummus
- 2 oz crumbled feta cheese
- 4 thin cucumber slices
- 4 tomato slices
- 2-3 lettuce leaves
- 4-5 thin red onion rings
- 4-5 kalamata olives, pitted and sliced
- 1 tablespoon extra virgin olive oil
- 1/2 teaspoon dried oregano
- Black pepper to taste
Spread hummus evenly on both slices of bread. Layer one slice with lettuce leaves, followed by cucumber slices, tomato slices, and red onion rings. Sprinkle crumbled feta cheese and sliced olives over the vegetables. Drizzle with olive oil and season with dried oregano and black pepper. Place the second slice of bread on top, hummus side down, and press gently.
For best results, store ingredients separately if preparing in advance and assemble just before eating to prevent the bread from becoming soggy. The sandwich can be wrapped tightly in parchment paper or plastic wrap to hold together while eating. Mediterranean ingredients can be substituted based on availability – roasted red peppers, artichoke hearts, or sun-dried tomatoes make excellent additions to this versatile sandwich.
Microwave Mac and Cheese
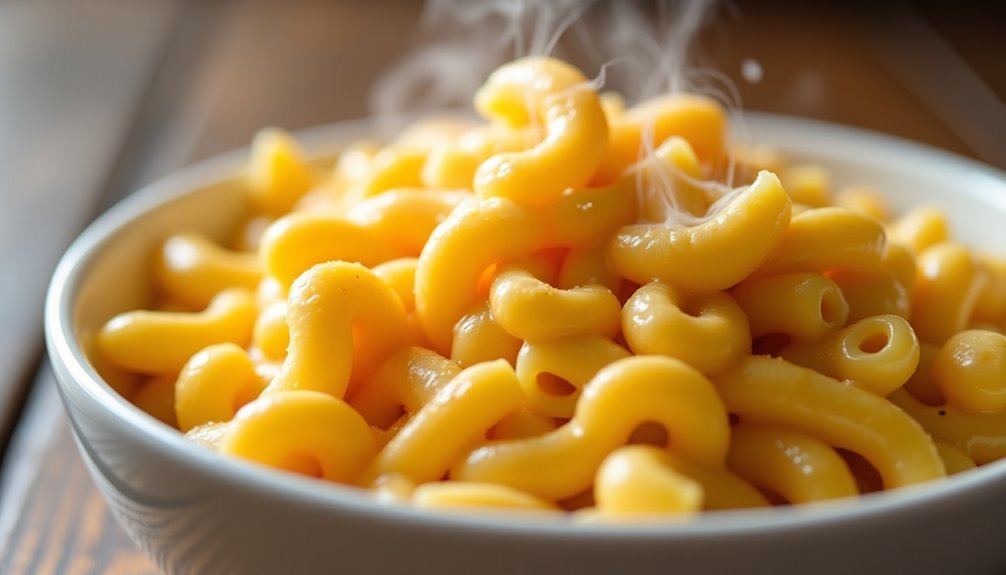
While boxed microwave mac and cheese exists, making it from scratch allows you to control the ingredients and achieve a richer, more authentic taste. The key is using the right cheese blend and ensuring the pasta doesn't overcook in the microwave.
Ingredients:
- 1 cup elbow macaroni
- 1½ cups water
- ½ cup milk
- 1 cup shredded cheddar cheese
- ¼ cup shredded mozzarella cheese
- 1 tablespoon butter
- ¼ teaspoon salt
- ⅛ teaspoon black pepper
- ⅛ teaspoon garlic powder
Combine macaroni and water in a large microwave-safe bowl. Microwave on high for 4 minutes, then stir and continue microwaving in 1-minute intervals until pasta is tender, usually 2-3 more minutes. Don't drain the remaining water.
Add milk, butter, and cheeses to the bowl, stirring until the mixture becomes creamy and smooth. Season with salt, pepper, and garlic powder.
Let the mac and cheese stand for 1 minute before serving, as this allows the sauce to thicken and the cheese to fully melt. The pasta will continue cooking slightly during this time, reaching the perfect consistency.
For best results, use a deep microwave-safe bowl to prevent boiling over, and watch carefully during cooking as microwave powers vary. If the mixture becomes too thick, add a splash of milk. Leftover mac and cheese can be stored in the refrigerator and reheated with a tablespoon of milk to restore creaminess.
Three-Ingredient Pasta Dish

The key to making this dish exceptional lies in the quality of the ingredients used and the proper cooking technique. When prepared correctly, the pasta becomes infused with the garlic-flavored oil, creating a dish that's both satisfying and flavorful.
Ingredients:
- 1 pound spaghetti or linguine
- 6 cloves of garlic, thinly sliced
- 1/3 cup extra virgin olive oil
Cook the pasta in a large pot of salted boiling water according to package instructions until al dente. While the pasta cooks, heat the olive oil in a large skillet over medium-low heat. Add the sliced garlic and cook until lightly golden, being careful not to burn it. When the pasta is ready, reserve 1/2 cup of pasta water, then drain the pasta and add it to the skillet with the garlic and oil. Toss everything together, adding small amounts of the reserved pasta water as needed to create a light sauce that coats the pasta evenly.
For the best results, use high-quality olive oil and fresh garlic, as these ingredients are the primary flavor components. Consider warming your serving bowls before plating to keep the pasta hot longer. The dish can be garnished with red pepper flakes or fresh herbs if desired, though these would technically make it more than three ingredients.
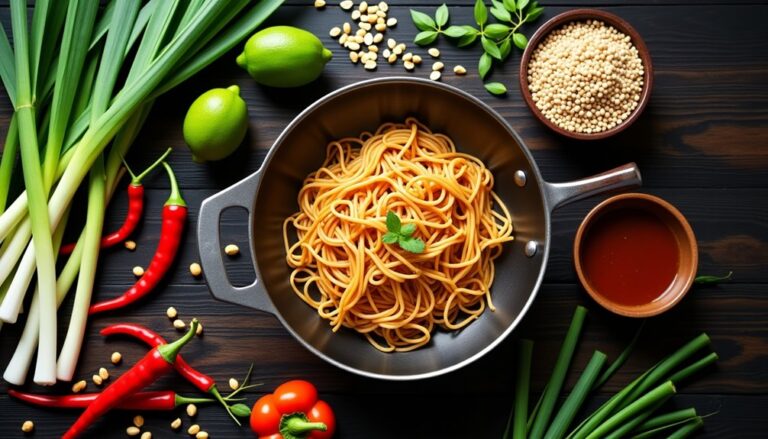
Quick Ramen Stir-Fry Upgrade
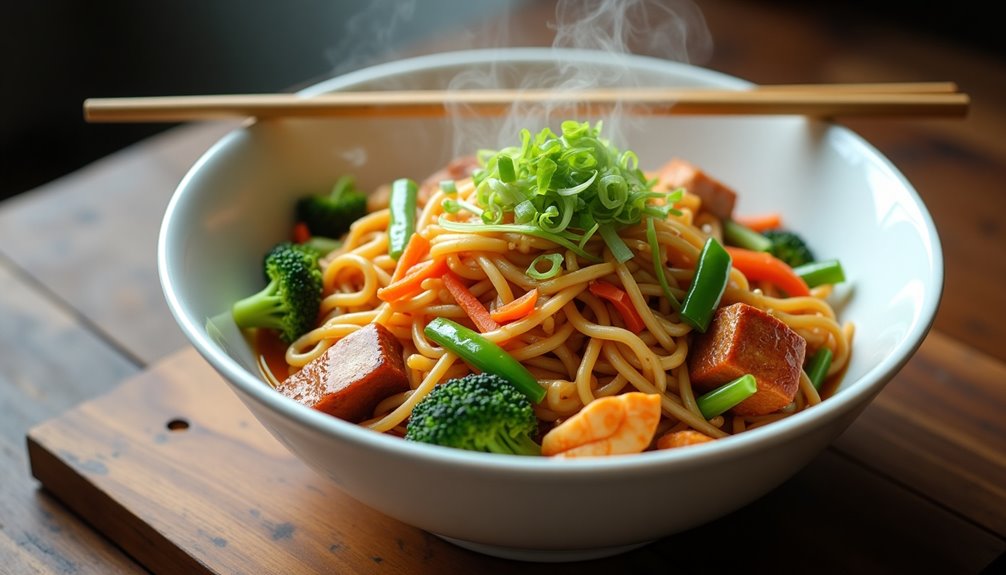
Perfect for busy college students, this recipe requires minimal cooking equipment and delivers maximum flavor. The beauty of this dish lies in its flexibility – you can use whatever vegetables you have on hand and swap out proteins based on your preferences or what's available in your mini-fridge.
Ingredients:
- 1 packet instant ramen noodles
- 1 cup mixed vegetables (carrots, broccoli, snap peas)
- 1 cup protein (chicken, tofu, or shrimp)
- 2 cloves garlic, minced
- 1 tablespoon oil
- 2 tablespoons soy sauce
- 1 teaspoon sesame oil
- 1 egg
- Green onions for garnish
- Half of the ramen seasoning packet
Cook the ramen noodles according to package instructions, but reduce the cooking time by 1 minute to keep them firm. Drain and set aside. In a pan or wok, heat oil over medium-high heat and cook your chosen protein until done. Add minced garlic and vegetables, stir-frying until vegetables are crisp-tender. Push everything to one side of the pan and crack the egg into the empty space, scrambling it quickly.
Add the cooked noodles to the pan along with soy sauce, sesame oil, and half the ramen seasoning packet. Toss everything together until well combined and heated through. Garnish with chopped green onions before serving.
For best results, prep all ingredients before starting to cook, as this dish comes together quickly. The key to a good stir-fry is high heat and quick cooking to maintain the crispness of the vegetables. You can also add hot sauce, rice vinegar, or a splash of fish sauce to customize the flavor to your taste.
Dorm Room Pizza Toast

Pizza Toast is the perfect solution for college students craving pizza but lacking access to a full kitchen. This simple yet satisfying dish transforms basic bread into a delicious pizza-like meal using minimal ingredients and equipment available in most dorm rooms.
The beauty of Pizza Toast lies in its versatility and quick preparation time. While traditional pizza requires an oven and dough-making skills, this dorm-friendly version needs only a toaster or microwave and basic ingredients that can be stored in a mini-fridge or at room temperature.
- Sliced bread (white or wheat)
- Tomato sauce or pizza sauce
- Shredded mozzarella cheese
- Italian seasoning
- Desired toppings (pepperoni, mushrooms, bell peppers)
- Salt and pepper
- Olive oil (optional)
Toast the bread until golden brown. If using a microwave, toast the bread first in a toaster, as microwaving untoasted bread will make it soggy. Spread a thin layer of tomato sauce on the toasted bread, sprinkle with Italian seasoning, salt, and pepper. Add a generous layer of shredded mozzarella and your chosen toppings. For toaster oven preparation, heat until cheese melts. For microwave preparation, heat in 15-30 second intervals until cheese melts.
Storage tip: Keep remaining ingredients in sealed containers or bags. Cheese and toppings like pepperoni can last several days in a mini-fridge, while dried herbs and bread can be stored at room temperature. Consider purchasing pre-portioned ingredients to prevent waste and ensure longer shelf life in limited dorm storage space.
Budget-Friendly Rice Bowl
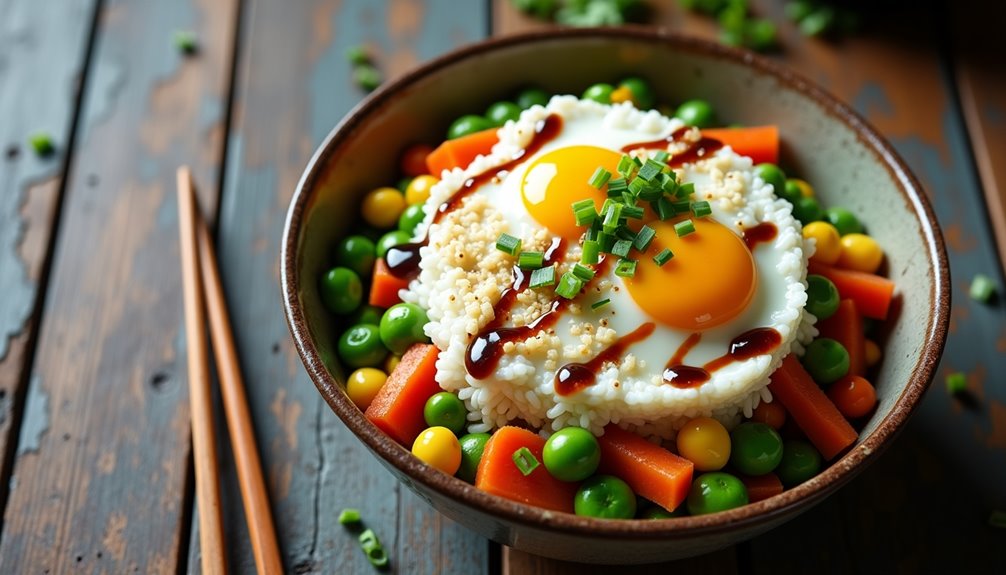
This basic recipe creates a satisfying meal that costs roughly $2-3 per serving and provides a good balance of protein, carbohydrates, and vegetables. The combination of soy sauce and sesame oil gives it an Asian-inspired flavor profile that's both comforting and delicious.
- 1 cup white rice
- 2 cups water
- 2 eggs
- 1 cup frozen mixed vegetables
- 2 tablespoons soy sauce
- 1 tablespoon sesame oil
- 1 clove garlic, minced
- Salt and pepper to taste
- Optional: green onions for garnish
Cook rice according to package instructions, typically combining rice and water in a pot, bringing to a boil, then reducing heat and simmering covered for 18-20 minutes.
While rice cooks, heat sesame oil in a pan over medium heat and add minced garlic. Add frozen vegetables and stir-fry until heated through. Push vegetables to one side of the pan and crack eggs into the empty space, scrambling them as they cook.
Once rice is done, divide it between two bowls. Top with the vegetable-egg mixture, drizzle with soy sauce, and season with salt and pepper to taste. Garnish with chopped green onions if desired.
For best results, rinse the rice before cooking to remove excess starch and prevent stickiness. The dish can be stored in an airtight container in the refrigerator for up to three days, though the texture is best when eaten fresh. To add variety, consider incorporating different protein sources like tofu or canned tuna, or experiment with other sauces such as sriracha or hoisin sauce.
Easy Overnight Oats
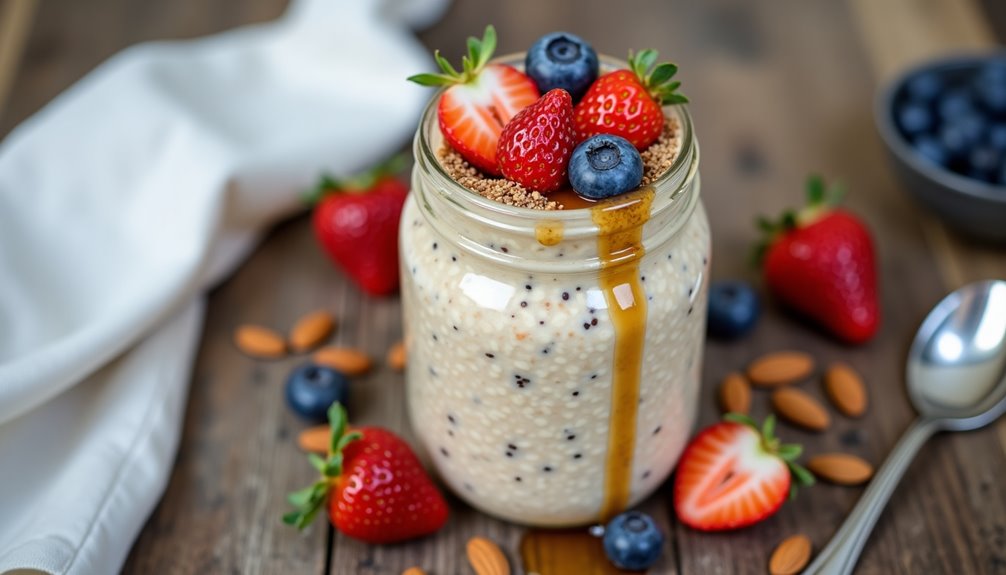
Overnight oats have become increasingly popular among college students for their simplicity and convenience. This no-cook breakfast option allows busy students to prepare their morning meal the night before, ensuring a nutritious start to their day without the morning rush.
The beauty of overnight oats lies in their versatility and room for creativity. While the base recipe remains consistent, students can customize their oats with various toppings, fruits, and flavoring options to prevent breakfast monotony throughout the semester.
Ingredients:
- ½ cup rolled oats
- ½ cup milk (dairy or plant-based)
- ¼ cup yogurt (plain or flavored)
- 1 tablespoon chia seeds
- 1 tablespoon honey or maple syrup
- ¼ teaspoon vanilla extract
- Pinch of salt
In a mason jar or container with a lid, combine the rolled oats, milk, yogurt, chia seeds, sweetener, vanilla extract, and salt. Stir the mixture thoroughly until all ingredients are well combined. Seal the container and refrigerate overnight or for at least 6 hours.
The next morning, the oats will have absorbed the liquid, creating a thick, creamy consistency. The chia seeds will have expanded, adding extra texture and nutritional benefits to the mixture. Give the oats a good stir before consuming.
For best results, use rolled oats rather than quick oats or steel-cut oats, as they provide the ideal texture. The mixture can be stored in the refrigerator for up to 5 days, making it perfect for batch preparation. Toppings such as fresh fruits, nuts, or granola should be added just before serving to maintain their texture and freshness.
Ten-Minute Tuna Melt
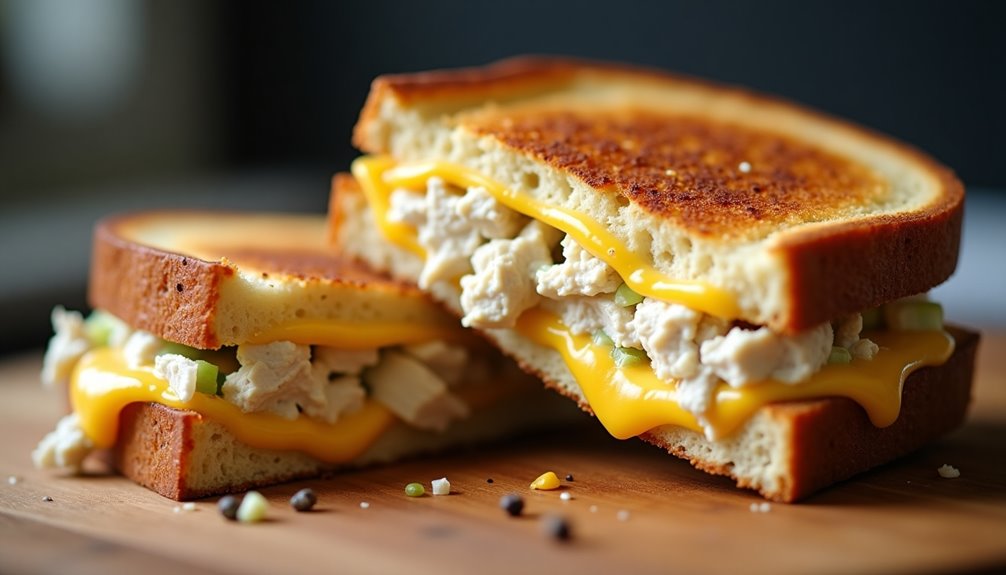
The tuna melt is a classic comfort food that transforms basic canned tuna into a warm, cheesy sandwich perfect for busy college students. This ten-minute version delivers all the satisfaction of a traditional tuna melt while requiring minimal cooking skills and equipment.
This recipe works well in a dorm room with just a microwave or hot plate, though it can also be prepared using a standard stovetop or toaster oven. The key is selecting the right bread that will hold up to the filling while becoming perfectly crispy on the outside.
Ingredients:
- 2 slices bread
- 1 can (5 oz) chunk light tuna, drained
- 3 tablespoons mayonnaise
- 1/4 cup diced celery
- 2 tablespoons diced onion
- 1/4 teaspoon black pepper
- 2 slices cheddar cheese
- 1 tablespoon butter
Mix the drained tuna with mayonnaise, celery, onion, and black pepper in a bowl until well combined. Butter one side of each bread slice, then flip them butter-side down. Place the tuna mixture on the unbuttered side of one slice, top with cheese slices, then cover with the second piece of bread (butter-side up).
Heat a pan over medium heat. Once hot, place the sandwich in the pan and cook for 3-4 minutes until golden brown. Carefully flip the sandwich and cook for an additional 2-3 minutes until the cheese melts and the second side is golden brown. Remove from heat and let rest for 1 minute before cutting diagonally.
For best results, use a heavy-bottomed pan and press down gently on the sandwich with a spatula while cooking to ensure even browning. Avoid high heat, which can burn the bread before the cheese melts. If using a microwave, toast the bread first, then assemble and microwave just until the cheese melts, about 30 seconds.
Mug Cake for Late-Night Study Sessions

A chocolate mug cake is the perfect solution for college students craving something sweet during those intense late-night study sessions. This single-serving dessert requires minimal ingredients, most of which can be stored in a dorm room, and takes less than five minutes to prepare.
The beauty of a mug cake lies in its simplicity and convenience. Using just a microwave and a standard coffee mug, students can create a warm, comforting treat without access to a full kitchen or fancy baking equipment. This recipe delivers a moist, chocolatey cake that satisfies sweet cravings without making a mess or requiring cleanup of multiple dishes.
- 4 tablespoons all-purpose flour
- 4 tablespoons sugar
- 2 tablespoons unsweetened cocoa powder
- 1 egg
- 3 tablespoons milk
- 3 tablespoons vegetable oil
- ¼ teaspoon vanilla extract
- Optional: chocolate chips or chopped chocolate
Start by combining all dry ingredients in a microwave-safe mug, mixing well to remove any lumps. Add the egg and stir thoroughly, then pour in the milk, oil, and vanilla extract. Mix the batter until smooth, ensuring no dry ingredients remain at the bottom of the mug. If desired, add a small handful of chocolate chips and gently fold them into the batter.
Microwave the mug on high for 1½ to 2 minutes, watching carefully as the cake rises. The cake is done when it stops rising and appears set on top. Let it cool for one minute before eating.
For best results, use a mug that holds at least 12 ounces, as the cake will rise significantly during cooking. Avoid overmixing the batter, which can make the cake tough, and remember that microwave cooking times may vary. If the cake seems undercooked, continue microwaving in 10-second intervals until done. The cake is best enjoyed immediately while warm.
Simple Bean and Rice Tacos
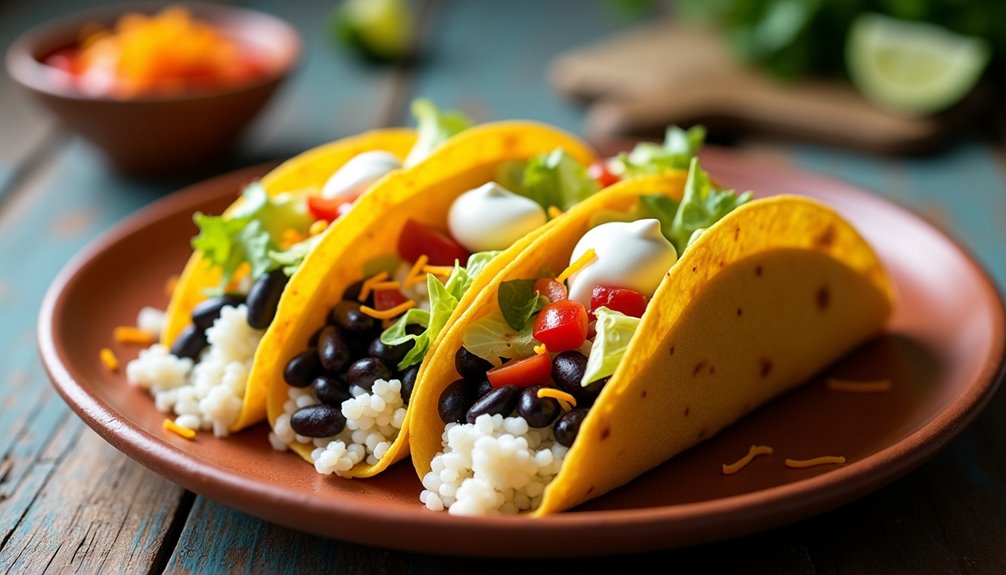
This recipe takes approximately 30 minutes to prepare and yields 6-8 tacos, enough for multiple servings or sharing with roommates. The combination of beans and rice provides a complete protein source, while the additional toppings allow for personalization based on individual preferences and available ingredients.
- 1 can (15 oz) black or pinto beans
- 2 cups cooked white or brown rice
- 8 corn or flour tortillas
- 1 tablespoon cooking oil
- 1 teaspoon chili powder
- 1/2 teaspoon ground cumin
- 1/2 teaspoon garlic powder
- Salt and pepper to taste
- Optional toppings: shredded lettuce, diced tomatoes, cheese, sour cream, hot sauce
Drain and rinse the beans, then heat them in a microwave-safe bowl or small saucepan with the chili powder, cumin, and garlic powder. While the beans heat, warm the rice if using leftover rice, or prepare fresh rice according to package instructions. Heat the tortillas in a dry skillet over medium heat for 30 seconds per side, or wrap them in slightly damp paper towels and microwave for 30 seconds.
Assemble the tacos by placing a portion of rice and seasoned beans in each tortilla. Add desired toppings and serve immediately. For a more substantial meal, consider adding additional protein sources like chicken or ground beef, or include fresh vegetables for extra nutrition.
To maintain freshness, store leftover ingredients separately in airtight containers. The beans and rice can be refrigerated for up to 4 days and reheated as needed. When reheating tortillas, avoid using the microwave for too long as they can become tough; instead, briefly warm them in a skillet or wrap them in foil and heat in a low-temperature oven.
Two-Minute Egg Sandwich

The Two-Minute Egg Sandwich is the ultimate quick breakfast solution for busy college students who need a protein-rich meal before rushing to class. This simple yet satisfying dish requires minimal cooking skills and equipment, making it perfect for dorm room cooking or small apartment kitchens.
Using just a microwave and a few basic ingredients, you can create a breakfast sandwich that rivals cafe offerings at a fraction of the cost. The secret lies in the microwave technique, which produces a perfectly cooked egg patty that fits nicely between your choice of bread.
Ingredients:
- 1 large egg
- 1 English muffin or 2 slices of bread
- 1 slice of cheese (American or cheddar)
- Salt and pepper to taste
- Butter or cooking spray
- Optional: sliced ham, bacon, or avocado
Crack the egg into a microwave-safe bowl or ramekin that's been lightly greased with butter or cooking spray. Pierce the yolk with a fork and gently beat the egg until combined. Microwave on high for about 45 seconds, or until the egg is set. Meanwhile, toast your English muffin or bread. Once the egg is done, season it with salt and pepper, then place it on the bottom half of your toasted bread. Add cheese and any optional ingredients, then close the sandwich with the top piece of bread.
For the best results, let the sandwich rest for 30 seconds before eating, allowing the residual heat to melt the cheese slightly. If adding cold toppings like avocado, place them on after the egg and cheese have had a chance to warm up together.
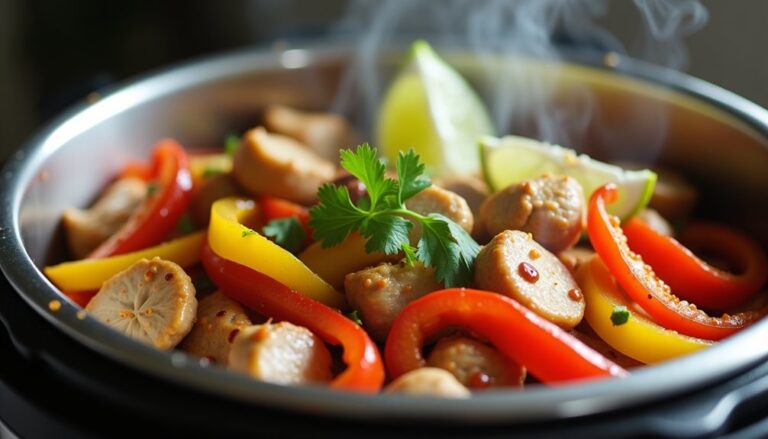
Instant Pot Chicken and Rice
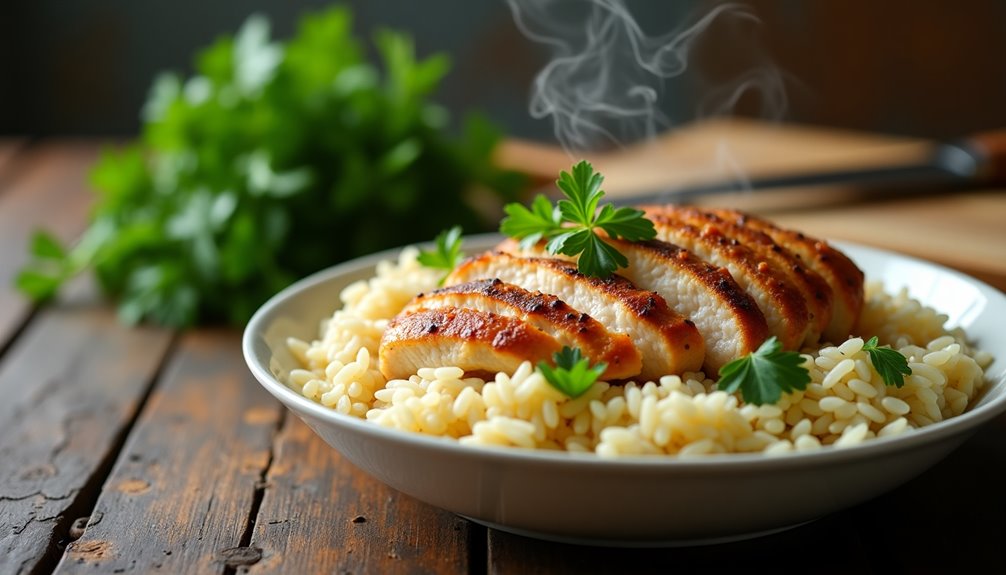
Instant Pot Chicken and Rice is a convenient one-pot meal that combines tender, juicy chicken with perfectly cooked rice. This comfort food classic transforms simple ingredients into a satisfying dish that's ready in under 30 minutes, making it ideal for busy college students.
The beauty of this recipe lies in its versatility – you can use any chicken parts you prefer, though boneless, skinless chicken breasts or thighs work best. The rice absorbs the flavors of the chicken and seasonings while cooking, creating a harmonious blend of tastes that's both filling and delicious.
Ingredients:
- 4 boneless, skinless chicken breasts
- 2 cups long-grain white rice
- 2½ cups chicken broth
- 1 onion, diced
- 3 garlic cloves, minced
- 2 tablespoons olive oil
- 1 teaspoon dried oregano
- 1 teaspoon paprika
- 1 teaspoon salt
- ½ teaspoon black pepper
- 1 bay leaf
Set your Instant Pot to sauté mode and heat the olive oil. Season the chicken with salt, pepper, oregano, and paprika, then brown for 2-3 minutes per side. Remove the chicken and set aside. Add onion and garlic to the pot, sautéing until translucent. Add rice and stir to coat with oil, then place the chicken on top of the rice. Pour in the chicken broth and add the bay leaf.
Lock the Instant Pot lid and set to pressure cook on high for 8 minutes. Once done, allow natural release for 5 minutes, then carefully quick-release the remaining pressure. Remove the bay leaf, fluff the rice with a fork, and let rest for 5 minutes before serving.
For best results, rinse the rice thoroughly before cooking to remove excess starch and prevent sticking. If the rice seems too wet after cooking, let it rest with the lid off for a few minutes to absorb excess moisture. The chicken can be cubed before or after cooking, depending on personal preference, and vegetables like peas or carrots can be added for extra nutrition.
No-Bake Energy Bites

No-bake energy bites have become a popular snack choice among college students due to their simplicity, portability, and nutritional value. These bite-sized treats require no cooking or baking, making them perfect for dorm rooms and small apartments with limited kitchen facilities.
These protein-packed snacks can be customized with various ingredients to suit different tastes and dietary needs. They're an excellent source of sustained energy for late-night study sessions, post-workout recovery, or quick breakfast alternatives when rushing to morning classes.
In a large mixing bowl, combine oats, peanut butter, and honey until well mixed. Add the remaining ingredients and stir until everything is evenly distributed. Cover the bowl and refrigerate for 30 minutes to allow the mixture to firm up slightly, making it easier to roll.
Once chilled, remove the mixture from the refrigerator. Using clean hands, roll the mixture into 1-inch balls. Place the formed balls on a parchment-lined baking sheet or container. Store in an airtight container in the refrigerator for up to one week.
For best results, slightly wet your hands before rolling the balls to prevent sticking. If the mixture is too dry, add more honey or peanut butter; if too wet, add more oats. The energy bites can also be frozen for up to three months – simply thaw in the refrigerator before consuming.
- 1 cup old-fashioned oats
- 1/2 cup peanut butter
- 1/3 cup honey
- 1/4 cup mini chocolate chips
- 1/4 cup ground flaxseed
- 1 teaspoon vanilla extract
- 1/2 cup shredded coconut
- 1/4 cup chia seeds