15 Easy Dinner Cooking Recipes
Like a well-stocked pantry ready for any culinary adventure, you'll find these 15 dinner recipes are your gateway to stress-free cooking. You'll discover how to transform simple ingredients into satisfying meals, from one-pan wonders to 20-minute pasta dishes that'll make you feel like a seasoned chef. With easy-to-follow steps and common ingredients, each recipe offers a practical solution to the age-old question: "What's for dinner?" Now, let's explore how you can master these kitchen-tested favorites.
One-Pan Lemon Garlic Chicken and Vegetables
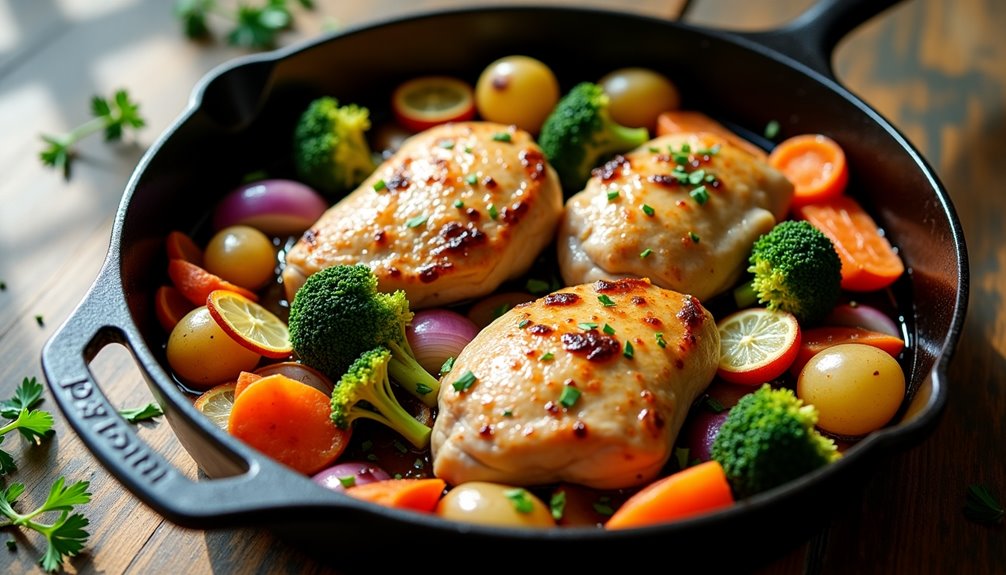
One-Pan Lemon Garlic Chicken and Vegetables is a delicious and efficient meal that combines tender chicken with colorful roasted vegetables, all infused with bright citrus and savory garlic flavors. This dish exemplifies the perfect balance between healthy eating and satisfying comfort food, while minimizing cleanup time.
The beauty of this recipe lies in its versatility – you can customize the vegetable selection based on what's in season or your personal preferences. The cooking process allows the chicken juices to flavor the vegetables while they roast together, creating a harmonious blend of tastes and textures in every bite.
Ingredients:
- 4 chicken breasts, skin-on
- 4 tablespoons olive oil
- 4 cloves garlic, minced
- 2 lemons
- 2 cups baby potatoes, halved
- 2 cups carrots, chopped
- 2 cups broccoli florets
- 1 red onion, quartered
- 1 tablespoon dried oregano
- 1 teaspoon dried thyme
- Salt and pepper to taste
- Fresh parsley for garnish
Preheat the oven to 400°F (200°C). In a large baking pan, arrange the chicken breasts and surround them with the prepared vegetables. Drizzle everything with olive oil and sprinkle with minced garlic, oregano, thyme, salt, and pepper. Slice one lemon and arrange the slices around the pan, then squeeze the juice of the second lemon over the entire dish.
Bake for 25-30 minutes, or until the chicken is cooked through and the vegetables are tender. For extra crispiness, broil for the final 2-3 minutes while watching carefully to prevent burning. The chicken should reach an internal temperature of 165°F (74°C), and the vegetables should be golden brown.
For best results, let the chicken rest for 5-10 minutes before serving. The size and thickness of chicken breasts can vary significantly, so adjust cooking time accordingly. To ensure even cooking, try to select vegetables of similar size when cutting them. If using wooden skewers for garnish or presentation, soak them in water for 30 minutes before use to prevent burning.
20-Minute Creamy Pasta Alfredo
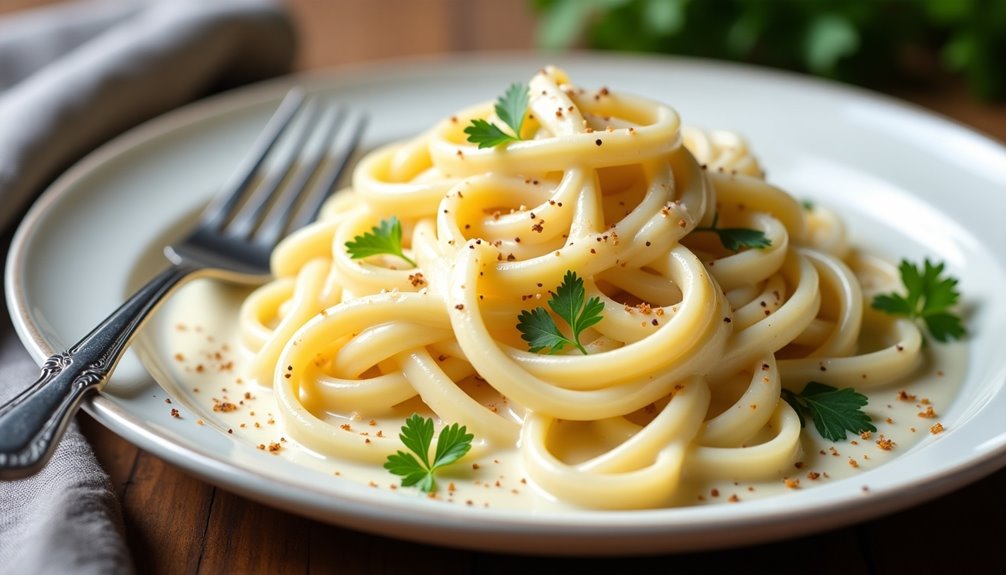
A classic Italian-American favorite, Creamy Pasta Alfredo combines al dente fettuccine with a rich, velvety sauce made from butter, heavy cream, and Parmesan cheese. This quick and satisfying dish can be prepared in just 20 minutes, making it perfect for busy weeknight dinners or last-minute entertaining.
While traditional Alfredo sauce originated in Rome as a simple mixture of butter and cheese, this version incorporates heavy cream for added richness and stability. The result is a luxurious pasta dish that has become a staple in homes and restaurants across the world.
- 1 pound fettuccine pasta
- 1 cup butter (2 sticks)
- 2 cups heavy cream
- 2 cups freshly grated Parmesan cheese
- 2 cloves garlic, minced
- 1/2 teaspoon salt
- 1/4 teaspoon black pepper
- Fresh parsley for garnish
Bring a large pot of salted water to boil and cook the fettuccine according to package instructions until al dente. While the pasta cooks, melt butter in a large saucepan over medium heat and add minced garlic, cooking until fragrant but not brown. Pour in the heavy cream and bring to a gentle simmer, stirring frequently.
Lower the heat and gradually whisk in the Parmesan cheese until melted and smooth. Season with salt and pepper. Drain the pasta, reserving 1/2 cup of pasta water, and add the fettuccine directly to the sauce. Toss until the pasta is evenly coated, adding reserved pasta water if needed to achieve desired consistency.
For best results, use freshly grated Parmesan cheese instead of pre-grated varieties, as it melts more smoothly and provides better flavor. The sauce will continue to thicken as it cools, so serve immediately and have extra warm pasta water on hand to adjust consistency. If reheating leftovers, add a splash of cream and warm gently over low heat to prevent the sauce from separating.
Sheet Pan Honey Glazed Salmon
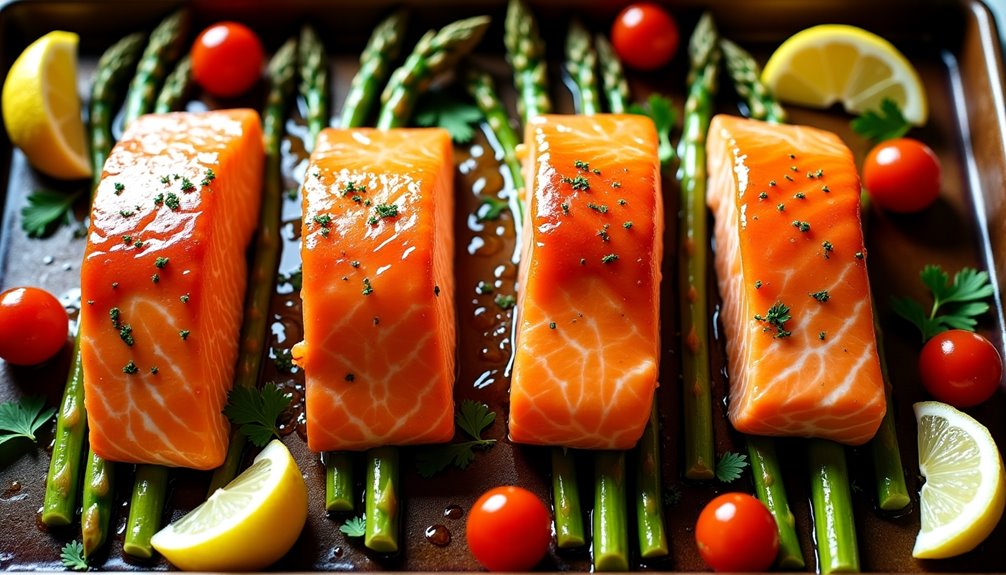
Sheet Pan Honey Glazed Salmon combines the perfect balance of sweet and savory flavors while offering a quick and convenient cooking method. The natural richness of salmon pairs beautifully with a honey-based glaze, creating a caramelized exterior while maintaining a tender, flaky interior.
This sheet pan dinner is ideal for busy weeknights, requiring minimal prep and cleanup. The salmon can be accompanied by roasted vegetables on the same pan, making it a complete meal solution that's both nutritious and delicious.
Ingredients:
- 4 salmon fillets (6 oz each)
- 1/4 cup honey
- 3 tablespoons soy sauce
- 2 tablespoons olive oil
- 4 cloves garlic, minced
- 1 teaspoon ginger, grated
- 1/2 teaspoon black pepper
- 1/4 teaspoon red pepper flakes
- 1 lemon
- Salt to taste
- Fresh parsley for garnish
Preheat the oven to 400°F (200°C). In a small bowl, whisk together honey, soy sauce, olive oil, minced garlic, grated ginger, black pepper, and red pepper flakes. Place the salmon fillets on a lined sheet pan and pat them dry with paper towels. Pour the honey mixture over the salmon, ensuring even coating. Let it marinate for 15 minutes if time permits.
Place the sheet pan in the preheated oven and bake for 12-15 minutes, or until the salmon is cooked through and flakes easily with a fork. During the last 2-3 minutes, switch to broil to achieve a caramelized glaze on top. Remove from oven, squeeze fresh lemon juice over the salmon, and garnish with chopped parsley.
For best results, bring the salmon to room temperature 15-20 minutes before cooking. The internal temperature of properly cooked salmon should reach 145°F (63°C), but be careful not to overcook as this can dry out the fish. The glaze can be prepared up to 24 hours in advance and stored in the refrigerator until needed.
Quick Black Bean and Rice Burrito Bowls
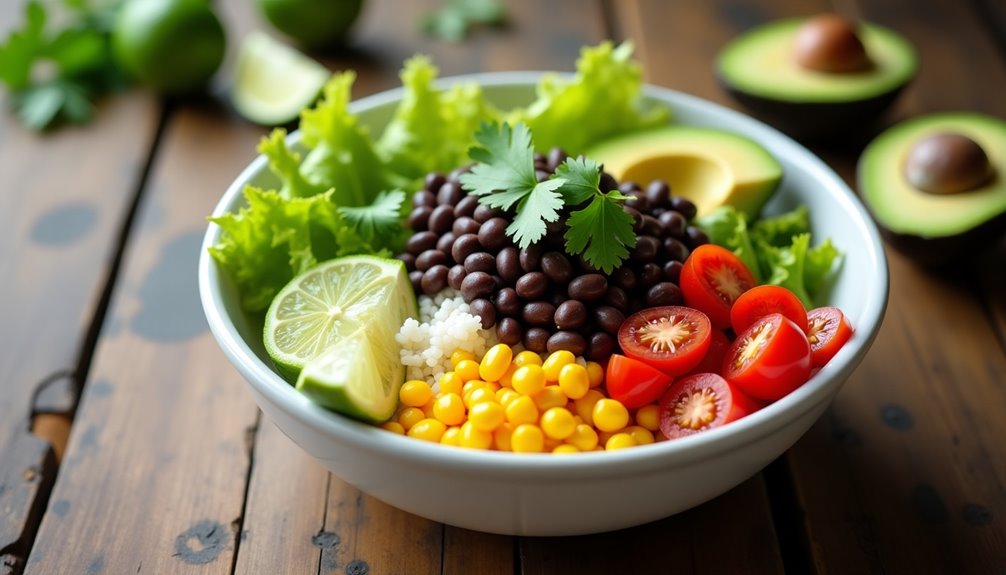
Black bean and rice burrito bowls are a versatile and satisfying meal that can be prepared in under 30 minutes. This Mexican-inspired dish combines protein-rich black beans with fluffy rice, fresh vegetables, and customizable toppings for a complete and balanced dinner.
The beauty of burrito bowls lies in their adaptability – they can be made ahead for meal prep, modified to accommodate various dietary preferences, and served hot or cold. Each component can be prepared while the rice cooks, making this an efficient option for busy weeknight dinners.
Ingredients:
- 2 cups white rice
- 1 (15 oz) can black beans, drained and rinsed
- 1 tablespoon olive oil
- 1 onion, diced
- 2 cloves garlic, minced
- 1 teaspoon ground cumin
- 1 teaspoon chili powder
- Salt and pepper to taste
- 2 cups cherry tomatoes, halved
- 1 avocado, sliced
- 2 cups shredded lettuce
- 1 cup corn kernels
- 1 lime, cut into wedges
- Fresh cilantro for garnish
- Optional toppings: sour cream, shredded cheese, hot sauce
Cook rice according to package instructions. While the rice cooks, heat olive oil in a medium pan over medium heat. Sauté onion until translucent, about 5 minutes, then add garlic and cook for another minute. Add black beans, cumin, and chili powder, stirring to combine. Season with salt and pepper, and cook until heated through, about 3-4 minutes.
To assemble the bowls, divide the cooked rice among serving bowls. Top with the seasoned black bean mixture, and arrange tomatoes, avocado, lettuce, and corn in sections around the bowl. Garnish with cilantro and lime wedges, adding optional toppings as desired.
For best results, prepare all toppings while the rice cooks to ensure everything is ready at the same time. The black bean mixture can be made up to 3 days in advance and reheated when needed. If meal prepping, store wet and dry ingredients separately and assemble just before eating to maintain optimal freshness and texture.
Skillet Italian Sausage With Peppers

This classic Italian-American dish combines the robust flavors of Italian sausage with colorful bell peppers and onions, all cooked to perfection in a single skillet. The sausages develop a beautiful brown crust while the peppers and onions caramelize, creating a medley of sweet and savory flavors.
The beauty of this recipe lies in its simplicity and versatility. Whether served on crusty rolls for a traditional sausage and peppers sandwich, or paired with pasta or polenta for a complete meal, this dish delivers satisfaction with minimal effort and cleanup.
Ingredients:
- 6 Italian sausage links (sweet or hot)
- 3 bell peppers (mixed colors), sliced
- 2 medium onions, sliced
- 4 cloves garlic, minced
- 2 tablespoons olive oil
- 1 cup chicken broth
- 1 teaspoon dried oregano
- 1 teaspoon dried basil
- Salt and black pepper to taste
- Red pepper flakes (optional)
Heat olive oil in a large skillet over medium-high heat. Add the sausages and brown them on all sides for about 8-10 minutes. Remove the sausages and set aside. In the same skillet, add the sliced peppers and onions, cooking until they begin to soften and caramelize, about 8 minutes. Add garlic, oregano, and basil, cooking for another minute until fragrant.
Return the sausages to the skillet and add the chicken broth. Reduce heat to medium-low, cover, and simmer for 10-12 minutes until the sausages are cooked through and the vegetables are tender. Season with salt and pepper to taste. If the liquid hasn't reduced enough, uncover and cook for a few additional minutes until it reaches desired consistency.
For best results, use a heavy-bottomed skillet or cast-iron pan to achieve optimal browning and prevent sticking. Allow the sausages to come to room temperature before cooking, and avoid piercing them while cooking to retain their juices. The dish can be made ahead and reheated, as the flavors often improve when the ingredients have time to meld together.
15-Minute Beef and Broccoli Stir-Fry
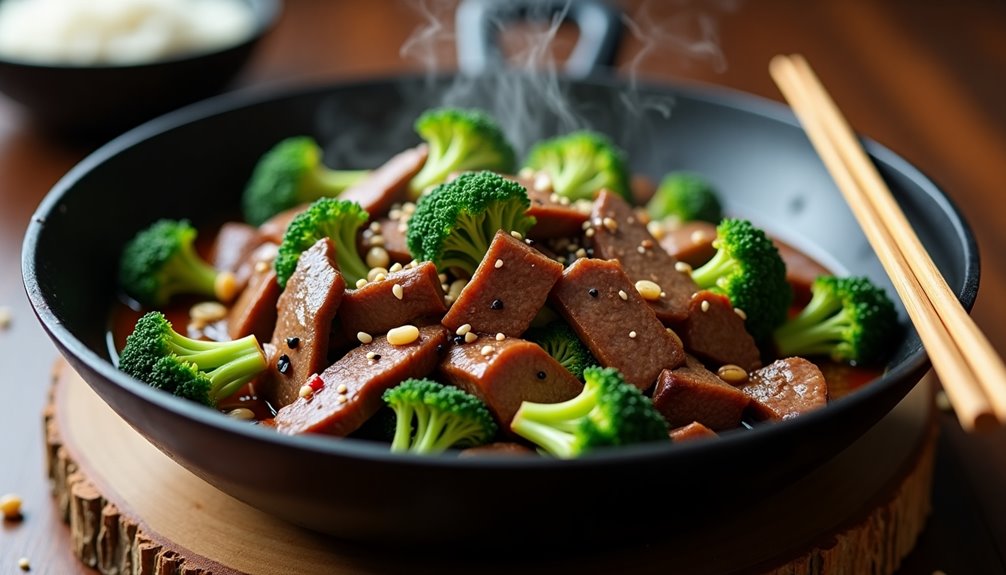
Minute Beef and Broccoli Stir-Fry is a quick and satisfying Asian-inspired dish that transforms simple ingredients into a restaurant-quality meal. The combination of tender sliced beef, crisp broccoli florets, and a savory sauce creates a perfect balance of flavors and textures that's sure to please the whole family.
This versatile recipe can be prepared in under 30 minutes, making it an ideal choice for busy weeknight dinners. The key to success lies in the proper preparation of ingredients before cooking and maintaining high heat throughout the stir-frying process to achieve that authentic wok-seared taste.
- 1 pound flank steak, thinly sliced against the grain
- 4 cups broccoli florets
- 3 cloves garlic, minced
- 1 tablespoon ginger, minced
- 1/4 cup soy sauce
- 2 tablespoons oyster sauce
- 1 tablespoon cornstarch
- 1/2 cup beef broth
- 2 tablespoons vegetable oil
- 1 teaspoon sesame oil
- Salt and pepper to taste
- Cooked rice for serving
Begin by marinating the sliced beef in a mixture of 1 tablespoon soy sauce, 1 teaspoon cornstarch, and a pinch of black pepper for 15 minutes. While the beef marinates, whisk together the remaining soy sauce, oyster sauce, beef broth, and cornstarch in a small bowl to create the sauce.
Heat a large wok or skillet over high heat until very hot, then add vegetable oil. Stir-fry the beef in batches until browned, about 2-3 minutes per batch, then remove and set aside.
In the same pan, add a bit more oil if needed, then stir-fry the garlic and ginger until fragrant. Add the broccoli and stir-fry for 2-3 minutes until bright green and crisp-tender. Return the beef to the pan, pour in the sauce mixture, and cook while stirring until the sauce thickens and coats everything evenly, about 2 minutes. Finish with a drizzle of sesame oil and adjust seasoning to taste.
For best results, slice the beef when it's partially frozen to achieve ultra-thin, even pieces. The broccoli can be blanched beforehand if you prefer it more tender, though this isn't necessary. Always ensure your pan is very hot before adding ingredients to achieve proper searing and prevent the meat from becoming tough. The dish can be stored in an airtight container in the refrigerator for up to 3 days.
Easy Mediterranean Chickpea Salad
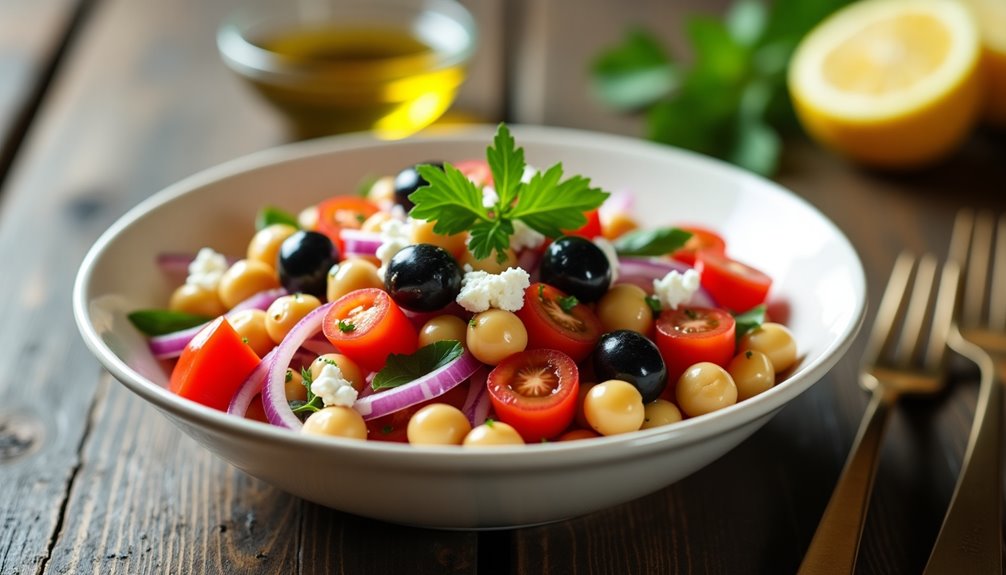
Mediterranean Chickpea Salad is a vibrant, protein-rich dish that combines the earthy flavors of legumes with fresh vegetables and herbs. This no-cook recipe delivers a perfect balance of nutrients while remaining light and refreshing, making it an ideal choice for warm summer evenings or as a healthy lunch option.
The beauty of this salad lies in its versatility and simplicity. It can be prepared in advance and stored in the refrigerator, allowing the flavors to develop and meld together. The combination of chickpeas, crisp vegetables, and tangy dressing creates a satisfying meal that's both nutritious and delicious.
Ingredients:
- 2 (15 oz) cans chickpeas, drained and rinsed
- 1 English cucumber, diced
- 2 cups cherry tomatoes, halved
- 1 red onion, finely chopped
- 1 red bell pepper, diced
- 1/2 cup kalamata olives, pitted and halved
- 1/2 cup fresh parsley, chopped
- 1/2 cup fresh feta cheese, crumbled
- 3 tablespoons extra virgin olive oil
- 2 tablespoons lemon juice
- 1 teaspoon dried oregano
- Salt and black pepper to taste
Drain and rinse the chickpeas thoroughly under cold water. In a large bowl, combine the chickpeas with diced cucumber, halved cherry tomatoes, chopped red onion, diced bell pepper, and kalamata olives. Add the fresh parsley and crumbled feta cheese to the mixture.
In a small bowl, whisk together the olive oil, lemon juice, dried oregano, salt, and black pepper. Pour the dressing over the salad ingredients and toss gently to combine. Let the salad rest for at least 15 minutes before serving to allow the flavors to meld together.
For best results, chill the salad for at least 2 hours before serving. The recipe can be customized by adding or substituting ingredients based on preference – try incorporating diced avocado, artichoke hearts, or roasted red peppers. To maintain freshness, store the salad in an airtight container in the refrigerator for up to 3 days, though the vegetables may lose some crispness over time.
Simple Shrimp Scampi
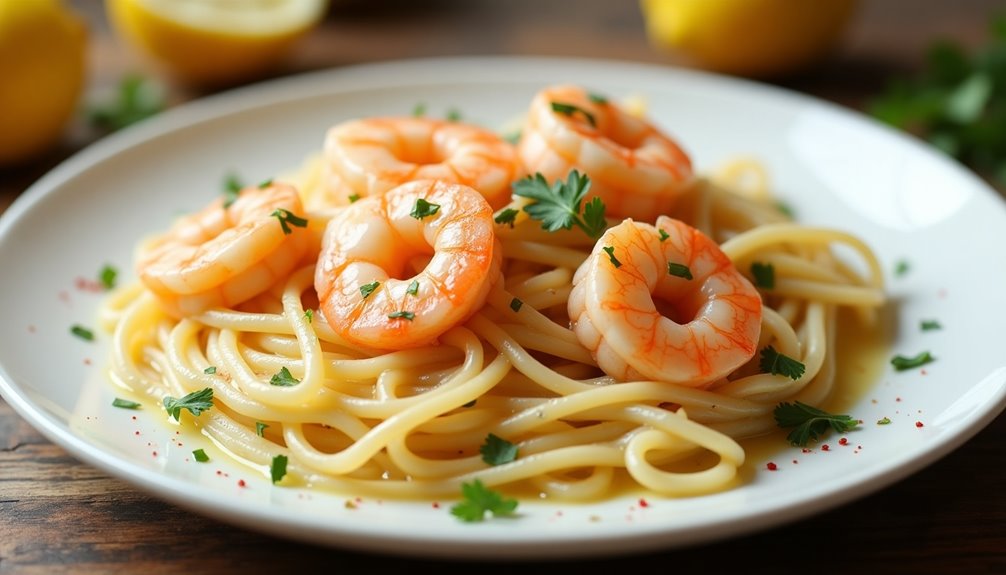
Simple Shrimp Scampi is a classic Italian-American dish that combines succulent shrimp with a light, garlicky wine sauce served over pasta. This elegant yet straightforward recipe transforms a handful of basic ingredients into a restaurant-quality meal in under 30 minutes.
The key to perfect shrimp scampi lies in the balance of flavors and proper cooking technique. While the dish appears sophisticated, it's actually one of the easiest seafood recipes to master, making it ideal for both weeknight dinners and special occasions.
Ingredients:
- 1 pound large shrimp, peeled and deveined
- 8 tablespoons butter
- 6 cloves garlic, minced
- 1/2 cup dry white wine
- 1/4 cup fresh lemon juice
- 1/4 cup chopped fresh parsley
- 1/4 teaspoon red pepper flakes
- Salt and black pepper to taste
- 1 pound linguine or spaghetti
- 2 tablespoons olive oil
- 1/4 cup reserved pasta water
Start by bringing a large pot of salted water to boil for the pasta. While waiting, melt 4 tablespoons of butter with olive oil in a large skillet over medium-high heat. Add minced garlic and red pepper flakes, cooking until fragrant but not brown, about 1 minute. Add the shrimp to the pan, cooking for 2-3 minutes per side until they turn pink. Remove shrimp from the pan and set aside.
Add wine and lemon juice to the pan, scraping up any browned bits. Let the sauce reduce by half, about 3-4 minutes. Return shrimp to the pan, add remaining butter, parsley, and season with salt and pepper. Toss the cooked pasta with the shrimp and sauce, adding reserved pasta water as needed to create a silky sauce that clings to the pasta.
For best results, avoid overcooking the shrimp as they can become tough and rubbery. Use fresh shrimp when possible, and make sure to pat them dry before cooking to achieve better browning. The pasta water is crucial for the final sauce consistency, so don't forget to reserve some before draining the pasta. For wine selection, choose a crisp, dry white wine that you'd enjoy drinking, as the flavor will concentrate in the sauce.
Three-Cheese Baked Ziti
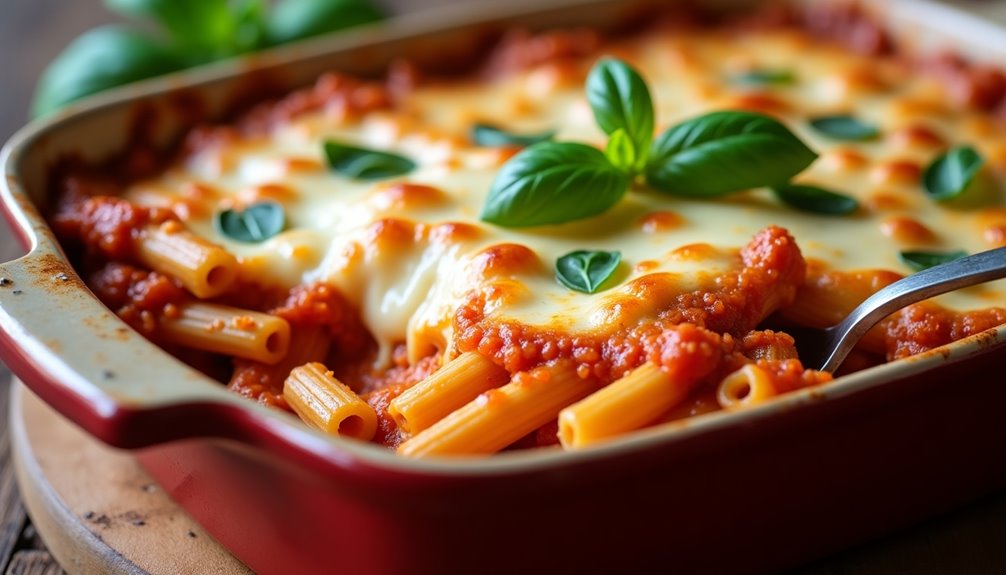
Three-Cheese Baked Ziti is a comforting Italian-American pasta dish that combines the heartiness of ziti pasta with a rich blend of melted cheeses and savory tomato sauce. This crowd-pleasing meal serves as the perfect centerpiece for family dinners or potluck gatherings, offering layers of flavor in every bite.
The key to an exceptional baked ziti lies in the quality of ingredients and the perfect balance of cheese varieties. This recipe uses a combination of mozzarella, ricotta, and Parmesan cheese, creating a creamy, gooey texture while providing distinct flavors that complement each other.
Ingredients:
- 1 pound ziti pasta
- 24 oz marinara sauce
- 15 oz ricotta cheese
- 2 cups shredded mozzarella cheese
- 1 cup grated Parmesan cheese
- 2 large eggs
- 1 tablespoon olive oil
- 2 cloves garlic, minced
- 1 teaspoon dried basil
- 1 teaspoon dried oregano
- Salt and pepper to taste
Cook the ziti in a large pot of salted boiling water until al dente, then drain and toss with olive oil. While the pasta cooks, combine ricotta, half the mozzarella, half the Parmesan, eggs, garlic, and herbs in a large bowl. Mix the cooked pasta with the marinara sauce, then fold in the cheese mixture.
Transfer everything to a 9×13 inch baking dish, top with remaining mozzarella and Parmesan cheese. Cover with foil and bake at 375°F for 25 minutes, then remove foil and bake for an additional 10-15 minutes until the cheese is golden brown and bubbly.
For best results, let the baked ziti rest for 10-15 minutes before serving. This allows the cheese to set slightly and makes portioning easier. The dish can be assembled up to 24 hours in advance and refrigerated until ready to bake, though you may need to add 10-15 minutes to the cooking time if baking from cold.
[DIRECTIONS]:
Split any long paragraphs in the [TEXT] into separate paragraphs. Write the entire [TEXT] again, but with any long paragraphs split.
Retain any and all special formatting (e.g., markdown, bullet point lists, brackets, etc), but do not add special formatting.
[OUTPUT]:
Three-Cheese Baked Ziti is a comforting Italian-American pasta dish that combines the heartiness of ziti pasta with a rich blend of melted cheeses and savory tomato sauce. This crowd-pleasing meal serves as the perfect centerpiece for family dinners or potluck gatherings, offering layers of flavor in every bite.
The key to an exceptional baked ziti lies in the quality of ingredients and the perfect balance of cheese varieties. This recipe uses a combination of mozzarella, ricotta, and Parmesan cheese, creating a creamy, gooey texture while providing distinct flavors that complement each other.
Ingredients:
- 1 pound ziti pasta
- 24 oz marinara sauce
- 15 oz ricotta cheese
- 2 cups shredded mozzarella cheese
- 1 cup grated Parmesan cheese
- 2 large eggs
- 1 tablespoon olive oil
- 2 cloves garlic, minced
- 1 teaspoon dried basil
- 1 teaspoon dried oregano
- Salt and pepper to taste
Cook the ziti in a large pot of salted boiling water until al dente, then drain and toss with olive oil. While the pasta cooks, combine ricotta, half the mozzarella, half the Parmesan, eggs, garlic, and herbs in a large bowl. Mix the cooked pasta with the marinara sauce, then fold in the cheese mixture.
Transfer everything to a 9×13 inch baking dish, top with remaining mozzarella and Parmesan cheese. Cover with foil and bake at 375°F for 25 minutes, then remove foil and bake for an additional 10-15 minutes until the cheese is golden brown and bubbly.
For best results, let the baked ziti rest for 10-15 minutes before serving. This allows the cheese to set slightly and makes portioning easier. The dish can be assembled up to 24 hours in advance and refrigerated until ready to bake, though you may need to add 10-15 minutes to the cooking time if baking from cold.
Crispy Sheet Pan Chicken Fajitas
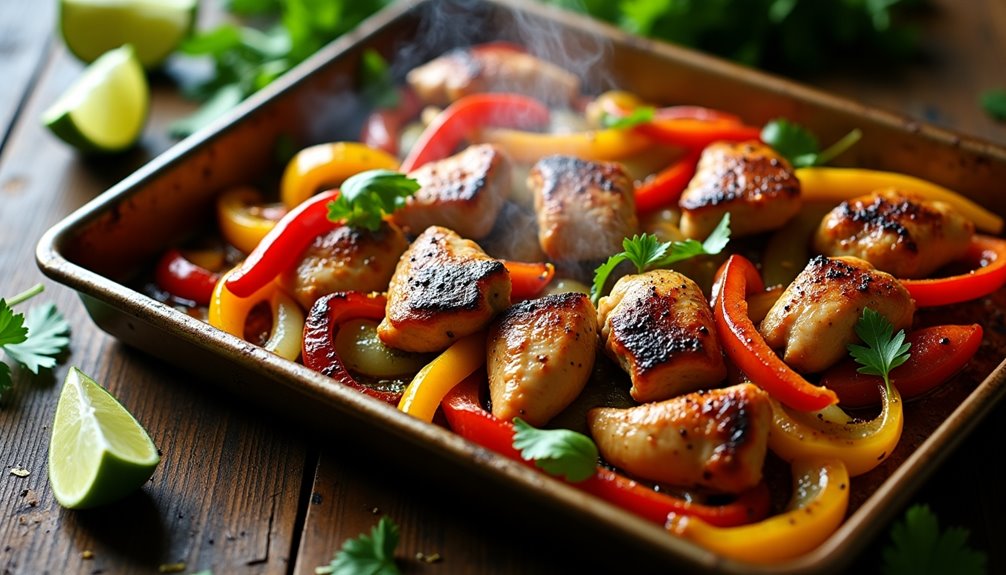
Crispy Sheet Pan Chicken Fajitas combine the vibrant flavors of Mexican cuisine with the convenience of one-pan cooking. The dish features tender, marinated chicken strips alongside colorful bell peppers and onions, all roasted to perfection on a single sheet pan.
This recipe simplifies the traditional fajita preparation method while maintaining the signature charred edges and smoky flavor that make fajitas a beloved dish. The sheet pan technique ensures even cooking and creates those coveted crispy bits, while the marinade infuses the chicken with classic fajita seasonings.
- 2 lbs chicken breasts, sliced into strips
- 3 bell peppers (mixed colors), sliced
- 2 large onions, sliced
- 3 tablespoons olive oil
- 2 tablespoons lime juice
- 2 teaspoons chili powder
- 1 teaspoon ground cumin
- 1 teaspoon paprika
- 1 teaspoon garlic powder
- 1 teaspoon oregano
- Salt and pepper to taste
- 12 flour tortillas
- Optional toppings: sour cream, guacamole, shredded cheese, lime wedges
Preheat the oven to 425°F and position a rack in the upper third. In a large bowl, combine olive oil, lime juice, and all seasonings to create the marinade. Add the chicken strips and toss to coat thoroughly. On a large sheet pan, spread the marinated chicken, bell peppers, and onions in a single layer, ensuring even distribution.
Roast for 20-25 minutes, stirring halfway through, until the chicken is cooked through and the vegetables have developed charred edges. The chicken should reach an internal temperature of 165°F. While the fajitas cook, warm the tortillas either in the microwave or in a separate pan.
For best results, avoid overcrowding the sheet pan, as this can lead to steaming rather than roasting. If needed, use two pans to ensure proper spacing between ingredients. The sheet pan should be preheated along with the oven to achieve better browning, and the chicken strips should be relatively uniform in size to ensure even cooking.
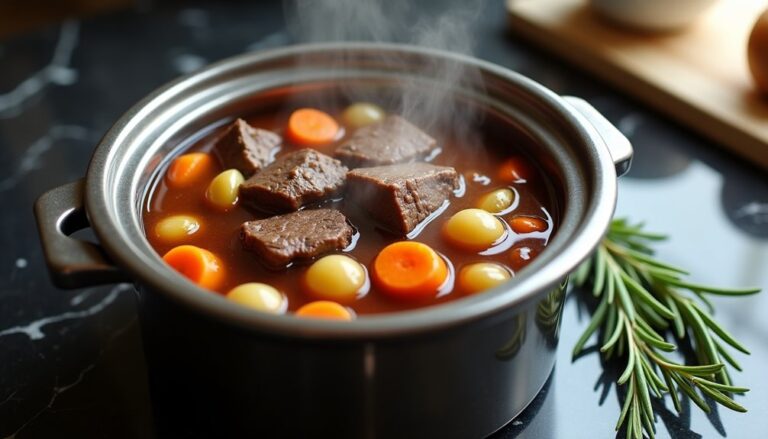
One-Pot Vegetable Curry
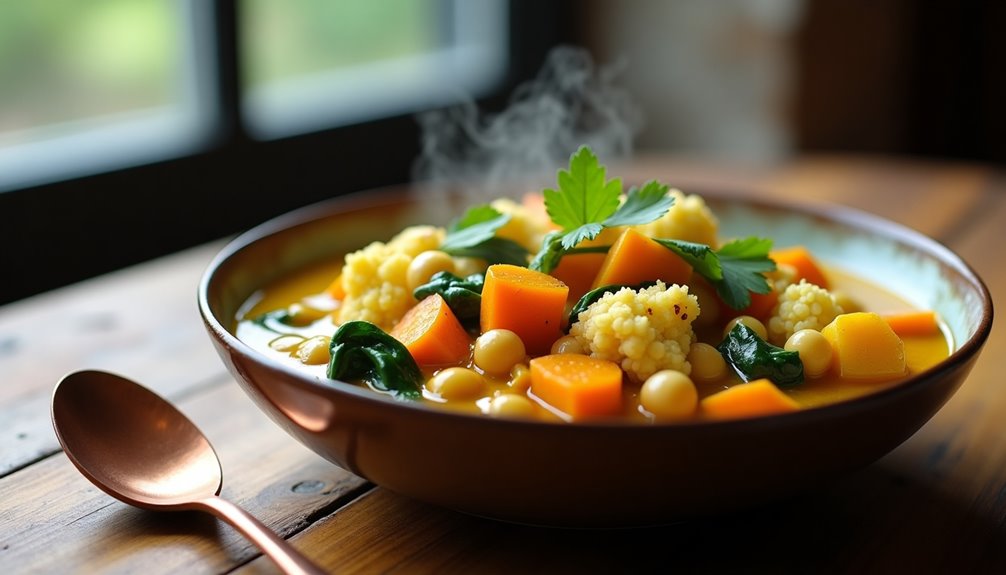
One-Pot Vegetable Curry is a comforting, flavorful dish that brings together aromatic spices and fresh vegetables in a rich, creamy sauce. This Indian-inspired meal provides a perfect balance of nutrients while requiring minimal cleanup, making it ideal for busy weeknight dinners.
This versatile recipe allows you to use whatever vegetables you have on hand, though root vegetables and hearty greens work particularly well. The coconut milk base creates a smooth, luxurious curry that pairs perfectly with rice or naan bread, while the combination of spices delivers authentic Indian flavors.
- 2 tablespoons vegetable oil
- 1 large onion, diced
- 3 cloves garlic, minced
- 1 tablespoon ginger, grated
- 2 tablespoons curry powder
- 1 teaspoon ground cumin
- 1 teaspoon ground coriander
- 2 potatoes, cubed
- 2 carrots, sliced
- 1 cauliflower, cut into florets
- 1 can chickpeas, drained
- 1 can coconut milk
- 2 cups vegetable broth
- 2 cups spinach
- Salt and pepper to taste
- Fresh cilantro for garnish
Heat oil in a large pot over medium heat and sauté onions until translucent. Add garlic and ginger, cooking for another minute until fragrant. Stir in all the spices and cook for 30 seconds to bloom their flavors. Add the potatoes, carrots, and cauliflower, stirring to coat with the spice mixture. Pour in the coconut milk and vegetable broth, bring to a boil, then reduce heat and simmer for 15-20 minutes.
Once the vegetables are tender, add the chickpeas and spinach, cooking until the spinach wilts. Season with salt and pepper to taste. The curry should be thick and creamy, with the vegetables cooked through but still maintaining their shape.
For best results, allow the curry to rest for 5-10 minutes before serving to let the flavors meld together. The curry can be stored in an airtight container in the refrigerator for up to 3 days, and it often tastes even better the next day as the spices continue to develop. If the curry becomes too thick when reheating, simply add a splash of water or broth to reach desired consistency.
Quick Ground Turkey Tacos

Ground turkey tacos are a healthier alternative to traditional beef tacos while maintaining the authentic Mexican flavors that make this dish a family favorite. This lean protein option combined with fresh vegetables and aromatic spices creates a satisfying meal that can be prepared in under 30 minutes.
This versatile recipe allows for customization with various toppings and can be served in either soft or hard taco shells. The ground turkey absorbs the seasonings exceptionally well, resulting in a flavorful filling that pairs perfectly with traditional taco garnishes like fresh tomatoes, lettuce, and cheese.
- 1 pound ground turkey
- 1 tablespoon olive oil
- 1 medium onion, diced
- 3 cloves garlic, minced
- 1 tablespoon chili powder
- 1 teaspoon ground cumin
- 1 teaspoon paprika
- 1/2 teaspoon oregano
- 1/2 teaspoon salt
- 1/4 teaspoon black pepper
- 1/4 cup tomato sauce
- 8-10 taco shells
- Optional toppings: shredded lettuce, diced tomatoes, shredded cheese, sour cream, avocado
Heat olive oil in a large skillet over medium-high heat. Add diced onion and cook until translucent, about 3-4 minutes. Add minced garlic and cook for another minute. Add ground turkey to the skillet, breaking it up with a wooden spoon, and cook until no longer pink, about 5-7 minutes. Add all the seasonings and tomato sauce, stirring well to combine. Reduce heat to medium-low and simmer for 5 minutes, allowing the flavors to meld together.
Warm the taco shells according to package instructions. Fill each shell with the prepared turkey mixture and add desired toppings.
For best results, drain any excess liquid from the turkey mixture before serving to prevent soggy tacos. The seasoned meat can be made ahead and reheated, and it freezes well for up to 3 months. If preparing for a crowd, consider setting up a taco bar with various toppings, allowing guests to customize their tacos to their liking.
Pan-Seared Fish With Herb Butter
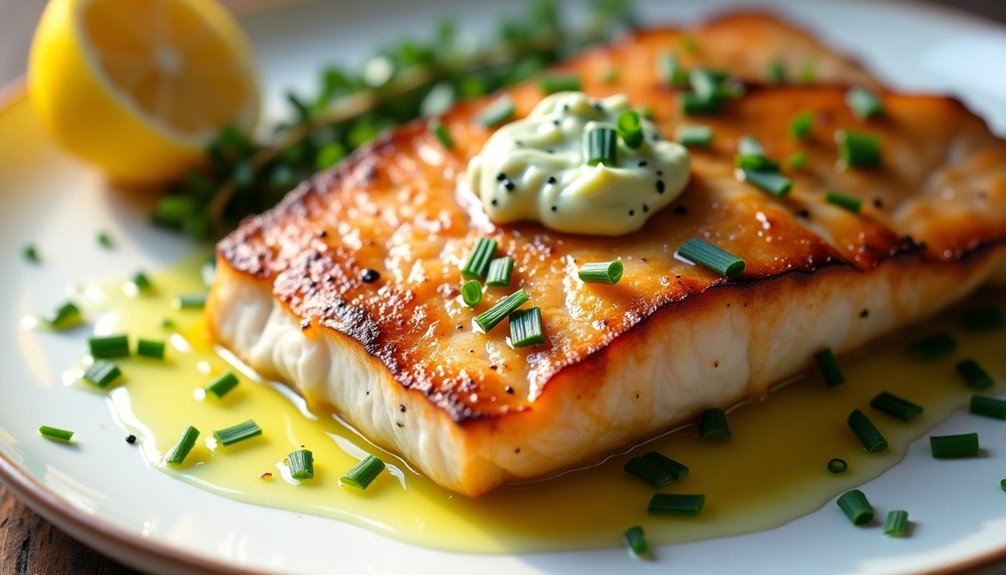
Pan-seared fish with herb butter is a classic dish that combines the delicate flavors of fresh fish with aromatic herbs and rich butter. The technique of pan-searing creates a golden-brown crust on the fish while keeping the inside moist and tender, making it a perfect choice for a quick yet elegant dinner.
This versatile recipe works well with various types of fish fillets, such as cod, halibut, sea bass, or salmon. The herb butter can be customized using your favorite fresh herbs, and the entire dish comes together in less than 30 minutes, making it ideal for busy weeknight meals.
- 4 fish fillets (6 oz each)
- 4 tablespoons unsalted butter
- 2 tablespoons fresh parsley, chopped
- 1 tablespoon fresh thyme leaves
- 1 tablespoon fresh chives, minced
- 2 cloves garlic, minced
- 1 lemon
- 2 tablespoons olive oil
- Salt and black pepper to taste
Pat the fish fillets dry with paper towels and season both sides generously with salt and pepper. Prepare the herb butter by combining softened butter with chopped herbs and minced garlic in a small bowl. Heat olive oil in a large skillet over medium-high heat until shimmering. Place the fish fillets skin-side up in the pan and cook for 3-4 minutes until golden brown. Carefully flip the fillets and cook for an additional 2-3 minutes.
Add the herb butter to the pan, allowing it to melt and foam. Tilt the pan slightly and spoon the melted butter over the fish continuously for about 30 seconds. Remove the fillets from the pan and squeeze fresh lemon juice over them. Serve immediately with the remaining herb butter sauce from the pan drizzled over top.
For best results, ensure the fish fillets are completely dry before cooking, as excess moisture will prevent proper searing. The cooking time may vary depending on the thickness of your fillets – the fish is done when it flakes easily with a fork and is opaque throughout. If using frozen fish, thaw completely in the refrigerator overnight and bring to room temperature 30 minutes before cooking.
Easy Tortellini Soup
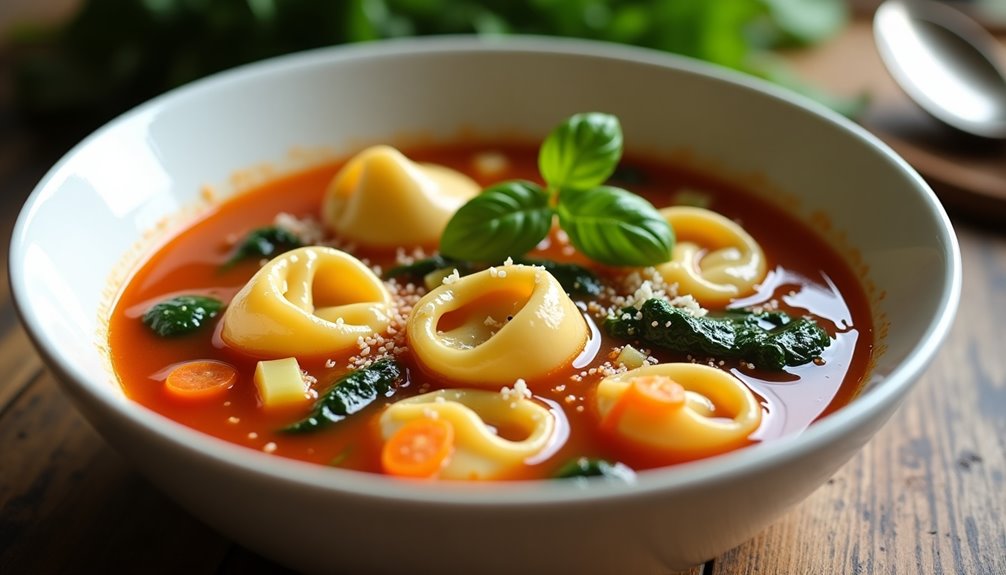
Easy Tortellini Soup is a comforting Italian-inspired dish that combines cheese-filled pasta with a rich, savory broth and vegetables. This hearty soup can be prepared in under 30 minutes, making it perfect for busy weeknight dinners or when you need a quick, satisfying meal.
The beauty of this recipe lies in its versatility – you can use fresh or frozen tortellini, adjust the vegetables to your preference, and control the consistency of the broth. The combination of tender pasta, flavorful broth, and colorful vegetables creates a well-balanced meal that's both nutritious and delicious.
Ingredients:
- 20 oz cheese tortellini (fresh or frozen)
- 32 oz chicken or vegetable broth
- 2 tablespoons olive oil
- 1 medium onion, diced
- 3 cloves garlic, minced
- 2 carrots, sliced
- 2 celery stalks, chopped
- 1 can (14.5 oz) diced tomatoes
- 2 cups fresh spinach
- 1 teaspoon Italian seasoning
- 1/2 teaspoon salt
- 1/4 teaspoon black pepper
- 1/2 cup heavy cream
- Grated Parmesan cheese for serving
Heat olive oil in a large pot over medium heat. Sauté onion, carrots, and celery until softened, about 5 minutes. Add garlic and cook for another minute. Pour in the broth and diced tomatoes, then add Italian seasoning, salt, and pepper. Bring to a boil, then reduce heat and simmer for 10 minutes. Add tortellini and cook according to package instructions, usually 3-5 minutes for fresh or 7-9 minutes for frozen. Stir in spinach and heavy cream, cooking until spinach wilts and soup is heated through.
For best results, avoid overcooking the tortellini as it can become mushy. If planning to have leftovers, consider cooking and storing the tortellini separately from the broth, combining them only when ready to serve. The soup can be made vegetarian by using vegetable broth and selecting cheese tortellini without meat filling.
30-Minute Teriyaki Chicken Bowl
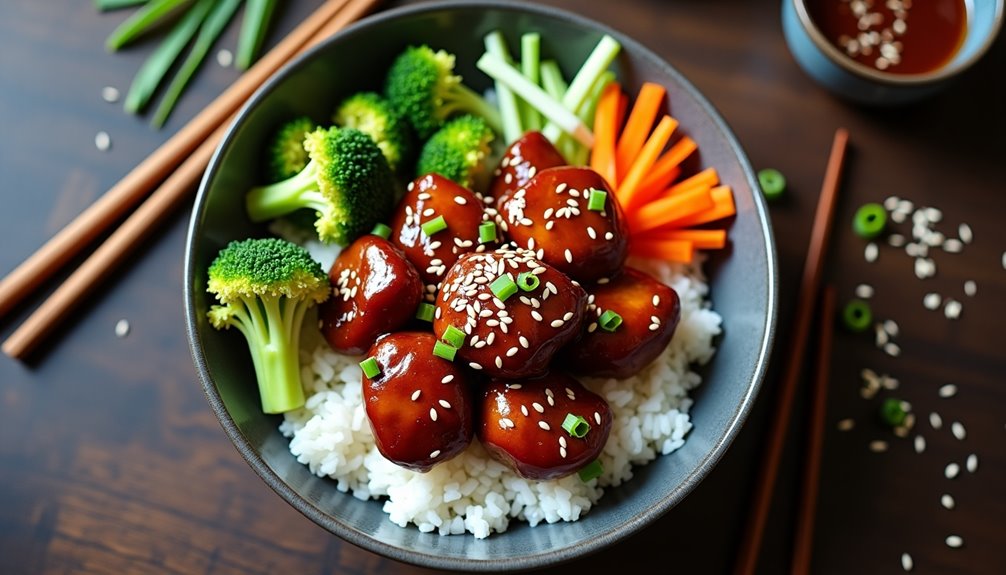
Minute Teriyaki Chicken Bowl is a perfect weeknight dinner solution that combines tender chicken pieces with a sweet and savory teriyaki sauce served over steaming rice. This Asian-inspired dish delivers restaurant-quality taste with minimal effort and basic pantry ingredients.
The key to this quick meal lies in its simplified approach to traditional teriyaki, using pre-made sauce or easily combined ingredients to create a glossy coating that clings to bite-sized chicken pieces. When paired with vegetables and served over rice, it creates a complete, balanced meal that satisfies both protein and carbohydrate needs.
Ingredients:
- 2 chicken breasts, cut into 1-inch pieces
- 1 cup teriyaki sauce
- 2 cups cooked white rice
- 2 tablespoons vegetable oil
- 1 cup broccoli florets
- 1 carrot, julienned
- 2 green onions, chopped
- 1 tablespoon sesame seeds
- Salt and pepper to taste
Heat oil in a large skillet over medium-high heat. Season chicken pieces with salt and pepper, then cook for 5-7 minutes until golden brown. Add teriyaki sauce and simmer for 2-3 minutes until the sauce thickens and coats the chicken. Steam broccoli and carrots separately until tender-crisp. Serve the teriyaki chicken over rice, topped with vegetables, chopped green onions, and sesame seeds.
For best results, keep your pan hot enough to sear the chicken but not so hot that the teriyaki sauce burns. Allow the chicken to develop a golden crust before adding the sauce, and don't overcook the vegetables to maintain their crunch and nutritional value.