15 Easy Dinner Recipes
You're about to discover 15 dinner recipes that'll transform your weeknight cooking routine. These aren't just any recipes – they're carefully selected for their simplicity, requiring minimal prep and cleanup while delivering maximum flavor. From one-pot creamy garlic pasta to 30-minute sheet pan dinners, each dish uses everyday ingredients you likely have in your pantry. Let's explore how these family-friendly meals can help you put a satisfying dinner on the table, even on your busiest days.
One-Pot Creamy Garlic Pasta
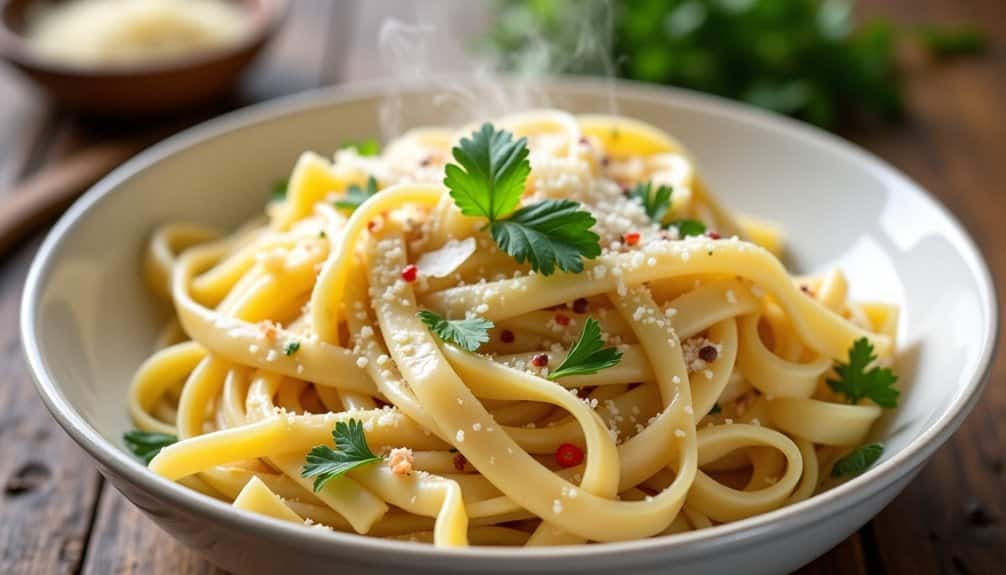
One-Pot Creamy Garlic Pasta combines simplicity with indulgence, creating a restaurant-quality dish that requires minimal cleanup. This pasta dish features a rich, velvety sauce that coats every strand with intense garlic flavor and creamy goodness.
The beauty of this recipe lies in its efficiency – the pasta cooks directly in the sauce, allowing the starch from the noodles to naturally thicken the mixture. The result is a perfectly balanced dish where every ingredient works together to create a harmonious blend of flavors.
Ingredients:
- 1 pound fettuccine or linguine
- 4 tablespoons butter
- 8 cloves garlic, minced
- 4 cups chicken broth
- 2 cups heavy cream
- 1 cup grated Parmesan cheese
- 1/2 teaspoon salt
- 1/4 teaspoon black pepper
- 1/4 teaspoon red pepper flakes
- Fresh parsley for garnish
Melt butter in a large pot over medium heat and sauté minced garlic until fragrant, about 1-2 minutes. Add chicken broth, heavy cream, and pasta to the pot. Bring the mixture to a boil, then reduce heat to medium-low and cook for 15-20 minutes, stirring occasionally to prevent the pasta from sticking together.
Once the pasta is al dente and most of the liquid has been absorbed, add the Parmesan cheese, salt, black pepper, and red pepper flakes. Stir continuously until the cheese has melted and the sauce has thickened to your desired consistency. Remove from heat and let stand for 5 minutes before serving. Garnish with fresh parsley.
For best results, avoid rinsing the pasta before cooking, as the starch is essential for creating the creamy sauce. If the sauce becomes too thick, gradually add small amounts of warm chicken broth or cream to achieve the desired consistency. The dish is best served immediately, as the sauce will continue to thicken as it cools.
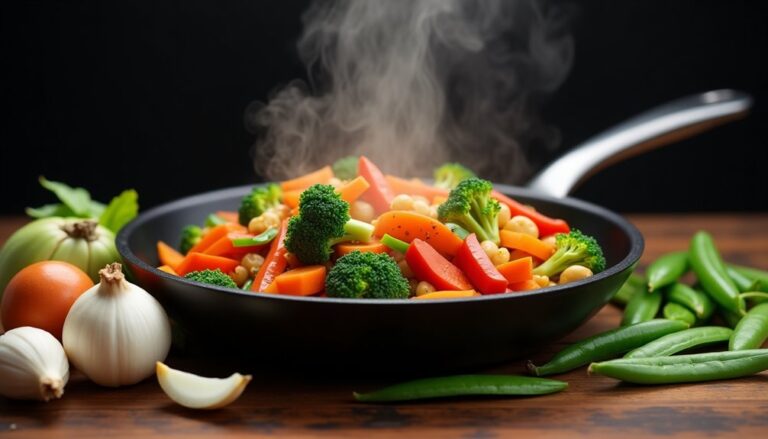
30-Minute Sheet Pan Chicken and Vegetables
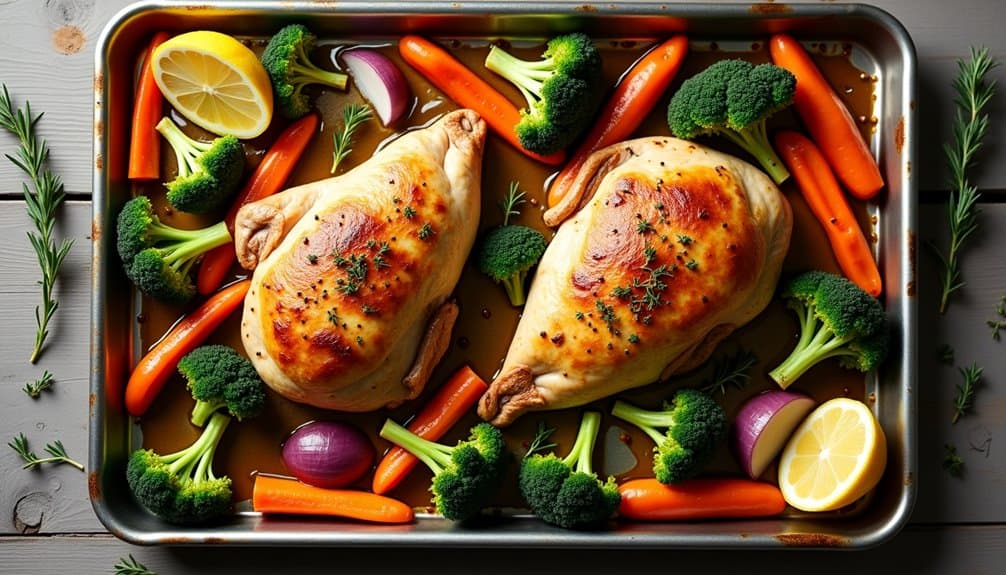
Sheet Pan Chicken and Vegetables is the ultimate weeknight dinner solution, combining protein and vegetables in one simple dish that's both nutritious and delicious. The beauty of this recipe lies in its simplicity – everything cooks together on a single pan, minimizing cleanup while maximizing flavor.
This versatile dish can be customized with different seasonal vegetables and various seasonings to suit your taste preferences. The chicken emerges tender and juicy while the vegetables roast to perfection, creating a complete meal that's ready in just 30 minutes.
Ingredients:
- 4 chicken breasts, boneless and skinless
- 2 cups broccoli florets
- 2 cups baby carrots
- 1 red bell pepper, sliced
- 1 medium onion, cut into wedges
- 3 tablespoons olive oil
- 2 teaspoons garlic powder
- 1 teaspoon dried thyme
- 1 teaspoon paprika
- 1 teaspoon salt
- 1/2 teaspoon black pepper
- 1 lemon
Preheat the oven to 400°F (200°C). Line a large sheet pan with parchment paper or foil for easy cleanup. In a large bowl, toss the vegetables with 2 tablespoons of olive oil and half of the seasonings. Arrange them on one side of the sheet pan. Rub the chicken breasts with the remaining olive oil and seasonings, then place them on the other side of the pan.
Bake for 20-25 minutes, or until the chicken reaches an internal temperature of 165°F (74°C) and the vegetables are tender and lightly browned. Squeeze fresh lemon juice over everything just before serving.
For best results, cut vegetables in similar sizes to ensure even cooking. If using larger chicken breasts, consider cutting them in half horizontally to maintain consistent cooking time with the vegetables. The sheet pan shouldn't be overcrowded – leave some space between ingredients to allow proper air circulation and prevent steaming.
Quick Mexican Rice and Bean Skillet
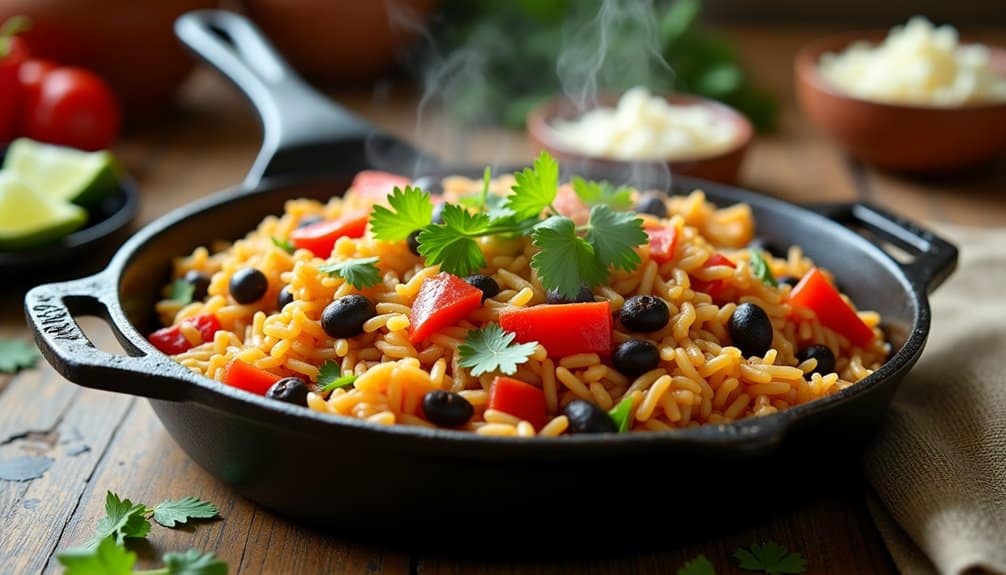
Quick Mexican Rice and Bean Skillet is a versatile one-pan meal that combines the heartiness of rice and beans with vibrant Mexican flavors. Perfect for busy weeknights, this dish delivers a satisfying combination of protein, carbohydrates, and vegetables in under 30 minutes.
This budget-friendly recipe can be customized based on available ingredients and personal preferences. The foundation of rice and beans creates a complete protein source, while the addition of fresh vegetables and Mexican seasonings transforms simple ingredients into a flavorful family meal.
Ingredients:
- 2 cups white rice
- 1 can (15 oz) black beans, drained and rinsed
- 1 can (14.5 oz) diced tomatoes
- 2 tablespoons olive oil
- 1 onion, diced
- 2 cloves garlic, minced
- 1 bell pepper, diced
- 2 cups chicken or vegetable broth
- 1 tablespoon chili powder
- 1 teaspoon ground cumin
- 1 teaspoon oregano
- Salt and pepper to taste
- Optional toppings: cilantro, lime wedges, shredded cheese
Heat oil in a large skillet over medium heat. Sauté onion, garlic, and bell pepper until softened, about 5 minutes. Add rice and toast for 2 minutes, stirring frequently. Pour in broth, diced tomatoes, and seasonings. Bring to a boil, then reduce heat, cover, and simmer for 15-18 minutes until rice is tender. Stir in black beans and cook for an additional 2-3 minutes until heated through.
For best results, use long-grain white rice and avoid stirring too frequently during cooking to prevent the rice from becoming mushy. The dish can be stored in an airtight container in the refrigerator for up to 3 days, and the flavors often improve overnight.
Classic Spaghetti and Meatballs
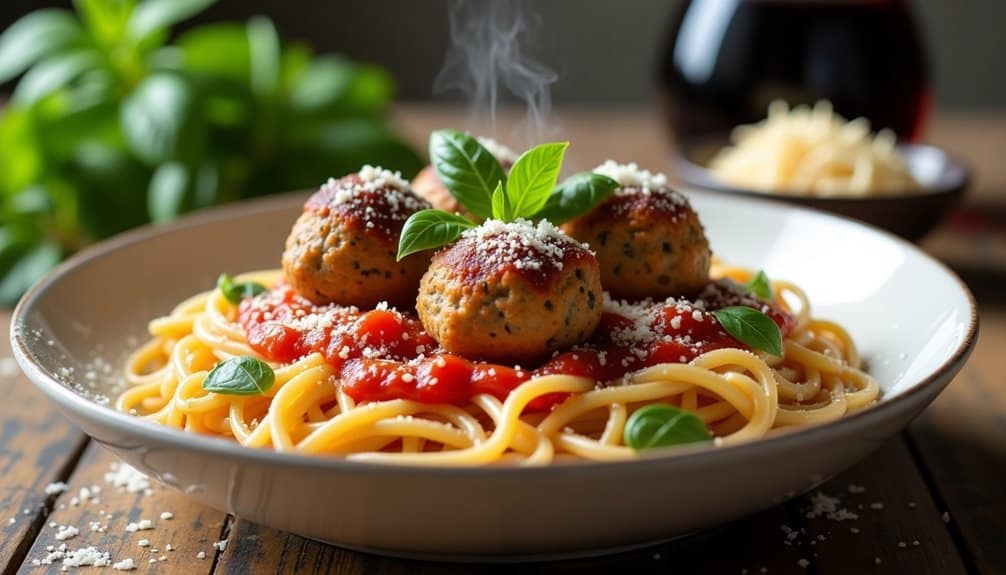
Classic Spaghetti and Meatballs is a timeless Italian-American dish that combines tender, seasoned meatballs with al dente pasta and rich tomato sauce. This hearty meal has become a staple of family dinners across the world, offering comfort and satisfaction in every bite.
The key to perfect spaghetti and meatballs lies in the balance of flavors and textures. The meatballs should be moist and flavorful, while the sauce needs to be rich and well-seasoned. When combined with properly cooked pasta, these elements create a harmonious dish that's greater than the sum of its parts.
Ingredients:
- 1 pound ground beef
- 1/2 pound ground pork
- 1/2 cup breadcrumbs
- 1/4 cup milk
- 2 eggs
- 1/2 cup grated Parmesan cheese
- 3 cloves garlic, minced
- 1 teaspoon dried oregano
- 1 teaspoon dried basil
- 1 pound spaghetti
- 2 (28 oz) cans crushed tomatoes
- 1 onion, finely diced
- 3 cloves garlic, minced
- 2 tablespoons olive oil
- Salt and pepper to taste
- Fresh basil for garnish
Begin by combining the ground meats, breadcrumbs, milk, eggs, Parmesan, minced garlic, and herbs in a large bowl. Mix gently with your hands until just combined, being careful not to overmix. Form into golf ball-sized meatballs and brown them in olive oil over medium heat, working in batches.
For the sauce, sauté onions and garlic in olive oil until translucent. Add crushed tomatoes and simmer for 20 minutes. Add the browned meatballs to the sauce and continue simmering for another 20-25 minutes. Meanwhile, cook the spaghetti in salted water according to package instructions until al dente. Serve the meatballs and sauce over the pasta, garnished with fresh basil and additional Parmesan cheese.
For best results, avoid overworking the meatball mixture, as this can make them tough. The meatballs can be made ahead and frozen for up to three months. When cooking the pasta, reserve a cup of pasta water before draining; this starchy water can be added to the sauce if needed to achieve the desired consistency.
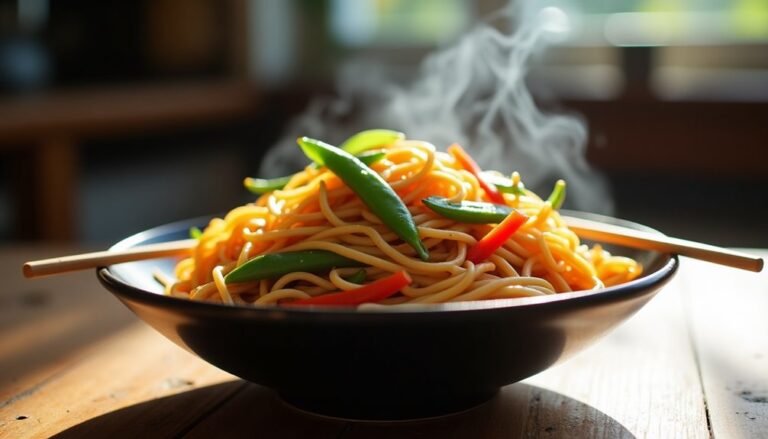
Easy Teriyaki Stir-Fry
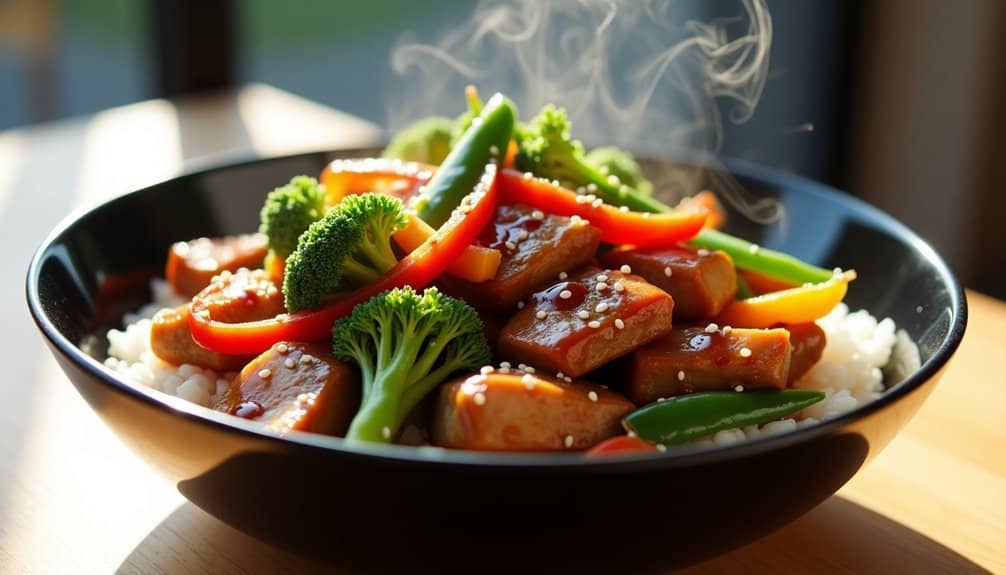
The key to a successful stir-fry lies in proper preparation and high-heat cooking. Having all ingredients chopped and ready before you start cooking ensures everything comes together smoothly, while cooking over high heat maintains the vegetables' crispness and creates a nice sear on the protein.
Ingredients:
- 1 pound chicken breast, sliced
- 2 cups broccoli florets
- 1 red bell pepper, sliced
- 1 carrot, julienned
- 1 cup snap peas
- 3 cloves garlic, minced
- 1 tablespoon ginger, grated
- 1/2 cup teriyaki sauce
- 2 tablespoons vegetable oil
- 2 cups cooked rice
- Sesame seeds for garnish
Start by heating oil in a large wok or skillet over medium-high heat. Add the chicken and cook until golden brown, about 5-6 minutes. Remove the chicken and set aside. In the same pan, add garlic and ginger, stirring quickly to prevent burning. Add the vegetables and stir-fry for 3-4 minutes until crisp-tender.
Return the chicken to the pan and add teriyaki sauce. Stir everything together and cook for an additional 2-3 minutes until the sauce is heated through and slightly thickened. Serve hot over rice and garnish with sesame seeds.
For best results, cut all ingredients into similar-sized pieces to ensure even cooking. If substituting different proteins or vegetables, maintain the same total volume to keep the sauce-to-ingredient ratio balanced. The dish can be made ahead and reheated, though the vegetables won't be as crisp. Store leftovers in an airtight container in the refrigerator for up to three days.
5-Ingredient Honey Garlic Salmon
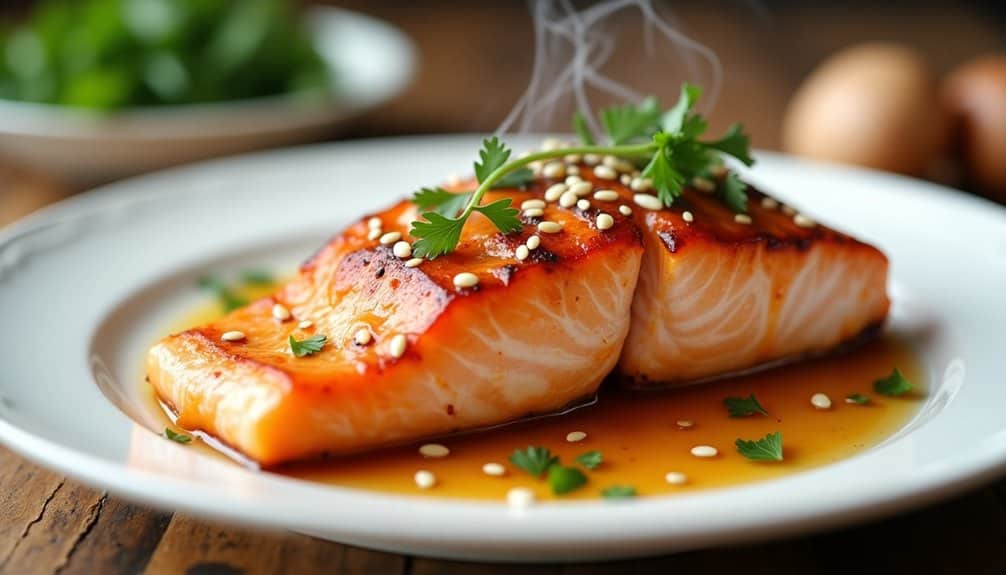
Honey Garlic Salmon is a delectable dish that combines sweet and savory flavors, creating a perfect balance that elevates the natural taste of the fish. The caramelized honey coating, infused with garlic, creates a glossy finish while keeping the salmon moist and tender on the inside.
This quick and easy recipe takes less than 30 minutes to prepare, making it an ideal choice for busy weeknight dinners. The sauce can be made ahead of time, and the cooking process is straightforward, requiring minimal kitchen experience to achieve restaurant-quality results.
- 4 salmon fillets (6 oz each)
- 4 tablespoons honey
- 3 cloves garlic, minced
- 2 tablespoons soy sauce
- 1 tablespoon olive oil
- 1 tablespoon butter
- 1 tablespoon lemon juice
- Salt and pepper to taste
- Optional garnish: chopped parsley, sesame seeds
Pat the salmon fillets dry with paper towels and season both sides with salt and pepper. In a small bowl, whisk together honey, minced garlic, soy sauce, and lemon juice until well combined. Heat olive oil and butter in a large skillet over medium-high heat. Once hot, place the salmon skin-side up and cook for 4 minutes until golden brown. Flip the salmon and cook for another 2 minutes, then pour the honey garlic sauce over the fillets. Continue cooking for 2-3 more minutes, occasionally spooning the sauce over the salmon, until the fish is cooked through and the sauce has thickened.
For best results, choose salmon fillets of equal thickness to ensure even cooking. The sauce will thicken quickly due to the honey, so keep a close eye on it to prevent burning. If it becomes too thick, add a tablespoon of water to thin it out. Remove the skin before serving if desired, and garnish with chopped parsley and sesame seeds for added texture and presentation.
Budget-Friendly Lentil Curry
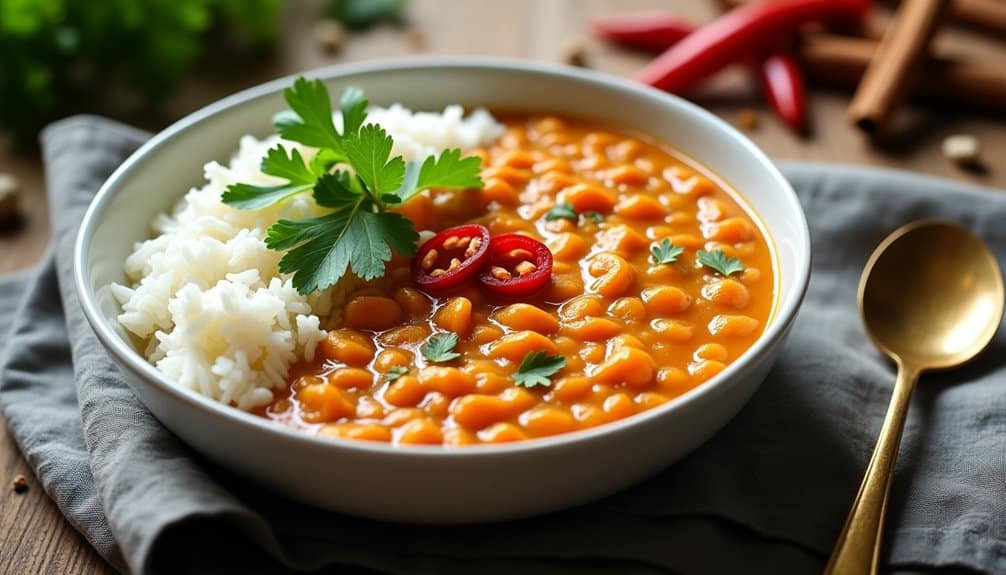
Budget-Friendly Lentil Curry makes an excellent weeknight dinner option that combines nutrition, flavor, and affordability. This hearty dish features protein-rich lentils simmered in aromatic spices and creamy coconut milk, creating a satisfying meal that costs just a few dollars per serving.
This Indian-inspired curry transforms simple ingredients into a complex, flavorful dish that can feed a family of four with leftovers to spare. Red lentils are ideal for this recipe as they cook quickly and naturally break down to create a thick, creamy consistency that pairs perfectly with rice or flatbread.
Rinse the lentils thoroughly and set aside. Heat oil in a large pot over medium heat and sauté onions until translucent, about 5 minutes. Add garlic and ginger, cooking for another minute until fragrant. Stir in all the spices and cook for 30 seconds to bloom their flavors.
Add the lentils, diced tomatoes, coconut milk, and vegetable broth to the pot. Bring to a boil, then reduce heat and simmer for 20-25 minutes, stirring occasionally until the lentils are tender and the curry has thickened. Season with salt and pepper to taste.
For best results, toast the spices separately in a dry pan before adding them to the curry to enhance their flavors. The curry will thicken as it cools, so add extra broth if needed when reheating. Leftovers can be stored in an airtight container in the refrigerator for up to 5 days, and the flavor often improves the next day.
- 2 cups red lentils
- 1 large onion, diced
- 4 cloves garlic, minced
- 2 tablespoons ginger, grated
- 2 tablespoons curry powder
- 1 teaspoon ground cumin
- 1 teaspoon ground turmeric
- 1 can (14 oz) diced tomatoes
- 1 can (14 oz) coconut milk
- 4 cups vegetable broth
- 2 tablespoons oil
- Salt and pepper to taste
- Fresh cilantro for garnish
Simple Ground Beef Tacos

Simple Ground Beef Tacos are a weeknight dinner staple that brings the vibrant flavors of Mexican cuisine to your table in under 30 minutes. This family-friendly meal combines seasoned ground beef with fresh toppings, all wrapped in warm corn or flour tortillas.
The key to perfect ground beef tacos lies in properly seasoning the meat and preparing a variety of fresh toppings that allow everyone to customize their tacos to their liking. These tacos aren't only delicious but also versatile, as the filling can be used in other Mexican dishes like burritos, quesadillas, or taco salads.
Ingredients:
- 1 pound ground beef (80/20)
- 8-10 taco shells or tortillas
- 1 tablespoon chili powder
- 1 teaspoon ground cumin
- 1 teaspoon paprika
- 1/2 teaspoon garlic powder
- 1/2 teaspoon onion powder
- 1/2 teaspoon salt
- 1/4 teaspoon black pepper
- 1/2 cup diced onion
- 2 cloves minced garlic
- Shredded lettuce
- Diced tomatoes
- Shredded cheese
- Sour cream
- Diced avocado
- Fresh cilantro
- Lime wedges
Heat a large skillet over medium-high heat. Add the ground beef and break it up with a wooden spoon. Add the diced onion and minced garlic, cooking until the beef is no longer pink and the onions are translucent. Drain excess fat if desired. Add all the dried spices to the meat mixture and stir well to combine. Cook for an additional 2-3 minutes to allow the flavors to meld.
While the meat is cooking, prepare your toppings and warm your taco shells or tortillas according to package instructions. To assemble, fill each shell with the seasoned ground beef and top with your desired combination of lettuce, tomatoes, cheese, sour cream, avocado, and cilantro. Serve with lime wedges for squeezing over the top.
For best results, avoid overcooking the ground beef as it can become dry and crumbly. If using fresh tortillas, warm them in a dry skillet for about 30 seconds per side or wrap them in damp paper towels and microwave for 30 seconds. The meat mixture can be made ahead and reheated, making it perfect for meal prep or busy weeknights.
Creamy Tomato Soup With Grilled Cheese

This classic comfort food combination brings together smooth, rich tomato soup with the ultimate grilled cheese sandwich. The homemade soup delivers a depth of flavor that canned varieties simply can't match, while using simple pantry ingredients that are easy to find.
The key to this recipe's success lies in properly roasting the tomatoes and slowly sautéing the onions to develop a natural sweetness that balances the acidity of the tomatoes. When paired with a perfectly golden-brown grilled cheese sandwich made with quality bread and cheese, this meal becomes the ultimate comfort food experience.
Ingredients for Tomato Soup:
- 2 lbs ripe tomatoes
- 1 large onion, diced
- 4 garlic cloves, minced
- 2 tablespoons olive oil
- 4 cups vegetable broth
- 1 cup heavy cream
- 1 tablespoon tomato paste
- 1 teaspoon sugar
- Salt and pepper to taste
- Fresh basil leaves
Ingredients for Grilled Cheese:
- 8 slices sourdough bread
- 8 slices sharp cheddar cheese
- 4 tablespoons butter, softened
- Pinch of garlic powder
Begin the soup by roasting halved tomatoes in a 400°F oven for 30 minutes with olive oil, salt, and pepper. Meanwhile, sauté diced onions in a large pot until golden, about 10 minutes, then add minced garlic and cook for another minute. Add roasted tomatoes, broth, and tomato paste to the pot, bringing the mixture to a simmer for 20 minutes.
Transfer the soup to a blender (or use an immersion blender) and purée until smooth. Return to pot, stir in heavy cream and sugar, then season with salt and pepper. For the grilled cheese, butter one side of each bread slice, sprinkle with garlic powder, and layer cheese between unbuttered sides. Cook in a skillet over medium heat until golden brown and cheese melts, about 3-4 minutes per side.
For best results, use room temperature dairy products when making the soup, as cold cream can curdle when added to hot liquid. When making grilled cheese, avoid high heat as it can burn the bread before the cheese melts. The soup can be made ahead and refrigerated for up to 3 days, while grilled cheese is best served immediately alongside the hot soup.
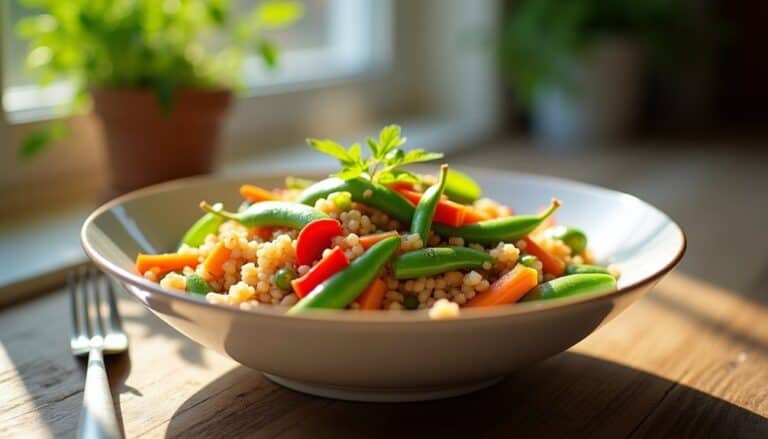
Quick Mediterranean Quinoa Bowl
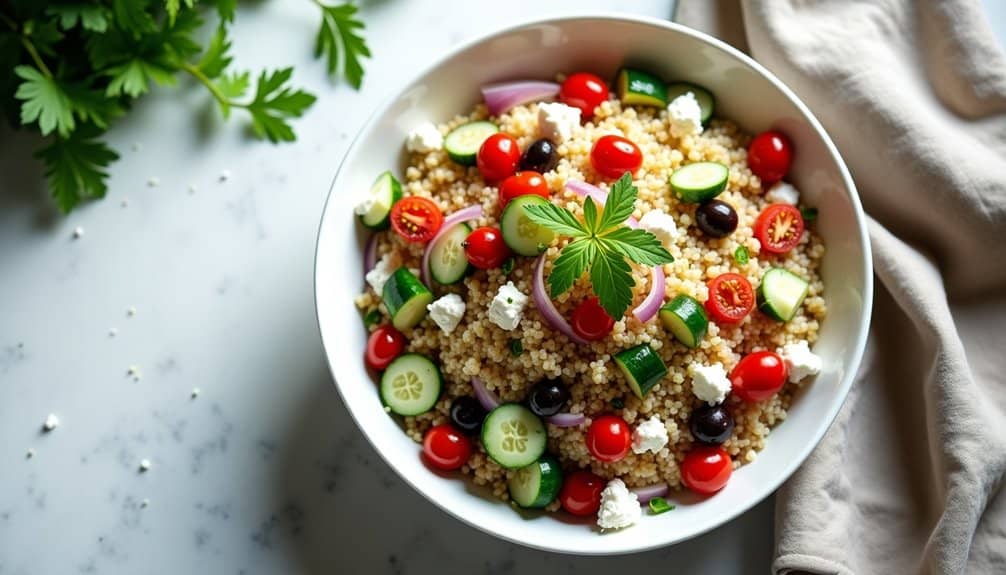
A Mediterranean Quinoa Bowl offers a perfect balance of protein, fiber, and fresh vegetables, making it an ideal choice for a nutritious weeknight dinner. This versatile dish combines the nutty flavor of quinoa with classic Mediterranean ingredients like chickpeas, cherry tomatoes, cucumber, and feta cheese.
The beauty of this recipe lies in its simplicity and room for customization. While quinoa cooks, you can prepare the fresh ingredients and whisk together a light lemon-olive oil dressing, allowing you to have dinner ready in under 30 minutes.
Ingredients:
- 1 cup quinoa
- 2 cups water
- 1 can chickpeas, drained and rinsed
- 2 cups cherry tomatoes, halved
- 1 cucumber, diced
- 1/2 red onion, finely chopped
- 1/2 cup kalamata olives
- 1/2 cup crumbled feta cheese
- 2 tablespoons olive oil
- 1 lemon, juiced
- 2 cloves garlic, minced
- 1 teaspoon dried oregano
- Salt and pepper to taste
- Fresh parsley for garnish
Rinse quinoa thoroughly under cold water. Add quinoa and water to a medium saucepan, bring to a boil, then reduce heat and simmer covered for 15-20 minutes until water is absorbed and quinoa is fluffy. While quinoa cooks, combine olive oil, lemon juice, minced garlic, oregano, salt, and pepper in a small bowl to make the dressing.
Once quinoa has cooled slightly, transfer to a large bowl and add chickpeas, tomatoes, cucumber, red onion, and olives. Pour the dressing over the mixture and toss gently to combine. Top with crumbled feta cheese and fresh parsley before serving.
For best results, allow the quinoa to cool for about 5 minutes before adding other ingredients to prevent the vegetables from wilting and the feta from melting. The dish can be served warm or cold, and leftovers will keep well in the refrigerator for up to 3 days.
No-Fuss Baked Chicken Thighs
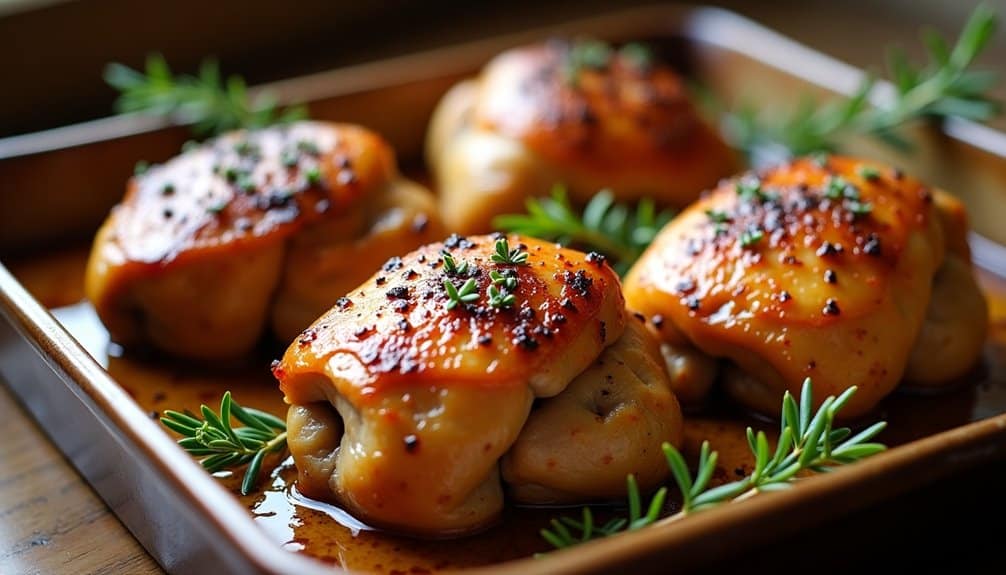
This simple recipe transforms humble chicken thighs into a delicious main course using basic pantry seasonings and a foolproof cooking method. The high-temperature roasting ensures golden-brown skin while keeping the meat moist and flavorful, all without requiring constant attention during cooking.
Ingredients:
- 6-8 bone-in, skin-on chicken thighs
- 2 tablespoons olive oil
- 1 teaspoon garlic powder
- 1 teaspoon paprika
- 1 teaspoon dried thyme
- 1 teaspoon salt
- 1/2 teaspoon black pepper
- 1/2 teaspoon onion powder
Preheat the oven to 425°F (220°C). Pat the chicken thighs dry with paper towels and place them in a large bowl. Drizzle with olive oil and sprinkle with all seasonings, making sure to coat both sides evenly. Arrange the chicken thighs skin-side up in a baking dish or rimmed baking sheet, leaving space between each piece.
Bake for 35-40 minutes until the skin is crispy and golden brown, and the internal temperature reaches 165°F (74°C) when checked with a meat thermometer. Let the chicken rest for 5-10 minutes before serving to allow the juices to redistribute throughout the meat.
For best results, bring the chicken thighs to room temperature 20-30 minutes before cooking, and avoid overcrowding the pan as this can create steam and prevent proper browning. If you notice excess fat accumulating during cooking, carefully drain it from the pan to maintain crispiness. The leftover chicken can be stored in an airtight container in the refrigerator for up to 4 days.
15-Minute Shrimp Scampi
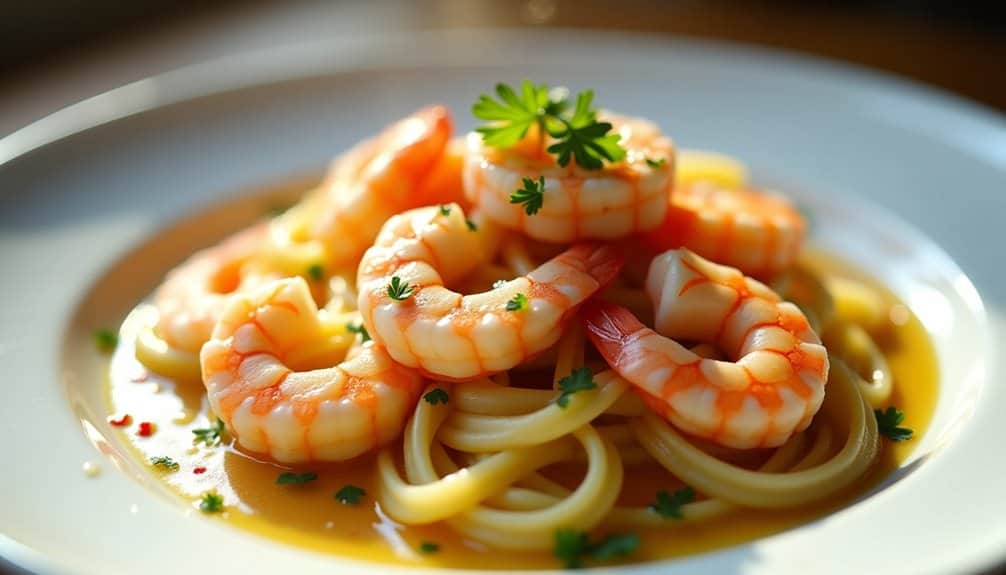
Minute Shrimp Scampi is a classic Italian-American dish that combines succulent shrimp with a rich, garlicky butter sauce over pasta. The dish has become a staple in many households due to its quick preparation time and impressive flavor profile that rivals restaurant-quality meals.
This simplified version can be prepared in under 15 minutes, making it perfect for busy weeknights while still maintaining the authentic taste of traditional shrimp scampi. The combination of white wine, lemon, and garlic creates a bright, flavorful sauce that perfectly coats both the shrimp and pasta.
- 1 pound large shrimp, peeled and deveined
- 8 ounces linguine or spaghetti
- 6 cloves garlic, minced
- 1/4 cup butter
- 1/4 cup olive oil
- 1/3 cup white wine
- 1 lemon, juiced
- 1/4 cup fresh parsley, chopped
- 1/2 teaspoon red pepper flakes
- Salt and black pepper to taste
Cook pasta according to package instructions in salted water until al dente. While pasta cooks, heat butter and olive oil in a large skillet over medium-high heat. Add garlic and red pepper flakes, cooking for 1 minute until fragrant. Add shrimp to the pan and cook for 2-3 minutes until they turn pink, then add white wine and lemon juice.
Let the sauce simmer for 2 minutes, then toss in the cooked pasta, adding a splash of pasta water if needed to create a silky sauce. Season with salt and black pepper, and finish with fresh parsley. The entire cooking process should take no more than 15 minutes from start to finish.
For best results, avoid overcooking the shrimp as they can become tough and rubbery. Also, choose a dry white wine like Pinot Grigio or Sauvignon Blanc, and make sure to bring your shrimp to room temperature before cooking to ensure even cooking throughout. Fresh garlic is strongly recommended over pre-minced varieties for the most authentic flavor.
Vegetarian Black Bean Enchiladas

Vegetarian Black Bean Enchiladas transform simple ingredients into a satisfying, protein-rich Mexican-inspired meal that's perfect for busy weeknights. The combination of seasoned black beans, melted cheese, and zesty enchilada sauce creates a comforting dish that appeals to both vegetarians and meat-eaters alike.
This recipe yields 8 enchiladas and can be prepared in advance, making it an excellent option for meal prep or entertaining. The dish delivers authentic Mexican flavors while maintaining a healthful profile through the use of fiber-rich beans, fresh vegetables, and whole-wheat tortillas.
Ingredients:
- 16 oz black beans, drained and rinsed
- 8 whole wheat tortillas
- 2 cups enchilada sauce
- 2 cups shredded Mexican cheese blend
- 1 medium onion, diced
- 2 bell peppers, diced
- 3 cloves garlic, minced
- 2 tbsp olive oil
- 1 tbsp chili powder
- 1 tsp ground cumin
- 1 tsp paprika
- Salt and pepper to taste
- Optional toppings: sour cream, cilantro, diced tomatoes, avocado
Heat the olive oil in a large skillet over medium heat. Sauté onions and peppers until softened, then add garlic and cook for another minute. Add black beans and seasonings, cooking until heated through. Mash about half the beans to create a thicker filling while leaving some whole for texture.
Preheat the oven to 375°F (190°C). Spread 1/2 cup of enchilada sauce in a 9×13 baking dish. Warm tortillas slightly to make them pliable, then fill each with the bean mixture and cheese. Roll tightly and place seam-side down in the baking dish. Pour remaining enchilada sauce over the top, sprinkle with remaining cheese, and bake for 20-25 minutes until the cheese is melted and bubbly.
For best results, avoid overfilling the tortillas as this can make them difficult to roll and lead to splitting. The enchiladas can be assembled up to 24 hours in advance and stored covered in the refrigerator until ready to bake. If making ahead, add the final layer of sauce and cheese just before baking to prevent the tortillas from becoming soggy.
Easy Weeknight Chili
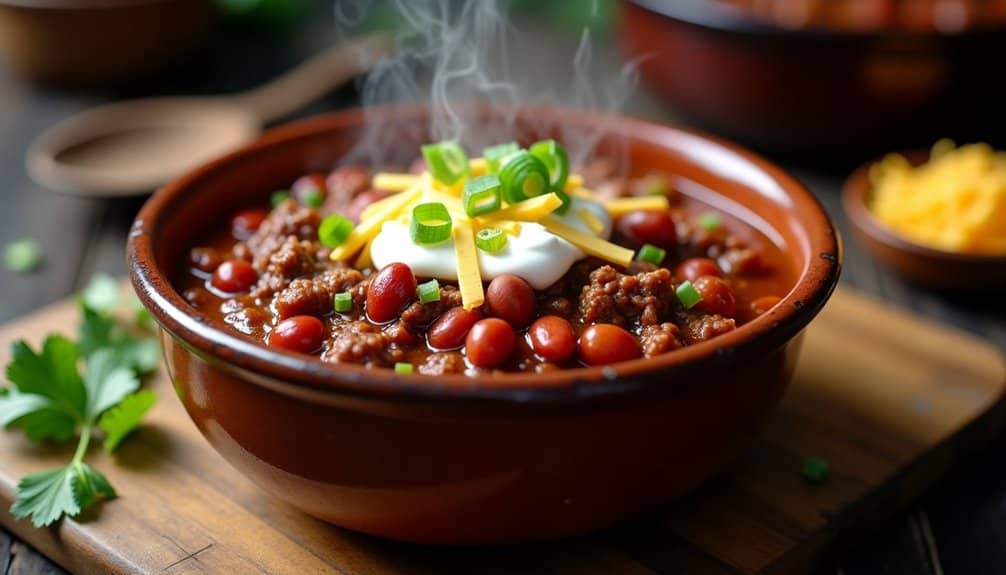
While traditional chili often requires long simmering times, this version delivers rich flavor in under an hour. The recipe is also versatile, allowing you to adjust the spice level and toppings to suit your preferences, making it an excellent choice for households with varying tastes.
Ingredients:
- 2 lbs ground beef
- 1 large onion, diced
- 3 cloves garlic, minced
- 2 cans (15 oz) kidney beans, drained
- 2 cans (14.5 oz) diced tomatoes
- 1 can (8 oz) tomato sauce
- 2 tablespoons chili powder
- 1 tablespoon ground cumin
- 1 teaspoon paprika
- 1 teaspoon oregano
- Salt and pepper to taste
- 2 tablespoons olive oil
Brown the ground beef in a large pot over medium-high heat, breaking it into small pieces. Once browned, remove the meat and set aside. In the same pot, heat olive oil and sauté onions until translucent, about 5 minutes. Add garlic and cook for another minute. Return the meat to the pot and add all remaining ingredients.
Bring the mixture to a boil, then reduce heat and simmer for 30-40 minutes, stirring occasionally. The chili will thicken as it cooks, and the flavors will meld together. Taste and adjust seasonings as needed.
For best results, let the chili rest for 5-10 minutes before serving to allow it to thicken slightly. Store leftovers in an airtight container in the refrigerator for up to 4 days, or freeze for up to 3 months. The flavors often improve the next day, making this an excellent make-ahead meal option.
Pan-Seared Pork Chops With Apples

Pan-seared pork chops with apples is a classic comfort dish that combines savory and sweet flavors in perfect harmony. The natural sweetness of apples complements the rich, tender pork while creating a sophisticated yet simple meal that's perfect for busy weeknights.
This recipe serves four people and takes approximately 30 minutes to prepare from start to finish. The key to success lies in selecting bone-in pork chops, which retain more moisture during cooking, and firm cooking apples that hold their shape when heated.
- 4 bone-in pork chops (1-inch thick)
- 2 large firm apples (Honeycrisp or Granny Smith), sliced
- 3 tablespoons butter
- 2 tablespoons olive oil
- 1 tablespoon fresh thyme
- 2 cloves garlic, minced
- 1/2 cup chicken broth
- Salt and black pepper to taste
- 1 tablespoon brown sugar
Season pork chops generously with salt and pepper. Heat olive oil in a large skillet over medium-high heat until shimmering. Add pork chops and sear for 4-5 minutes on each side until golden brown and cooked through. Remove chops and set aside. In the same pan, add butter, apples, and garlic, cooking until apples are tender-crisp, about 5 minutes. Add chicken broth, thyme, and brown sugar, stirring to combine and scraping up any browned bits from the bottom of the pan.
Return pork chops to the pan and simmer for 2-3 minutes until the sauce thickens slightly and the pork is heated through. The internal temperature of the pork should reach 145°F (63°C).
For best results, let the pork chops rest at room temperature for 15-20 minutes before cooking, and avoid moving them around in the pan while searing. If the pork chops are too thick, you can finish them in a preheated 375°F oven for 5-8 minutes after searing. The apples should be sliced uniformly to ensure even cooking, and the sauce can be adjusted with additional broth if it becomes too thick.