15 Easy Healthy Food Recipes
You're about to discover 15 healthy recipes that'll transform your weekly meal prep without overwhelming your schedule. These kitchen-tested favorites combine fresh ingredients with simple techniques, giving you nutritious options for every meal of the day. From protein-packed breakfast bowls to colorful Buddha bowls for dinner, each recipe takes 30 minutes or less to prepare. Let's explore how these approachable dishes can make healthy eating both manageable and enjoyable.
Greek Yogurt Breakfast Bowl With Fresh Berries
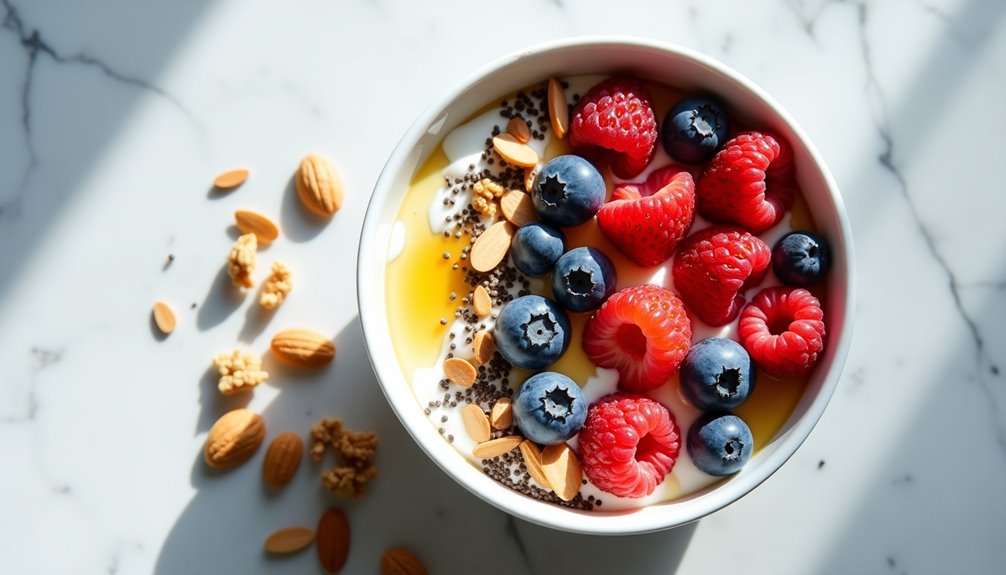
Greek yogurt breakfast bowls are a nutritious and delicious way to start your day, combining protein-rich yogurt with the natural sweetness of fresh berries. This simple yet satisfying dish provides a perfect balance of nutrients while being incredibly quick to prepare.
The beauty of this breakfast bowl lies in its versatility – you can customize it with different toppings and mix-ins to suit your taste preferences or what's available in your kitchen. While this recipe features fresh berries, you can experiment with various fruits, nuts, and granola combinations.
Ingredients:
- 1 cup plain Greek yogurt
- 1/2 cup mixed fresh berries (strawberries, blueberries, raspberries)
- 1 tablespoon honey
- 1/4 cup granola
- 1 tablespoon chia seeds
- 1 tablespoon sliced almonds
- 1/2 teaspoon vanilla extract (optional)
Start by selecting a medium-sized bowl and adding the plain Greek yogurt as the base. If desired, stir in the vanilla extract for additional flavor. Drizzle honey over the yogurt, adjusting the amount to achieve your preferred level of sweetness. Layer the fresh berries on top of the yogurt, arranging them in a visually appealing pattern.
Sprinkle the granola, chia seeds, and sliced almonds over the berries to add crunch and nutritional benefits. For the best texture, add these toppings just before eating to maintain their crispness.
To maximize freshness and presentation, wash and dry the berries thoroughly before using them, and store any leftover prepared ingredients separately. The yogurt can be prepared the night before, but add the crunchy toppings just before serving to prevent them from becoming soggy. For a creamier texture, allow the yogurt to sit at room temperature for 5-10 minutes before assembling the bowl.
Overnight Oats With Chia Seeds and Honey
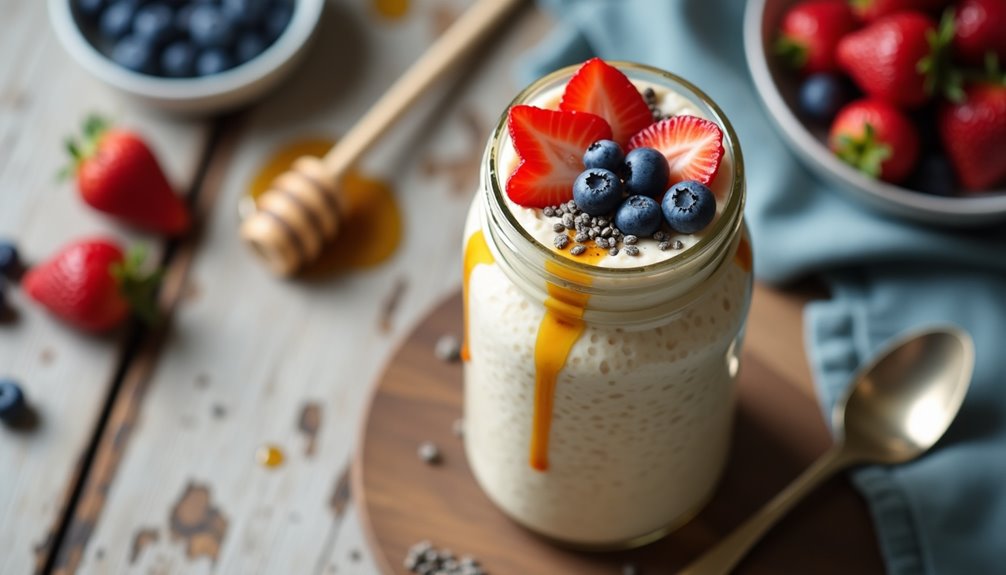
Overnight oats have become increasingly popular as a convenient and nutritious breakfast option that requires minimal morning preparation. This make-ahead meal combines the wholesome goodness of oats with the omega-rich benefits of chia seeds, all naturally sweetened with honey.
This version of overnight oats delivers a perfect balance of protein, fiber, and healthy fats, making it an ideal breakfast for busy mornings. The chia seeds not only add nutritional value but also create a pudding-like consistency that transforms basic oatmeal into a creamy, satisfying meal.
- 1 cup rolled oats
- 1 tablespoon chia seeds
- 1¼ cups milk (dairy or plant-based)
- 2 tablespoons honey
- ¼ teaspoon vanilla extract
- Pinch of salt
- Optional toppings: fresh fruits, nuts, or seeds
In a mason jar or container with a lid, combine the rolled oats and chia seeds. Add the milk, honey, vanilla extract, and salt. Stir the mixture thoroughly to ensure the honey is well distributed and the chia seeds aren't clumping together. Seal the container and refrigerate overnight or for at least 6 hours.
When ready to serve, give the oats a good stir. If the mixture is too thick, add a splash of milk to reach your desired consistency. Top with your choice of fresh fruits, nuts, or additional honey if desired.
For best results, use old-fashioned rolled oats rather than quick oats or steel-cut oats, as they provide the ideal texture. The oats can be stored in the refrigerator for up to 5 days, making it perfect for meal prep. For a warmer breakfast, microwave the mixture for 30-45 seconds before adding toppings.
Mediterranean Quinoa Salad
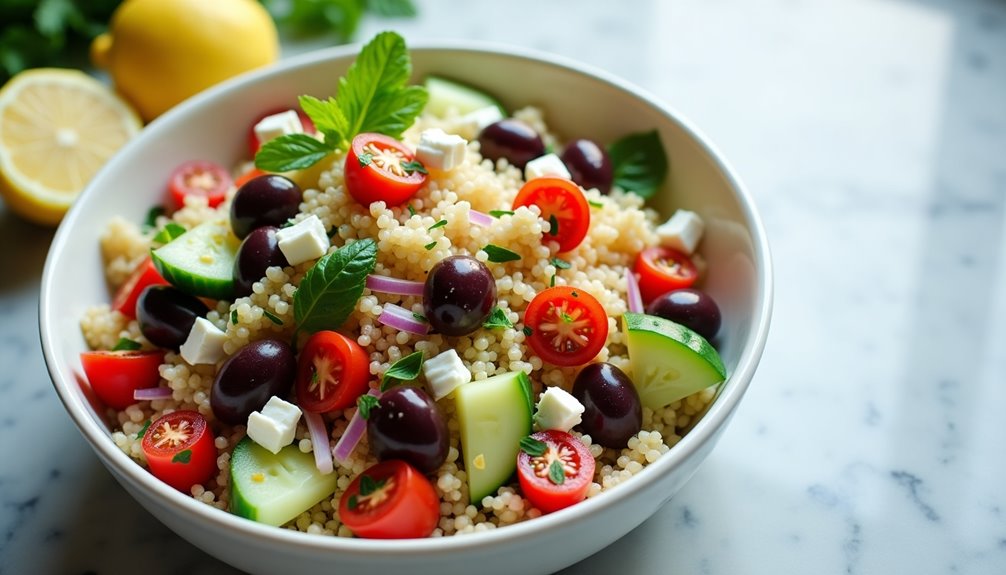
Mediterranean Quinoa Salad is a vibrant and nutritious dish that combines the protein-rich ancient grain quinoa with fresh Mediterranean ingredients. This colorful salad features crisp vegetables, tangy feta cheese, and briny olives, all dressed in a zesty lemon vinaigrette.
The beauty of this dish lies in its versatility and make-ahead potential. Perfect for meal prep, this salad holds up well in the refrigerator and actually tastes better after the flavors have had time to meld together. It works equally well as a light main course or as a substantial side dish.
Ingredients:
- 1 cup uncooked quinoa
- 2 cups water
- 1 cucumber, diced
- 1 pint cherry tomatoes, halved
- 1 red bell pepper, diced
- 1/2 red onion, finely chopped
- 1/2 cup kalamata olives, pitted and halved
- 1/2 cup crumbled feta cheese
- 1/4 cup fresh parsley, chopped
- 1/4 cup fresh mint, chopped
- 3 tablespoons extra virgin olive oil
- 2 tablespoons lemon juice
- 1 clove garlic, minced
- 1 teaspoon dried oregano
- Salt and black pepper to taste
Rinse quinoa thoroughly under cold water using a fine-mesh strainer. Combine quinoa and water in a medium saucepan, bring to a boil, then reduce heat to low, cover, and simmer for 15-20 minutes until water is absorbed and quinoa is tender. Fluff with a fork and let cool to room temperature.
In a large bowl, combine the cooled quinoa with cucumber, tomatoes, bell pepper, red onion, olives, feta cheese, parsley, and mint. In a separate small bowl, whisk together olive oil, lemon juice, garlic, oregano, salt, and pepper. Pour the dressing over the salad and toss gently to combine.
For best results, refrigerate the salad for at least 30 minutes before serving to enhance the flavors. Keep raw onions in ice water for 10 minutes before adding them to the salad to reduce their sharp bite. The salad can be stored in an airtight container in the refrigerator for up to 5 days, though the vegetables will soften slightly over time.
Grilled Chicken and Avocado Wrap
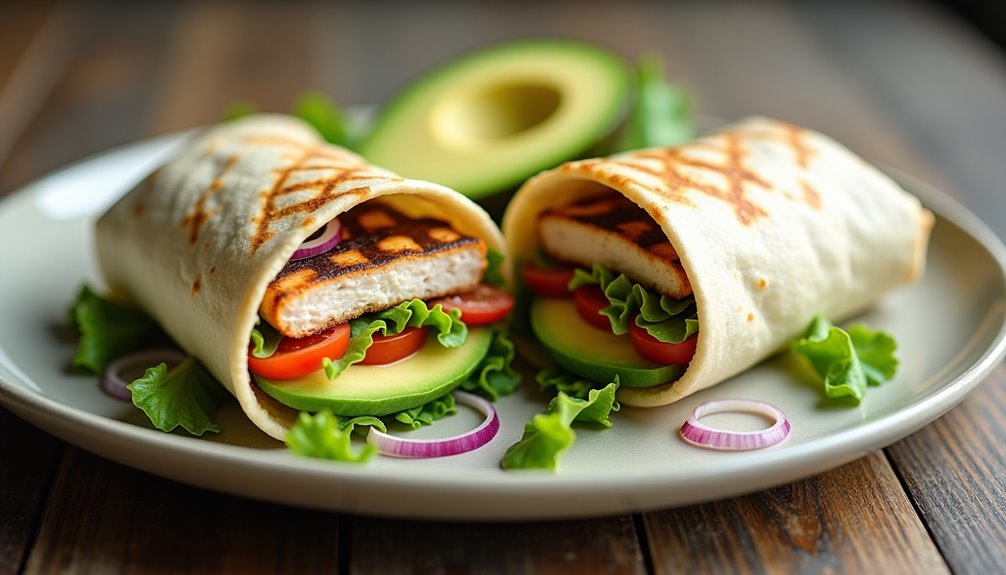
Grilled chicken and avocado wraps offer a perfect balance of lean protein, healthy fats, and fresh vegetables, making them an ideal choice for a nutritious lunch or light dinner. This versatile dish combines the smoky flavors of grilled chicken with the creamy texture of ripe avocados, all wrapped in a soft tortilla.
The beauty of this recipe lies in its simplicity and adaptability. While maintaining its healthy core ingredients, you can customize the wrap with various vegetables and seasonings to suit your taste preferences. The combination of warm grilled chicken and cool avocado creates an appealing temperature contrast that enhances the overall eating experience.
Ingredients:
- 2 chicken breasts
- 4 large tortilla wraps
- 2 ripe avocados
- 1 cup lettuce, shredded
- 1 tomato, diced
- 1/4 red onion, thinly sliced
- 2 tablespoons olive oil
- 1 lime
- Salt and pepper to taste
- 1 teaspoon garlic powder
- 1 teaspoon paprika
Season the chicken breasts with olive oil, garlic powder, paprika, salt, and pepper. Grill the chicken on medium-high heat for 6-7 minutes per side until fully cooked and internal temperature reaches 165°F (74°C). Let the chicken rest for 5 minutes before slicing into strips.
While the chicken rests, mash the avocados in a bowl with lime juice, salt, and pepper. Warm the tortillas slightly. Layer each tortilla with mashed avocado, grilled chicken strips, shredded lettuce, diced tomatoes, and red onion slices. Fold in the sides of the tortilla and roll tightly from bottom to top.
For best results, slice avocados just before serving to prevent browning, and ensure the chicken isn't too hot when assembling to avoid wilting the lettuce. The wraps can be prepared in advance and stored in the refrigerator for up to 4 hours, but the tortillas may become slightly soggy if left longer.
Roasted Sweet Potato and Black Bean Buddha Bowl
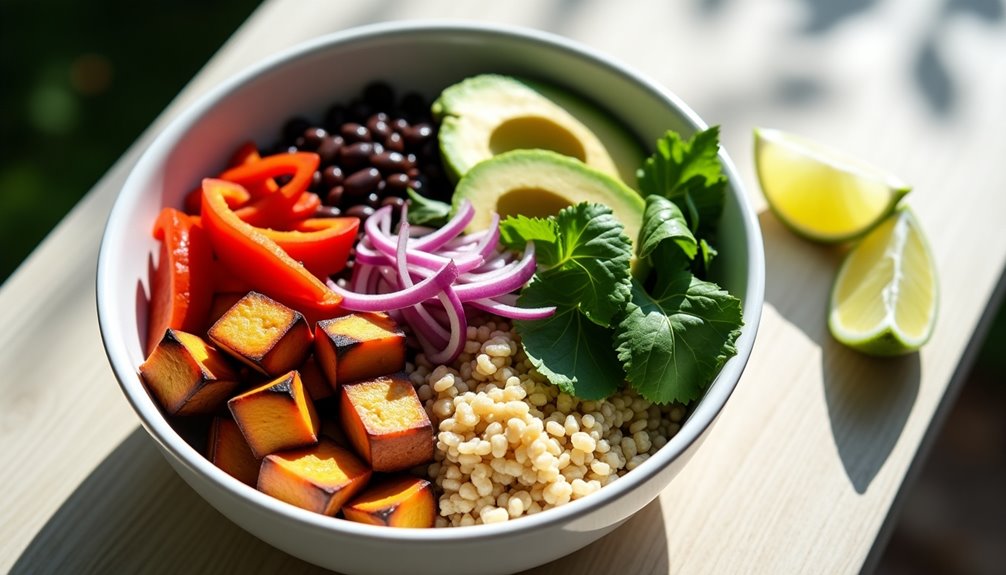
Roasted Sweet Potato and Black Bean Buddha Bowl is a nutrient-rich, plant-based meal that combines warm, tender sweet potatoes with protein-packed black beans and fresh vegetables. This colorful bowl delivers a perfect balance of complex carbohydrates, plant protein, and healthy fats while remaining incredibly satisfying.
This versatile dish can be customized based on seasonal vegetables and personal preferences. The combination of roasted sweet potatoes' natural sweetness with the earthiness of black beans creates a hearty base, while fresh vegetables add crunch and vitamins. The dish works well for meal prep and can be enjoyed hot or cold.
Ingredients:
- 2 medium sweet potatoes, cubed
- 1 can black beans, drained and rinsed
- 2 cups cooked quinoa
- 2 cups fresh spinach
- 1 red bell pepper, sliced
- 1 avocado, sliced
- 1/4 red onion, thinly sliced
- 2 tablespoons olive oil
- 1 lime
- 1 teaspoon cumin
- 1 teaspoon paprika
- Salt and pepper to taste
- Optional: cilantro for garnish
Preheat the oven to 400°F (200°C). Toss sweet potato cubes with olive oil, cumin, paprika, salt, and pepper. Spread them on a baking sheet and roast for 25-30 minutes until tender and slightly crispy on the edges, stirring halfway through. While the sweet potatoes roast, warm the black beans in a saucepan over medium heat with a pinch of cumin and salt.
Assemble the bowls by creating a base of quinoa, then arranging the roasted sweet potatoes, black beans, fresh spinach, bell pepper slices, and red onion in sections. Top with avocado slices, a squeeze of lime juice, and optional cilantro. The components can be arranged in any order that appeals to you visually.
For best results, roast the sweet potatoes until they develop a slight caramelization on the edges, as this enhances their natural sweetness. The bowl components can be prepared up to three days in advance and stored separately in the refrigerator, making this an excellent meal prep option. Just wait to cut the avocado until ready to serve to prevent browning.
Three-Bean Vegetarian Chili
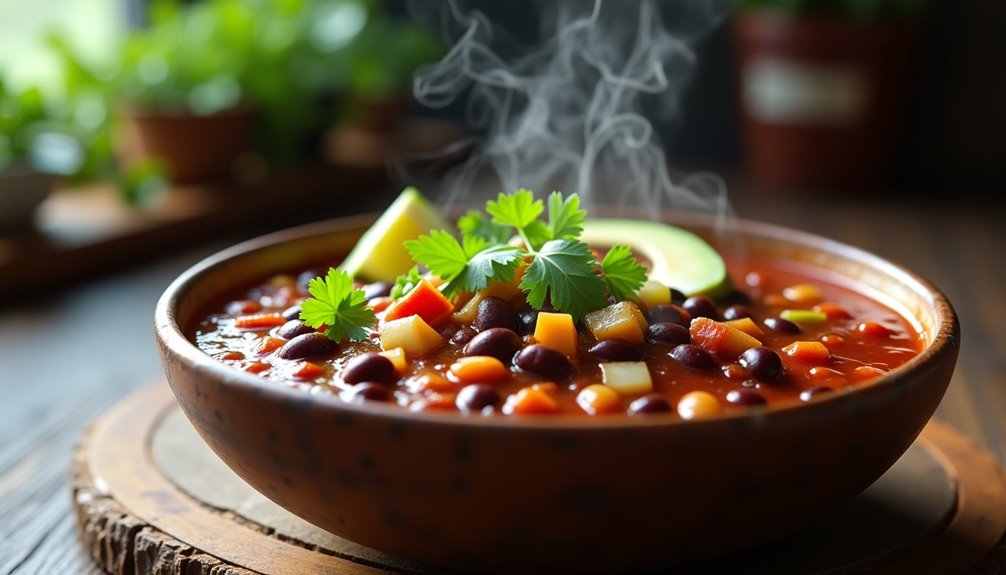
Three-Bean Vegetarian Chili is a hearty, protein-rich dish that brings together the robust flavors of different legumes with traditional Mexican spices. This meat-free version delivers the same satisfying texture and deep flavors as traditional chili while being completely plant-based.
Perfect for cold weather or meal prep, this recipe yields 6-8 servings and can be easily frozen for future meals. The combination of beans provides essential nutrients, fiber, and protein, while the blend of spices creates a complex flavor profile that develops further when left to simmer.
Ingredients:
- 1 can black beans, drained and rinsed
- 1 can kidney beans, drained and rinsed
- 1 can pinto beans, drained and rinsed
- 2 medium onions, diced
- 3 cloves garlic, minced
- 2 bell peppers, chopped
- 2 carrots, diced
- 2 celery stalks, diced
- 2 cans diced tomatoes
- 2 tablespoons olive oil
- 2 tablespoons chili powder
- 1 tablespoon ground cumin
- 1 teaspoon paprika
- 1 teaspoon oregano
- Salt and pepper to taste
- 2 cups vegetable broth
Heat olive oil in a large pot over medium heat. Add onions, garlic, bell peppers, carrots, and celery, sautéing until the vegetables soften, about 5-7 minutes. Add all spices and cook for another minute to bloom their flavors. Pour in the tomatoes, vegetable broth, and all three types of beans. Bring to a boil, then reduce heat and simmer uncovered for 45-60 minutes, stirring occasionally.
For best results, allow the chili to cool slightly before serving. The flavors will continue to develop as it rests. This chili can be topped with various garnishes like diced avocado, fresh cilantro, lime wedges, or dairy-free sour cream for extra flavor and texture.
Optional tip: Adding a tablespoon of cocoa powder during cooking will create deeper, richer flavors, and a splash of lime juice at the end helps brighten the entire dish. If storing, keep in an airtight container in the refrigerator for up to 5 days, or freeze for up to 3 months.
Sheet Pan Salmon With Roasted Vegetables
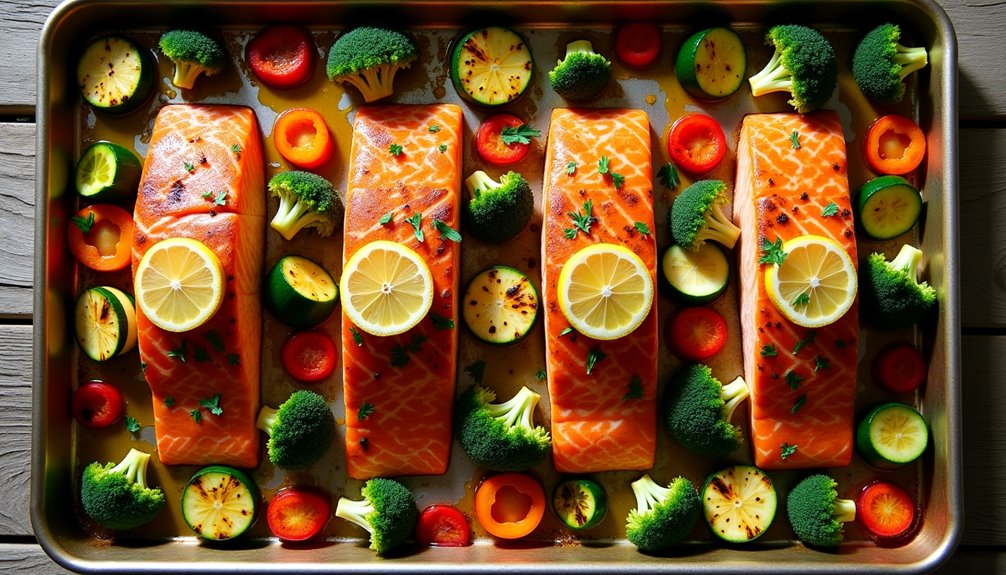
Sheet pan dinners have revolutionized weeknight cooking by combining protein and vegetables in one easy-to-clean pan. This salmon and roasted vegetable combination delivers a perfect balance of healthy omega-3 fatty acids, protein, and fiber-rich vegetables, all while requiring minimal prep time and cleanup.
The key to this recipe's success lies in timing the ingredients properly, ensuring that both the salmon and vegetables are cooked to perfection. The vegetables need to start first, as they require longer cooking time, while the salmon joins later to prevent overcooking and maintain its moistness.
Ingredients:
- 4 salmon fillets (6 oz each)
- 2 cups broccoli florets
- 2 medium carrots, sliced
- 1 red bell pepper, chopped
- 1 medium zucchini, sliced
- 2 tablespoons olive oil
- 2 tablespoons lemon juice
- 4 garlic cloves, minced
- 1 teaspoon dried thyme
- 1 teaspoon dried rosemary
- Salt and pepper to taste
- 1 lemon, sliced (for garnish)
Preheat the oven to 400°F (200°C). Toss the prepared vegetables with olive oil, half the garlic, thyme, rosemary, salt, and pepper. Spread them evenly on a large sheet pan and roast for 15 minutes. While the vegetables roast, prepare the salmon by patting it dry and seasoning with remaining garlic, salt, pepper, and a drizzle of olive oil and lemon juice.
After the initial 15 minutes, push the vegetables to the sides of the pan and place the salmon fillets in the center. Return the pan to the oven and cook for an additional 12-15 minutes, or until the salmon is cooked through and flakes easily with a fork, and the vegetables are tender and lightly caramelized.
For best results, ensure your sheet pan is large enough to avoid overcrowding, which can lead to steaming rather than roasting. Line the pan with parchment paper for easier cleanup, and bring the salmon to room temperature 15 minutes before cooking. The vegetables can be cut larger or smaller, but remember to keep them uniform in size for even cooking. If using frozen salmon, thaw completely and pat dry before cooking to achieve better browning.
Lentil and Spinach Soup
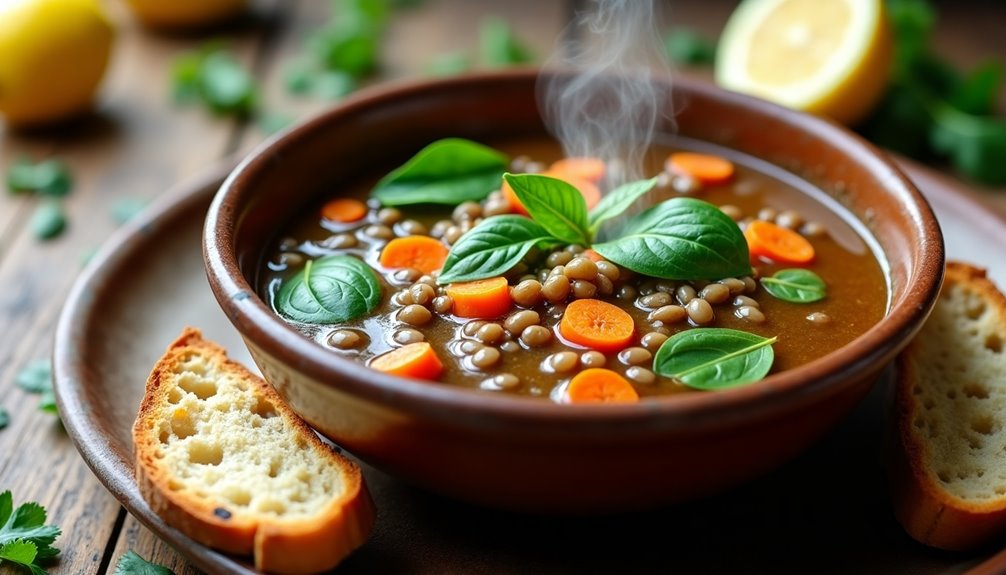
Lentil and spinach soup is a hearty, nutritious dish that combines protein-rich lentils with iron-packed spinach. This Mediterranean-inspired recipe creates a warming meal perfect for cold days while providing essential nutrients and fiber.
The combination of aromatic vegetables, earthy lentils, and fresh spinach creates a balanced flavor profile that's both satisfying and healthy. This soup can be prepared in advance and actually tastes better the next day as the flavors continue to develop.
- 1 cup dried brown or green lentils
- 8 cups vegetable or chicken broth
- 2 tablespoons olive oil
- 1 large onion, diced
- 3 carrots, chopped
- 3 celery stalks, chopped
- 4 garlic cloves, minced
- 2 bay leaves
- 1 teaspoon ground cumin
- 1 teaspoon paprika
- 6 cups fresh spinach
- Salt and pepper to taste
- 1 lemon, juiced
Rinse the lentils thoroughly and check for any debris. Heat olive oil in a large pot over medium heat and sauté onions, carrots, and celery until softened, about 5-7 minutes. Add garlic, cumin, and paprika, cooking for another minute until fragrant. Add the lentils, broth, and bay leaves to the pot.
Bring the mixture to a boil, then reduce heat and simmer covered for 25-30 minutes or until lentils are tender but not mushy. Remove bay leaves and add the fresh spinach, stirring until wilted. Season with salt, pepper, and lemon juice to taste.
The soup can be stored in an airtight container for up to 5 days in the refrigerator. To achieve the best texture, avoid overcooking the lentils, as they can become mushy. The spinach should be added at the very end to maintain its bright color and nutritional benefits. If using pre-washed spinach, make sure it's completely dry before adding to prevent the soup from becoming watery.
Turkey and Vegetable Stir-Fry
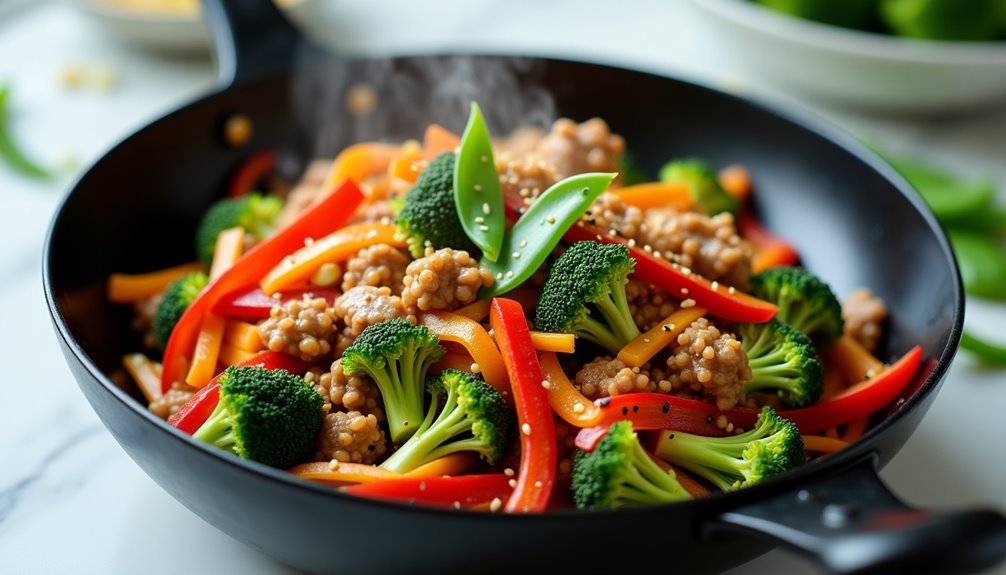
Turkey and Vegetable Stir-Fry is a nutritious and flavorful dish that combines lean protein with colorful vegetables in a savory Asian-inspired sauce. This quick-cooking meal is perfect for busy weeknights when you want something healthy but don't have hours to spend in the kitchen.
This versatile recipe can be adapted to use whatever vegetables you have on hand, making it an excellent option for using up produce before it spoils. The combination of turkey and vegetables provides a balanced meal rich in protein, vitamins, and minerals, while keeping the calorie count reasonable.
Ingredients:
- 1 lb ground turkey
- 2 cups broccoli florets
- 1 red bell pepper, sliced
- 2 carrots, julienned
- 1 cup snap peas
- 3 cloves garlic, minced
- 1 tablespoon ginger, grated
- 3 tablespoons soy sauce
- 1 tablespoon cornstarch
- 1/4 cup water
- 2 tablespoons vegetable oil
- 1 tablespoon sesame oil
- Salt and pepper to taste
- Optional: red pepper flakes
Heat vegetable oil in a large wok or skillet over medium-high heat. Add ground turkey and cook until browned, breaking it up into small pieces. Remove turkey and set aside. In the same pan, add sesame oil and stir-fry garlic and ginger until fragrant. Add vegetables and cook until crisp-tender.
Mix cornstarch with water and soy sauce in a small bowl. Return turkey to the pan with vegetables, pour the sauce mixture over everything, and cook until the sauce thickens, about 2-3 minutes. Season with salt and pepper to taste.
For best results, prepare all ingredients before starting to cook, as stir-frying moves quickly. The vegetables can be cut up to a day in advance and stored in airtight containers in the refrigerator. If the sauce becomes too thick, add water one tablespoon at a time until desired consistency is reached.
Chickpea and Kale Power Salad
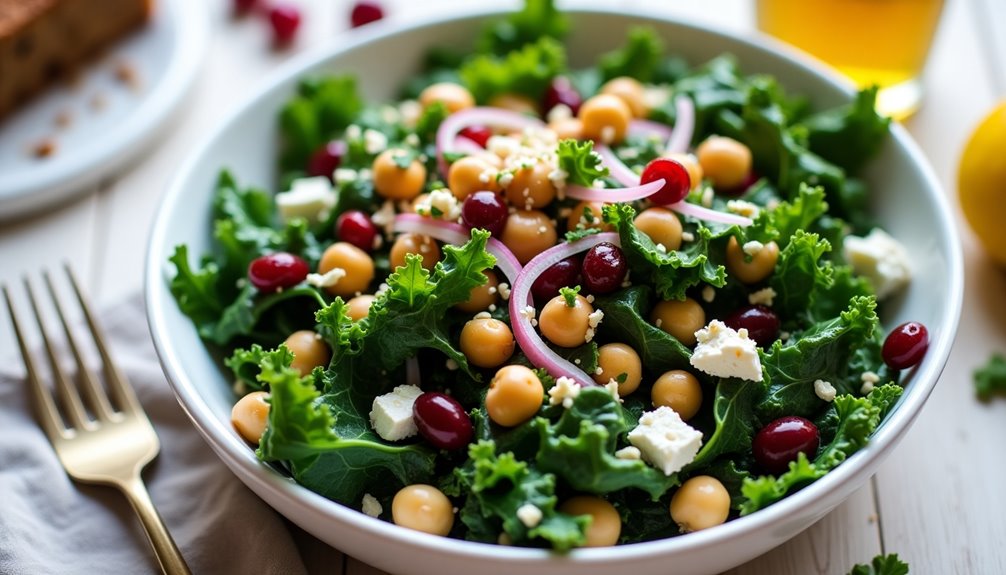
Chickpea and kale power salad combines nutrient-rich ingredients to create a satisfying and energizing meal. This plant-based dish delivers protein from chickpeas, essential vitamins from kale, and healthy fats from olive oil and nuts, making it an excellent choice for lunch or dinner.
The beauty of this salad lies in its versatility and make-ahead potential. The sturdy kale leaves hold up well when dressed, unlike more delicate greens, and the flavors actually improve as the ingredients marinate together.
Place the chopped kale in a large bowl and drizzle with half the olive oil. Massage the kale with your hands for 2-3 minutes until it becomes darker and softer in texture. In a separate bowl, whisk together the remaining olive oil, lemon juice, garlic, salt, pepper, and Dijon mustard to create the dressing. Add the chickpeas, red onion, almonds, and cranberries to the kale, then pour the dressing over the mixture and toss well to combine. If using feta cheese, gently fold it in last.
Let the salad rest for at least 15 minutes before serving to allow the flavors to meld together. The acidity from the lemon juice will continue to soften the kale, making it more tender and flavorful. This salad can be stored in an airtight container in the refrigerator for up to 3 days.
For best results, bring the salad to room temperature before serving, and give it a quick toss to redistribute the dressing. If making ahead, consider adding the almonds and feta cheese just before serving to maintain their texture. You can also customize the salad by substituting different nuts, seeds, or dried fruits based on your preferences.
Ingredients:
- 2 cans chickpeas, drained and rinsed
- 1 large bunch curly kale, stems removed and chopped
- 1/4 cup extra virgin olive oil
- 2 tablespoons lemon juice
- 2 cloves garlic, minced
- 1/2 red onion, thinly sliced
- 1/2 cup toasted almonds, chopped
- 1/2 cup dried cranberries
- 1/2 teaspoon sea salt
- 1/4 teaspoon black pepper
- 1 teaspoon Dijon mustard
- 1/2 cup crumbled feta cheese (optional)
Baked Herb Chicken With Brown Rice
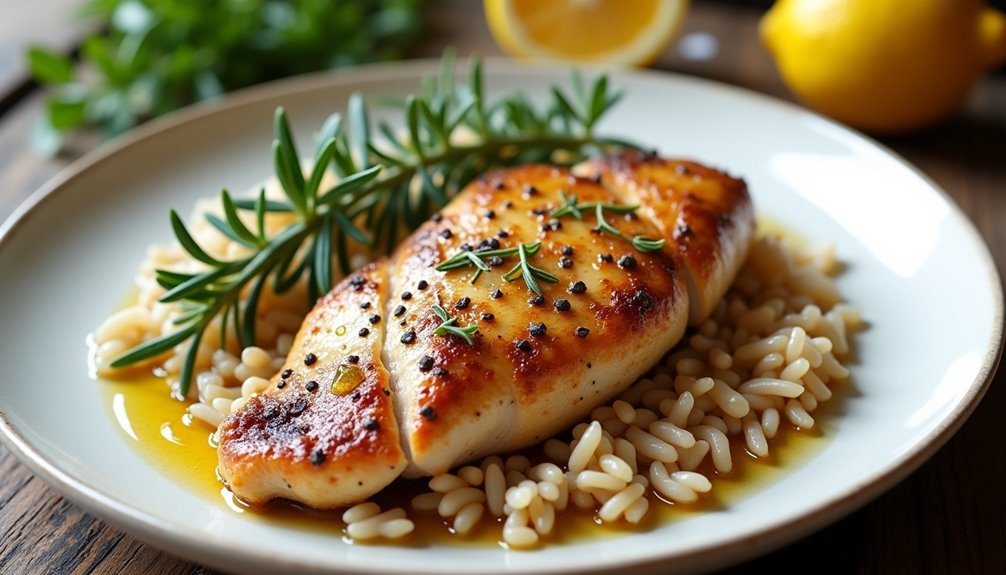
Baked herb chicken with brown rice is a wholesome, protein-rich meal that combines the succulence of well-seasoned poultry with nutritious whole grains. This dish offers a perfect balance of lean protein, complex carbohydrates, and aromatic herbs that create a satisfying dining experience.
The beauty of this recipe lies in its simplicity and versatility. While the chicken bakes in the oven, absorbing the flavors of fresh herbs and seasonings, the brown rice cooks separately, developing its characteristic nutty taste. The combination creates a complete meal that's both filling and nutritious.
Ingredients:
- 4 chicken breasts, boneless and skinless
- 2 cups brown rice
- 4 cups chicken broth
- 4 tablespoons olive oil
- 2 tablespoons fresh rosemary, chopped
- 2 tablespoons fresh thyme
- 3 cloves garlic, minced
- 1 lemon, juiced
- 1 teaspoon salt
- 1/2 teaspoon black pepper
- 1/2 teaspoon paprika
Begin by preheating the oven to 375°F (190°C). In a medium pot, combine brown rice with chicken broth and bring to a boil. Reduce heat, cover, and simmer for 45 minutes or until rice is tender.
Meanwhile, mix olive oil, herbs, garlic, lemon juice, and seasonings in a bowl. Place chicken breasts in a baking dish and coat them thoroughly with the herb mixture. Bake for 25-30 minutes or until the internal temperature reaches 165°F (74°C).
When the chicken is done, let it rest for 5 minutes before slicing. Serve the chicken over a bed of the cooked brown rice, spooning any remaining pan juices over the top.
For best results, allow the chicken to come to room temperature before baking, and avoid overcooking as this can lead to dry meat. Fresh herbs are preferred over dried ones for this recipe, but if using dried herbs, reduce the quantity by half. The rice can be made ahead of time and reheated when needed, making this dish suitable for meal preparation.
Cauliflower Rice Burrito Bowl
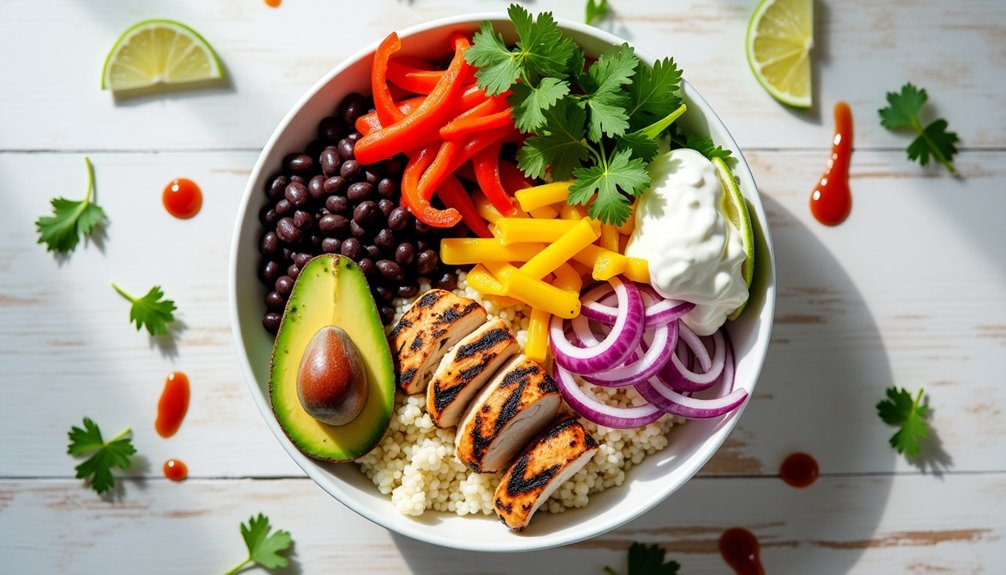
A healthy twist on the traditional burrito bowl, this cauliflower rice version delivers all the Mexican flavors you love while keeping carbs low and nutrients high. The dish combines fresh vegetables, lean protein, and aromatic spices to create a satisfying meal that's perfect for lunch or dinner.
This recipe takes approximately 30 minutes to prepare and serves 4 people. The cauliflower rice base provides a light, grain-free alternative that pairs perfectly with traditional burrito bowl toppings while adding extra vegetables to your diet.
Ingredients:
- 1 large head cauliflower
- 1 pound chicken breast
- 1 can black beans, drained and rinsed
- 2 bell peppers, sliced
- 1 red onion, diced
- 2 tablespoons olive oil
- 2 teaspoons chili powder
- 1 teaspoon cumin
- 1 teaspoon paprika
- 1 lime
- Salt and pepper to taste
- Optional toppings: avocado, salsa, cilantro, Greek yogurt
First, pulse the cauliflower in a food processor until it reaches a rice-like consistency. Heat 1 tablespoon of olive oil in a large skillet over medium heat and cook the cauliflower rice for 5-7 minutes until tender but not mushy. Season with salt and set aside.
In another pan, cook diced chicken breast with remaining olive oil and seasonings until golden brown and cooked through. While the chicken cooks, sauté the bell peppers and onions until they're slightly charred but still crisp.
Layer the cauliflower rice in bowls, top with seasoned chicken, black beans, sautéed vegetables, and your choice of toppings. Finish with a squeeze of fresh lime juice and chopped cilantro.
For best results, avoid overcooking the cauliflower rice as it can become mushy. If meal prepping, store the components separately and assemble just before eating. The cauliflower rice can be made ahead and frozen for up to 3 months. For a vegetarian version, replace the chicken with additional black beans or your preferred plant-based protein.
One-Pan Shrimp and Broccoli
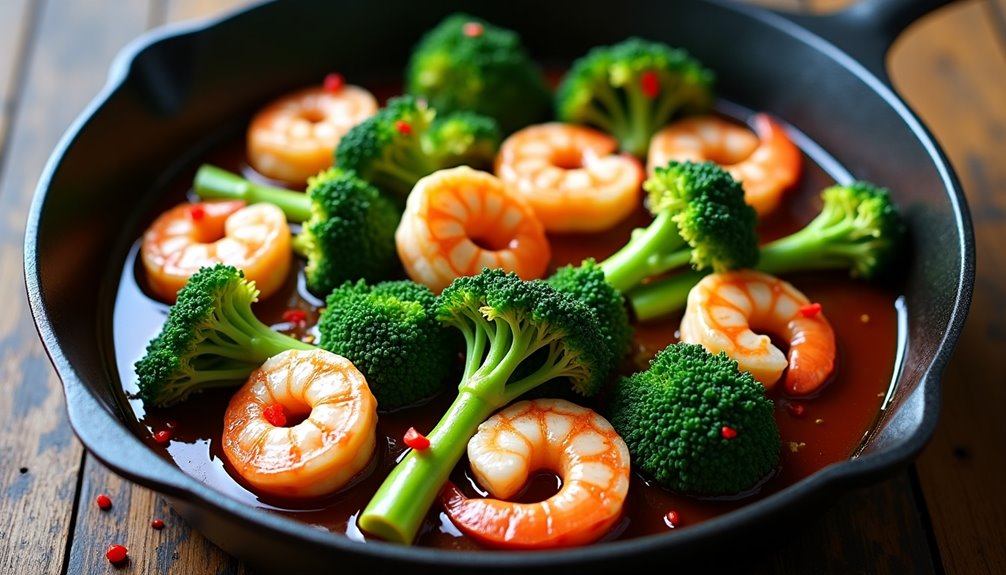
One-Pan Shrimp and Broccoli is a nutritious and delicious meal that combines lean protein with fiber-rich vegetables. The dish takes less than 30 minutes to prepare and requires minimal cleanup, making it perfect for busy weeknight dinners.
This recipe features tender shrimp and crisp-tender broccoli florets coated in a savory Asian-inspired sauce. The combination of garlic, ginger, and soy sauce creates a flavorful blend that perfectly complements both the seafood and vegetables.
Ingredients:
- 1 pound large shrimp, peeled and deveined
- 4 cups broccoli florets
- 3 tablespoons olive oil
- 4 cloves garlic, minced
- 1 tablespoon fresh ginger, grated
- 1/4 cup low-sodium soy sauce
- 1 tablespoon sesame oil
- 1 tablespoon cornstarch
- 1/4 cup water
- Salt and pepper to taste
- Red pepper flakes (optional)
Heat olive oil in a large skillet over medium-high heat. Add garlic and ginger, sautéing for 30 seconds until fragrant. Add broccoli and cook for 3-4 minutes until bright green. Push broccoli to one side of the pan and add shrimp to the empty space. Cook shrimp for 2-3 minutes per side until pink.
In a small bowl, whisk together soy sauce, sesame oil, cornstarch, and water. Pour the sauce over the shrimp and broccoli, stirring to combine. Cook for an additional 2-3 minutes until the sauce thickens and coats the ingredients evenly. Season with salt, pepper, and red pepper flakes if desired.
For best results, avoid overcrowding the pan as this can lead to steaming rather than proper searing. Make sure the shrimp are completely thawed and patted dry before cooking to achieve better browning. The broccoli can be cut into similar-sized pieces to ensure even cooking, and the dish can be served over rice or noodles to soak up the flavorful sauce.
Mason Jar Tuna Niçoise Salad
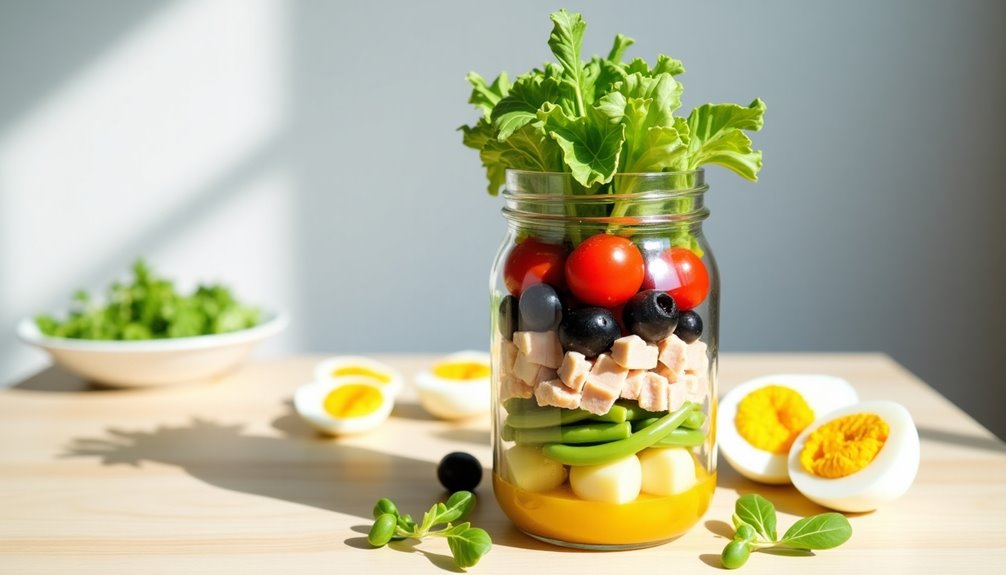
Mason Jar Tuna Niçoise Salad is a portable, healthy twist on the classic French salad that combines protein-rich tuna with fresh vegetables and a tangy vinaigrette. This layered salad keeps ingredients fresh and crisp, making it perfect for meal prep and on-the-go lunches.
The key to this mason jar version is the strategic layering of ingredients, which prevents soggy greens and ensures each component maintains its texture and flavor. When ready to eat, simply shake the jar to distribute the dressing and empty the contents onto a plate for a beautiful, restaurant-worthy presentation.
- 1 can chunk light tuna in water, drained
- 2 hard-boiled eggs, quartered
- 1 cup green beans, blanched
- 1 cup cherry tomatoes, halved
- ½ cup black olives, pitted
- ½ cup baby potatoes, cooked and quartered
- 2 cups mixed salad greens
- 2 tablespoons red wine vinegar
- 3 tablespoons extra virgin olive oil
- 1 teaspoon Dijon mustard
- Salt and pepper to taste
- 1 quart-sized mason jar
Start by making the vinaigrette by whisking together the red wine vinegar, olive oil, Dijon mustard, salt, and pepper. Pour this dressing into the bottom of your mason jar. Layer the ingredients in order from sturdiest to most delicate: begin with the potatoes, followed by tuna, green beans, tomatoes, olives, and eggs. Top with the salad greens, making sure to leave about an inch of space at the top of the jar.
When packing the ingredients, press them down gently to fit more into the jar, but avoid compressing them too much. Seal the jar tightly and refrigerate. The salad will keep fresh for up to 3 days when properly stored.
For best results, use fresh, crisp vegetables and make sure all ingredients are completely cooled before layering them in the jar. If using canned tuna, drain it thoroughly to prevent excess liquid from making the salad watery. The mason jar can be gently shaken before serving to distribute the dressing, or the contents can be emptied onto a plate where the dressing will naturally coat all ingredients.
Zucchini Noodles With Turkey Meatballs
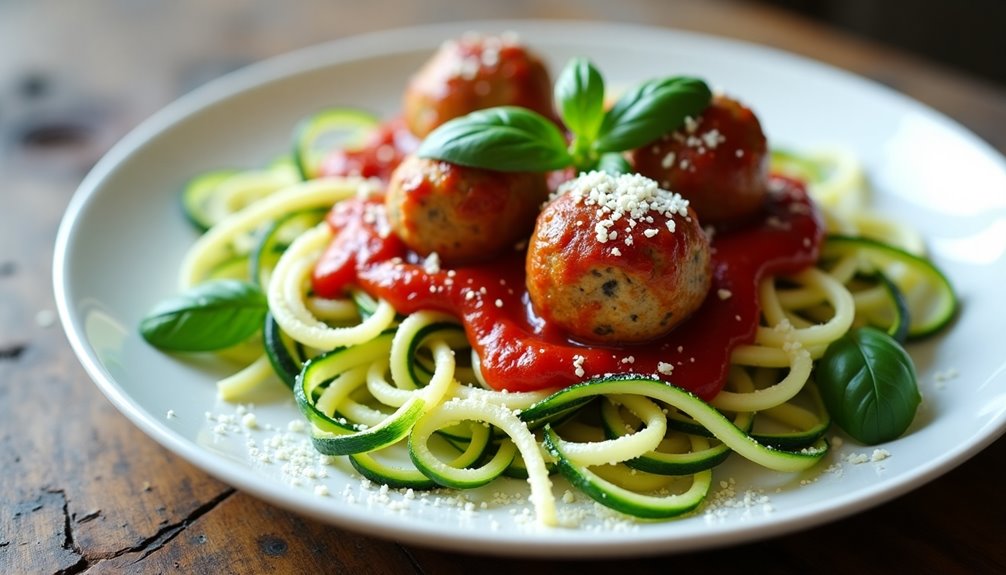
Zucchini noodles, also known as "zoodles," have become a popular low-carb alternative to traditional pasta. This healthy dish combines spiralized zucchini with lean turkey meatballs, creating a nutritious meal that's both satisfying and light. Perfect for those watching their carbohydrate intake or simply looking to incorporate more vegetables into their diet.
The combination of tender turkey meatballs and fresh zucchini noodles offers a balanced meal rich in protein and vegetables. When properly prepared, the zucchini maintains a slight crunch while the meatballs remain juicy and flavorful, making this dish a delightful alternative to traditional spaghetti and meatballs.
Ingredients:
- 4 medium zucchini
- 1 pound ground turkey
- 1/4 cup breadcrumbs
- 1 egg
- 2 cloves garlic, minced
- 1 tablespoon Italian seasoning
- 1/2 cup grated Parmesan cheese
- 1 teaspoon salt
- 1/2 teaspoon black pepper
- 2 tablespoons olive oil
- 2 cups marinara sauce
- Fresh basil for garnish
Using a spiralizer, create zucchini noodles from the zucchini and set aside. In a large bowl, combine ground turkey, breadcrumbs, egg, minced garlic, Italian seasoning, half of the Parmesan cheese, salt, and pepper. Form the mixture into 1-inch meatballs. Heat olive oil in a large skillet over medium heat and cook the meatballs until browned on all sides and cooked through, about 8-10 minutes.
Add marinara sauce to the skillet with the meatballs and simmer for 5 minutes. In a separate pan, sauté the zucchini noodles for 2-3 minutes until just tender but still slightly crisp. Plate the zucchini noodles, top with meatballs and sauce, and garnish with remaining Parmesan cheese and fresh basil.
To prevent watery zucchini noodles, avoid overcooking them and consider salting them beforehand to draw out excess moisture. Let them sit for 10 minutes, then pat dry with paper towels before cooking. The meatballs can be made ahead and frozen for up to three months, making this a convenient meal prep option.