15 Easy Instant Pot Recipes for Beginners
Have you ever wondered how to transform your Instant Pot from a kitchen gadget into your most trusted culinary companion? You'll discover that mastering this versatile appliance doesn't require years of cooking experience or complex techniques. From perfectly tender chicken and rice to creamy mac and cheese in minutes, these 15 beginner-friendly recipes will help you build confidence with your pressure cooker. Each recipe serves as a stepping stone toward becoming an Instant Pot pro, and you won't believe what's next on the menu.
Classic Chicken and Rice
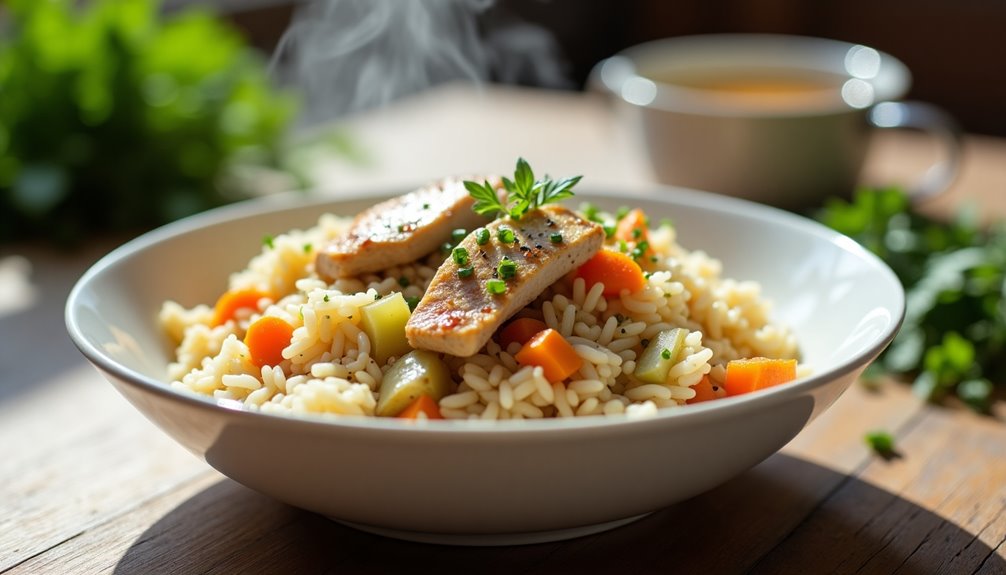
Classic Chicken and Rice in the Instant Pot combines comfort food with modern convenience, creating a hearty meal that's both satisfying and easy to prepare. This one-pot dish features tender chicken pieces and perfectly cooked rice, all infused with savory herbs and aromatics.
This beginner-friendly recipe transforms basic pantry staples into a flavorful meal that's ready in under 30 minutes, making it perfect for busy weeknight dinners. The pressure cooking process ensures the chicken stays moist while the rice absorbs all the delicious flavors from the broth and seasonings.
- 4 boneless, skinless chicken breasts
- 2 cups long-grain white rice
- 2½ cups chicken broth
- 1 medium onion, diced
- 3 garlic cloves, minced
- 2 tablespoons olive oil
- 1 teaspoon dried thyme
- 1 teaspoon dried oregano
- 1 bay leaf
- Salt and pepper to taste
- 2 tablespoons butter
- 1 cup diced carrots
- 1 cup diced celery
Set the Instant Pot to sauté mode and heat the olive oil. Season the chicken breasts with salt and pepper, then brown them for 2-3 minutes per side. Remove the chicken and set aside. In the same pot, sauté onions, carrots, celery, and garlic until softened.
Add the rice, broth, thyme, oregano, and bay leaf to the pot. Place the browned chicken on top of the rice mixture. Seal the Instant Pot and cook on high pressure for 10 minutes, followed by a 5-minute natural release. After 5 minutes, carefully release any remaining pressure.
For best results, let the dish rest for 5-10 minutes before serving to allow the rice to absorb any excess liquid. Some Instant Pot models may require slight adjustments to cooking time based on their specific settings. Always ensure the sealing ring is properly installed and the steam valve is in the sealing position before starting the pressure cooking process.
Hard-Boiled Eggs in Minutes
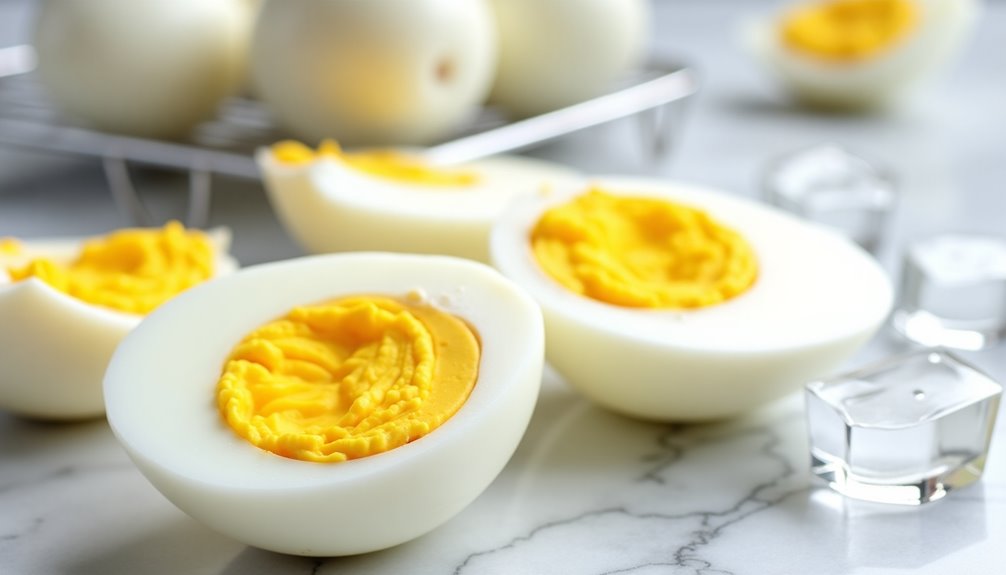
Perfect hard-boiled eggs can be a challenge to master on the stovetop, often resulting in overcooked, rubbery eggs with those unsightly green rings around the yolks. The Instant Pot changes everything by providing consistent results every time, delivering eggs that are easy to peel with perfectly cooked, creamy yolks.
Whether you're meal prepping for the week or making a batch of deviled eggs for a gathering, using your Instant Pot takes the guesswork out of cooking hard-boiled eggs. This method uses the 5-5-5 rule: 5 minutes of pressure cooking, 5 minutes of natural release, and 5 minutes in an ice bath.
Ingredients:
- 6-12 large eggs
- 1 cup water
- Ice
- Large bowl for ice bath
Place the trivet or egg rack in your Instant Pot and add 1 cup of water. Carefully place the eggs on the trivet, seal the lid, and ensure the valve is set to "sealing" position. Select Manual/Pressure Cook (depending on your model) and set for 5 minutes at high pressure. When the cooking cycle completes, allow for 5 minutes of natural pressure release, then carefully release any remaining pressure.
While the eggs are cooking, prepare an ice bath by filling a large bowl with cold water and ice. When the pressure has been released, transfer the eggs immediately to the ice bath using tongs. Let them cool for 5 minutes in the ice bath to stop the cooking process and make them easier to peel.
For best results, use eggs that are at least a week old, as very fresh eggs can be more difficult to peel. If your eggs crack during cooking, try placing them on a steamer basket instead of directly on the trivet, and avoid stacking them if possible. Store peeled eggs in an airtight container in the refrigerator for up to one week.
Creamy Mac and Cheese

Instant Pot mac and cheese transforms a classic comfort food into a quick and effortless meal. This creamy, cheesy dish can be ready in less than 30 minutes, making it perfect for busy weeknights or when you need a satisfying meal without much fuss.
The beauty of making mac and cheese in an Instant Pot lies in its one-pot simplicity and the perfect consistency achieved through pressure cooking. The pasta cooks to ideal tenderness while absorbing the flavors of the cooking liquid, creating the foundation for a rich, velvety sauce.
- 16 oz elbow macaroni
- 4 cups water
- 2 tablespoons butter
- 1 teaspoon salt
- 1/2 teaspoon garlic powder
- 2 cups sharp cheddar cheese, shredded
- 1 cup monterey jack cheese, shredded
- 1/2 cup heavy cream
- 1/4 teaspoon black pepper
- 1/2 teaspoon mustard powder
Add macaroni, water, butter, salt, and garlic powder to the Instant Pot. Seal the lid and set to Manual/Pressure Cook for 4 minutes. Once cooking is complete, perform a quick release of pressure. Open the lid and stir to break up any pasta that may have stuck together.
Switch the Instant Pot to the Keep Warm setting. Add both types of cheese gradually while stirring continuously. Pour in the heavy cream, black pepper, and mustard powder. Continue stirring until the cheese is completely melted and the sauce reaches your desired consistency. If the sauce seems too thick, add warm milk a tablespoon at a time until reaching the preferred texture.
For best results, shred your own cheese rather than using pre-shredded varieties, as fresh-shredded cheese melts more smoothly and creates a creamier sauce. The mac and cheese will continue to thicken as it cools, so serve immediately for the optimal creamy texture. If reheating leftovers, add a splash of milk and stir well while warming.
Beef and Vegetable Soup
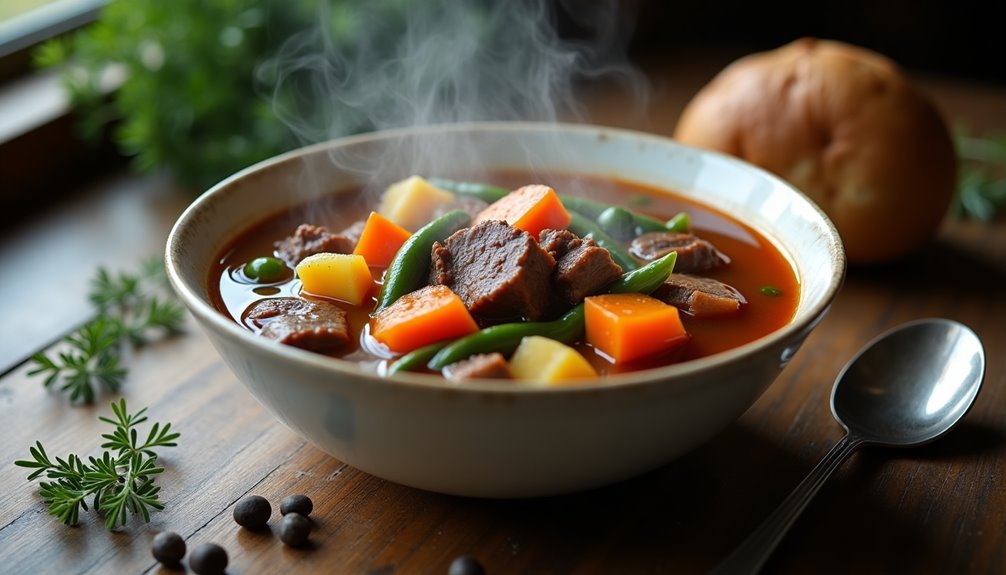
Beef and vegetable soup is a hearty, comforting meal that's perfect for busy weeknights or cold weather days. The Instant Pot transforms what would typically be a long-simmering dish into a quick and easy dinner, while still developing deep, rich flavors.
This recipe combines tender chunks of beef with a medley of vegetables in a savory broth, creating a complete meal in one pot. The pressure cooking process not only speeds up the cooking time but also helps tenderize the meat and meld the flavors together perfectly.
Ingredients:
- 2 lbs beef chuck, cut into 1-inch cubes
- 2 carrots, chopped
- 2 celery stalks, chopped
- 1 large onion, diced
- 3 garlic cloves, minced
- 2 potatoes, cubed
- 1 cup green beans, cut
- 2 cups beef broth
- 1 can (14 oz) diced tomatoes
- 2 tablespoons olive oil
- 1 bay leaf
- 1 teaspoon thyme
- Salt and pepper to taste
- 2 tablespoons flour (for thickening)
Set the Instant Pot to "Sauté" mode and heat the olive oil. Brown the beef cubes in batches until they develop a nice crust, then remove and set aside. In the same pot, sauté onions, carrots, and celery until softened. Add garlic and cook for another minute. Return the beef to the pot, add remaining ingredients except flour, and stir to combine.
Seal the Instant Pot and set to "Manual" or "Pressure Cook" (depending on your model) for 35 minutes at high pressure. Once cooking is complete, allow for 10 minutes of natural pressure release before releasing remaining pressure. If desired, create a slurry with the flour and a little broth, then stir into the soup using "Sauté" mode until it reaches desired thickness.
For best results, cut all vegetables in similar-sized pieces to ensure even cooking. The soup can be stored in the refrigerator for up to 4 days, and the flavors often improve the next day. If the soup becomes too thick during storage, thin it with additional broth when reheating.
Perfect White Rice
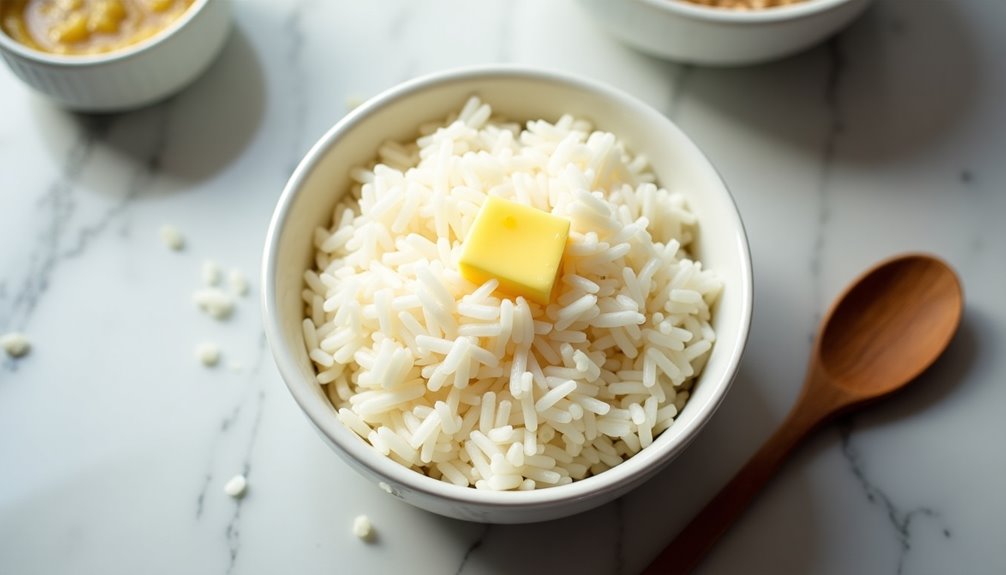
Using an Instant Pot to cook white rice eliminates the need to watch the pot or worry about rice sticking to the bottom. The sealed environment and precise pressure cooking create ideal conditions for rice to absorb water evenly, resulting in tender, separate grains that aren't mushy or undercooked.
- 2 cups white long-grain rice
- 2 cups water
- 1/2 teaspoon salt
- 1 tablespoon butter or oil (optional)
Rinse the rice in a fine-mesh strainer until the water runs clear to remove excess starch. Add the rinsed rice, water, salt, and butter (if using) to the Instant Pot. Close the lid and set the valve to sealing position. Select the "Rice" setting or manually set to high pressure for 4 minutes.
Once the cooking cycle is complete, allow for a 10-minute natural pressure release. After 10 minutes, carefully release any remaining pressure by turning the valve to venting position. Open the lid away from your face to avoid steam burns. Fluff the rice gently with a fork before serving.
To ensure the best results, maintain the 1:1 ratio of rice to water, and don't skip the rinsing step as it prevents clumping. If you're storing the rice for later use, let it cool completely before transferring to an airtight container. The rice will keep well in the refrigerator for up to 5 days, and you can reheat portions in the microwave with a sprinkle of water to restore moisture.
Fall-Apart Pot Roast
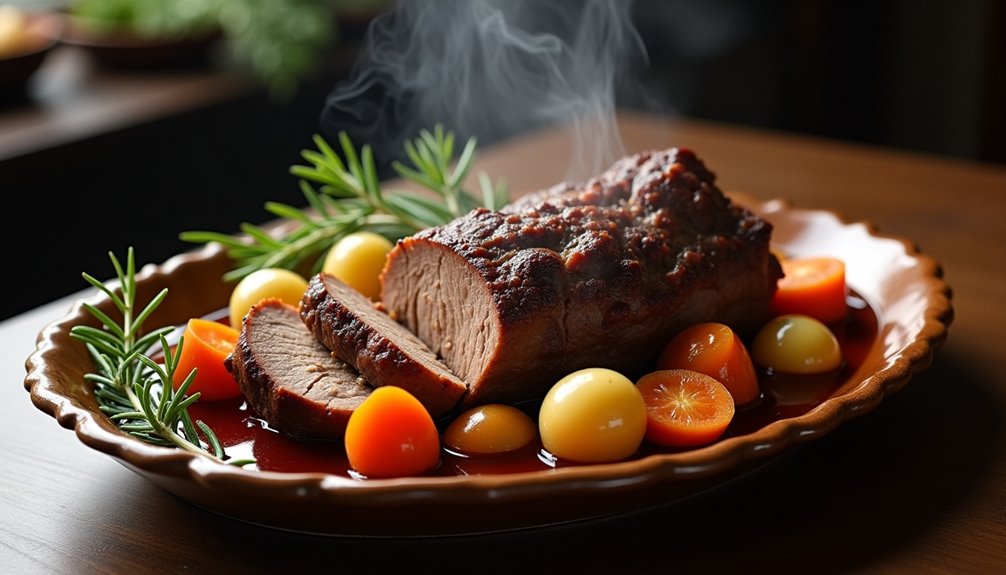
Fall-Apart Pot Roast is a classic comfort dish that transforms a tough cut of beef into tender, juicy meat through the magic of pressure cooking. The Instant Pot makes this traditionally time-consuming recipe achievable even on busy weeknights, reducing cooking time from hours to about 60 minutes.
This recipe creates a richly flavored, fork-tender pot roast complete with vegetables that cook in the same pot, absorbing all the savory meat juices. The result is a complete meal that delivers that slow-cooked taste without the long wait, making it perfect for novice Instant Pot users.
- 3-4 pound chuck roast
- 2 tablespoons olive oil
- 1 large onion, roughly chopped
- 4 carrots, cut into large chunks
- 3 celery stalks, cut into large pieces
- 4 garlic cloves, minced
- 2 cups beef broth
- 1 cup red wine (optional)
- 2 tablespoons tomato paste
- 1 tablespoon Worcestershire sauce
- 2 sprigs fresh rosemary
- 2 sprigs fresh thyme
- 2 bay leaves
- Salt and pepper to taste
- 1 pound baby potatoes
Season the roast generously with salt and pepper. Using the Instant Pot's sauté function, heat the olive oil and brown the meat on all sides until golden, about 3-4 minutes per side. Remove the roast and set aside.
In the same pot, sauté the onions, carrots, and celery until the onions are translucent. Add garlic and cook for another minute. Deglaze the pot with wine or broth, scraping up any brown bits from the bottom. Return the roast to the pot, add remaining ingredients, and seal the lid.
Cook on high pressure for 60 minutes, then allow for 15 minutes of natural release before quick-releasing any remaining pressure. Remove the roast and vegetables to a serving platter.
Optional: Set the Instant Pot to sauté and reduce the cooking liquid for 5-10 minutes to create a thicker sauce.
For best results, choose a well-marbled chuck roast and don't skip the browning step, as this develops crucial flavor. If your roast is larger than 4 pounds, add 10 minutes of cooking time per pound. For leftovers, slice the meat against the grain and store it in the cooking liquid to maintain moisture.
Quick Black Beans

These black beans come out perfectly tender while maintaining their shape, and they're incredibly versatile. They can be used in burritos, tacos, soups, or as a simple side dish. The cooking liquid becomes rich and flavorful, creating a natural sauce that's delicious when served with the beans.
Ingredients:
- 1 pound dried black beans
- 8 cups water
- 1 medium onion, diced
- 4 garlic cloves, minced
- 1 bay leaf
- 2 teaspoons salt
- 1 teaspoon ground cumin
- 1 tablespoon olive oil
- Optional: 1 jalapeño pepper, seeded and diced
Sort through the dried beans to remove any stones or debris, then rinse them thoroughly under cold water. Add all ingredients except the salt to the Instant Pot and stir to combine. Secure the lid and set the valve to sealing position. Cook on high pressure for 35 minutes, then allow for a natural pressure release for 20 minutes. After the natural release, carefully release any remaining pressure, then open the lid and stir in the salt.
For the best results, let the beans rest in their cooking liquid for about 10 minutes after adding the salt. This allows them to absorb the seasoning and achieve the perfect texture. If the beans are still firmer than you'd like, you can always reseal the pot and cook for an additional 5-10 minutes on high pressure.
The cooking time may need to be adjusted depending on the age of your beans – older beans typically require longer cooking times. If you plan to use the beans in a recipe that requires further cooking, like a soup or stew, consider reducing the initial cooking time by 5 minutes to prevent them from becoming too soft.
Hearty Chili

Classic Instant Pot chili delivers all the deep, rich flavors of slow-cooked beans and meat in a fraction of the time. This beginner-friendly recipe combines ground beef, beans, and aromatic vegetables with a blend of traditional chili spices to create a satisfying, warming meal.
The beauty of making chili in an Instant Pot lies in its simplicity and the pressure cooker's ability to infuse flavors quickly. While conventional stovetop chili requires hours of simmering, this version achieves the same depth of flavor in under an hour, making it perfect for weeknight dinners or last-minute gatherings.
- 2 lbs ground beef
- 2 cans (15 oz each) kidney beans, drained
- 1 can (14.5 oz) diced tomatoes
- 1 large onion, diced
- 2 bell peppers, chopped
- 3 cloves garlic, minced
- 2 tablespoons chili powder
- 1 tablespoon cumin
- 1 teaspoon paprika
- 1 teaspoon oregano
- 1 cup beef broth
- Salt and pepper to taste
- 2 tablespoons olive oil
Set Instant Pot to sauté mode and heat olive oil. Brown the ground beef with onions and garlic until meat is no longer pink, about 5-7 minutes. Add bell peppers and all dry seasonings, stirring to combine. Pour in the diced tomatoes, beef broth, and drained kidney beans.
Secure the Instant Pot lid and set valve to sealing position. Cancel sauté mode and select Manual/Pressure Cook on high pressure for 15 minutes. Once cooking is complete, allow for natural pressure release for 10 minutes, then carefully release any remaining pressure manually.
For best results, let the chili rest for 5-10 minutes after cooking to allow the flavors to settle and the sauce to thicken. The consistency can be adjusted by using the sauté function after pressure cooking – simmer uncovered to thicken, or add more broth to thin. Leftovers can be stored in an airtight container for up to 5 days in the refrigerator or frozen for up to 3 months.
Tender Pulled Pork
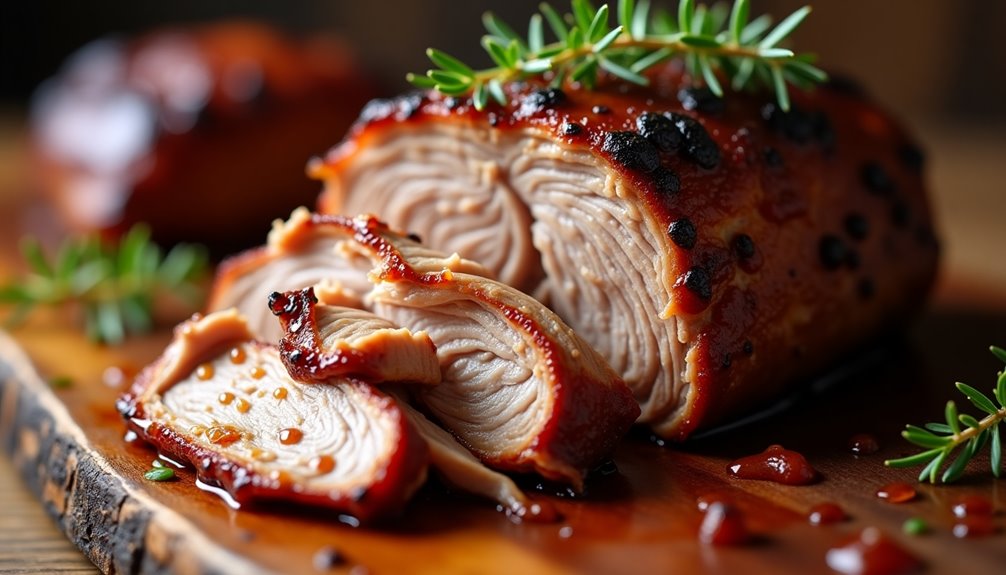
Pulled pork is a classic comfort food that transforms an affordable cut of meat into a tender, flavorful dish perfect for sandwiches, tacos, or rice bowls. The Instant Pot makes this traditionally long-cooking dish achievable in just a fraction of the time, while still maintaining that melt-in-your-mouth texture.
This recipe uses a simple dry rub and basic pantry ingredients to create a versatile pulled pork that can be customized with your favorite BBQ sauce or seasonings after cooking. The natural pressure cooking process helps break down the tough muscle fibers in the pork shoulder, resulting in meat that easily shreds with two forks.
Ingredients:
- 4 lbs pork shoulder (Boston butt), cut into 4-inch chunks
- 1 cup chicken broth
- 2 tablespoons brown sugar
- 2 tablespoons paprika
- 1 tablespoon garlic powder
- 1 tablespoon onion powder
- 1 tablespoon black pepper
- 1 tablespoon kosher salt
- 1 large onion, quartered
- 4 cloves garlic, smashed
- 2 tablespoons apple cider vinegar
Mix all the dry spices together and thoroughly rub them over the chunks of pork shoulder. Set the Instant Pot to "Sauté" mode and brown the meat on all sides in batches, about 3-4 minutes per side. Remove the pork and deglaze the pot with chicken broth, scraping up any browned bits from the bottom.
Return the pork to the pot along with the onion, garlic, and apple cider vinegar. Seal the lid and cook on high pressure for 75 minutes, followed by a 15-minute natural release. After releasing any remaining pressure, remove the meat and shred it using two forks, discarding any excess fat. If desired, strain the cooking liquid and mix some back into the meat to maintain moisture.
For best results, let the meat rest for 10-15 minutes after cooking before shredding. If the pork seems too liquid after shredding, you can use the Instant Pot's "Sauté" function to reduce the sauce until it reaches your desired consistency. The pulled pork can be stored in an airtight container in the refrigerator for up to 5 days or frozen for up to 3 months.
Garlic Mashed Potatoes
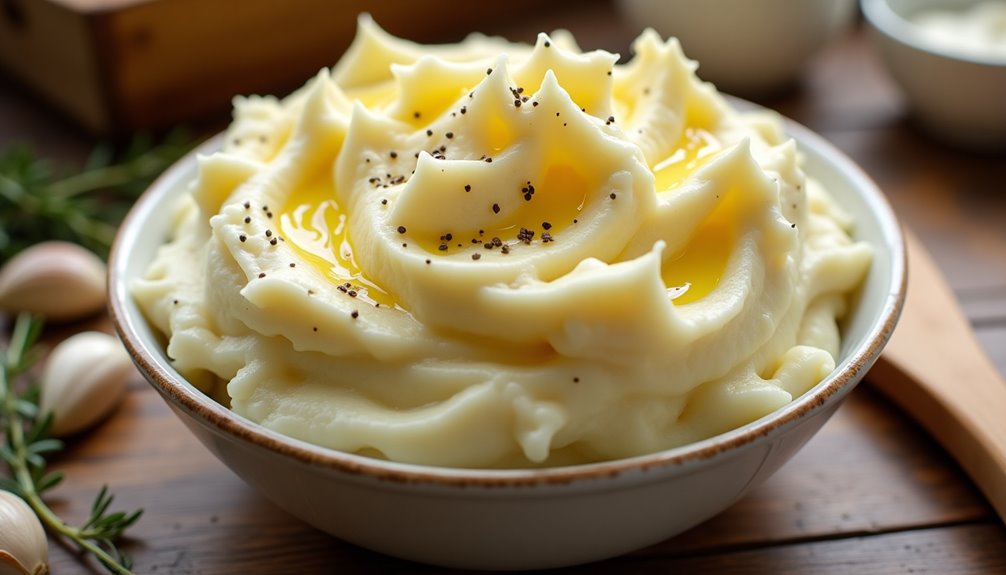
Garlic mashed potatoes made in an Instant Pot deliver the perfect creamy, smooth texture while saving time and effort compared to traditional stovetop methods. This foolproof recipe creates restaurant-quality mashed potatoes with rich garlic flavor in just minutes, making it an ideal side dish for both weeknight dinners and special occasions.
The key to exceptional Instant Pot mashed potatoes lies in the pressure cooking process, which thoroughly cooks the potatoes while retaining their natural flavors and nutrients. The addition of roasted garlic adds depth and complexity to this classic comfort food, elevating it from simple to sublime.
Ingredients:
- 3 pounds Yukon Gold potatoes, peeled and quartered
- 1 whole head of garlic
- 1 cup chicken or vegetable broth
- 1/2 cup whole milk
- 1/2 cup butter
- 1/2 cup sour cream
- 1 teaspoon salt
- 1/2 teaspoon black pepper
- 2 tablespoons olive oil
First, wrap the whole head of garlic in aluminum foil with a drizzle of olive oil and place it in the Instant Pot on a trivet. Add the quartered potatoes and broth. Seal the lid and cook on high pressure for 8 minutes, followed by a quick release of pressure. Remove the garlic, squeeze the roasted cloves out of their skins, and set aside.
Drain any excess liquid from the potatoes, then return them to the pot. Add butter, milk, sour cream, roasted garlic, salt, and pepper. Mash everything together using a potato masher or hand mixer until reaching the desired consistency. For extra smoothness, continue mixing while adding small amounts of warm milk until achieving the perfect texture.
Important tip: Allow the butter and milk to come to room temperature before adding them to the potatoes, as cold dairy products can make the potatoes gummy. Also, avoid overmixing, as this can lead to a sticky, paste-like consistency. If the potatoes become too thick after sitting, simply stir in some warm milk or broth to restore their creamy texture.
Basic Bone Broth
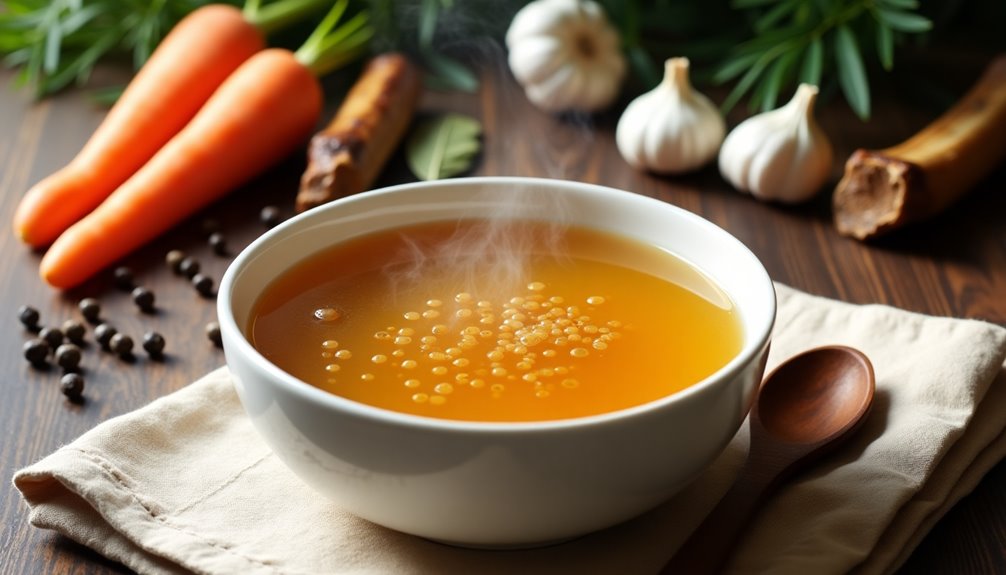
Bone broth has become increasingly popular for its rich nutritional content and deep, complex flavor. This ancient food contains collagen, minerals, and amino acids that support joint health, digestion, and immune function. Making it in an Instant Pot significantly reduces the traditional cooking time while still extracting maximum nutrients from the bones.
This recipe creates a versatile broth that can be used as a base for soups, sauces, or simply enjoyed on its own. The pressure cooking process breaks down the connective tissues in the bones more efficiently than traditional simmering methods, resulting in a gelatinous, nutrient-dense broth in just a fraction of the time.
Ingredients:
- 2-3 pounds mixed bones (beef, chicken, or pork)
- 2 carrots, roughly chopped
- 2 celery stalks, roughly chopped
- 1 onion, quartered
- 2 cloves garlic, smashed
- 2 bay leaves
- 1 tablespoon apple cider vinegar
- 1 teaspoon black peppercorns
- 8-10 cups water
- 1 teaspoon salt
Place all ingredients in the Instant Pot, making sure not to fill beyond the maximum fill line. The apple cider vinegar helps extract minerals from the bones, so don't skip this ingredient. Close the lid and set valve to sealing position. Select the "Manual" or "Pressure Cook" setting and set the timer for 120 minutes at high pressure.
Once the cooking cycle is complete, allow for a natural pressure release, which may take 15-20 minutes. After the pressure has fully released, strain the broth through a fine-mesh strainer into storage containers. Let cool completely before refrigerating.
For best results, roast the bones at 400°F for 30-45 minutes before adding them to the Instant Pot – this develops a deeper flavor. The broth can be stored in the refrigerator for up to 5 days or frozen for up to 6 months. A layer of fat may form on top when chilled; this can be either removed or stirred back in depending on preference.
Steel-Cut Oatmeal

Steel-cut oats are a hearty, nutritious breakfast option that's perfect for busy mornings. Unlike regular rolled oats, steel-cut oats maintain a chewy texture and nutty flavor that many prefer, but they traditionally require long cooking times on the stovetop.
The Instant Pot transforms this time-consuming breakfast into a hands-off affair, producing perfectly cooked steel-cut oatmeal in a fraction of the time. This recipe creates a creamy, satisfying breakfast that can be customized with your favorite toppings and stored in portions for the week ahead.
- 1 cup steel-cut oats
- 3 cups water
- 1/4 teaspoon salt
- 1 tablespoon butter (optional)
- 1 cinnamon stick (optional)
Add the steel-cut oats, water, salt, and optional butter and cinnamon stick to the Instant Pot. Secure the lid and set the valve to sealing position. Select Manual/Pressure Cook and set for 4 minutes at high pressure. Once the cooking cycle is complete, allow for natural pressure release for 10 minutes, then carefully release any remaining pressure.
Remove the lid and stir the oatmeal thoroughly. The mixture will appear loose at first but will thicken as it cools. Remove the cinnamon stick if used. Let stand for 2-3 minutes before serving, as the oatmeal will continue to thicken.
For best results, spray the inner pot with cooking spray before adding ingredients to prevent sticking. Leftover oatmeal can be stored in an airtight container in the refrigerator for up to 5 days. When reheating, add a splash of milk or water to reach desired consistency. For variation, try substituting some of the water with milk or adding vanilla extract for extra flavor.
Simple Spaghetti and Meatballs

Making spaghetti and meatballs in an Instant Pot transforms a traditional stovetop recipe into a quick, one-pot meal that delivers the same comforting flavors in a fraction of the time. This method eliminates the need for multiple pots and pans, making it perfect for busy weeknights or when you want to minimize cleanup.
The key to successful Instant Pot spaghetti and meatballs lies in proper layering of ingredients and using the right amount of liquid. This recipe uses store-bought meatballs to keep things simple, but you can certainly use homemade ones if you prefer.
Ingredients:
- 1 pound frozen meatballs
- 1 pound spaghetti
- 24 oz marinara sauce
- 4 cups water
- 1 tablespoon olive oil
- 1 teaspoon Italian seasoning
- 1 teaspoon garlic powder
- 1/2 teaspoon salt
- 1/4 teaspoon black pepper
- 1/2 cup grated Parmesan cheese
Break the spaghetti in half and layer the ingredients in the Instant Pot: start by adding olive oil, then water, followed by the marinara sauce. Add the spaghetti in a criss-cross pattern to prevent clumping. Place the meatballs on top and sprinkle with seasonings. Don't stir. Seal the lid and set to Manual/Pressure Cook for 8 minutes.
Once cooking is complete, allow for a quick release of pressure. Open the lid carefully and stir everything together, breaking up any pasta that might've stuck together. Let it sit for 2-3 minutes to allow the sauce to thicken slightly. Serve hot with grated Parmesan cheese on top.
For best results, avoid stirring the ingredients before cooking, as this can lead to the dreaded "burn" notice on your Instant Pot. If your sauce is particularly thick, you may want to add an extra 1/2 cup of water. The pasta will continue to absorb liquid as it sits, so serve promptly for the best texture.
Buttery Corn on the Cob

Cooking corn on the cob in an Instant Pot brings out the natural sweetness while maintaining the perfect texture. This method isn't only faster than traditional boiling but also ensures consistently tender, juicy results every time.
This simple recipe transforms fresh corn into a buttery, delectable side dish that pairs perfectly with summer barbecues, family dinners, or any casual meal. The pressure cooking process infuses the corn with flavor while preserving its natural nutrients.
- 4-6 ears of fresh corn
- 1 cup water
- 4 tablespoons butter
- 1 teaspoon salt
- 1/2 teaspoon black pepper
- Optional: fresh herbs (parsley, chives)
Remove husks and silk from corn ears. Pour water into the Instant Pot and place the trivet inside. Arrange corn ears vertically on the trivet, stacking them if necessary. Close the lid and set valve to sealing position. Cook on high pressure for 2-3 minutes (2 for crisp-tender, 3 for softer corn). When cooking time ends, perform a quick release of pressure.
Remove corn carefully and place on a serving platter. While still hot, coat each ear with butter and season with salt and pepper. For extra flavor, sprinkle with fresh herbs if desired.
For best results, choose fresh corn with bright green husks and golden-brown silk. If cooking more than 6 ears at once, don't increase the water amount but add 1 minute to cooking time. Frozen corn can also be used, but add 1 minute to cooking time and expect slightly different texture results.
Basic Shredded Chicken
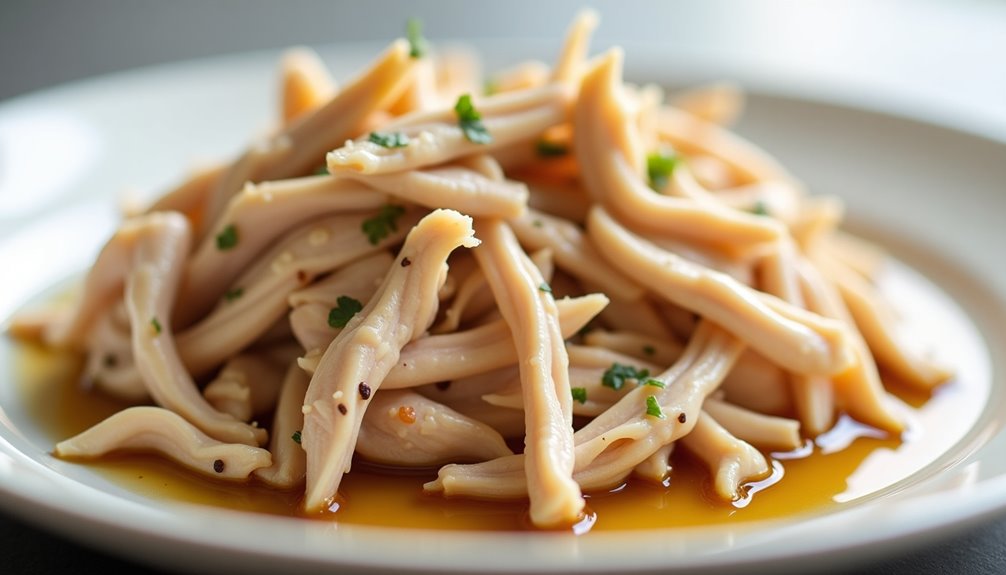
Basic Instant Pot shredded chicken is a versatile foundation for countless meals, from tacos and sandwiches to salads and casseroles. This simple preparation method yields tender, flavorful chicken that can be stored and used throughout the week.
The beauty of making shredded chicken in an Instant Pot lies in its efficiency and consistency. What once took hours in a slow cooker now requires just minutes of cooking time, while still maintaining the same tender, pull-apart texture that makes shredded chicken so appealing.
Ingredients:
- 2 lbs boneless, skinless chicken breasts
- 1 cup chicken broth
- 1 teaspoon salt
- 1/2 teaspoon black pepper
- 1 teaspoon garlic powder
- 1 teaspoon onion powder
- 1 bay leaf
Place chicken breasts in the Instant Pot and add chicken broth and all seasonings. Secure the lid and set the valve to "sealing" position. Cook on high pressure for 10 minutes, followed by 5 minutes of natural release. After 5 minutes, carefully perform a quick release of any remaining pressure.
Remove the chicken from the pot and place it on a cutting board. Using two forks, shred the chicken while it's still warm. For extra flavor and moisture, toss the shredded chicken with a few tablespoons of the cooking liquid from the pot before serving or storing.
For best results, avoid overcooking the chicken as this can lead to a dry, stringy texture. The internal temperature should reach 165°F (74°C), but cooking beyond this point isn't necessary. When storing, keep the shredded chicken in an airtight container with some of the cooking liquid to maintain moisture for up to 4 days in the refrigerator or 3 months in the freezer.