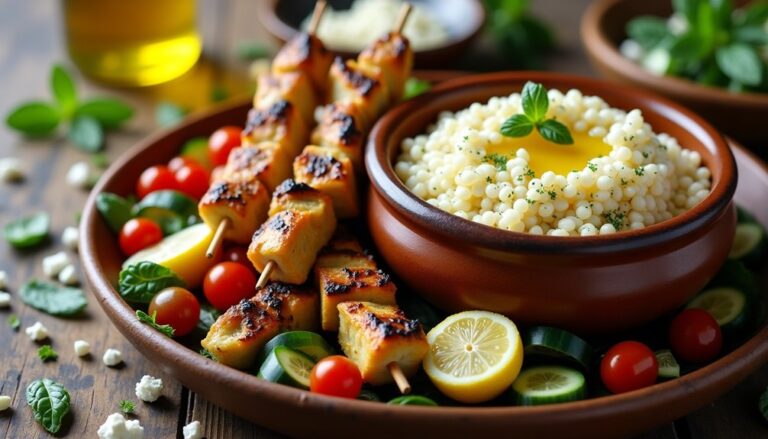
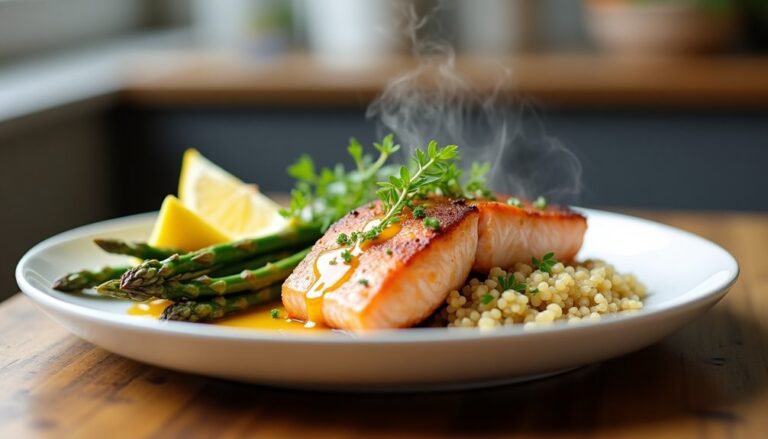
12 Easy Quick Snack Recipes
Studies show that 73% of Americans snack between meals, yet many struggle to find options that are both quick and nutritious. You'll discover these 12 easy recipes strike the perfect balance between convenience and health, taking just minutes to prepare with ingredients you likely have on hand. From protein-packed energy bites to satisfying microwave nachos, these snacks will transform your approach to between-meal eating. Let's explore how these simple recipes can revolutionize your snacking routine.
No-Bake Energy Bites
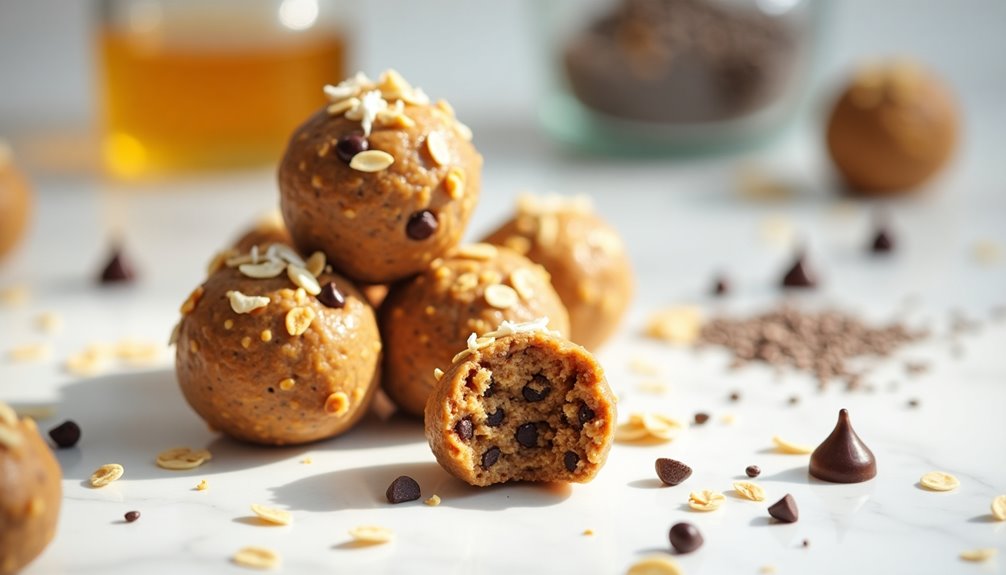
No-bake energy bites are the perfect solution for busy individuals seeking a healthy, protein-packed snack that can be prepared in advance. These convenient, bite-sized treats combine wholesome ingredients like oats, nut butter, and honey to create a satisfying boost of energy that can be enjoyed any time of day.
These versatile snacks can be customized with various mix-ins and flavors to suit individual preferences while maintaining their nutritious core ingredients. The best part is that they require no cooking or baking, making them an ideal recipe for hot summer days or when you want to avoid using the oven.
In a large mixing bowl, combine oats, peanut butter, and honey until well mixed. Add the remaining ingredients and stir until everything is evenly distributed throughout the mixture. If the mixture seems too sticky, add more oats; if too dry, add more honey or peanut butter until you achieve a consistency that holds together when rolled.
Roll the mixture into 1-inch balls using your hands. Place the balls on a parchment-lined baking sheet and refrigerate for at least 30 minutes to allow them to set. Once firm, transfer to an airtight container and store in the refrigerator.
For best results, keep these energy bites refrigerated for up to two weeks. The mixture can be quite sticky during rolling, so slightly wet hands can make the process easier. If you prefer a firmer texture, you can freeze the bites and enjoy them straight from the freezer as a cool treat.
- 1 cup old-fashioned oats
- 1/2 cup creamy peanut butter
- 1/3 cup honey
- 1/4 cup mini chocolate chips
- 1/4 cup ground flaxseed
- 1 teaspoon vanilla extract
- 1/2 cup shredded coconut
- 1/4 cup chia seeds
3-Minute Microwave Nachos

Minute Microwave Nachos are the perfect solution for those sudden snack cravings when you want something warm, cheesy, and satisfying without spending much time in the kitchen. This quick and easy recipe transforms basic tortilla chips into a delicious plate of melted cheese and toppings in just minutes using your microwave.
While traditional nachos are usually baked in an oven, this microwave version delivers surprisingly good results, creating that essential melted cheese consistency that makes nachos so irresistible. The key is in layering the ingredients properly and not overheating, which can make the chips soggy.
Ingredients:
- 2 cups tortilla chips
- 1 cup shredded Mexican cheese blend
- 1/4 cup diced tomatoes
- 1/4 cup sliced black olives
- 1/4 cup sliced jalapeños
- 1/4 cup diced onions
- 1/2 cup prepared refried beans (optional)
- Sour cream for serving
- Guacamole for serving
- Salsa for serving
Arrange a layer of tortilla chips on a microwave-safe plate, making sure they overlap slightly but aren't piled too high. If using refried beans, drop small dollops evenly over the chips. Sprinkle the cheese evenly over the chips, followed by the tomatoes, olives, jalapeños, and onions. Microwave on high for 45-60 seconds, or until the cheese is completely melted. Watch carefully to prevent overheating, as microwaves vary in power.
For optimal results, serve immediately while the cheese is still hot and melted. Top with cold garnishes like sour cream, guacamole, or salsa just before serving.
Important tip: Use a microwave-safe plate that's completely flat and avoid using paper plates, as they can become soggy. To prevent the chips from becoming too soft, don't let the nachos sit for too long after heating, and be careful not to add too many wet ingredients before microwaving. If making multiple servings, it's better to prepare them in separate batches rather than overloading one plate.
Greek Yogurt Parfait

A Greek yogurt parfait is a delightfully fresh and nutritious snack that combines creamy yogurt with layers of fruits, honey, and crunchy granola. Perfect for breakfast, a midday boost, or even dessert, this versatile dish provides a balanced mix of protein, healthy fats, and natural sugars.
This no-cook recipe takes just minutes to prepare and can be customized with seasonal fruits and various toppings. The protein-rich Greek yogurt serves as a filling base, while the granola adds necessary texture and the fruits provide essential vitamins and natural sweetness.
- 1 cup plain Greek yogurt
- 1/2 cup granola
- 1/4 cup honey
- 1 cup mixed berries (strawberries, blueberries, raspberries)
- 1/4 cup sliced almonds
- 1 tablespoon chia seeds (optional)
Start by placing a layer of Greek yogurt at the bottom of a clear glass or mason jar. Add a layer of mixed berries, followed by a drizzle of honey. Sprinkle a portion of granola over the honey layer. Repeat these layers until you reach the top of the container, typically creating 2-3 complete sets of layers.
For the final layer, top with remaining berries, a sprinkle of granola, sliced almonds, and chia seeds if desired. If preparing in advance, keep the granola separate and add it just before serving to maintain its crunch. The parfait can be assembled in under 5 minutes and served immediately.
For best results, use thick Greek yogurt with at least 2% fat content for optimal creaminess and texture. Fresh fruits are preferred, but frozen fruits can be used if thawed and drained properly. Store any leftover parfait in the refrigerator for up to 24 hours, though the granola may soften over time.
Peanut Butter Apple Slices
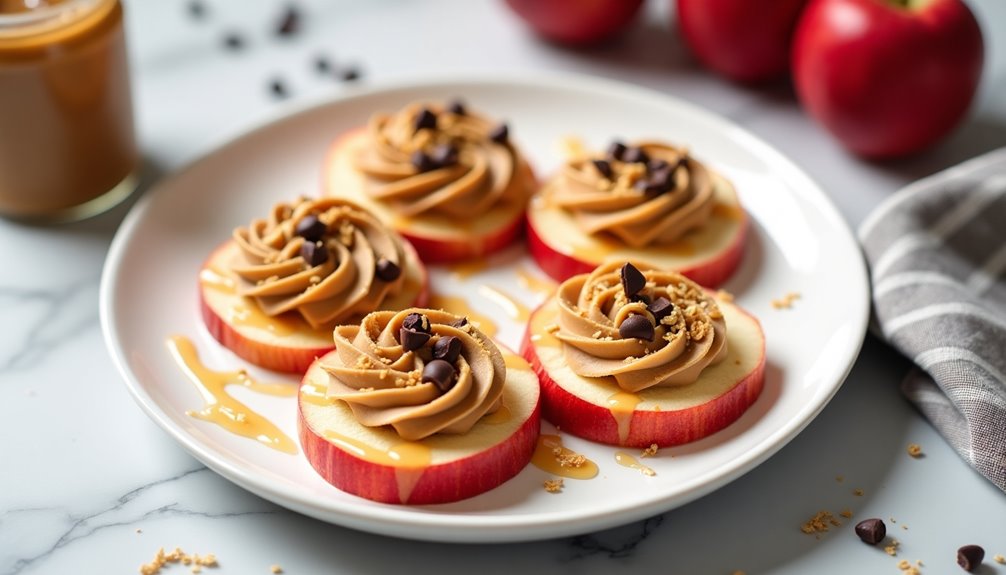
Peanut butter apple slices are a wholesome and satisfying snack that combines the natural sweetness of fresh apples with protein-rich peanut butter. This classic pairing offers a perfect balance of flavors and textures while providing essential nutrients and sustained energy throughout the day.
This simple yet delicious treat requires minimal preparation and can be customized with various toppings to suit different taste preferences. Whether enjoyed as an afternoon pick-me-up or as a healthy dessert alternative, peanut butter apple slices are an excellent choice for both children and adults.
Ingredients:
- 2 medium apples
- 1/2 cup creamy peanut butter
- 1/4 cup granola (optional)
- 2 tablespoons mini chocolate chips (optional)
- 1 tablespoon honey (optional)
- Ground cinnamon (optional)
Start by washing and drying the apples thoroughly. Using a sharp knife, core the apples and slice them horizontally into 1/4-inch thick rings, or cut them vertically into wedges if preferred. Spread a generous layer of peanut butter onto one side of each apple slice, ensuring even coverage.
For added texture and flavor, sprinkle your chosen toppings over the peanut butter layer. Popular combinations include granola and honey for extra crunch and sweetness, or chocolate chips and a dash of cinnamon for a more indulgent twist. Arrange the prepared slices on a serving plate and serve immediately.
To prevent the apple slices from browning, consider brushing them with lemon juice before adding the peanut butter. If preparing in advance, store the slices in an airtight container in the refrigerator for up to 24 hours. For the best spreadability, allow the peanut butter to reach room temperature before use, and consider warming it slightly if it's too firm.
Quick Trail Mix
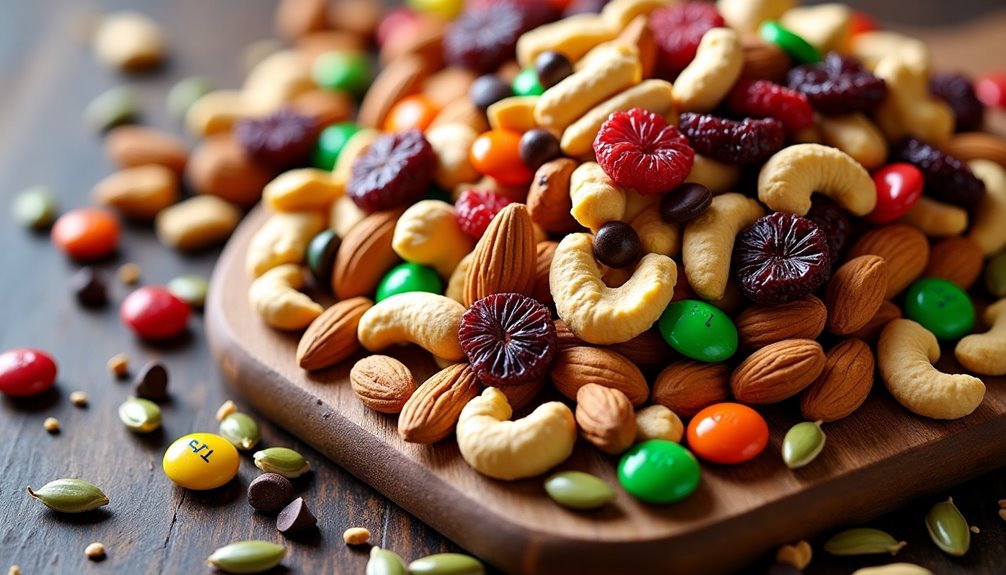
This simple recipe takes just minutes to prepare and can be stored for weeks in an airtight container. The combination of nuts, dried fruits, and chocolate provides a good mix of protein, healthy fats, and carbohydrates, making it an ideal snack for maintaining energy levels throughout the day.
Ingredients:
- 1 cup almonds
- 1 cup cashews
- 1 cup peanuts
- 1 cup raisins
- 1 cup dried cranberries
- 1 cup M&Ms or chocolate chips
- 1/2 cup sunflower seeds
- 1/2 cup pumpkin seeds
In a large mixing bowl, combine all ingredients. Mix thoroughly until all components are evenly distributed. Transfer the mixture to an airtight container or portion into individual serving-size bags.
For best results, store the trail mix in a cool, dry place away from direct sunlight. The mixture will stay fresh for up to three weeks when properly stored. If you're planning to take your trail mix on outdoor adventures, consider using resealable plastic bags for convenient portioning and to maintain freshness.
Savory Mug Pizza
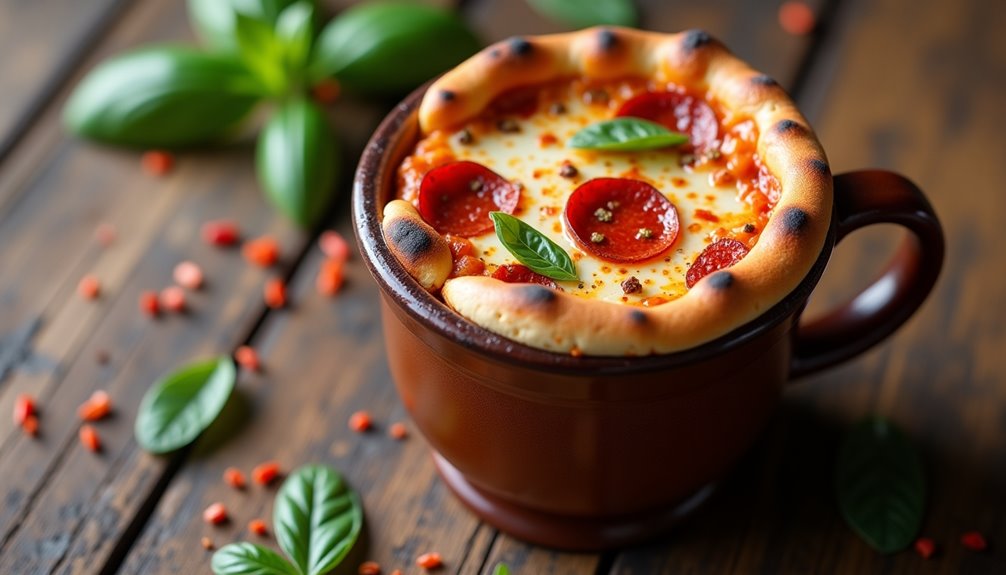
The beauty of mug pizza lies in its versatility and convenience. You can customize the toppings based on your preferences or what you have available in your refrigerator. The self-rising flour creates a surprisingly soft and chewy crust, while the marinara sauce and melted cheese provide that classic pizza taste.
- 4 tablespoons self-rising flour
- 3 tablespoons milk
- 1 tablespoon olive oil
- 2 tablespoons marinara sauce
- 3 tablespoons shredded mozzarella cheese
- 2-3 slices pepperoni (optional)
- 1/4 teaspoon Italian seasoning
- Pinch of salt
Mix the flour, milk, and olive oil in a microwave-safe mug until a smooth batter forms. Spread the marinara sauce over the batter, then top with mozzarella cheese, pepperoni (if using), and Italian seasoning. Sprinkle a pinch of salt over the top.
Microwave on high for 1 minute, then check the consistency. Continue microwaving in 15-second intervals until the cheese is melted and the crust is fully cooked. The total cooking time typically ranges from 1 to 2 minutes, depending on your microwave's power.
For best results, use a wide-mouthed ceramic mug to allow even cooking and easier eating. Let the mug pizza cool for 1-2 minutes before eating, as the contents will be extremely hot. If self-rising flour isn't available, substitute regular flour mixed with 1/4 teaspoon baking powder and a pinch of salt for each 4 tablespoons of flour used.
Banana Roll-Ups
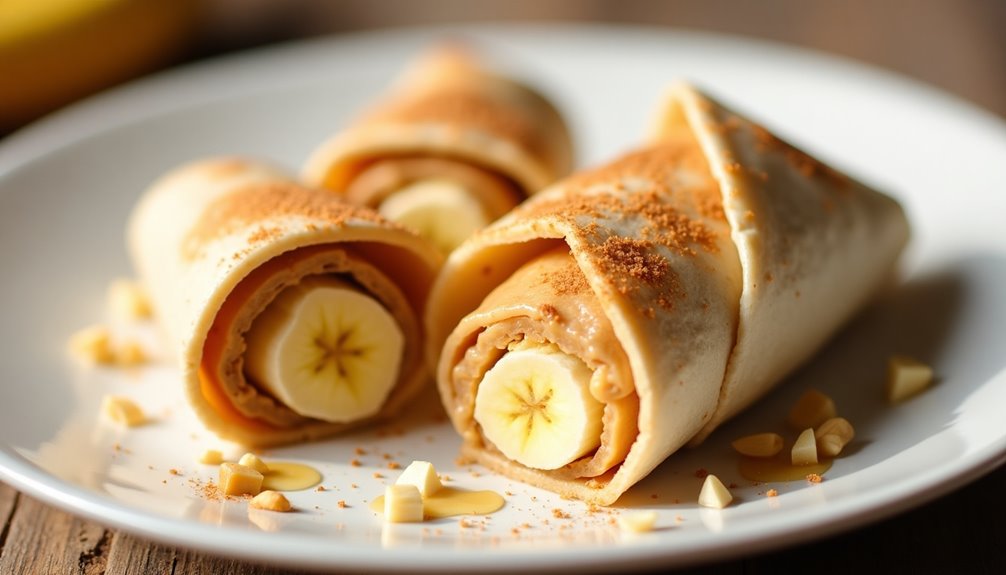
Banana Roll-Ups are a delightful and nutritious snack that combines the natural sweetness of bananas with the satisfying crunch of tortillas. Perfect for both kids and adults, these roll-ups can be prepared in minutes and offer a versatile foundation for various toppings and spreads.
This simple yet creative snack transforms basic ingredients into a treat that works well for breakfast, after-school snacks, or a quick energy boost during busy days. The combination of protein from nut butter and potassium from bananas makes it a balanced choice for maintaining steady energy levels.
Ingredients:
- 2 medium bananas
- 2 flour tortillas (8-inch diameter)
- 4 tablespoons peanut butter or almond butter
- 2 tablespoons honey
- 1/4 teaspoon ground cinnamon
- Optional toppings: chocolate chips, granola, or crushed nuts
Warm each tortilla in the microwave for 15-20 seconds to make it more pliable. Spread 2 tablespoons of nut butter evenly across each tortilla, leaving a small border around the edges. Drizzle honey over the nut butter and sprinkle with cinnamon. Place a peeled banana near one edge of each tortilla and roll tightly, ensuring the banana stays centered. If desired, add optional toppings before rolling.
For the best results, slice each roll-up into 1-inch pieces using a sharp knife. If serving to young children, you can leave them whole or cut them in half diagonally. The roll-ups can be secured with toothpicks if needed, especially if transporting them in lunch boxes or serving them at parties.
Storage tip: These roll-ups are best consumed immediately after preparation, but can be wrapped in plastic wrap and refrigerated for up to 4 hours. To prevent bananas from browning, try dipping them in lemon juice before rolling. For a warm treat, briefly heat the completed roll-up in the microwave for 10-15 seconds, being careful not to overheat as the banana will become very soft.
Hummus Veggie Cups
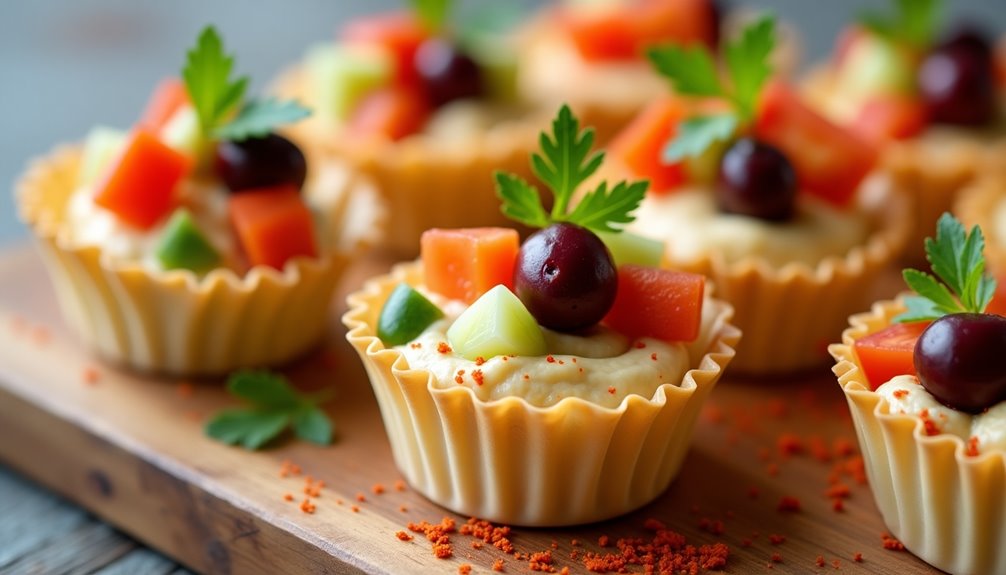
Hummus Veggie Cups combine the creamy richness of hummus with the refreshing crunch of fresh vegetables, all served in convenient, portable portions. This Mediterranean-inspired appetizer transforms traditional hummus and crudités into an elegant finger food perfect for parties, picnics, or healthy snacking.
These customizable cups can be assembled in minutes and offer a protein-rich, fiber-filled alternative to traditional party snacks. The vegetables not only add nutritional value but also create an appealing color palette that makes these cups visually striking on any serving platter.
Ingredients:
- 2 cups store-bought or homemade hummus
- 24 mini phyllo cups (found in freezer section)
- 1 cup cherry tomatoes, quartered
- 1 cucumber, finely diced
- 1 red bell pepper, finely diced
- 1/2 cup kalamata olives, chopped
- Fresh parsley for garnish
- Extra virgin olive oil
- Ground paprika
- Salt and pepper to taste
Remove the phyllo cups from the freezer and let them thaw for 10 minutes at room temperature. Fill each cup with approximately 1-2 tablespoons of hummus, leaving a small well in the center for the vegetables. Top each cup with a combination of the diced vegetables, distributing them evenly among the cups. Finish by drizzling with olive oil, sprinkling with paprika, and garnishing with fresh parsley.
For best results, assemble these cups no more than 2 hours before serving to maintain the crispness of both the phyllo shells and vegetables. Store them in the refrigerator, covered loosely with plastic wrap. The phyllo cups can become soggy if filled too far in advance, and the vegetables may release excess moisture over time. If preparing components ahead, store the cut vegetables and hummus separately and assemble just before serving.
Cheese and Crackers Board
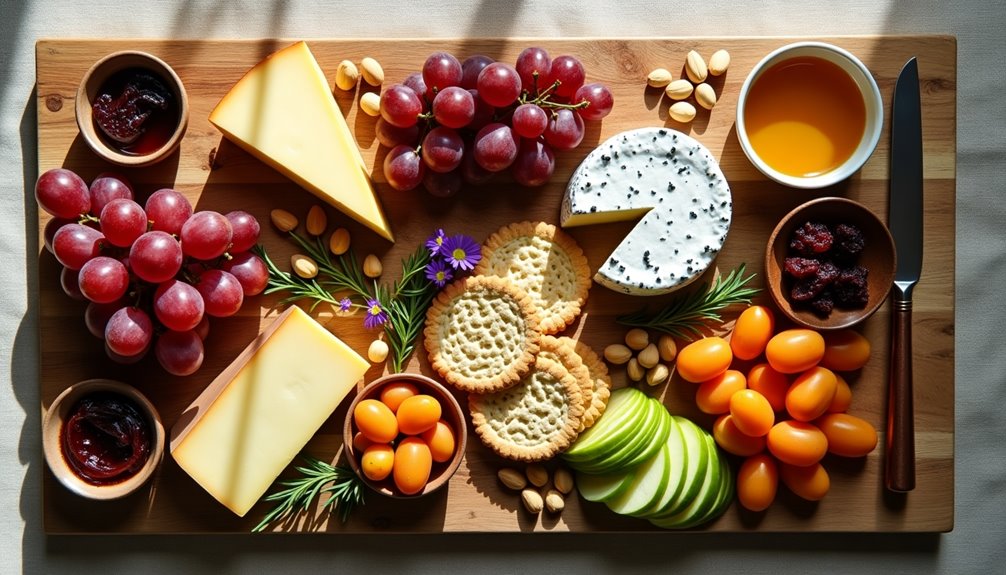
Creating a cheese and crackers board is a timeless entertaining solution that combines simplicity with elegance. This versatile snack arrangement can be scaled up or down depending on your needs, from an intimate evening for two to a large gathering of friends and family.
While technically not a "cooked" dish, a well-curated cheese and crackers board requires careful attention to selection, temperature, and presentation. The key is balancing different textures and flavors while ensuring all elements complement each other.
Ingredients:
- 3-4 types of cheese (soft, semi-soft, hard)
- Assorted crackers
- Fresh fruits (grapes, apple slices, pears)
- Dried fruits (apricots, cranberries)
- Mixed nuts
- Honey
- Fig jam or quince paste
- Fresh herbs for garnish
- Charcuterie (optional)
- Small cheese knife
- Serving board or platter
Remove cheeses from refrigeration 30-60 minutes before serving to allow them to reach room temperature, which enhances their flavors and textures. Arrange larger items first – placing cheeses with adequate space between them, then fill in gaps with crackers arranged in fan patterns or neat rows. Add fruits and nuts in small clusters, and place condiments in small bowls or directly on the board.
For visual appeal, cut harder cheeses into different shapes – cubes, triangles, or slices – while leaving softer cheeses whole with appropriate serving utensils. Create pathways between items to make it easy for guests to access everything. Consider placing crackers in multiple locations around the board for easy reach.
Extra Tip: When selecting cheeses, follow the rule of "something old, something new, something goat, something blue" to ensure variety. Store leftover cheese by wrapping it in cheese paper or wax paper, never plastic wrap, as cheese needs to breathe. Serve red wine, sparkling wine, or craft beer as perfect accompaniments to your cheese board.
5-Minute Smoothie Bowl
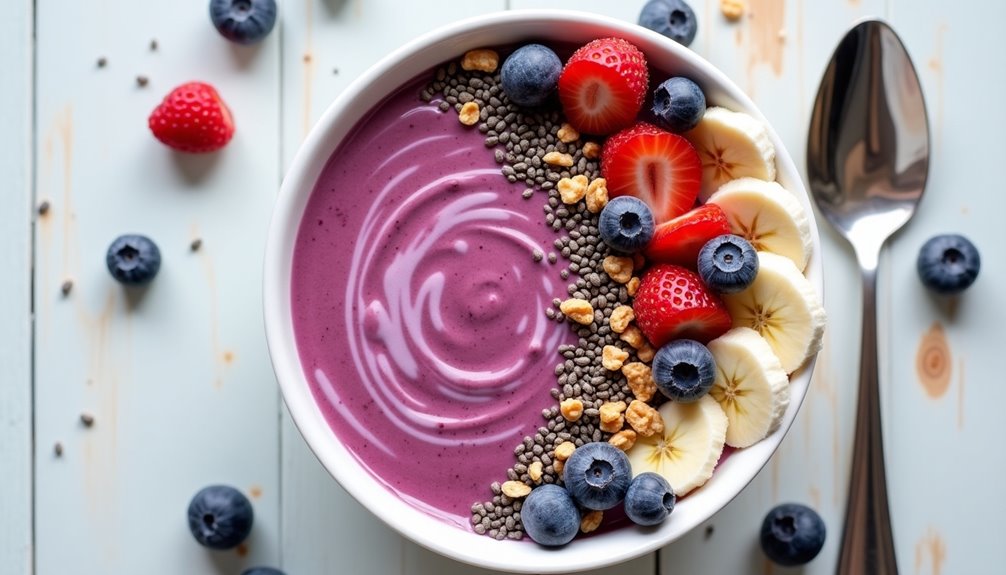
A smoothie bowl is a delicious and nutritious alternative to traditional breakfast or snack options, combining the refreshing qualities of a smoothie with the satisfying texture of various toppings. This versatile dish can be customized with countless ingredient combinations, making it perfect for using seasonal fruits and accommodating different dietary preferences.
Unlike regular smoothies, smoothie bowls are thicker in consistency and eaten with a spoon, allowing for a more substantial and fulfilling experience. The key to a perfect smoothie bowl lies in achieving the right texture – thick enough to hold the toppings but still smooth enough to eat comfortably.
Ingredients:
- 1 frozen banana
- 1 cup frozen mixed berries
- 1 cup Greek yogurt
- 1/2 cup milk (dairy or plant-based)
- 1 tablespoon honey
- 1/4 cup granola
- 2 tablespoons chia seeds
- Fresh fruit for topping
- Coconut flakes
- Nuts or seeds of choice
Begin by adding the frozen banana, mixed berries, Greek yogurt, milk, and honey to a high-powered blender. Blend on low speed initially, then gradually increase to high speed, using the tamper if needed to push ingredients toward the blades. Continue blending until smooth but thick, approximately 1-2 minutes. The consistency should be thicker than a regular smoothie.
Pour the mixture into a bowl and immediately add toppings. Arrange the fresh fruit, granola, chia seeds, coconut flakes, and nuts in sections or in a pattern of your choice. Serve immediately while the base is still frozen and thick.
For the best results, freeze fruits in advance and use minimal liquid when blending. If the mixture becomes too thin, add more frozen fruit; if too thick, add small amounts of liquid gradually. Pre-chilling the serving bowl can help maintain the optimal temperature and consistency longer. Smoothie bowls should be eaten immediately after preparation, as they tend to melt and lose their thick consistency if left at room temperature.
Microwave Popcorn Mix
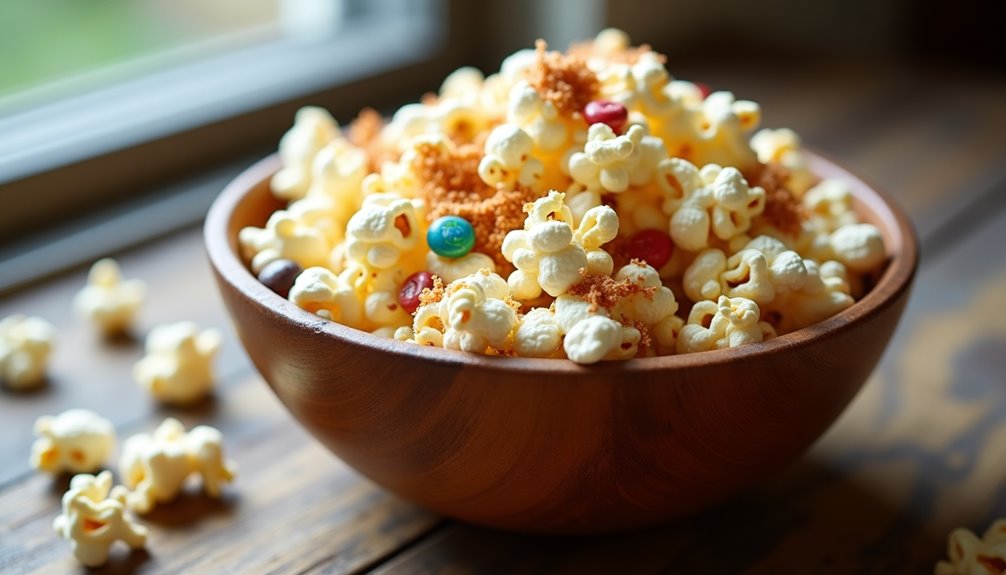
Microwave popcorn is a classic snack that can be elevated into something extraordinary with just a few additional ingredients. This versatile treat can be transformed into a sweet, savory, or spicy mix depending on your preferences and the seasonings you choose.
Making your own microwave popcorn mix not only allows you to control the ingredients but also helps you avoid the artificial flavors and preservatives found in store-bought versions. The basic method starts with plain popcorn kernels, which are then enhanced with your choice of toppings and mix-ins for a customized snacking experience.
- 1/4 cup popcorn kernels
- 2 tablespoons vegetable oil
- 1/2 teaspoon salt
- 3 tablespoons melted butter
- Optional mix-ins (choose 2-3):
- 1/4 cup M&Ms
- 1/4 cup nuts
- 1/4 cup pretzels
- 2 tablespoons grated Parmesan
- 1 teaspoon chili powder
- 1 teaspoon garlic powder
Place popcorn kernels and oil in a microwave-safe bowl with a lid or paper plate cover. Microwave on high for 2-3 minutes, or until the popping slows to 2-3 seconds between pops. Carefully remove from microwave and transfer to a large mixing bowl. Drizzle with melted butter and sprinkle with salt, tossing to coat evenly.
Add your chosen mix-ins while the popcorn is still warm, gently tossing to distribute ingredients evenly. For cheese or seasoning powders, add these ingredients immediately after the butter while the popcorn is hot to ensure they stick properly. For candies or nuts, wait until the popcorn has cooled slightly to prevent melting.
For best results, use a brown paper bag instead of a bowl if available, as it absorbs excess moisture and creates crispier popcorn. Store any leftover mix in an airtight container for up to 2 days, though it's best consumed fresh. If using cheese or butter, consume within 24 hours for optimal taste and texture.
Quick Avocado Toast
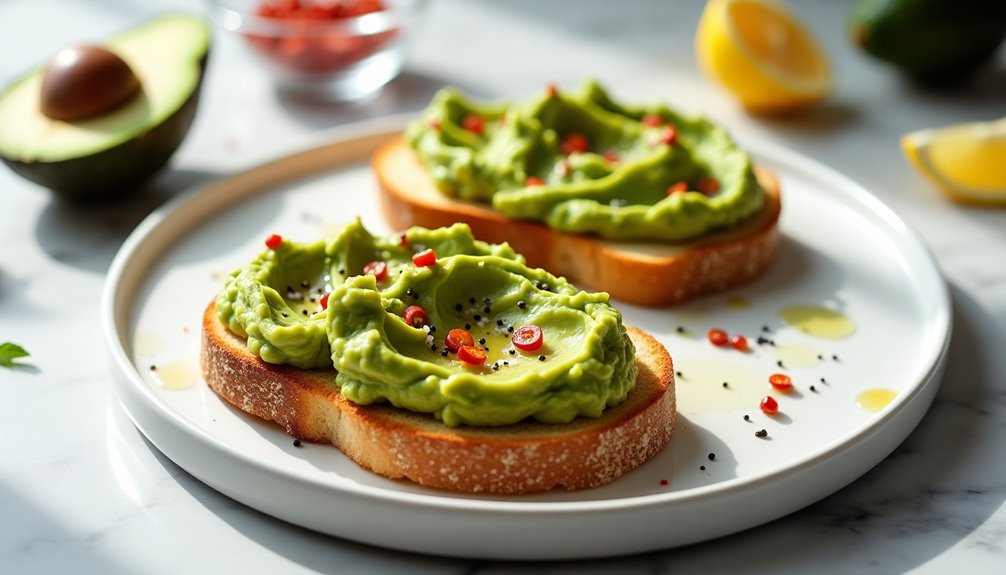
Avocado toast has become a modern breakfast and snack staple, combining the creamy richness of ripe avocados with crispy, toasted bread. This simple yet satisfying dish offers a perfect balance of healthy fats, carbohydrates, and endless topping possibilities.
While the basic recipe requires just a few ingredients, avocado toast can be elevated with various additions to suit different tastes and nutritional needs. From classic salt and pepper to more elaborate combinations with eggs or microgreens, this versatile dish works perfectly for any time of day.
Ingredients:
- 2 slices bread (sourdough or whole grain recommended)
- 1 ripe avocado
- 1/4 teaspoon salt
- 1/8 teaspoon black pepper
- 1/2 lemon
- Red pepper flakes (optional)
- Extra virgin olive oil
Toast your bread slices until they reach a golden-brown color and develop a crispy exterior while maintaining a slightly soft interior. While the bread is toasting, cut the avocado in half, remove the pit, and scoop the flesh into a bowl. Mash the avocado with a fork until it reaches your desired consistency – some prefer it chunky, while others like it smooth. Add salt, pepper, and a squeeze of fresh lemon juice to the mashed avocado.
Spread the seasoned avocado mixture generously onto the toasted bread slices. For extra flavor, drizzle with olive oil and sprinkle with red pepper flakes if desired. Serve immediately while the toast is still warm and crispy.
For best results, select avocados that yield slightly when gently pressed but aren't too soft. Store unripe avocados at room temperature until they ripen, then refrigerate to slow the ripening process. To prevent browning, always prepare avocado toast just before serving, and use fresh lemon juice in the avocado mixture as it helps prevent oxidation.