15 Easy Summer Dessert Recipes
You'll find these 15 summer dessert recipes are perfectly suited for those hot days when you don't want to turn on the oven. From refreshing no-bake lemon cheesecake to frosty mango ice pops, each treat requires minimal prep time and basic kitchen skills. Whether you're hosting a backyard BBQ or simply craving something sweet, these make-ahead options showcase summer's best fruits and flavors. Let's explore how you can create these cooling desserts with just a few simple steps.
Classic No-Bake Lemon Cheesecake
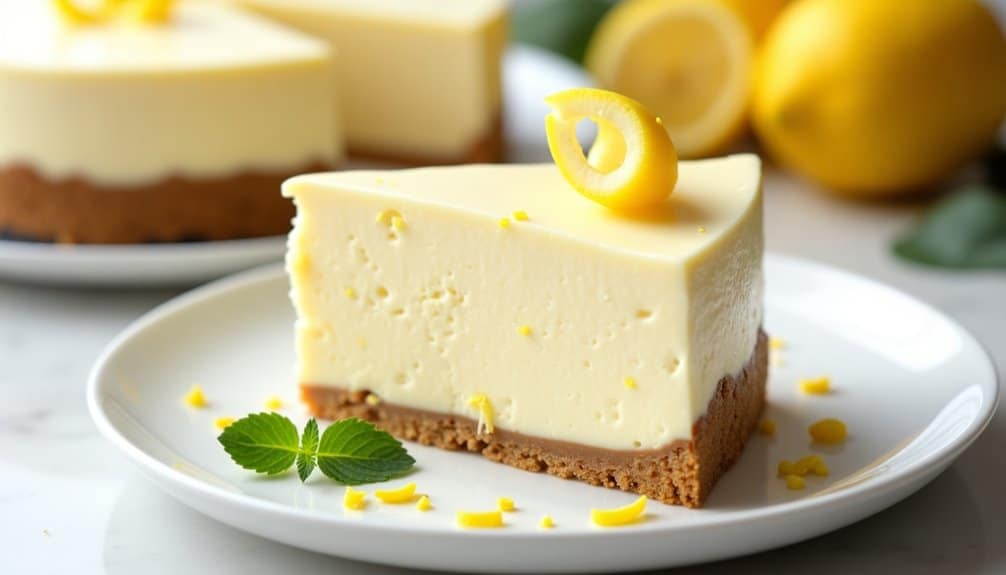
A no-bake lemon cheesecake is the perfect summer dessert that combines creamy richness with bright citrus flavors. This classic recipe requires no oven time, making it ideal for hot days when you want to avoid heating up your kitchen.
The key to this dessert's success lies in its carefully balanced layers: a buttery graham cracker crust topped with a smooth, tangy cream cheese filling that's infused with fresh lemon. The overnight setting time ensures a perfectly firm texture that slices beautifully.
- 2 cups graham cracker crumbs
- 1/2 cup melted butter
- 24 oz cream cheese, softened
- 1 cup granulated sugar
- 2/3 cup heavy cream
- 3 tablespoons fresh lemon juice
- 2 tablespoons lemon zest
- 1 tablespoon vanilla extract
- 2 packets unflavored gelatin
- 1/4 cup cold water
Mix graham cracker crumbs with melted butter and press firmly into the bottom of a 9-inch springform pan. Refrigerate while preparing the filling.
In a large bowl, beat cream cheese until smooth, then gradually add sugar. In a separate small bowl, sprinkle gelatin over cold water and let stand for 5 minutes. Heat the gelatin mixture in the microwave for 20 seconds or until dissolved. Fold the gelatin into the cream cheese mixture, then add heavy cream, lemon juice, zest, and vanilla. Beat until smooth and well combined.
Pour the filling over the chilled crust, smoothing the top with a spatula. Refrigerate for at least 6 hours or overnight until completely set. Before serving, run a knife around the edge of the pan before releasing the springform.
For best results, ensure all ingredients are at room temperature before beginning, except for the heavy cream which should be cold. The gelatin must be completely dissolved with no granules visible to prevent a grainy texture in the final dessert. If the cheesecake seems too soft after the initial setting time, an additional 2-3 hours in the refrigerator will help firm it up further.
5-Minute Berry Frozen Yogurt
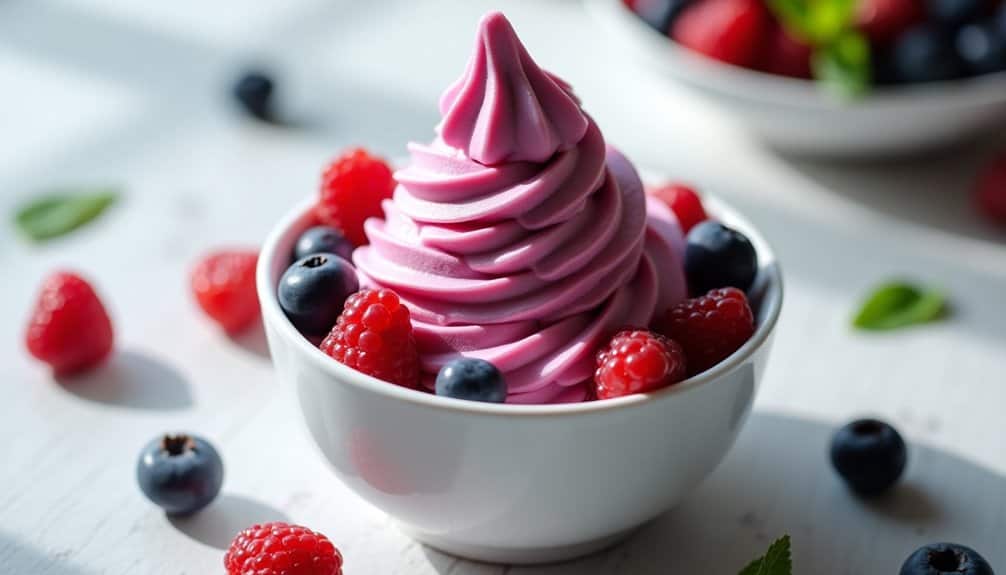
Minute Berry Frozen Yogurt is a refreshing and healthy alternative to traditional ice cream that can be made in just minutes. This simple dessert combines the natural sweetness of frozen berries with creamy yogurt for a delightful summer treat that's both nutritious and satisfying.
Perfect for hot summer days, this quick frozen yogurt requires minimal preparation and delivers maximum flavor. The beauty of this recipe lies in its versatility – you can use any combination of frozen berries and adjust the sweetness to your preference, making it an ideal dessert for both adults and children.
Ingredients:
- 3 cups frozen mixed berries
- 1 cup plain Greek yogurt
- 3 tablespoons honey
- 1 teaspoon vanilla extract
- Pinch of salt
Process the frozen berries in a food processor until they break down into small pieces. Add the Greek yogurt, honey, vanilla extract, and salt, then continue processing until the mixture becomes smooth and creamy, scraping down the sides as needed. The consistency should be similar to soft-serve ice cream.
For optimal results, serve immediately while the texture is perfectly scoopable. If you prefer a firmer consistency, transfer the mixture to a freezer-safe container and freeze for 30 minutes before serving. If frozen solid, let it sit at room temperature for 5-10 minutes before scooping.
The success of this recipe depends on using completely frozen berries – partially thawed fruit will result in a runny consistency. For a dairy-free version, substitute the Greek yogurt with coconut yogurt. The dessert can be stored in the freezer for up to one month, but the texture will become icier over time, so it's best enjoyed fresh.
Watermelon and Mint Granita
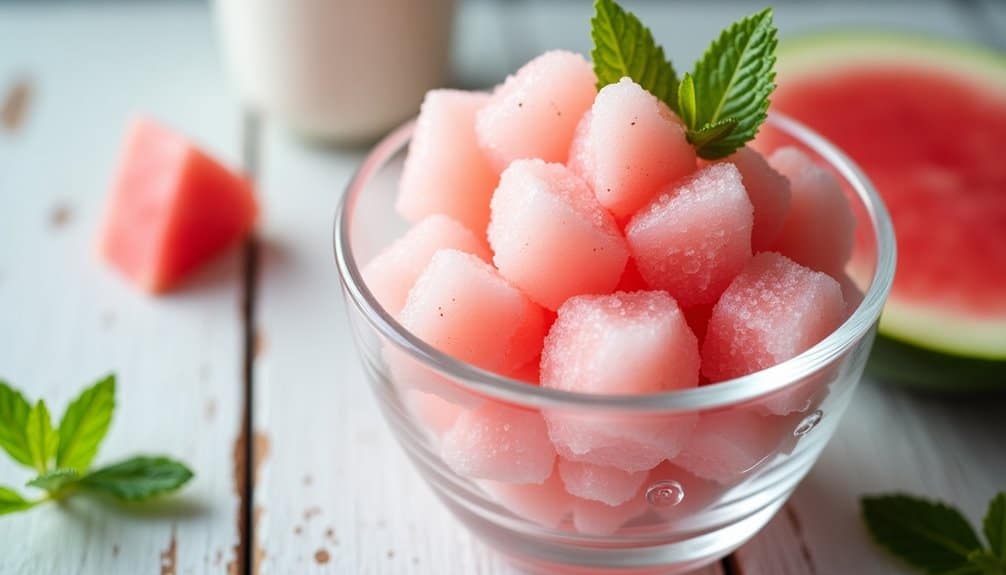
Watermelon and mint granita is a refreshing Italian-style frozen dessert that perfectly captures the essence of summer. This semi-frozen treat transforms fresh watermelon into a light, crystalline dessert that's both elegant and simple to prepare.
Unlike traditional ice cream, granita requires no special equipment and achieves its signature texture through a simple freeze-and-scrape method. The addition of fresh mint leaves adds a cooling depth that complements the natural sweetness of watermelon, creating a sophisticated yet approachable dessert.
- 8 cups seedless watermelon, cubed
- 1/3 cup granulated sugar
- 2 tablespoons fresh lime juice
- 1/4 cup fresh mint leaves
- Pinch of salt
- Additional mint leaves for garnish
Place watermelon chunks, sugar, lime juice, mint leaves, and salt in a blender. Blend until completely smooth, about 1-2 minutes. Strain the mixture through a fine-mesh sieve into a 9×13-inch metal baking pan, pressing gently to extract all the liquid while keeping the pulp behind. Place the pan in the freezer.
After 45 minutes, remove the pan and use a fork to scrape any frozen crystals that have formed around the edges into the center of the pan. Return to freezer and repeat this process every 30 minutes for about 3-4 hours, until the entire mixture is frozen into light, flaky crystals. Before serving, fluff the granita one final time with a fork to create a light, snow-like texture.
For best results, serve the granita immediately after the final scraping while the texture is at its most delicate. If making ahead, cover the pan tightly with plastic wrap and store in the freezer for up to 3 days, but remember to re-scrape the mixture with a fork before serving to restore its fluffy texture. The granita should never become a solid block of ice; if it does, let it sit at room temperature for 5-10 minutes before scraping.
Fresh Peach and Cream Trifle
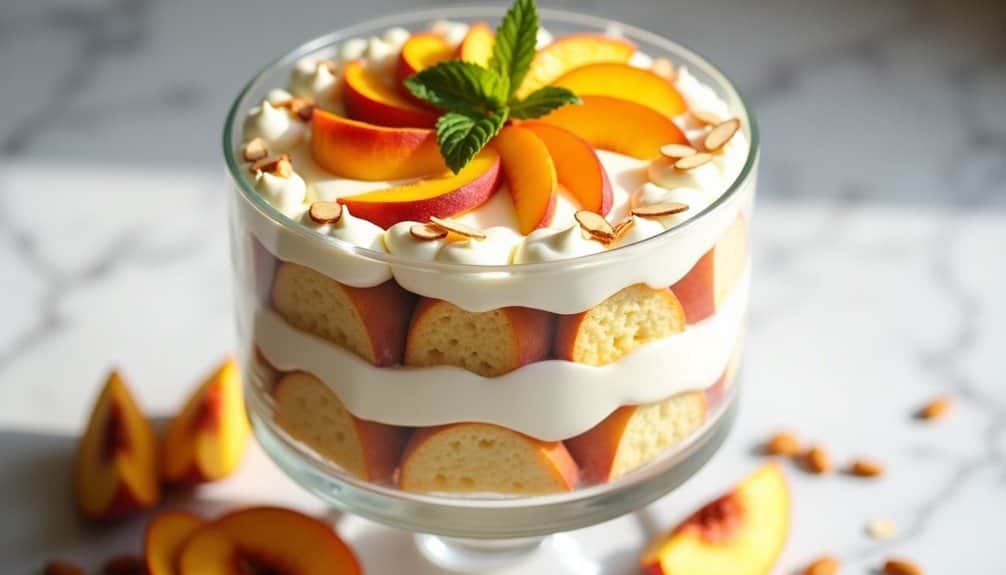
A Fresh Peach and Cream Trifle is a classic summer dessert that beautifully showcases ripe, juicy peaches layered with soft cake and silky cream. The combination of textures and flavors creates an impressive dessert that's perfect for warm weather gatherings and celebrations.
This no-bake trifle can be assembled in advance and requires minimal cooking, making it an ideal choice for summer entertaining. The dessert gains flavor as it sits, allowing the fruit juices to soak into the cake layers while maintaining distinct, colorful layers that look stunning when served in a glass trifle bowl.
Ingredients:
- 1 pound cake, cut into 1-inch cubes
- 6 ripe peaches, sliced
- 2 cups heavy whipping cream
- 8 ounces mascarpone cheese
- 1/3 cup granulated sugar
- 1 teaspoon vanilla extract
- 1/4 cup peach nectar or juice
- 2 tablespoons honey
- 1/2 cup sliced almonds, toasted
- Fresh mint leaves for garnish
Begin by preparing the cream layer by whipping the heavy cream until soft peaks form. In a separate bowl, mix mascarpone cheese with sugar and vanilla until smooth, then fold into the whipped cream until well combined. Toss the sliced peaches with honey and peach nectar in a bowl, allowing them to macerate for 10 minutes to release their juices.
Layer the dessert in a clear trifle bowl, starting with a layer of pound cake cubes, followed by a layer of the peach mixture, and then a generous layer of the cream mixture. Continue layering in this order until all ingredients are used, ending with the cream layer on top. Garnish with toasted almonds and fresh mint leaves.
For best results, prepare this trifle at least 4 hours before serving and store it in the refrigerator. Choose peaches that are ripe but still firm enough to hold their shape, and avoid over-whipping the cream as it can become grainy. The trifle can be made up to 24 hours in advance, though the garnishes should be added just before serving to maintain their crunch and freshness.
3-Ingredient Mango Ice Pops
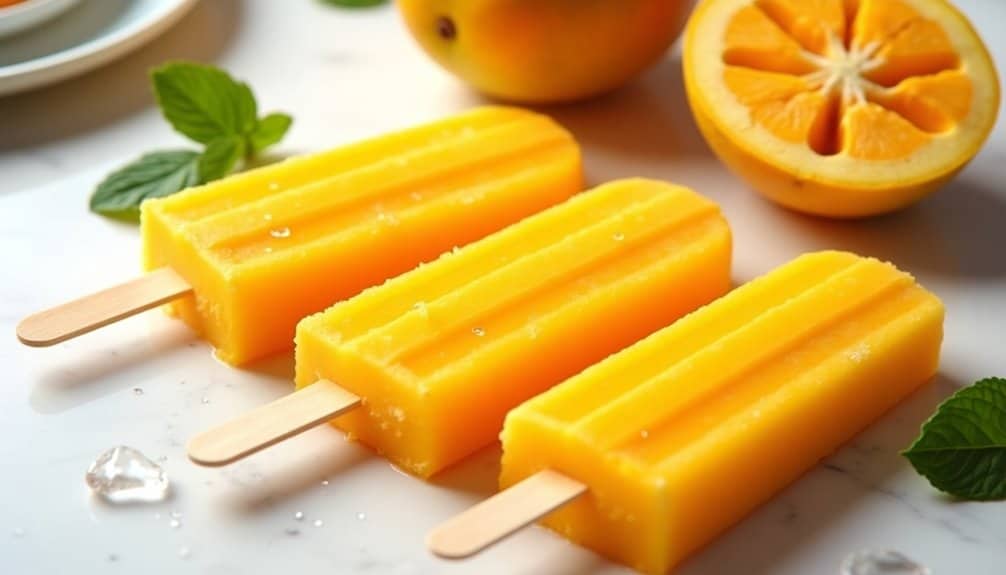
Mango ice pops are the perfect refreshing treat for hot summer days, combining the natural sweetness of ripe mangoes with a smooth, creamy texture that delights both children and adults alike. These tropical-inspired treats can be made with just a few simple ingredients and require minimal effort, making them an ideal dessert option for busy families.
These homemade pops aren't only delicious but also healthier than store-bought alternatives, as they contain no artificial preservatives or added colors. The natural fiber and vitamins from fresh mangoes are preserved in these frozen treats, providing a guilt-free indulgence that can be enjoyed any time of day.
Ingredients:
- 4 ripe mangoes, peeled and chopped
- 1/2 cup granulated sugar
- 1/4 cup water
- 2 tablespoons fresh lime juice
- Pinch of salt
- 8-10 ice pop molds with sticks
Begin by combining the water and sugar in a small saucepan over medium heat, stirring until the sugar completely dissolves. Remove from heat and let the simple syrup cool to room temperature.
Meanwhile, puree the chopped mangoes in a blender until smooth and creamy. Add the cooled simple syrup, lime juice, and salt to the mango puree, blending until well combined.
Pour the mixture into ice pop molds, leaving about 1/4 inch of space at the top to allow for expansion during freezing. Insert the sticks and freeze for at least 6 hours or overnight until completely solid. To remove the pops, run the molds briefly under warm water and gently pull on the sticks.
For best results, choose mangoes that are fully ripe and slightly soft to the touch for maximum sweetness and flavor. If your mangoes aren't perfectly ripe, you may need to adjust the amount of sugar. The pops can be stored in the freezer for up to 2 months if wrapped individually in plastic wrap and placed in an airtight container.
Mixed Berry Mason Jar Parfaits
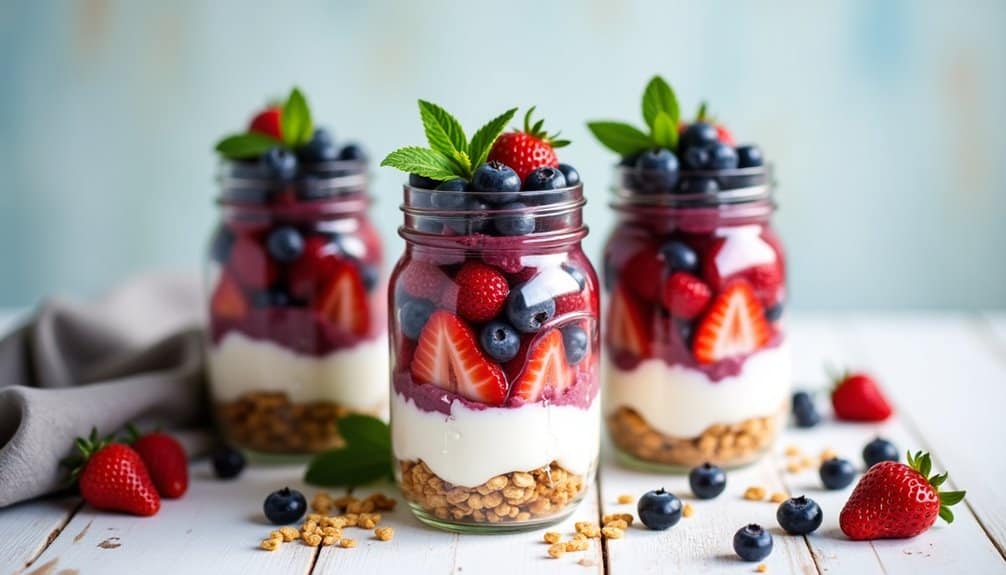
Mixed berry parfaits served in mason jars combine the fresh sweetness of summer berries with creamy layers of yogurt and crunchy granola. This make-ahead dessert isn't only visually stunning but also offers a perfect balance of flavors and textures that make it an ideal choice for outdoor gatherings, picnics, or a light after-dinner treat.
These parfaits can be customized with any combination of seasonal berries and your preferred type of yogurt, making them a versatile dessert option that can be adapted to different dietary preferences. The layered presentation in mason jars not only creates an appealing visual effect but also makes them perfectly portable and portion-controlled.
Ingredients:
- 3 cups mixed berries (strawberries, blueberries, raspberries, blackberries)
- 3 cups Greek yogurt (plain or vanilla)
- 2 cups granola
- 2 tablespoons honey
- 1 teaspoon lemon juice
- 4 16-oz mason jars
- Optional: mint leaves for garnish
Begin by washing and preparing the berries – hull and quarter the strawberries if using, while leaving other berries whole. In a small bowl, toss the berries with honey and lemon juice to enhance their natural sweetness. Let the mixture sit for 5-10 minutes to allow the flavors to meld together.
To assemble the parfaits, start by placing 2-3 tablespoons of granola at the bottom of each mason jar. Add a layer of yogurt (about 1/4 cup), followed by a generous layer of the prepared berry mixture. Repeat these layers until you reach the top of the jar, ensuring you end with a berry layer for visual appeal. Finish with a sprinkle of granola and a mint leaf if desired.
For best results, prepare these parfaits at least 30 minutes before serving to allow the flavors to develop, but add the final granola layer just before serving to maintain its crunch. The parfaits can be stored in the refrigerator for up to 24 hours, though the granola may soften if added too early. If making ahead, consider layering extra berries at the bottom to prevent the granola from becoming too soggy.
Easy Chocolate-Dipped Fruit Platter
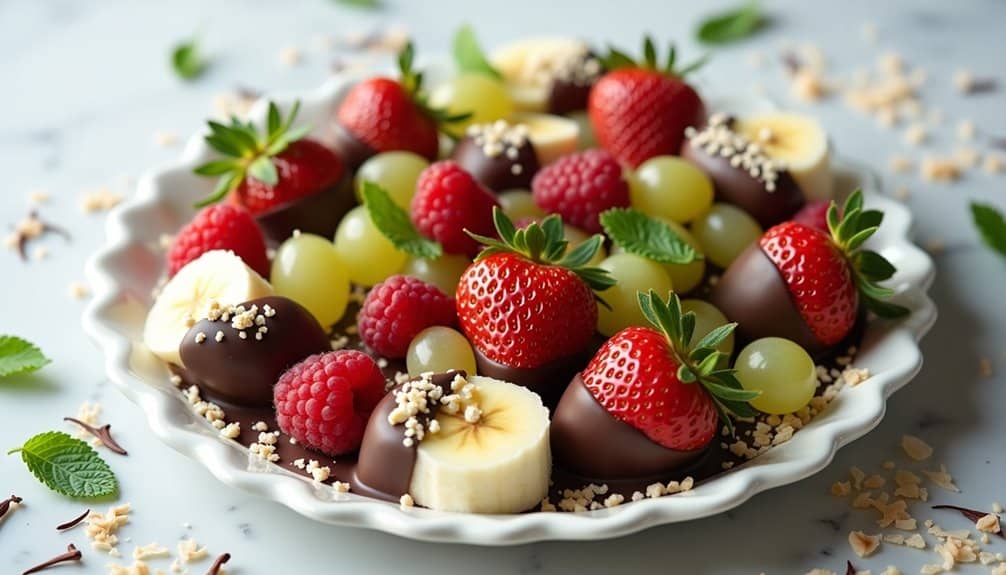
A chocolate-dipped fruit platter is the perfect summer dessert that combines fresh, seasonal fruits with rich, decadent chocolate. This elegant yet simple dish requires minimal cooking and can be prepared in advance for parties, gatherings, or a sophisticated after-dinner treat.
The key to creating an impressive chocolate-dipped fruit platter lies in selecting fresh, ripe fruits and using quality chocolate that melts smoothly. While dark chocolate is traditional, you can also use milk or white chocolate to create variety and visual appeal on your platter.
- 12 large strawberries
- 2 bananas, cut into 2-inch chunks
- 1 pint raspberries
- 2 cups green grapes
- 8 ounces high-quality dark chocolate
- 2 tablespoons vegetable oil
- Optional toppings: crushed nuts, coconut flakes, or sprinkles
- Parchment paper
Wash all fruits thoroughly and pat them completely dry with paper towels, as any water will cause the chocolate to seize. Line a large baking sheet with parchment paper. Chop the chocolate into small, uniform pieces and combine with vegetable oil in a microwave-safe bowl. Microwave in 30-second intervals, stirring between each interval, until the chocolate is completely melted and smooth.
Working quickly while the chocolate is warm, dip each piece of fruit halfway into the melted chocolate, allowing excess to drip off. If using toppings, sprinkle them over the chocolate-covered portion immediately before it sets. Place the dipped fruit on the parchment-lined baking sheet. Once all fruits are dipped, refrigerate the platter for 15-20 minutes until the chocolate is completely set.
For best results, serve the fruit platter within 2-3 hours of preparation. Keep the chocolate from becoming too hot when melting, as this can affect its texture and ability to set properly. If the chocolate becomes too thick while dipping, reheat it briefly in the microwave. Store any leftover dipped fruit in the refrigerator, but be aware that some fruits may release moisture over time, affecting the chocolate's appearance.
10-Minute Key Lime Mousse
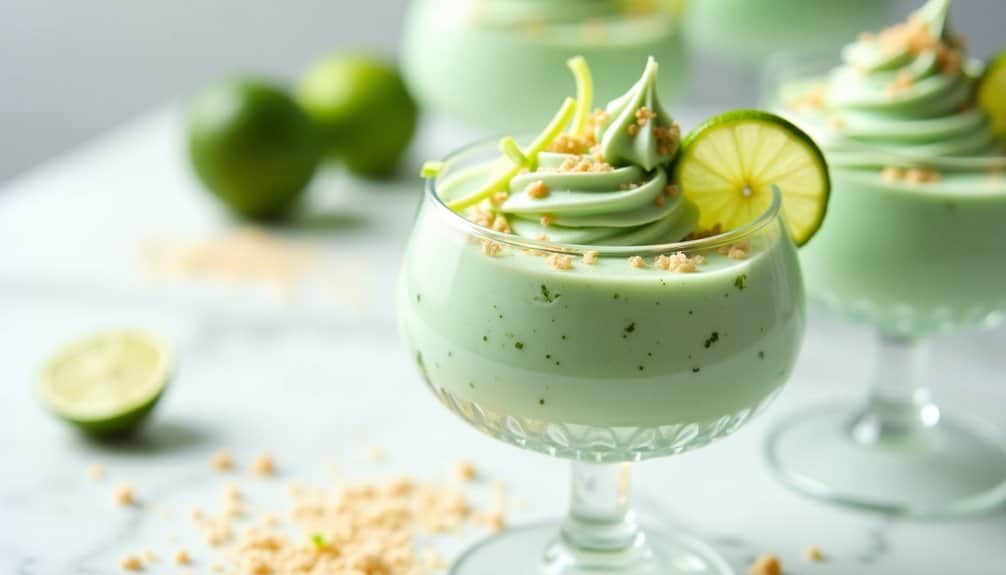
Minute Key Lime Mousse is a refreshing summer dessert that combines the tangy brightness of key limes with the luxurious texture of whipped cream. This no-bake treat delivers all the flavors of a traditional key lime pie but requires minimal effort and kitchen time.
This simplified mousse version eliminates the need for eggs or gelatin, making it an ideal choice for hot summer days when you don't want to turn on the oven. The dessert can be prepared in advance and stored in the refrigerator, perfect for entertaining or as a cooling treat after a backyard barbecue.
Ingredients:
- 16 oz cream cheese, softened
- 1 cup key lime juice
- 1 can (14 oz) sweetened condensed milk
- 2 cups heavy whipping cream
- 1/4 cup powdered sugar
- 1 tablespoon lime zest
- Graham cracker crumbs for garnish
- Fresh lime slices for garnish
In a large bowl, beat the softened cream cheese until smooth and creamy. Gradually add the sweetened condensed milk and key lime juice, beating until well combined. In a separate bowl, whip the heavy cream with powdered sugar until stiff peaks form. Gently fold the whipped cream into the lime mixture until fully incorporated, being careful not to deflate the mixture.
Divide the mousse among serving glasses or bowls. Refrigerate for at least 2 hours or overnight until set. Before serving, top with graham cracker crumbs, lime zest, and fresh lime slices.
For best results, ensure all ingredients are properly chilled before starting, except for the cream cheese which should be at room temperature for smooth blending. The mousse can be stored in the refrigerator for up to 3 days, though the graham cracker garnish should be added just before serving to maintain its crunch. If key limes are unavailable, regular lime juice can be substituted, though the flavor will be slightly less intense.
No-Churn Vanilla Bean Ice Cream
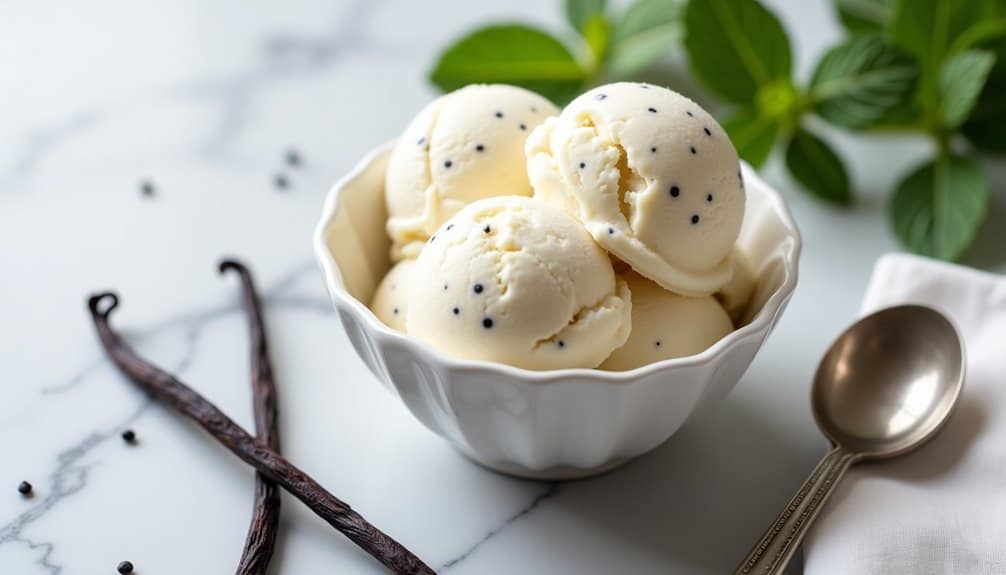
No-churn vanilla bean ice cream is a luxurious homemade dessert that captures the essence of summer without requiring an ice cream maker. This simple yet sophisticated treat uses just a few basic ingredients to create a smooth, creamy texture that rivals store-bought versions.
The magic of this recipe lies in the combination of sweetened condensed milk and whipped cream, which creates a perfect ice cream base. The addition of real vanilla beans elevates the flavor profile, infusing the ice cream with authentic vanilla specks and an intense, natural sweetness that artificial flavoring simply can't match.
Ingredients:
- 2 cups heavy whipping cream
- 1 (14 oz) can sweetened condensed milk
- 1 vanilla bean pod (or 2 teaspoons pure vanilla extract)
- 1/4 teaspoon salt
- Optional: 1 tablespoon vanilla bean paste
Pour the sweetened condensed milk into a large bowl. Split the vanilla bean pod lengthwise and scrape out the seeds using the back of a knife. Add the seeds to the condensed milk along with the salt, and mix well. In a separate bowl, whip the heavy cream until stiff peaks form, typically 2-3 minutes with an electric mixer. Gently fold the whipped cream into the condensed milk mixture using a rubber spatula, maintaining as much air as possible in the mixture.
Transfer the mixture to a freezer-safe container, preferably a metal loaf pan or similar container that allows for even freezing. Cover the surface directly with plastic wrap to prevent ice crystals from forming, then seal with a lid or additional wrap. Freeze for at least 6 hours or overnight until firm.
For best results, store the ice cream at the back of the freezer where the temperature is most consistent. Let it sit at room temperature for 5-10 minutes before scooping. If using vanilla extract instead of a vanilla bean, add it to the condensed milk before combining with the whipped cream. The ice cream will keep well for up to 2 weeks if properly stored.
Summer Fruit Pizza With Sugar Cookie Crust
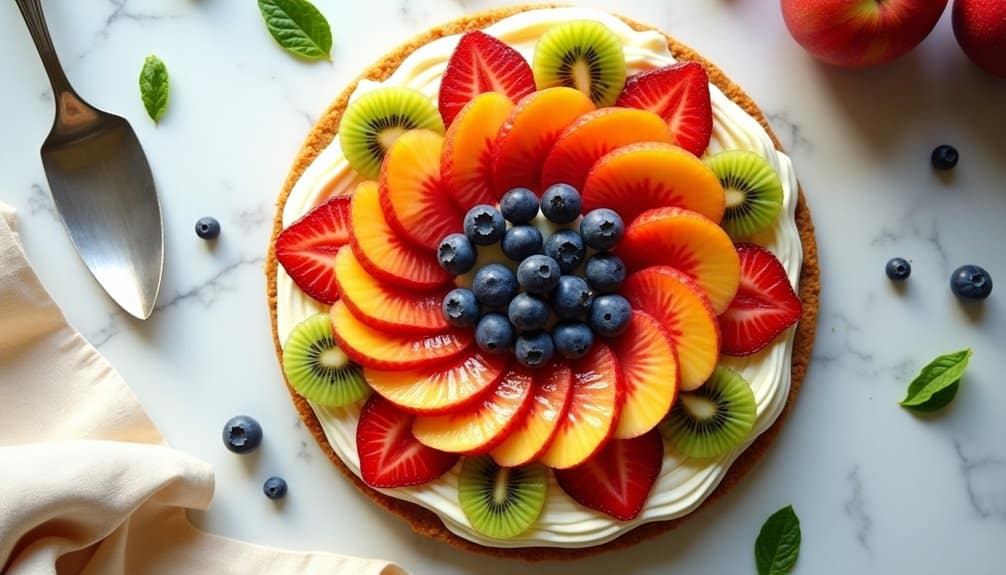
A fruit pizza combines the best of summer's bounty with a soft, sweet cookie base that's perfect for casual entertaining. This dessert takes the concept of a traditional pizza and transforms it into a delightful sweet treat that showcases vibrant fresh fruits atop a cream cheese frosting.
The beauty of this summer fruit pizza lies in its versatility – you can customize the fruit toppings based on what's in season or your personal preferences. The sugar cookie crust provides a sturdy yet tender foundation that perfectly complements the creamy topping and juicy fruits.
Ingredients:
- 1 package sugar cookie dough (16.5 oz) or homemade sugar cookie dough
- 8 oz cream cheese, softened
- 1/3 cup granulated sugar
- 1 teaspoon vanilla extract
- 2 cups assorted fresh fruit (strawberries, kiwi, blueberries, peaches)
- 1/4 cup apricot preserves
- 1 tablespoon water
Press the sugar cookie dough into a 12-inch pizza pan or round baking sheet, creating an even layer about 1/4 inch thick. Bake at 350°F for 12-15 minutes until lightly golden brown. Allow the crust to cool completely. Meanwhile, beat the cream cheese, sugar, and vanilla extract until smooth and creamy.
Once the crust has cooled, spread the cream cheese mixture evenly over the surface, leaving a small border around the edge. Arrange the sliced fruits in a decorative pattern on top of the cream cheese layer. Heat the apricot preserves with water until melted, then brush this glaze over the fruit to create a shiny finish and prevent browning.
For best results, chill the fruit pizza for at least one hour before serving. The cookie crust can be baked a day ahead, and the cream cheese mixture can be prepared in advance, but assemble with fruit just a few hours before serving to maintain freshness. If the cookie crust seems too soft, place it in the freezer for 5-10 minutes before adding toppings.
Grilled Pineapple With Honey-Lime Drizzle
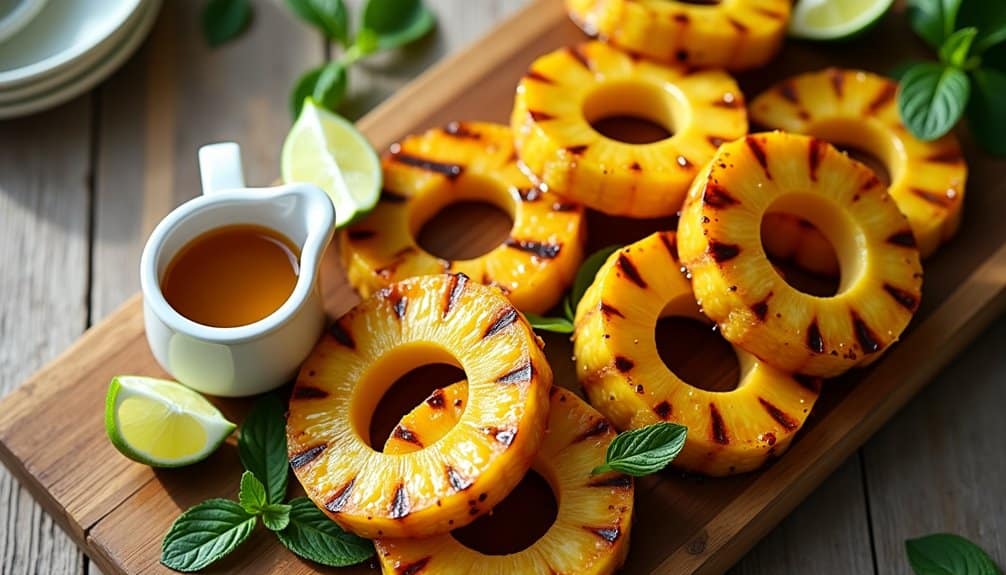
Grilled pineapple transforms an everyday tropical fruit into a sophisticated summer dessert. The heat from grilling caramelizes the natural sugars, creating deep, complex flavors while maintaining the fruit's refreshing qualities.
The honey-lime drizzle adds a perfect balance of sweet and tart notes, elevating this simple dessert to a restaurant-worthy finale. This recipe takes minimal effort but delivers impressive results, making it ideal for summer entertaining or a light weeknight treat.
- 1 ripe pineapple, peeled and cut into 1-inch rings
- 1/4 cup honey
- 2 tablespoons fresh lime juice
- 1 teaspoon lime zest
- 2 tablespoons butter, melted
- Pinch of sea salt
- Optional: vanilla ice cream for serving
Prepare the honey-lime drizzle by whisking together honey, lime juice, and lime zest in a small bowl until well combined. Set aside at room temperature. Brush the pineapple rings with melted butter on both sides and sprinkle with a tiny pinch of sea salt to enhance the sweetness.
Preheat your grill to medium-high heat (around 400°F). Place the pineapple rings directly on the grill grates and cook for 3-4 minutes per side until distinct grill marks appear and the fruit is heated through. The pineapple should be slightly softened but still maintain its shape.
For best results, choose a pineapple that yields slightly when pressed and has a sweet aroma at the base. The fruit should have a golden-yellow color, though some green is acceptable. If the pineapple is too ripe, it may fall apart on the grill. You can prepare the honey-lime drizzle up to 24 hours in advance and store it in the refrigerator, but bring it to room temperature before serving.
Strawberry Icebox Cake
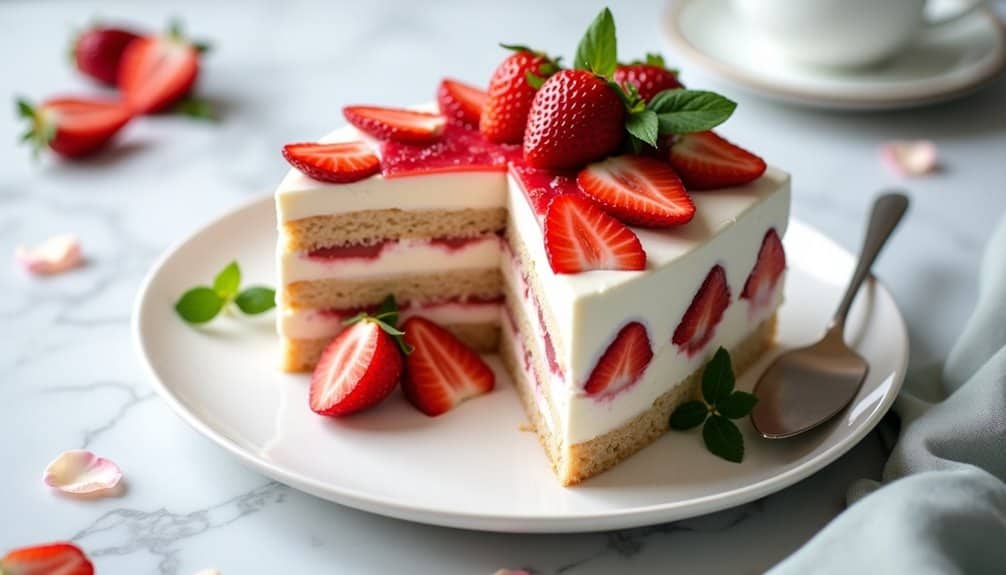
Strawberry Icebox Cake is a refreshing no-bake dessert that perfectly captures the essence of summer. This layered treat combines fresh strawberries, whipped cream, and graham crackers that soften into a cake-like texture as it chills in the refrigerator.
The beauty of this dessert lies in its simplicity and make-ahead convenience. As the layers rest together, the graham crackers absorb moisture from the cream and berries, transforming into tender layers that slice beautifully and melt in your mouth.
Ingredients:
- 3 pounds fresh strawberries, sliced
- 3 cups heavy whipping cream
- 1/4 cup powdered sugar
- 1 teaspoon vanilla extract
- 24-30 graham crackers
- 1/4 cup sour cream (optional)
- Fresh mint leaves for garnish
Layer the graham crackers in a 9×13 inch baking dish, breaking them as needed to create an even base. Whip the heavy cream with powdered sugar and vanilla until stiff peaks form. If using, fold in the sour cream for extra tanginess. Spread a thin layer of whipped cream over the graham crackers, then add a layer of sliced strawberries. Repeat the layers three more times, ending with whipped cream and a decorative arrangement of strawberries on top.
Cover the dish with plastic wrap and refrigerate for at least 4 hours, though overnight is best. This allows the graham crackers to soften and the flavors to meld together. When ready to serve, slice into squares and garnish with fresh mint leaves.
For best results, use ripe but firm strawberries and make sure they're completely dry after washing. The dessert can be made up to 24 hours in advance, but the strawberries may release more juice after this time. To prevent the whipped cream from weeping, avoid overbeating it and consider stabilizing it with a small amount of gelatin if serving in very warm conditions.
Blueberry and Lemon Yogurt Bark
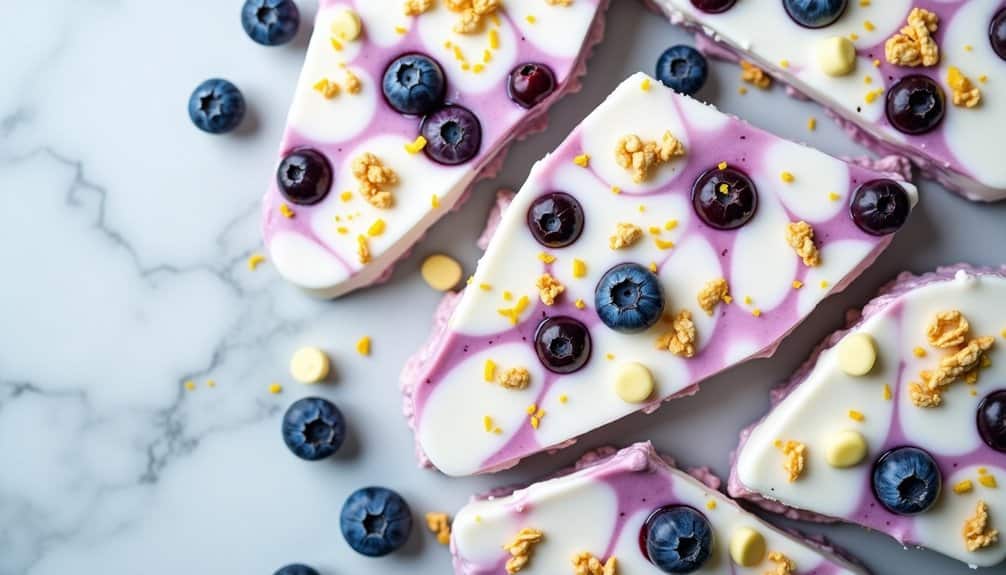
Blueberry and Lemon Yogurt Bark is a refreshing frozen treat that combines the tangy brightness of citrus with sweet summer berries. This no-bake dessert offers a healthier alternative to traditional ice cream while still satisfying sweet cravings on hot summer days.
The beauty of yogurt bark lies in its simplicity and versatility. The smooth, creamy base of Greek yogurt provides a protein-rich foundation, while fresh blueberries add bursts of natural sweetness and honey enhances the overall flavor profile without overwhelming the natural tanginess of the yogurt.
- 2 cups plain Greek yogurt
- 3 tablespoons honey
- 1 lemon (zest and 2 tablespoons juice)
- 1 cup fresh blueberries
- 1/4 cup granola
- 2 tablespoons white chocolate chips (optional)
Line a baking sheet with parchment paper. In a mixing bowl, combine the Greek yogurt, honey, lemon zest, and lemon juice until smooth and well incorporated. Pour the mixture onto the prepared baking sheet and spread it evenly to about 1/4-inch thickness. Scatter fresh blueberries, granola, and white chocolate chips (if using) across the surface, gently pressing them into the yogurt mixture.
Transfer the baking sheet to the freezer and freeze for at least 4 hours or until completely solid. Once frozen, break or cut the bark into irregular pieces or preferred shapes. Store the pieces in an airtight container in the freezer.
For best results, allow the yogurt bark to sit at room temperature for 1-2 minutes before eating to slightly soften. The bark can be stored in the freezer for up to 1 month, but the texture of the blueberries may change slightly over time. Using full-fat Greek yogurt will result in a creamier texture, while low-fat options may become slightly more icy when frozen.
No-Bake S'mores Bars
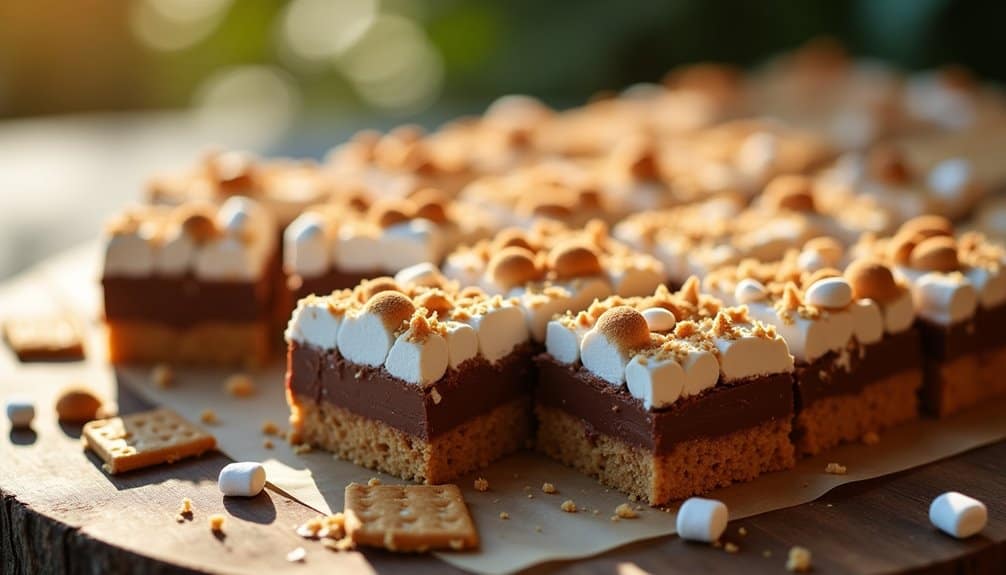
No-bake s'mores bars capture the essence of summer campfire treats without the need for an actual fire or oven. These delicious bars combine the classic elements of s'mores – graham crackers, chocolate, and marshmallows – in a convenient, portable form that's perfect for picnics, backyard gatherings, or any summer celebration.
The beauty of this recipe lies in its simplicity and the fact that it doesn't require heating up your kitchen on hot summer days. The result is a satisfying treat that delivers all the nostalgic flavors of traditional s'mores while being much easier to serve and share with a crowd.
Ingredients:
- 2 1/2 cups graham cracker crumbs
- 1/2 cup unsalted butter, melted
- 2 cups mini marshmallows
- 2 cups milk chocolate chips
- 1/4 cup heavy cream
- 1 cup crushed graham crackers for topping
- 1 cup additional mini marshmallows for topping
Line a 9×13 inch baking pan with parchment paper, allowing excess paper to hang over the sides. Mix graham cracker crumbs with melted butter until well combined, then press firmly into the bottom of the prepared pan to create the crust. Place in the refrigerator to chill while preparing the remaining layers.
Create the chocolate layer by heating heavy cream until just simmering, then pour over chocolate chips in a bowl. Let sit for 2 minutes, then stir until smooth. Fold in 2 cups of mini marshmallows. Pour this mixture over the chilled graham cracker crust, spreading evenly. Top with the remaining crushed graham crackers and mini marshmallows, pressing them lightly into the chocolate layer.
For best results, refrigerate the bars for at least 4 hours or overnight before cutting. The chocolate layer should be completely set to achieve clean cuts. Store these bars in an airtight container in the refrigerator for up to 5 days, but allow them to sit at room temperature for 10-15 minutes before serving for the best texture and flavor.
Coconut and Raspberry Chia Pudding
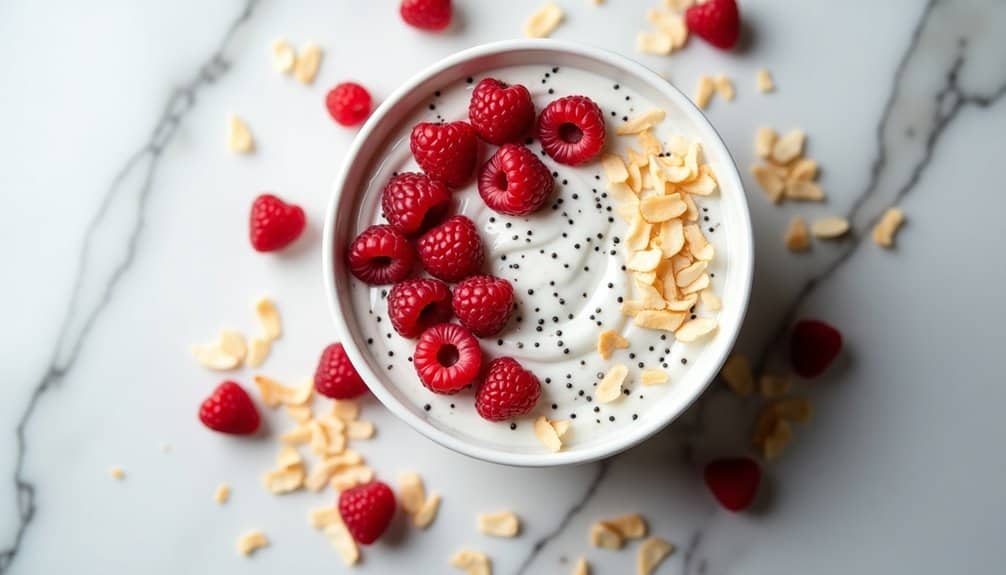
Coconut and raspberry chia pudding is a refreshing and healthy summer dessert that combines the tropical essence of coconut with the tartness of fresh raspberries. This no-bake treat is perfect for hot days when you want something sweet but light.
The beauty of this dessert lies in its simplicity and versatility. The chia seeds create a delightful pudding-like texture when soaked in coconut milk, while also providing omega-3 fatty acids, fiber, and protein. The natural sweetness of coconut paired with fresh raspberries creates a balanced flavor profile that's both satisfying and nutritious.
- 1/4 cup chia seeds
- 1 can (14 oz) full-fat coconut milk
- 2 tablespoons maple syrup
- 1/2 teaspoon vanilla extract
- 1 cup fresh raspberries
- 1/4 cup coconut flakes
- Pinch of salt
In a medium bowl, whisk together the coconut milk, maple syrup, vanilla extract, and salt until well combined. Add the chia seeds and whisk thoroughly to prevent clumping. Let the mixture stand for 5 minutes, then whisk again to break up any clusters that may have formed. Cover the bowl and refrigerate for at least 4 hours or overnight, until the pudding has thickened to a desired consistency.
Once set, gently fold in half of the raspberries, being careful not to crush them. Divide the pudding between serving bowls and top with the remaining raspberries and coconut flakes. For best results, serve immediately after adding the toppings.
For optimal results, use full-fat coconut milk as it creates the creamiest texture. The pudding can be stored in an airtight container in the refrigerator for up to 5 days, but add the fresh toppings just before serving. If the pudding becomes too thick, thin it out with a splash of coconut milk or water.