8 Easy Vegetarian Sandwich Recipes
You're about to discover eight vegetarian sandwiches that'll transform your lunch routine, each one designed to be both satisfying and simple to prepare. Whether you're a committed vegetarian or just looking to add more plant-based options to your menu, these recipes combine familiar ingredients in creative ways. From the rich comfort of caramelized onions in a classic grilled cheese to the Mediterranean flair of hummus-veggie stacks, there's a sandwich here that'll match your taste and skill level.
Classic Grilled Cheese With Caramelized Onions

The classic grilled cheese sandwich gets a gourmet upgrade with the addition of sweet, caramelized onions. This combination transforms a simple comfort food into an elevated dining experience that still maintains its nostalgic appeal.
The key to this recipe lies in properly caramelizing the onions, a process that takes time but rewards patience with deep, complex flavors. When paired with melted cheese between crispy, buttered bread slices, the result is a perfectly balanced sandwich that's both sophisticated and satisfying.
Ingredients:
- 2 slices sourdough bread
- 2 tablespoons butter, softened
- 4 ounces aged cheddar cheese, sliced
- 1 large yellow onion, thinly sliced
- 2 tablespoons olive oil
- 1/2 teaspoon salt
- 1/4 teaspoon black pepper
- 1/4 teaspoon sugar
Start by caramelizing the onions. Heat olive oil in a pan over medium heat, add sliced onions, salt, pepper, and sugar. Cook for 25-30 minutes, stirring occasionally, until onions are golden brown and very soft.
While the onions cook, butter one side of each bread slice. Once onions are ready, place one slice of bread butter-side down in a clean skillet over medium heat. Layer half the cheese, the caramelized onions, and remaining cheese, then top with the second slice of bread, butter-side up.
Cook for 3-4 minutes on each side, pressing gently with a spatula, until the bread is golden brown and cheese is completely melted. If the bread browns too quickly before the cheese melts, lower the heat and cover the pan with a lid for 1-2 minutes.
For best results, let the sandwich rest for 2 minutes before cutting. This allows the cheese to set slightly, preventing it from oozing out completely when cut. Using a serrated knife will give you cleaner slices without squishing the sandwich. The onions can be made ahead and stored in the refrigerator for up to three days, making this an easy meal to prepare on busy days.
Mediterranean Hummus and Veggie Stack
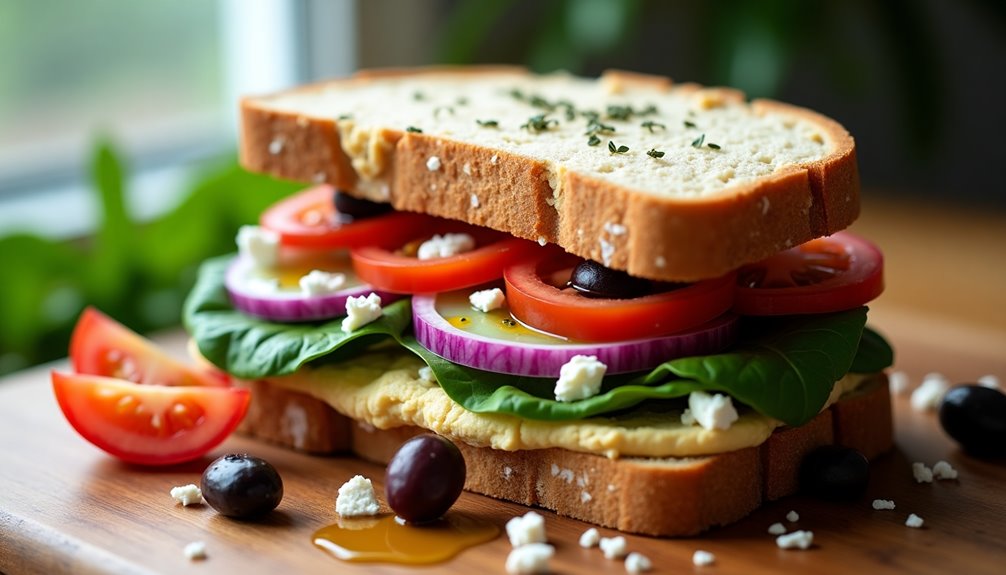
The Mediterranean Hummus and Veggie Stack combines fresh vegetables with creamy hummus for a satisfying and nutritious vegetarian sandwich. This colorful creation draws inspiration from Mediterranean cuisine, featuring layers of crisp vegetables, tangy feta, and protein-rich hummus between slices of artisanal bread.
Perfect for lunch or a light dinner, this sandwich can be assembled quickly while delivering complex flavors and textures. The combination of fresh produce and hearty hummus provides a good balance of nutrients, making it both filling and healthy.
Ingredients:
- 2 slices whole grain bread
- 1/2 cup classic hummus
- 1 medium cucumber, thinly sliced
- 1 large tomato, sliced
- 1/2 red onion, thinly sliced
- 1 cup fresh spinach leaves
- 1/4 cup crumbled feta cheese
- 4-5 kalamata olives, pitted and chopped
- 1 tablespoon extra virgin olive oil
- 1 teaspoon dried oregano
- Salt and black pepper to taste
Spread a generous layer of hummus on both slices of bread. On one slice, begin layering the vegetables: cucumber, tomato, red onion, and spinach leaves. Sprinkle the feta cheese and chopped olives over the vegetables. Drizzle with olive oil and season with dried oregano, salt, and pepper. Top with the second slice of bread (hummus side down) and press gently to compact the sandwich.
For best results, let the sandwich rest for 5-10 minutes before cutting to allow the flavors to meld. The bread can be lightly toasted beforehand for extra crunch, and the sandwich can be wrapped tightly in parchment paper to prevent the fillings from falling out while eating.
Roasted Red Pepper and Mozzarella Panini
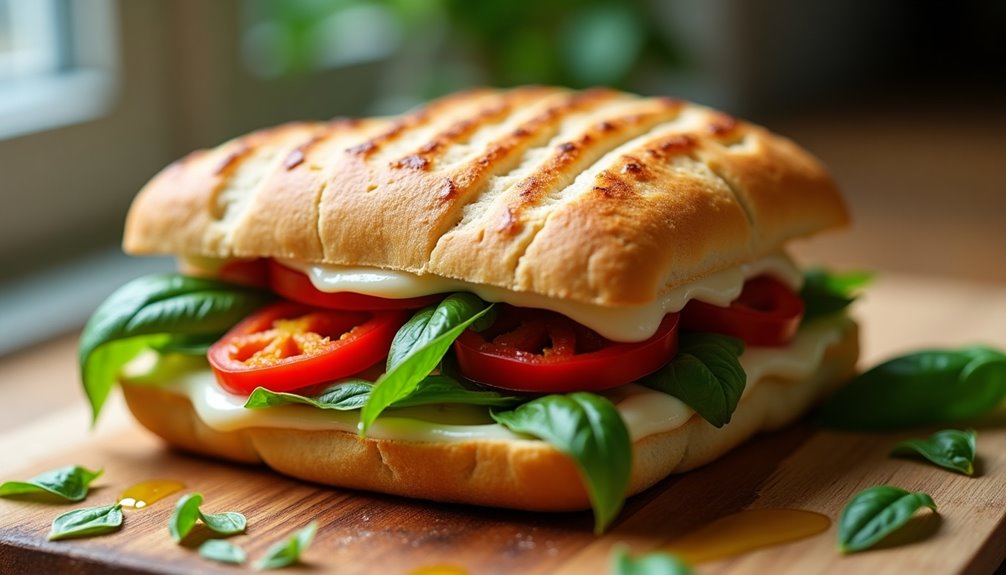
Roasted Red Pepper and Mozzarella Panini elevates the classic grilled cheese to new heights with the addition of sweet, smoky roasted red peppers and creamy fresh mozzarella. This Italian-inspired sandwich delivers a perfect balance of flavors and textures, from the crispy grilled bread to the melty cheese and tender peppers.
Whether prepared for a quick lunch or casual dinner, this panini combines simplicity with sophistication. The combination of fresh basil, garlic-infused olive oil, and high-quality ingredients transforms ordinary sandwich ingredients into a cafe-worthy creation that can be made in minutes.
Ingredients:
- 2 slices sourdough bread
- 4 oz fresh mozzarella, sliced
- 1 roasted red pepper, sliced
- 4-5 fresh basil leaves
- 2 tablespoons olive oil
- 1 clove garlic, minced
- Salt and black pepper to taste
- 1 teaspoon Italian seasoning (optional)
Begin by mixing minced garlic with olive oil and let it sit for 5 minutes to infuse. Brush the outside of both bread slices with the garlic-infused oil. Layer one slice of bread with mozzarella, followed by roasted red peppers and fresh basil leaves. Season with salt, pepper, and Italian seasoning if desired. Top with the second slice of bread, oiled side facing out.
Heat a panini press to medium-high heat (alternatively, use a heavy skillet or griddle). Place the sandwich in the press and grill for 3-4 minutes until the bread is golden brown and crispy, and the cheese has melted completely. If using a skillet, press down on the sandwich with a spatula or place a heavy pan on top, grilling for 2-3 minutes per side.
For best results, allow the sandwich to rest for 1-2 minutes before slicing and serving. This resting period helps the cheese set slightly and prevents the filling from immediately sliding out. If you don't have a panini press, a cast-iron skillet with a weight on top works just as well – simply wrap a brick in foil or use another heavy pan as a press to achieve the characteristic crispy exterior.
Chickpea "Tuna" Salad Sandwich

A chickpea "tuna" salad sandwich is a plant-based alternative that closely mimics the texture and taste of traditional tuna salad. This versatile recipe transforms ordinary chickpeas into a protein-rich, creamy filling that satisfies cravings for classic deli-style sandwiches while remaining completely vegetarian.
The magic of this recipe lies in its simplicity and the way chickpeas are mashed to create a flaky texture similar to actual tuna. When combined with classic tuna salad ingredients like celery, onions, and mayo, the result is a convincing and delicious sandwich filling that's perfect for lunch boxes, picnics, or quick meals.
- 2 15-oz cans chickpeas, drained and rinsed
- 1/2 cup vegan or regular mayonnaise
- 2 celery stalks, finely diced
- 1/4 red onion, finely chopped
- 2 tablespoons fresh lemon juice
- 1 tablespoon Dijon mustard
- 1/4 cup fresh parsley, chopped
- 1 teaspoon kelp powder (optional, for seafood flavor)
- 1/2 teaspoon salt
- 1/4 teaspoon black pepper
- 8 slices bread of choice
- Lettuce leaves
- Sliced tomatoes
Drain and rinse the chickpeas thoroughly, then place them in a large bowl. Using a potato masher or fork, mash the chickpeas until they're broken down but still maintain some texture – you don't want them completely smooth. Add the mayonnaise, celery, red onion, lemon juice, mustard, parsley, kelp powder (if using), salt, and pepper to the mashed chickpeas.
Mix all ingredients thoroughly until well combined. Taste and adjust seasonings as needed. To assemble the sandwiches, layer lettuce on bread slices, add a generous portion of the chickpea mixture, and top with sliced tomatoes and the remaining bread slices.
For best results, refrigerate the chickpea mixture for at least 30 minutes before serving to allow the flavors to meld together. The mixture can be stored in an airtight container in the refrigerator for up to 5 days. If the mixture becomes dry during storage, simply add a small amount of mayonnaise to restore the creamy texture. The kelp powder is optional but adds a subtle ocean flavor that makes the mixture taste more like traditional tuna salad.
Avocado and Cucumber Tea Sandwich
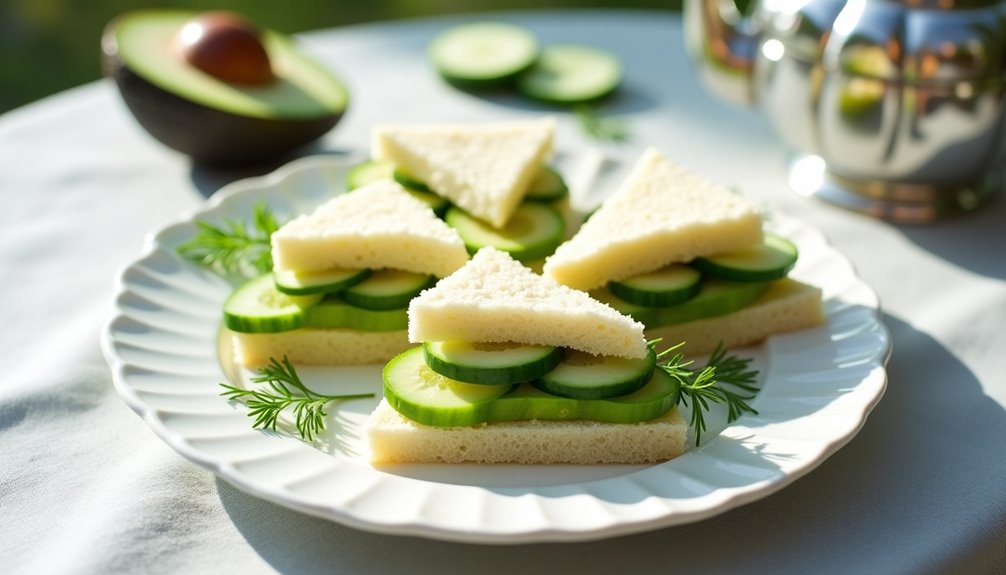
The avocado and cucumber tea sandwich is a refreshing twist on traditional afternoon tea fare, combining the creamy richness of ripe avocados with the crisp coolness of fresh cucumber. This light yet satisfying vegetarian option offers a perfect balance of textures and flavors that work harmoniously together.
These dainty sandwiches are ideal for spring and summer gatherings, garden parties, or simple afternoon snacks. The key to their success lies in using fresh, high-quality ingredients and preparing them just before serving to maintain optimal freshness and prevent the bread from becoming soggy.
Ingredients:
- 8 slices white bread, crusts removed
- 2 ripe avocados
- 1 English cucumber, thinly sliced
- 2 tablespoons fresh lemon juice
- 1/4 cup cream cheese, softened
- Salt and pepper to taste
- Fresh dill sprigs
- Watercress (optional)
Begin by peeling and mashing the avocados in a bowl, then mix with lemon juice, salt, and pepper until smooth. Spread a thin layer of cream cheese on each slice of bread, followed by the avocado mixture. Layer thin cucumber slices on half of the bread slices, overlapping slightly to ensure even coverage. Add fresh dill sprigs and watercress if desired, then top with the remaining bread slices.
Cut each sandwich diagonally twice to create four triangular pieces. If serving later, cover with a slightly damp paper towel and plastic wrap to prevent the bread from drying out and the avocado from browning.
For best results, select avocados that yield slightly to gentle pressure and English cucumbers, which have fewer seeds and thinner skin than regular cucumbers. The sandwiches can be prepared up to 2 hours in advance if properly wrapped and refrigerated, but they're best enjoyed fresh. Consider serving with a light dusting of paprika or microgreens for added visual appeal.
Caprese Sandwich With Pesto Spread
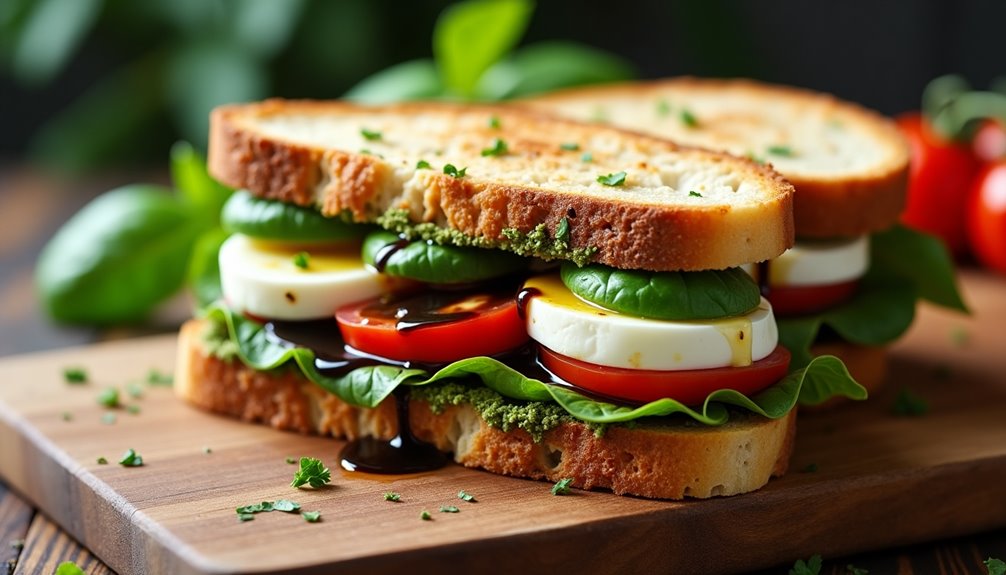
The classic Caprese sandwich transforms the beloved Italian salad into a satisfying handheld meal. Fresh mozzarella, ripe tomatoes, and fragrant basil leaves come together between slices of crusty bread, creating a harmony of flavors that celebrates simple, quality ingredients.
What elevates this version is the addition of a homemade pesto spread, which adds depth and intensity to the traditional combination. The bright, garlicky notes of the pesto complement the creamy mozzarella while adding an extra layer of basil flavor that permeates the entire sandwich.
Ingredients:
- 2 slices crusty Italian bread
- 4 thick slices fresh mozzarella
- 2 medium ripe tomatoes, sliced
- Fresh basil leaves
- 3 tablespoons pesto
- Extra virgin olive oil
- Balsamic glaze
- Salt and black pepper to taste
Start by lightly toasting the bread slices until they're golden brown but still soft in the middle. Spread a generous layer of pesto on both inner sides of the bread. Layer the bottom slice with fresh mozzarella, followed by tomato slices and whole basil leaves. Drizzle with a small amount of olive oil and balsamic glaze, then season with salt and pepper. Top with the remaining bread slice, pesto side down.
For the best results, let the sandwich rest for 5 minutes before cutting. This allows the pesto to slightly soften the bread and the flavors to meld together. If serving later, wrap the sandwich in parchment paper rather than plastic wrap to prevent the bread from becoming soggy. Use only room-temperature mozzarella for optimal texture and flavor, and select tomatoes that are ripe but still firm enough to slice cleanly.
Grilled Portobello Mushroom Burger
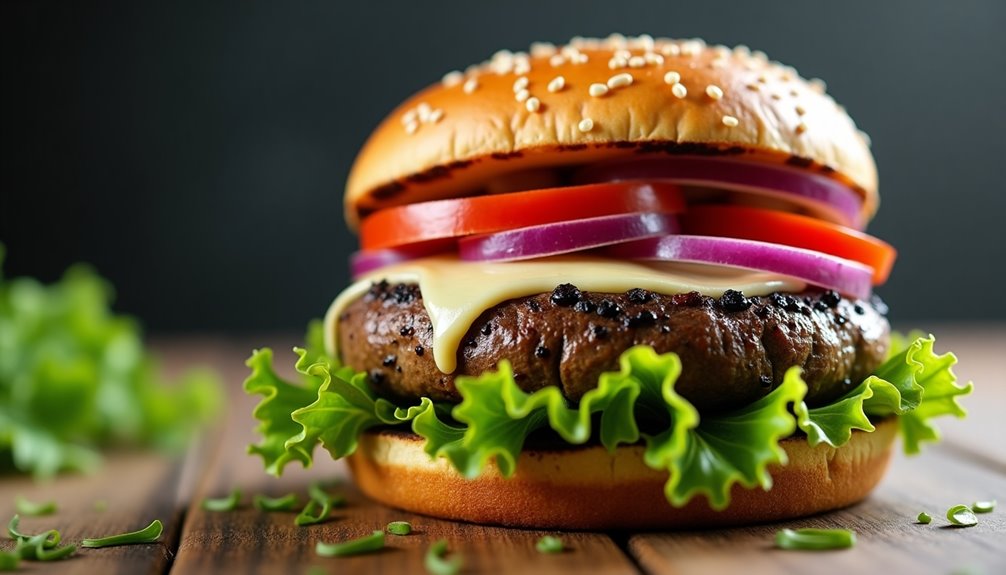
A grilled portobello mushroom burger offers a hearty, meat-free alternative that satisfies even dedicated carnivores. The large, meaty cap of the portobello mushroom provides a substantial base that absorbs marinades well and develops a rich, umami flavor when grilled to perfection.
When properly prepared, this sandwich delivers a juicy, flavorful experience complete with a slight char from the grill and complementary toppings that enhance the mushroom's natural earthiness. The key to success lies in proper cleaning and marinating of the mushroom caps before they hit the grill.
- 4 large portobello mushroom caps
- 1/4 cup balsamic vinegar
- 3 tablespoons olive oil
- 2 cloves garlic, minced
- 1 teaspoon dried thyme
- 1/2 teaspoon salt
- 1/4 teaspoon black pepper
- 4 burger buns
- 4 slices provolone cheese
- Lettuce leaves
- Sliced tomatoes
- Red onion rings
- Mayonnaise or preferred condiments
Clean the mushroom caps by gently wiping them with a damp paper towel and removing the stems. In a shallow dish, whisk together balsamic vinegar, olive oil, minced garlic, thyme, salt, and pepper. Place the mushroom caps in the marinade, gill side up, and let them sit for 15-30 minutes. Preheat your grill to medium-high heat. Grill the mushrooms for 5-7 minutes per side, starting with the gill side up. During the last minute of cooking, add cheese to the caps if desired and close the grill lid to melt. Assemble the burgers on toasted buns with your chosen toppings.
For best results, avoid washing mushrooms under running water as they can become waterlogged. Instead, use a damp cloth to clean them. If grilling isn't an option, these can be cooked in a grill pan or under the broiler with similarly delicious results. The mushrooms will shrink during cooking, so choose caps that are slightly larger than your buns.
Egg Salad and Watercress on Rye
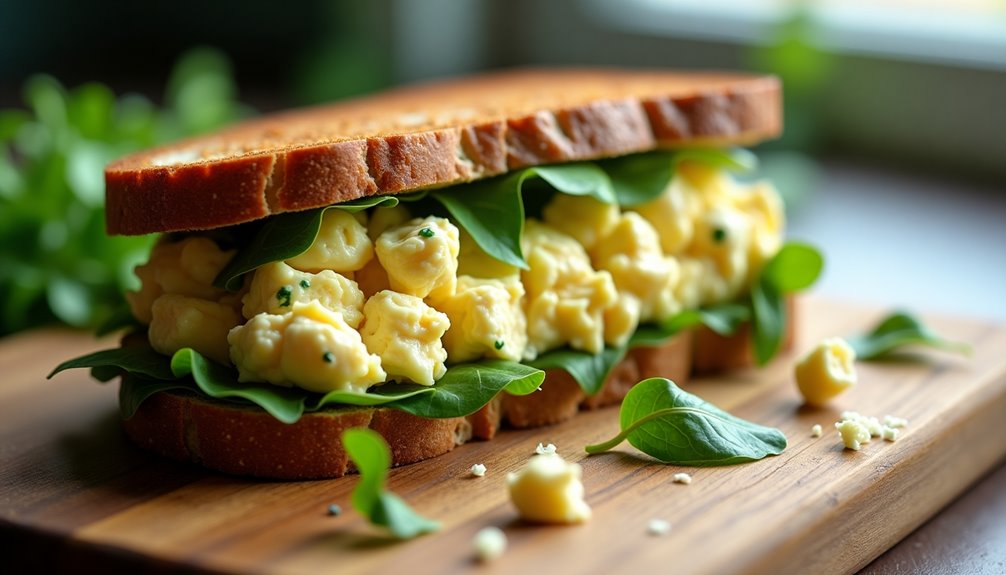
Egg salad sandwiches are a classic vegetarian option that combines creamy textures with the peppery bite of fresh watercress. This version elevates the traditional recipe by using hearty rye bread, which adds a robust, earthy flavor that perfectly complements the filling.
The key to an exceptional egg salad sandwich lies in properly cooking the eggs and achieving the right balance of creaminess and texture. When paired with crisp watercress, the combination creates a satisfying lunch option that provides protein, healthy fats, and fresh vegetables in one convenient package.
Ingredients:
- 6 large eggs
- 1/3 cup mayonnaise
- 1 tablespoon Dijon mustard
- 1 celery stalk, finely diced
- 2 tablespoons finely chopped red onion
- 1/4 teaspoon salt
- 1/4 teaspoon black pepper
- 8 slices rye bread
- 2 cups fresh watercress
- 1 tablespoon fresh lemon juice
Place the eggs in a pot and cover with cold water. Bring to a boil, then remove from heat and let stand, covered, for 12 minutes. Transfer eggs to an ice bath and peel once cooled. Chop the eggs into small pieces and mix with mayonnaise, mustard, celery, red onion, salt, and pepper in a bowl until well combined.
Toss the watercress with lemon juice and set aside. Spread the egg salad mixture evenly on four slices of rye bread, top with dressed watercress, and cover with remaining bread slices. Cut sandwiches diagonally and serve immediately.
For best results, prepare the egg salad mixture at least one hour before serving to allow flavors to meld. The egg salad can be stored in an airtight container for up to two days in the refrigerator, but add the watercress just before serving to maintain its crispness. To prevent soggy sandwiches, lightly toast the rye bread and let it cool completely before assembling.