15 Innovative Ways to Use Ripe Bananas
You've got ripe bananas on your counter, and they're practically begging to become something extraordinary. From transforming them into creamy desserts to leveraging their natural sweetness in unexpected recipes, these soft, speckled fruits are culinary chameleons waiting to surprise you. Whether you're a home cook looking to reduce food waste or a curious experimenter in the kitchen, these 15 innovative techniques will revolutionize how you view this humble fruit.
Banana Bread Reimagined
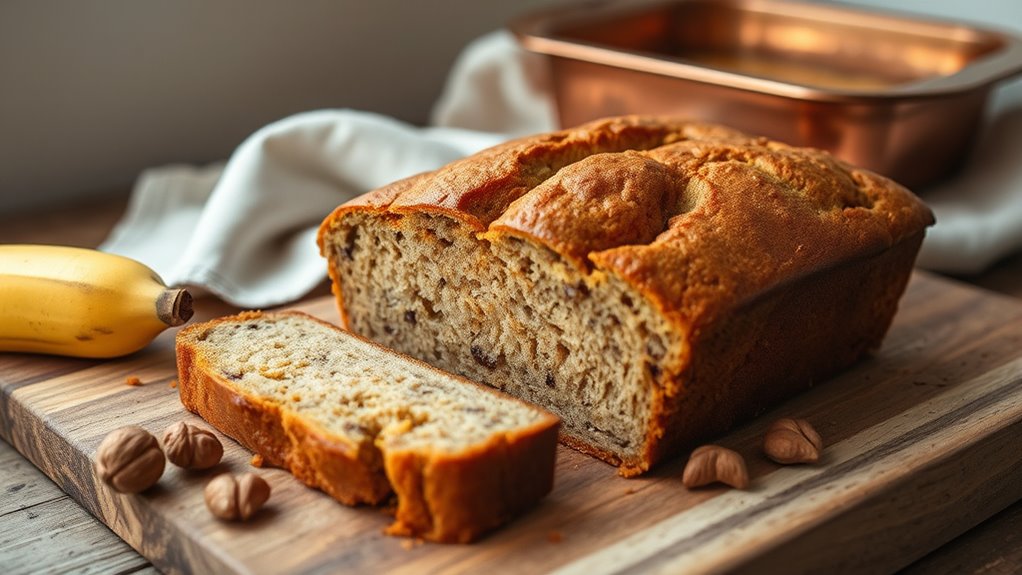
When traditional banana bread becomes mundane, it's time to elevate this classic comfort food into something extraordinary. This reimagined banana bread introduces unexpected flavors and textures that transform the humble loaf into a gourmet experience that will surprise and delight even the most discerning palate.
By incorporating sophisticated ingredients and innovative techniques, we'll create a banana bread that goes far beyond the standard recipe, offering a complex and memorable culinary journey that celebrates the natural sweetness of ripe bananas while introducing exciting new dimensions of taste and texture.
Ingredients:
- 3 very ripe bananas, mashed
- 1/2 cup brown butter
- 1/3 cup dark muscovado sugar
- 2 large eggs
- 1 teaspoon vanilla extract
- 1 1/2 cups all-purpose flour
- 1 teaspoon baking soda
- 1/2 teaspoon sea salt
- 1/4 cup toasted hazelnuts, chopped
- 2 tablespoons crystallized ginger, finely diced
- Zest of one orange
Begin by browning the butter in a skillet over medium heat, swirling constantly until it develops a nutty aroma and golden brown color. Allow the brown butter to cool slightly before incorporating it into the mashed bananas, creating a rich, caramelized base for the bread. Combine the wet ingredients thoroughly, ensuring the eggs are fully integrated and the mixture is smooth.
In a separate bowl, sift together the dry ingredients, then gently fold them into the wet mixture. Be careful not to overmix, as this can result in a dense, tough bread. Fold in the chopped hazelnuts, crystallized ginger, and orange zest, distributing them evenly throughout the batter. Pour the batter into a prepared loaf pan and smooth the top with a spatula.
Bake the banana bread in a preheated 350°F oven for approximately 50-60 minutes, or until a toothpick inserted into the center comes out clean. Allow the bread to cool in the pan for 10 minutes before transferring to a wire rack to cool completely.
For the most vibrant flavor and texture, use bananas that are almost completely black and soft, as these will provide the most intense sweetness and moisture. If the bread seems to be browning too quickly, loosely tent it with aluminum foil to prevent burning while allowing the interior to continue cooking. This banana bread can be stored at room temperature, wrapped tightly in plastic wrap, for up to five days, or frozen for up to three months.
Smoothie Superstar
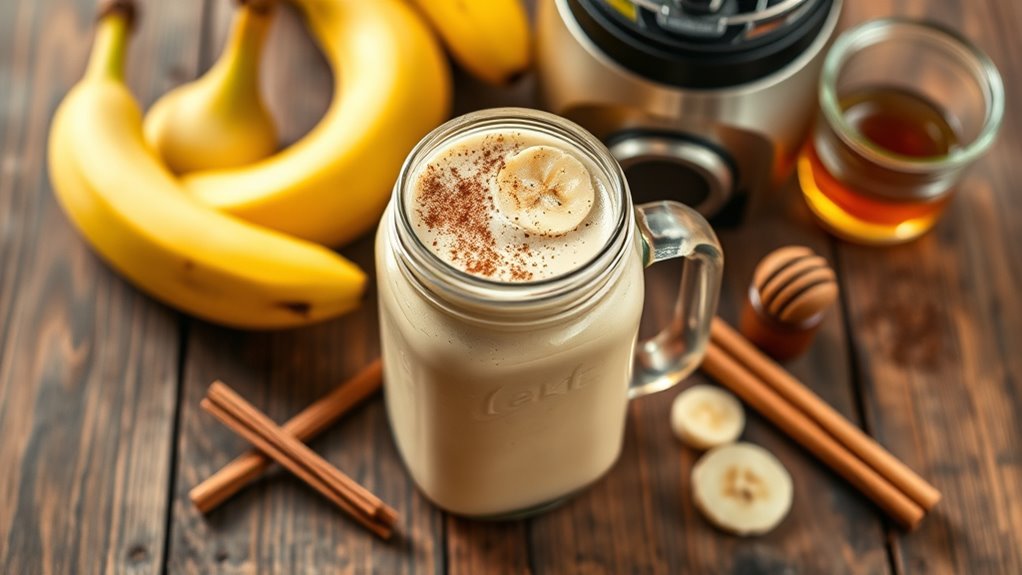
Ripe bananas are the secret weapon in creating the most delectable and creamy smoothies. Their natural sweetness and soft texture make them the perfect base for a nutritious and delicious drink that can easily become a breakfast staple or post-workout refreshment.
This Banana Bliss Smoothie takes advantage of overripe bananas, transforming them from potential waste into a vibrant, energizing beverage that will tantalize your taste buds and provide essential nutrients.
Ingredients:
- 2 very ripe bananas
- 1 cup almond milk
- 1/2 cup Greek yogurt
- 1 tablespoon honey
- 1/2 teaspoon vanilla extract
- 1/4 teaspoon ground cinnamon
- 4-5 ice cubes
- Optional: 1 tablespoon almond butter
Combine the ripe bananas, almond milk, Greek yogurt, honey, vanilla extract, and cinnamon in a blender. Blend these ingredients on high speed until the mixture becomes smooth and creamy, ensuring no banana chunks remain. Add the ice cubes and blend again until the smoothie reaches a thick, frosty consistency.
For best results, use bananas that are completely brown or nearly black on the outside, as these will provide the deepest, most concentrated banana flavor and natural sweetness. If you prefer a thicker smoothie, freeze the bananas beforehand by peeling and cutting them into chunks before freezing. This technique will also eliminate the need for additional ice and create an even more luxurious texture.
Natural Sweetener Hack
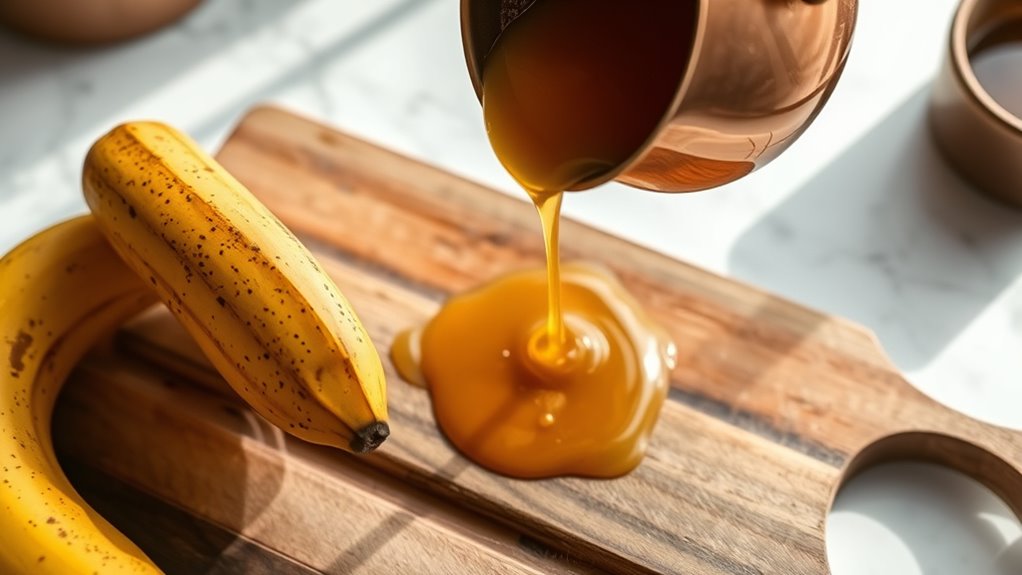
Banana natural sweetener is a game-changing kitchen technique that transforms overripe bananas into a versatile, sugar-alternative ingredient. By creating a concentrated banana syrup, home cooks can reduce refined sugar in multiple recipes while adding depth of flavor and natural sweetness.
This method works exceptionally well for baking, smoothies, and as a topping for various desserts, maximizing the potential of bananas that might otherwise be discarded. The process is simple and requires minimal equipment, making it accessible for both novice and experienced cooks.
Ingredients:
- 4-5 very ripe bananas
- 1/4 cup water
- Optional: 1 teaspoon vanilla extract
- Optional: Pinch of cinnamon
To create the banana natural sweetener, begin by peeling and roughly chopping the ripest bananas you have available. Place the bananas and water in a medium saucepan over medium-low heat, allowing them to slowly break down and release their natural sugars. Continuously mash the bananas with a wooden spoon or potato masher to help them release moisture and create a smooth consistency.
Simmer the mixture for approximately 15-20 minutes, stirring frequently to prevent burning. The liquid will gradually reduce and thicken, transforming into a concentrated, golden-brown syrup with an intense banana flavor. If desired, stir in vanilla extract or cinnamon during the last few minutes of cooking to enhance the complexity of the sweetener.
For best results, store your banana natural sweetener in a clean, sealed glass jar in the refrigerator, where it will keep for up to one week. The syrup's consistency will be thinner than traditional syrups but can be further reduced if a thicker texture is preferred, and it works wonderfully as a sugar replacement in baking, drizzling over pancakes, or mixing into morning oatmeal.
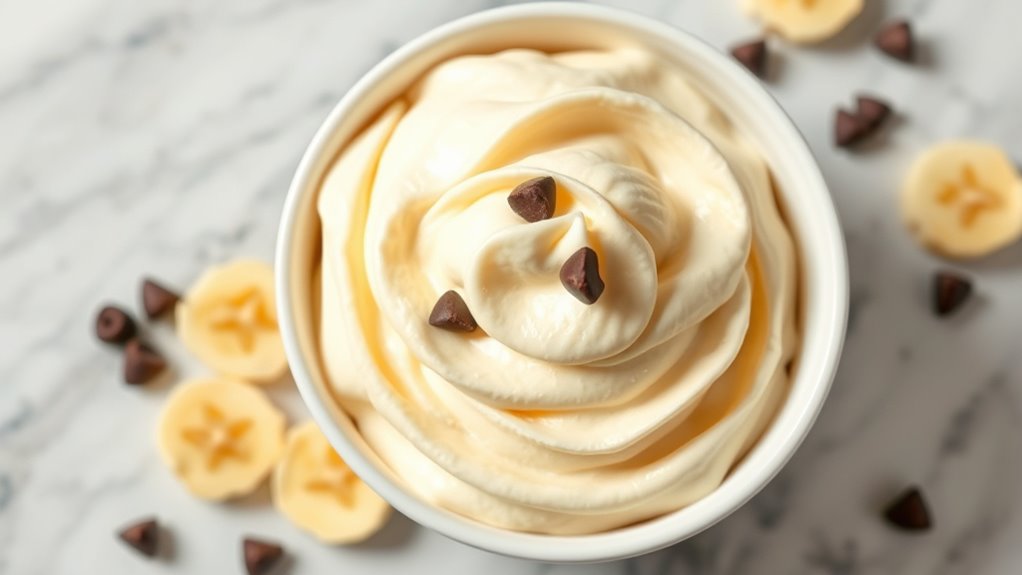
Homemade Ice Cream Delight
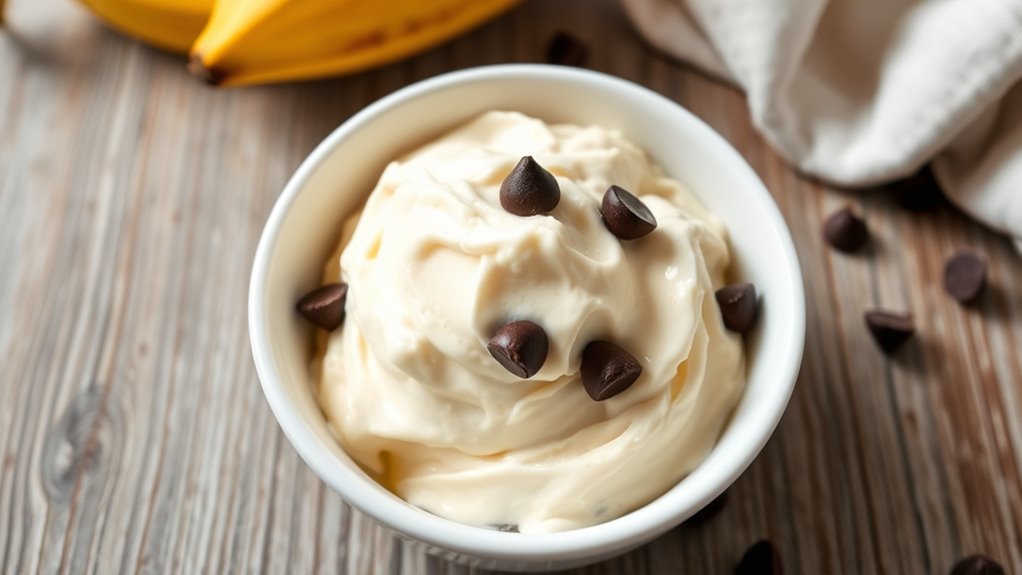
Banana "Nice" Cream is a delightful, guilt-free dessert that transforms overripe bananas into a creamy, delectable treat. This no-churn, dairy-free ice cream alternative isn't only easy to make but also provides a nutritious way to enjoy a sweet indulgence while reducing food waste.
The magic of this recipe lies in the natural sweetness and smooth texture of frozen bananas, which create a remarkably ice cream-like consistency when blended. By simply freezing ripe bananas and processing them, you can create a delicious dessert that rivals traditional ice cream in taste and texture.
Ingredients:
- 3-4 very ripe bananas
- 1/4 cup optional mix-ins (chocolate chips, nuts, cocoa powder)
- Pinch of salt (optional)
- 1 teaspoon vanilla extract (optional)
To prepare, first peel the ripe bananas and slice them into roughly 1-inch chunks. Arrange the banana pieces on a parchment-lined baking sheet, ensuring they aren't touching each other. Freeze the banana pieces for at least 2 hours, or preferably overnight, until they're completely solid.
Once frozen, transfer the banana chunks to a food processor or high-powered blender. Pulse and blend the frozen bananas, scraping down the sides periodically. Continue blending until the bananas transform from chunky to crumbly, and finally into a smooth, creamy consistency resembling soft-serve ice cream. If desired, add optional mix-ins during the final blend and pulse to incorporate.
For best results, serve the nice cream immediately for a soft-serve texture, or transfer to a freezer-safe container and freeze for 1-2 hours for a firmer consistency. If freezing longer, let the nice cream sit at room temperature for 5-10 minutes before serving to soften slightly.
Vegan Baking Magic
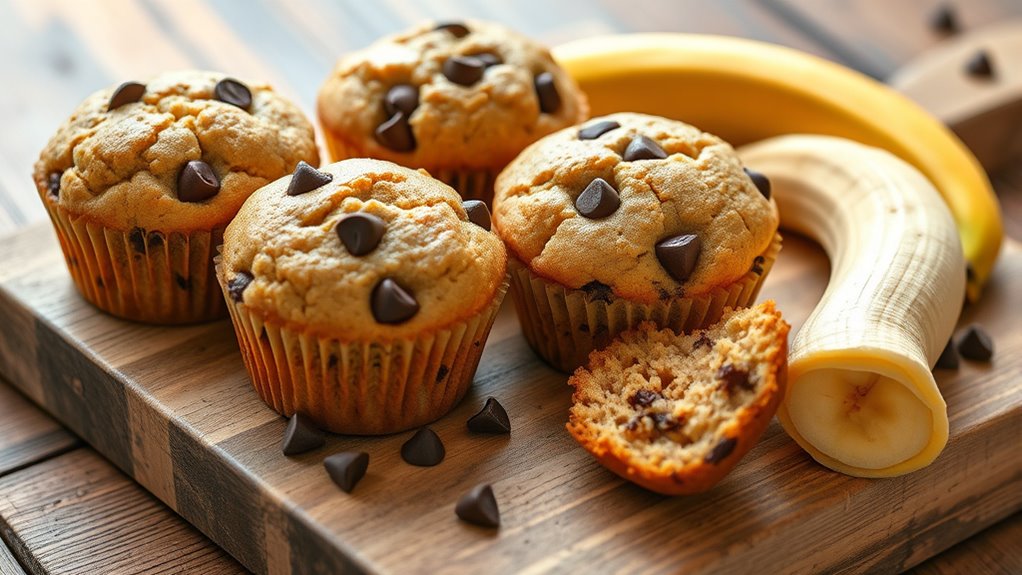
Banana Chocolate Chip Muffins are a delightful way to transform overripe bananas into a decadent vegan treat. These moist, fluffy muffins aren't only incredibly easy to make but also pack a powerful flavor punch that will satisfy even the most discerning sweet tooth.
By using mashed bananas as a binding and moistening agent, these muffins eliminate the need for traditional eggs, making them a perfect choice for plant-based bakers. The natural sweetness of ripe bananas means you can reduce the added sugar, creating a healthier alternative to traditional muffin recipes.
Ingredients:
- 3 ripe bananas, mashed
- 1/3 cup melted coconut oil
- 1/2 cup maple syrup
- 2 cups all-purpose flour
- 1 tsp baking soda
- 1 tsp baking powder
- 1/2 tsp salt
- 1 tsp vanilla extract
- 1/2 cup vegan chocolate chips
Preheat your oven to 375°F and line a 12-cup muffin tin with paper liners. In a large mixing bowl, combine the mashed bananas, melted coconut oil, maple syrup, and vanilla extract, whisking until smooth and well incorporated.
In a separate bowl, sift together the flour, baking soda, baking powder, and salt. Gradually fold the dry ingredients into the wet mixture, stirring until just combined. Be careful not to overmix, as this can result in tough muffins. Gently fold in the chocolate chips, distributing them evenly throughout the batter. Divide the batter equally among the muffin cups, filling each about 3/4 full.
For best results, allow the muffins to cool completely before storing, as this helps them maintain their moisture and prevents them from becoming soggy. Store in an airtight container at room temperature for up to 3 days, or freeze for longer preservation. For an extra flavor boost, consider adding a sprinkle of cinnamon or a handful of chopped nuts to the batter.
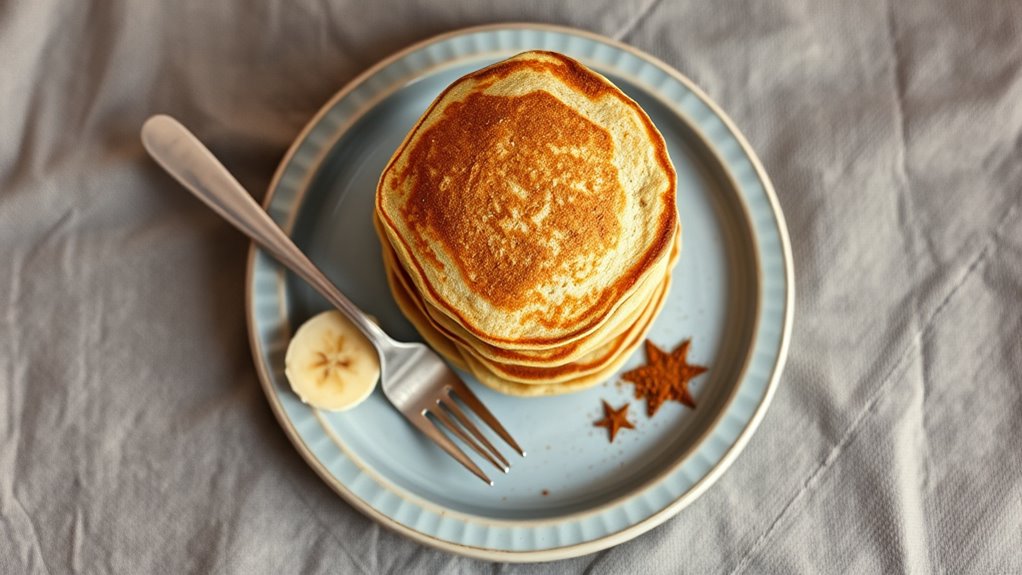
Pancake and Waffle Enhancer
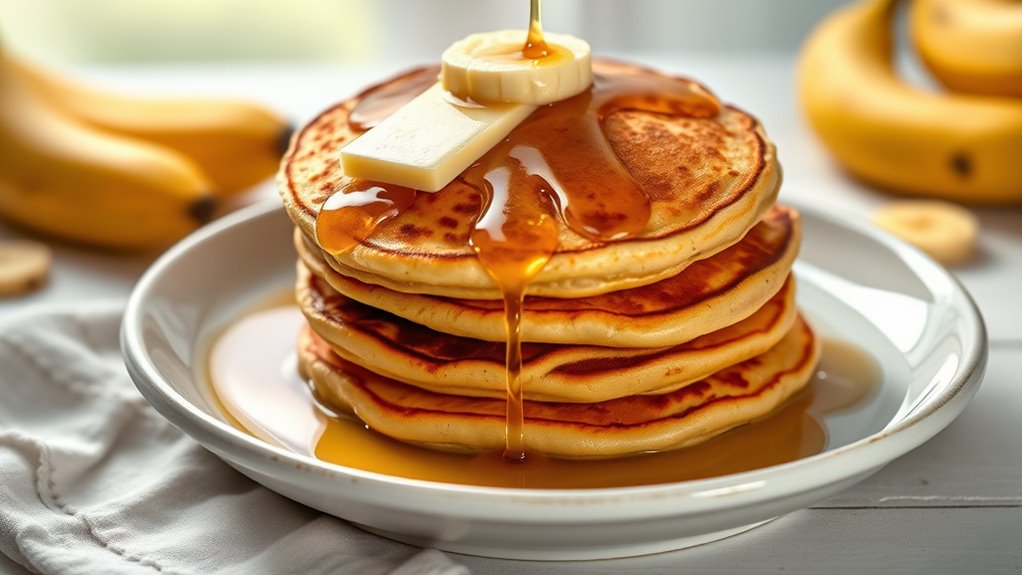
Banana-Enhanced Buttermilk Pancakes transform an ordinary breakfast into a delightful morning experience. By incorporating ripe, mashed bananas directly into the pancake batter, you create a naturally sweet and incredibly moist breakfast treat that elevates traditional pancake recipes.
This method not only helps use up overripe bananas but also adds nutritional value and depth of flavor to your morning meal. The natural sugars in the bananas caramelize slightly during cooking, creating deliciously golden pancakes with a rich, almost custard-like interior.
Ingredients:
- 1½ cups all-purpose flour
- 2 ripe bananas, mashed
- 2 teaspoons baking powder
- ½ teaspoon salt
- 2 tablespoons sugar
- 2 large eggs
- 1½ cups buttermilk
- 3 tablespoons melted butter
- 1 teaspoon vanilla extract
Prepare the batter by first whisking together the dry ingredients in a large mixing bowl, creating a well in the center. In a separate bowl, combine the mashed bananas, eggs, buttermilk, melted butter, and vanilla extract, mixing until well incorporated. Gently fold the wet ingredients into the dry ingredients, being careful not to overmix; some small lumps are perfectly acceptable.
Heat a non-stick griddle or skillet over medium heat, lightly greasing the surface with butter or cooking spray. Pour ¼ cup of batter for each pancake, cooking until small bubbles form on the surface, then flip and cook the other side until golden brown. The banana-enhanced batter will cook slightly slower than traditional pancake batter, so watch carefully to prevent burning.
When serving these pancakes, consider additional toppings that complement the banana flavor, such as a sprinkle of cinnamon, a drizzle of honey, or a dollop of whipped cream. For best results, use bananas that are very ripe with significant brown spots, as these will provide the most intense flavor and natural sweetness to your pancakes.
Energy-Boosting Snacks
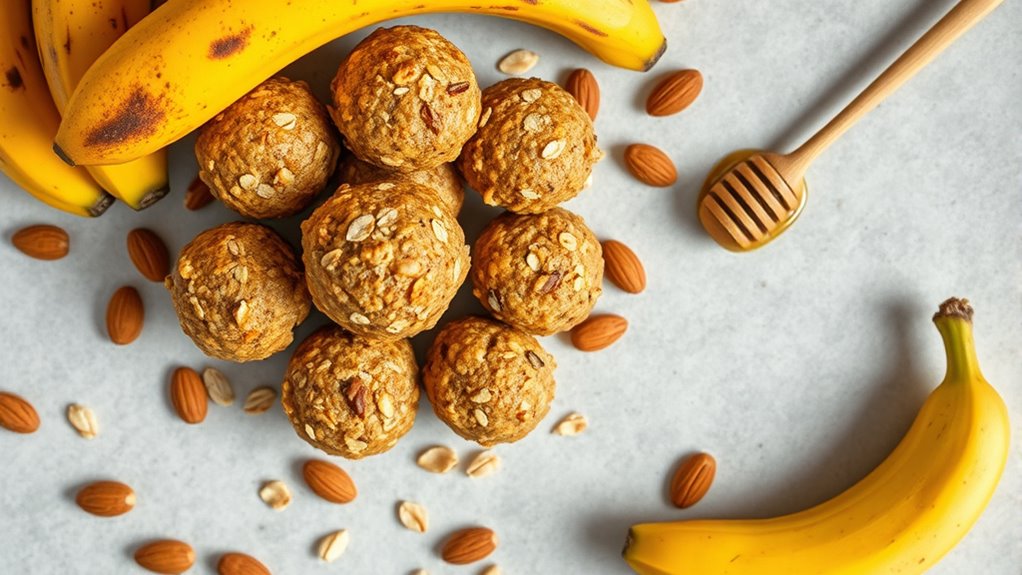
Banana Energy Bites are a perfect solution for those seeking a quick, nutritious boost during busy days or before a workout. These no-bake treats combine the natural sweetness of ripe bananas with protein-rich nuts and seeds, creating a compact energy snack that's both delicious and nourishing.
These energy bites are incredibly simple to prepare and can be customized with your favorite mix-ins, making them a versatile option for athletes, students, or anyone needing a wholesome pick-me-up. By using overripe bananas, you'll also reduce food waste while creating a nutrient-dense snack.
Ingredients:
- 2 ripe bananas
- 1 cup rolled oats
- 1/2 cup almond butter
- 1/4 cup chia seeds
- 1/4 cup chopped almonds
- 2 tablespoons honey
- 1 teaspoon vanilla extract
- Pinch of cinnamon
- Optional: Dark chocolate chips
Mash the ripe bananas in a large mixing bowl until they reach a smooth consistency. Add the almond butter, honey, and vanilla extract, stirring until well combined. Gradually mix in the rolled oats, chia seeds, chopped almonds, and cinnamon, ensuring all ingredients are evenly distributed.
Once the mixture is thoroughly combined, use a tablespoon to scoop and roll the mixture into small, compact balls. Place the energy bites on a parchment-lined baking sheet and refrigerate for at least 30 minutes to help them set and firm up. If desired, roll the chilled bites in additional chia seeds or drizzle with melted dark chocolate for extra texture.
For best results, store the banana energy bites in an airtight container in the refrigerator for up to a week. They can also be frozen for longer storage, making them a convenient make-ahead snack that can be enjoyed straight from the freezer or allowed to thaw for a few minutes before eating.
Skin and Hair Care Treatment
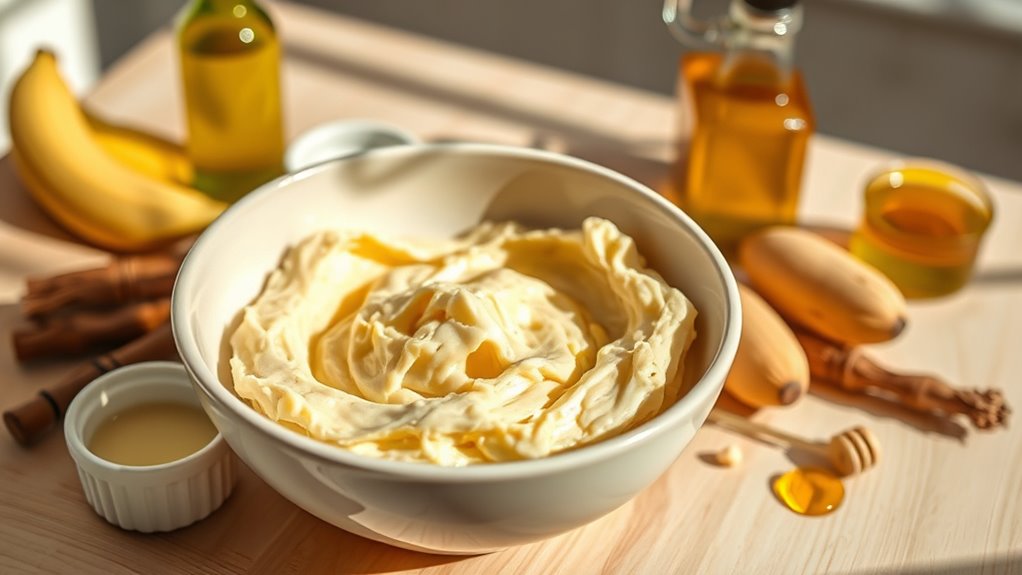
Ripe bananas aren't just for eating—they can also be transformed into nourishing skincare and hair treatments. Their natural moisturizing properties and rich nutrient profile make them an excellent base for homemade beauty remedies that can help hydrate, soften, and revitalize both skin and hair.
This banana hair and face mask is a natural, chemical-free solution that can help combat dryness, reduce frizz, and provide essential nutrients to your skin and scalp. Using just a few simple ingredients, you can create a luxurious treatment that rivals expensive salon products.
Ingredients:
- 2 ripe bananas
- 2 tablespoons honey
- 1 tablespoon plain yogurt
- 1 tablespoon olive oil
- Optional: 1 teaspoon vitamin E oil
To prepare the mask, start by thoroughly mashing the ripe bananas in a bowl until they form a smooth, creamy consistency. Add the honey, yogurt, and olive oil, then blend the ingredients until they're completely combined and no lumps remain. If using, mix in the vitamin E oil for extra nourishment.
Apply the mask to clean, damp hair from roots to ends, ensuring complete coverage. For facial application, gently spread the mixture evenly across your face, avoiding the eye area. Let the mask sit for 15-20 minutes, allowing the nutrients to penetrate and work their magic. Rinse thoroughly with lukewarm water, then follow with your regular hair or skincare routine.
For best results, use this treatment once a week and store any leftover mask in an airtight container in the refrigerator for up to two days. Always do a patch test before applying to ensure you don't have any allergic reactions, and adjust ingredient quantities based on your hair length or skin coverage needs.
Compost and Garden Helper
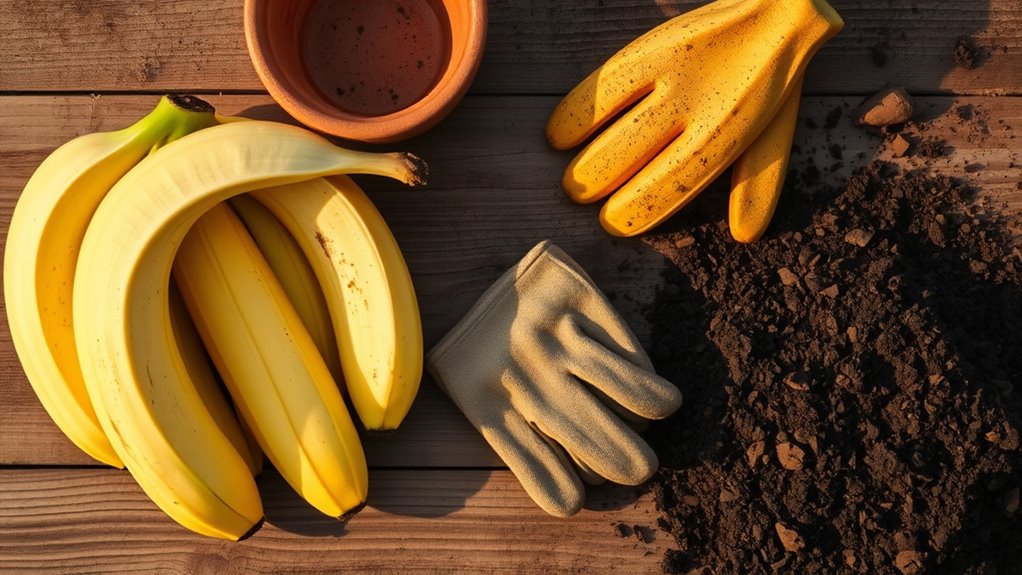
Transforming overripe bananas into a nutrient-rich garden helper is an excellent way to reduce food waste and support plant growth. Bananas are packed with essential nutrients like potassium, phosphorus, and calcium, which can significantly benefit soil health and plant development.
By creating a banana-based compost or fertilizer, gardeners can naturally enhance their soil's fertility and provide a sustainable solution for plant nourishment. This method not only recycles kitchen waste but also promotes organic gardening practices.
Ingredients:
- 3-4 very ripe bananas
- Large mixing container
- Garden gloves
- Gardening trowel
- Water
- Optional: Blender
To create banana garden fertilizer, begin by peeling the overripe bananas and mashing them thoroughly. If using a blender, puree the bananas until they form a smooth, liquid-like consistency. For a more manual approach, use a fork or potato masher to break down the fruit into small pieces.
Mix the mashed bananas with water, creating a nutrient-rich liquid that can be directly applied to garden soil or added to your compost pile. The decomposing banana matter will release valuable minerals and organic matter that strengthen plant roots and improve overall soil structure.
When applying the banana fertilizer, always ensure even distribution around plant bases and avoid direct contact with plant stems. It's best to apply the mixture in the early morning or evening to prevent rapid evaporation and allow maximum nutrient absorption by the soil and plants.
Meat Tenderizer Trick
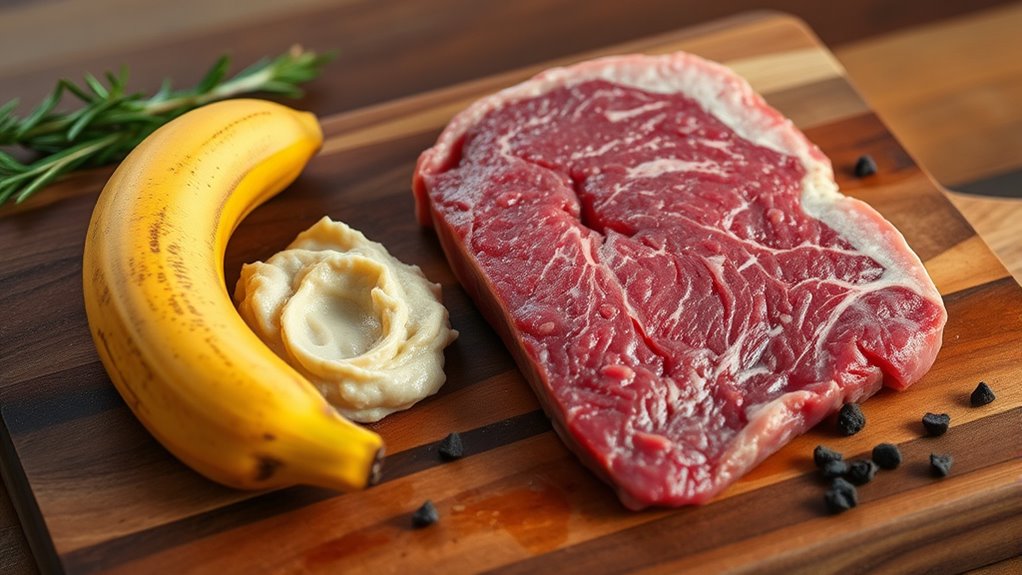
Discover a unique culinary hack that transforms overripe bananas into a natural meat tenderizer that rivals commercial products. This method not only reduces food waste but also introduces a subtle sweetness to your meats while breaking down tough muscle fibers.
The enzymes in ripe bananas, specifically bromelain and papain, work similarly to commercial meat tenderizers, helping to soften protein structures and create more tender, flavorful cuts of meat. By using this natural technique, home cooks can achieve restaurant-quality texture without harsh chemical additives.
Ingredients:
- 2-3 very ripe bananas
- 1 pound of meat (beef, chicken, or pork)
- 1 tablespoon olive oil
- Salt
- Pepper
- Optional herbs (rosemary, thyme)
To prepare the meat tenderizer, begin by mashing the ripe bananas into a smooth paste. The bananas should be extremely soft with dark brown or black spots, indicating peak enzyme activity. Spread the banana paste evenly across the surface of your chosen meat, making sure to cover all sides completely.
Allow the meat to rest with the banana mixture for 30-45 minutes at room temperature. The enzymes will gradually break down the protein structures, resulting in a more tender final product. After marinating, gently wipe off excess banana paste and season the meat with salt, pepper, and any additional herbs before cooking using your preferred method.
When using this technique, remember that timing is crucial. Over-marinating can cause the meat to become mushy, so stick to the recommended 30-45 minute window. Different meats will react slightly differently to the tenderizing process, so experiment with various cuts and cooking methods to find your perfect balance.
Natural Cleaning Solution
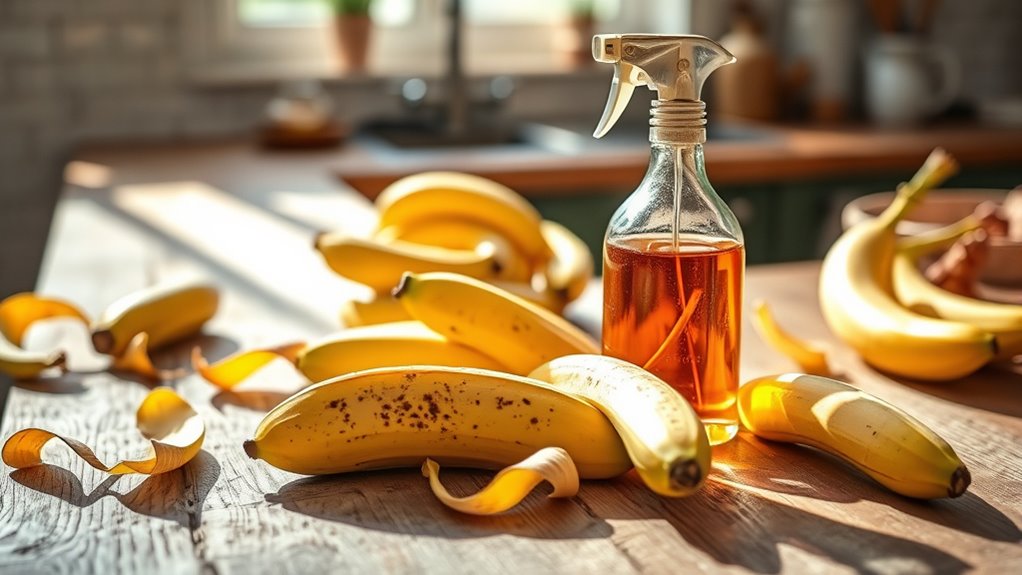
Bananas aren't only a delicious fruit but can also be transformed into an effective, eco-friendly cleaning solution. This natural alternative to harsh chemical cleaners harnesses the power of banana peels' potassium and enzymes to create a versatile and gentle cleaning agent for various surfaces in your home.
The natural cleaning solution made from ripe bananas is particularly effective for polishing and removing stubborn dirt from leather, silver, and even houseplant leaves. By utilizing the entire banana, you can reduce waste while creating a cost-effective and environmentally friendly cleaning product.
Ingredients:
- 2-3 ripe banana peels
- 1 cup of water
- 1 spray bottle
- Fine mesh strainer
- Small bowl
To create the banana peel cleaning solution, start by thoroughly washing the banana peels to remove any potential pesticide residues. Cut the peels into small pieces to maximize their surface area and potential cleaning power. Place the chopped peels into a bowl and cover them with water, allowing them to steep for 24 hours at room temperature.
After steeping, strain the liquid through a fine mesh strainer, pressing gently to extract all the liquid from the banana peels. Transfer the strained liquid into a clean spray bottle, which can now be used as a natural cleaning solution for various surfaces. The solution works best when used immediately, so prepare only small batches as needed.
When using the banana peel cleaning solution, always test a small, inconspicuous area first to ensure compatibility with the surface. Store the spray bottle in a cool, dark place and discard after 3-5 days to maintain effectiveness and prevent bacterial growth. For best results, shake the bottle gently before each use to redistribute any settled particles.
Plant Fertilizer Boost
Bananas aren't just a delicious fruit, but they can also be an incredible natural fertilizer for your garden. By transforming overripe bananas into a nutrient-rich plant supplement, gardeners can provide essential potassium, phosphorus, and other minerals to their soil without resorting to synthetic chemicals.
This homemade banana fertilizer is an eco-friendly and cost-effective way to nourish plants, promoting healthier growth and more robust root systems. The process is simple and requires minimal preparation, making it an accessible method for both novice and experienced gardeners.
Ingredients:
- 3-4 very ripe bananas
- 4 cups of water
- Large mixing container
- Strainer
- Spray bottle or watering can
To create the banana fertilizer, start by thoroughly mashing the ripe bananas in a large container. The softer and more overripe the bananas, the better they'll break down and release nutrients. Add water to the mashed bananas and mix thoroughly, creating a liquid solution that will be easily absorbed by plant roots.
Let the banana mixture sit for 24-48 hours, allowing the nutrients to fully infuse into the water. After the steeping period, strain the liquid through a fine mesh strainer to remove solid banana pieces. The resulting liquid can be directly applied to soil around plants or diluted further depending on the specific needs of your garden.
When applying the banana fertilizer, it's important to use it sparingly and monitor plant responses. Some plants are more sensitive to nutrient changes, so start with a small amount and observe how your plants react. For best results, apply the fertilizer once every two to three weeks during the growing season, and always dilute the mixture if it appears too concentrated.
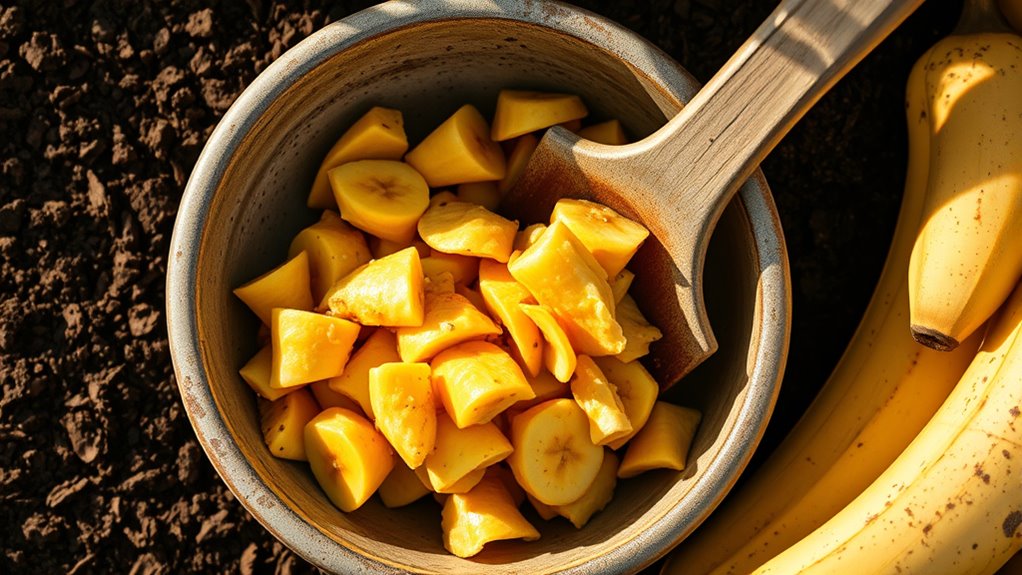
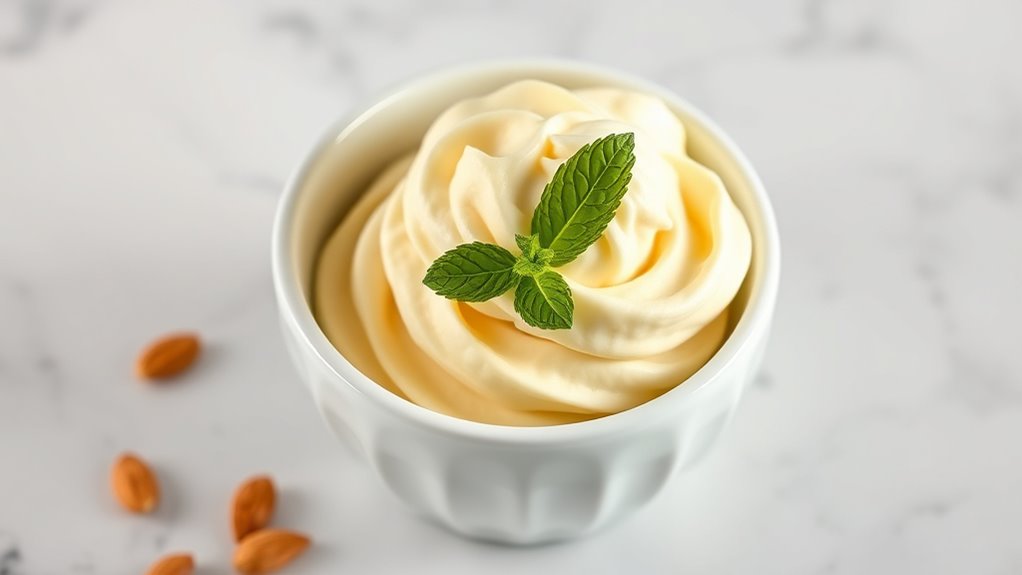
Faux "Nice Cream" Recipe
Craving a guilt-free, creamy dessert that's both delicious and nutritious? This faux "nice cream" is the perfect solution for those looking to satisfy their sweet tooth while using up ripe bananas. Unlike traditional ice cream, this dairy-free alternative offers a healthy twist that's both refreshing and satisfying.
The magic of this recipe lies in its simplicity and versatility. Frozen bananas transform into a smooth, soft-serve-like treat that can be customized with various mix-ins and toppings, making it a crowd-pleaser for both kids and adults alike.
Ingredients:
- 3-4 ripe bananas
- 2 tablespoons cocoa powder (optional)
- 1 tablespoon honey or maple syrup (optional)
- Pinch of salt
- Additional mix-ins (nuts, chocolate chips, berries)
Preparation begins by peeling and slicing ripe bananas into thin coins, then freezing them completely on a lined baking sheet. This crucial step ensures the right texture and prevents ice crystals from forming. Once frozen solid (typically 2-3 hours), transfer the banana pieces to a food processor or high-powered blender.
Blend the frozen banana pieces, scraping down the sides occasionally, until they transform into a creamy, soft-serve consistency. If desired, add cocoa powder, honey, or salt during the blending process to enhance flavor. Continue processing until the mixture is completely smooth and resembles soft-serve ice cream.
Pro tip: For best results, use very ripe bananas with brown spots, as they'll be sweeter and blend more smoothly. If the mixture seems too thick, add a small splash of milk (dairy or non-dairy) to help it blend. You can also prepare multiple batches and store in the freezer for up to two weeks, allowing you to enjoy this healthy treat whenever a craving strikes.
Healthy Frozen Treats
Banana Nice Cream is a delightful, guilt-free dessert that transforms overripe bananas into a creamy, nutritious frozen treat. This simple recipe requires minimal ingredients and offers a healthier alternative to traditional ice cream, making it perfect for those seeking a nutritious dessert option.
The beauty of this recipe lies in its versatility, allowing you to customize the nice cream with various mix-ins and toppings to suit your taste preferences. Whether you're looking for a refreshing summer treat or a quick breakfast option, this banana nice cream delivers both flavor and nutrition.
Ingredients:
- 3-4 very ripe bananas
- 2 tablespoons milk (dairy or non-dairy)
- 1 teaspoon vanilla extract (optional)
- Pinch of salt
Prepare the nice cream by first peeling the ripe bananas and cutting them into large chunks. Place the banana pieces on a parchment-lined baking sheet and freeze for at least 2 hours, or until completely solid. This freezing process is crucial for achieving the right creamy texture.
Once frozen, transfer the banana chunks to a food processor or high-powered blender. Pulse and blend the frozen bananas, occasionally scraping down the sides, until they transform into a smooth, creamy consistency. Add milk, vanilla extract, and salt to enhance the flavor and adjust the texture as needed. Continue blending until the mixture resembles soft-serve ice cream.
For best results, serve immediately for a soft-serve texture, or transfer to a freezer-safe container and freeze for 1-2 hours for a firmer consistency. Experiment with additional mix-ins like cocoa powder, peanut butter, or fresh berries to create unique flavor variations and keep your banana nice cream exciting and delicious.
Unexpected Culinary Substitutions
Banana Oat Pancakes transform overripe bananas into a nutritious and delightful breakfast option. These pancakes offer a gluten-free alternative that's both tender and satisfying, providing a creative way to use fruit that might otherwise be discarded.
By mashing ripe bananas and incorporating them directly into the pancake batter, home cooks can create a naturally sweetened breakfast that's packed with flavor and nutrients. The result is a lighter, more moist pancake with a subtle banana essence that appeals to both children and adults.
Ingredients:
- 2 ripe bananas
- 2 large eggs
- 1 cup rolled oats
- 1 tsp baking powder
- 1/2 tsp ground cinnamon
- Pinch of salt
- Butter or oil for cooking
Prepare the batter by first mashing the ripe bananas in a medium mixing bowl until they're completely smooth. Add the eggs and whisk thoroughly to combine, ensuring no large banana chunks remain.
In a separate bowl, mix the oats, baking powder, cinnamon, and salt, then gradually fold these dry ingredients into the banana-egg mixture.
Heat a non-stick skillet or griddle over medium heat, lightly greasing the surface with butter or oil. Using a 1/4 cup measure, pour the batter onto the heated surface, allowing each pancake to cook for approximately 2-3 minutes per side. Look for small bubbles forming on the surface and golden-brown edges as indicators of when to flip.
For best results, use bananas that are very ripe with significant brown spotting, as these will provide maximum natural sweetness and moisture. Allow the batter to rest for 5 minutes before cooking to help the oats absorb liquid and create a more cohesive texture. These pancakes can be stored in the refrigerator for 2-3 days and quickly reheated in a toaster or microwave.