Mummy Oreo Balls Recipe
Halloween's coming, and you're looking for a spooky-sweet treat that'll impress your friends and family, right? Mummy Oreo Balls are the perfect no-bake dessert that'll transform your kitchen into a festive culinary playground. These creepy-cute confections combine crushed Oreos, cream cheese, and white chocolate into bite-sized morsels that look like adorable mummy faces. You'll love how simple they are to create, and your guests won't believe how professional they look. Curious about how to craft these ghoulishly good treats? Let's unwrap the delicious details.
Recipe Highlights
- Mummy Oreo Balls are no-bake Halloween treats made by crushing Oreos, mixing with cream cheese, and forming into bite-sized spheres.
- The recipe requires softened cream cheese, white chocolate for coating, and a simple drizzling technique to create mummy-like wrapping patterns.
- Roll the Oreo and cream cheese mixture into uniform balls, then chill in the freezer for 15 minutes before dipping in melted white chocolate.
- Use a piping bag or fork to create thin, criss-crossing chocolate lines across the white-coated balls, mimicking mummy bandage wrappings.
- These festive desserts can be prepared ahead of time, stored for up to one week, and are perfect for Halloween parties and family gatherings.
History
While the exact origin of Oreo Balls remains somewhat mysterious, these delectable treats emerged from the broader trend of no-bake desserts that gained popularity in home kitchens during the late 20th century.
You'll find that this dessert represents a clever culinary innovation, blending convenience with creativity. The concept likely developed from:
- Traditional cookie ball techniques
- Growing interest in simple, quick desserts
- Desire for adaptable party treats
Home bakers quickly realized how versatile these bite-sized confections could be, especially for themed events like Halloween.
The mummy variation specifically gained traction in the early 2000s, when creative cooks began experimenting with decorative techniques.
You can trace the recipe's spread through community cookbooks, online forums, and social media platforms, where home cooks shared their unique twists on this delightful no-bake dessert.
Recipe
Mummy Oreo Balls are a delightful Halloween-themed dessert that combines the rich, chocolatey flavor of Oreo cookies with creamy cream cheese and a smooth white chocolate coating.
These adorable treats aren't only delicious but also incredibly fun to make, making them a perfect activity for families and friends during the spooky season. The process of creating these bite-sized mummy-inspired delights is straightforward and enjoyable, requiring minimal baking skills and offering maximum creative potential.
With just a few simple ingredients and some playful decorating, you can transform ordinary Oreo cookies into festive, eye-catching treats that are sure to impress both children and adults alike.
Ingredients:
- 1 package (14.3 oz) Oreo cookies
- 8 oz cream cheese, softened
- 16 oz white chocolate chips
- 2 tablespoons vegetable oil
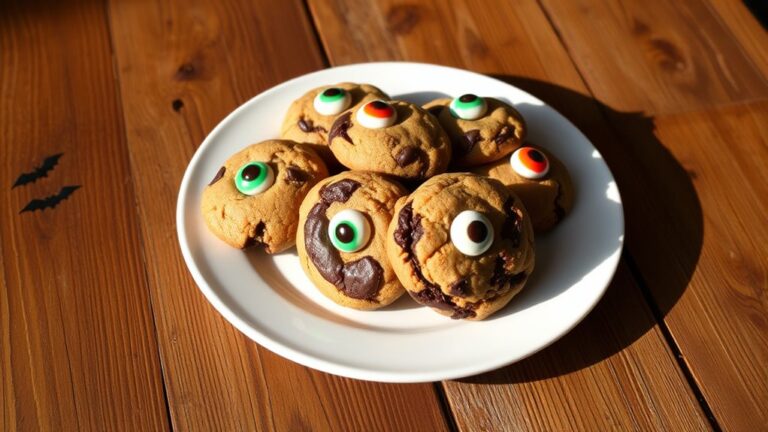
- 48 candy eyes
Begin by crushing the Oreo cookies into fine crumbs using a food processor or a rolling pin. In a large mixing bowl, combine the cookie crumbs with softened cream cheese, mixing thoroughly until the ingredients are well incorporated.
Use your hands or a small cookie scoop to roll the mixture into 1-inch balls, placing them on a parchment-lined baking sheet.
Place the baking sheet with the Oreo balls in the freezer for 15 minutes to firm them up. While the balls are chilling, melt the white chocolate chips with vegetable oil in the microwave, using 30-second intervals and stirring between each interval to ensure smooth melting.
Remove the Oreo balls from the freezer and carefully dip each one into the melted white chocolate, allowing excess chocolate to drip off before returning them to the baking sheet.
Immediately press two candy eyes onto each chocolate-coated ball. Once the eyes are in place, use the remaining melted white chocolate to drizzle thin lines across the balls, creating the appearance of mummy wrappings.
Return the decorated Oreo balls to the refrigerator and chill for approximately one hour or until the chocolate coating is completely set.
When preparing Mummy Oreo Balls, work quickly and keep the ingredients chilled to prevent the mixture from becoming too soft. If the white chocolate becomes thick during dipping, briefly reheat it or add a small amount of vegetable oil to restore its smooth consistency.
These festive treats can be stored in an airtight container in the refrigerator for up to one week, making them an excellent make-ahead dessert for Halloween parties or seasonal gatherings.
Cooking Steps
You'll start by transforming Oreo cookies into fine, uniform crumbs using a food processor or rolling pin, ensuring a smooth texture for your Halloween treats.
Next, blend the crumbs with softened cream cheese, mixing thoroughly until the ingredients form a cohesive, moldable mixture that'll become your spooky mummy balls.
When rolling the mixture into perfect 1-inch spheres, work quickly and with clean hands to maintain consistent size and shape, placing each ball on a parchment-lined baking sheet ready for the next step.
Step 1. Crush Oreos Into Fine Crumbs
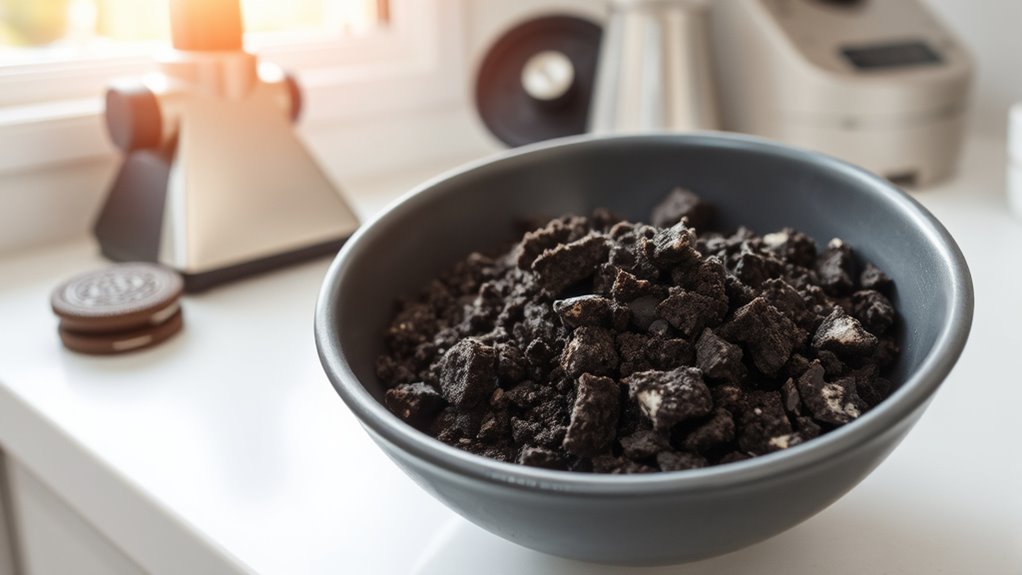
The initial step in crafting delectable Mummy Oreo Balls involves transforming whole Oreo cookies into fine, uniform crumbs that'll serve as the recipe's foundational texture.
You'll want to choose between two primary crushing methods:
- Food Processor Method
- Place entire package of Oreos in processor
- Pulse until consistent, fine crumb texture emerges
- Aim for sand-like consistency without large cookie chunks
- Manual Rolling Method
- Place cookies in sealed plastic bag
- Use rolling pin to crush cookies
- Apply firm, even pressure
- Roll back and forth until crumbs are uniformly small
Each method achieves similar results, so select the technique most convenient for your kitchen setup.
Precision matters: overly large crumbs won't bind properly with cream cheese, while too-fine crumbs can become paste-like. Aim for a texture resembling coarse sand that'll mix smoothly and hold shape when forming balls.
Step 2. Mix Cream Cheese Thoroughly
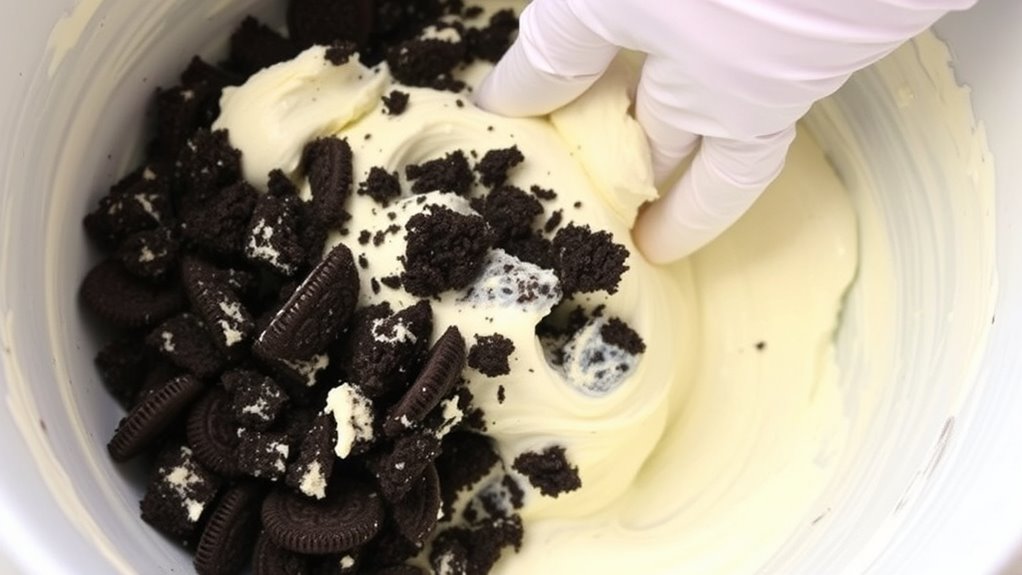
When blending cream cheese for Mummy Oreo Balls, start by ensuring the cream cheese has softened to room temperature, which prevents lumps and allows for smoother integration with the Oreo crumbs.
Use a medium-sized mixing bowl and a sturdy spatula or hand mixer to combine the ingredients. Press and fold the cream cheese, breaking down any remaining firm spots, until it reaches a smooth, uniform consistency.
Key mixing techniques:
- Work slowly and deliberately
- Press cream cheese against bowl sides
- Mix until no white streaks remain
- Aim for a silky, moldable texture
Incorporate Oreo crumbs gradually, mixing thoroughly between additions. The final mixture should hold together easily when pressed, without being too wet or too dry.
Your goal is a cohesive, rollable dough that will form perfect mummy ball shapes.
Step 3. Roll Mummy Oreo Balls
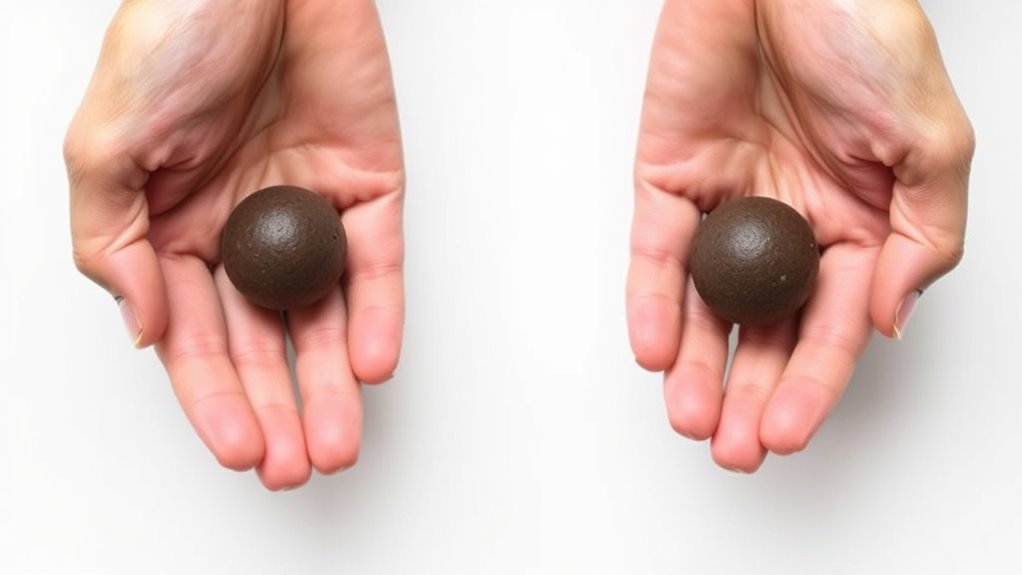
After thoroughly mixing your Oreo and cream cheese mixture, grab a small cookie scoop or tablespoon to ensure uniform sizing while rolling your mummy balls. Aim for consistent 1-inch balls, which will help create an even coating and professional appearance.
Gently roll the mixture between your palms, applying light, even pressure to form smooth, compact spheres.
Key rolling tips:
- Keep hands slightly damp to prevent sticking
- Work quickly to maintain mixture temperature
- Place rolled balls on a parchment-lined baking sheet
- Space balls about 1 inch apart
Once all balls are formed, transfer the baking sheet to the freezer. Chilling for 15 minutes will help the balls maintain their shape during the chocolate dipping process and prevent crumbling.
The cold temperature firms up the cream cheese, creating a more stable base for your spooky mummy treats.
Step 4. Melt Chocolate Smoothly
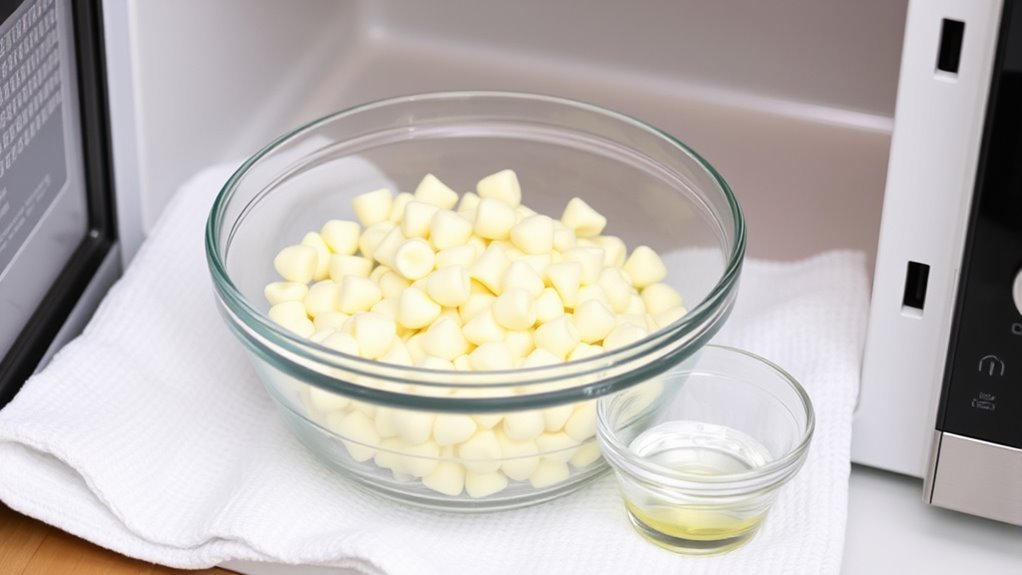
Freezing your Oreo balls provides the perfect launch pad for melting chocolate smoothly. Use a microwave-safe bowl and select white chocolate chips carefully, ensuring they're high-quality and uniform in size.
Break down the melting process into strategic 30-second intervals, stirring between each heating cycle to prevent scorching. Add vegetable oil (about 2 tablespoons per 16 oz of chocolate) to create a silky, more manageable coating consistency.
Key chocolate melting tips:
- Use low power settings
- Stir frequently
- Watch for glossy, smooth texture
- Avoid overheating
Keep your chocolate workspace clean and dry, as moisture can cause chocolate to seize. Work quickly once melted, dipping each Oreo ball swiftly and allowing excess chocolate to drip off.
Maintain a steady hand and consistent temperature for professional-looking mummy treats.
Step 5. Drizzle Chocolate Like Bandages

Unleash your inner pastry artist and transform those white chocolate-coated Oreo balls into adorable mummy treats by drizzling chocolate in delicate, bandage-like patterns.
Use a small piping bag or a fork to create thin, criss-crossing lines across the chilled Oreo balls, mimicking authentic mummy wrapping techniques. Start at one side and move methodically, varying line thickness for a more realistic effect.
Key drizzling tips:
- Keep chocolate at a smooth, pourable consistency
- Move quickly to prevent chocolate from hardening
- Use light, controlled wrist movements
- Maintain a consistent angle while drizzling
- Leave small gaps between chocolate lines to simulate authentic bandage spacing
Practice creates precision. Each pass adds depth and character to your spooky Halloween confection, turning simple ingredients into a festive, Instagram-worthy treat.
Final Thoughts
Because Halloween treats can be both delightful and memorable, these Mummy Oreo Balls will surely become a festive favorite in your dessert repertoire.
You'll find this recipe strikes the perfect balance between playful presentation and delectable taste, making it ideal for Halloween parties, family gatherings, or seasonal baking adventures.
The simplicity of preparation means even novice bakers can create impressive-looking treats that will delight both children and adults.
Remember to work efficiently when coating and decorating, keeping ingredients chilled and your workspace organized.
Whether you're hosting a Halloween celebration or simply craving a sweet, themed dessert, these Mummy Oreo Balls offer a creative and delicious solution that transforms basic ingredients into a spooky, memorable confection.