15 Quick Healthy Meals Dinner
You'll discover how to transform your weeknight dinners with these 15 nutritious, time-saving meals that take 30 minutes or less to prepare. From sheet pan classics to one-pot wonders, each recipe combines lean proteins, colorful vegetables, and wholesome grains into satisfying combinations you'll want to make again. Whether you're cooking for one or feeding a family, these proven recipes offer the perfect balance of flavor and convenience. Let's explore how these efficient meals can revolutionize your dinner routine.
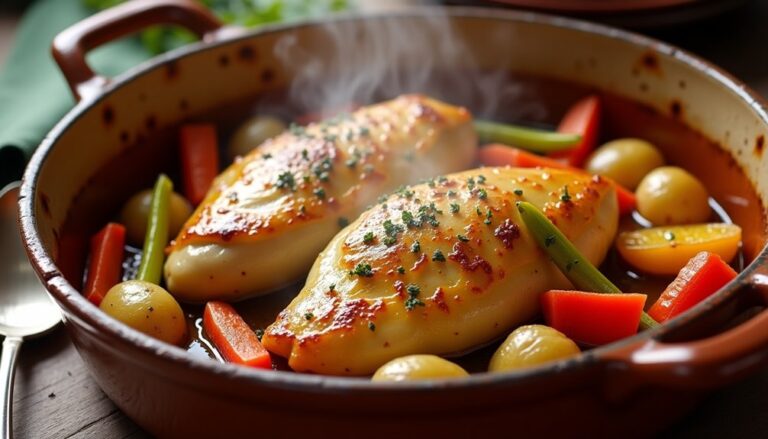
Sheet Pan Lemon Herb Chicken and Vegetables
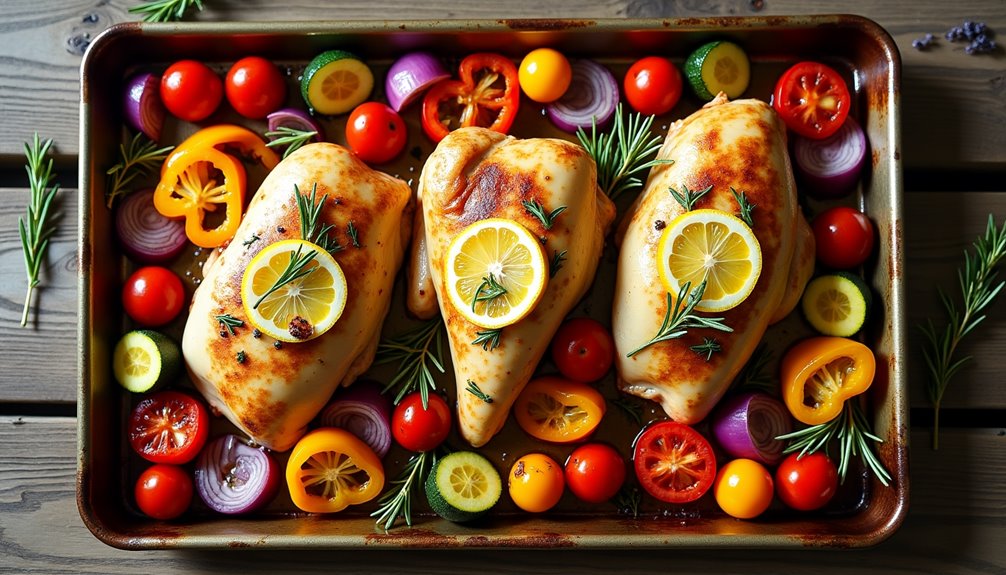
Sheet pan dinners have become increasingly popular for busy families looking to create nutritious meals with minimal cleanup. This lemon herb chicken and vegetables combination delivers a perfect balance of protein and colorful vegetables, all roasted together to create a harmonious blend of flavors.
The bright citrus notes from the lemon complement the aromatic herbs, while the vegetables caramelize to perfection alongside the juicy chicken. This one-pan wonder isn't only healthy but also customizable with seasonal vegetables of your choice.
- 4 chicken breasts, boneless and skinless
- 2 medium zucchini, sliced
- 2 bell peppers, chunked
- 1 red onion, quartered
- 2 cups cherry tomatoes
- 4 tablespoons olive oil
- 3 lemons
- 4 garlic cloves, minced
- 2 tablespoons fresh rosemary
- 2 tablespoons fresh thyme
- 1 tablespoon dried oregano
- 1 teaspoon salt
- 1/2 teaspoon black pepper
Preheat oven to 400°F (200°C). In a large bowl, combine olive oil, juice of 2 lemons, minced garlic, rosemary, thyme, oregano, salt, and pepper. Place chicken breasts and vegetables on a large sheet pan, then pour the marinade over everything, ensuring even coating. Slice the remaining lemon and arrange the slices around the pan.
Roast in the preheated oven for 25-30 minutes, or until chicken reaches an internal temperature of 165°F (74°C) and vegetables are tender with slightly crispy edges. Halfway through cooking, flip the chicken and stir the vegetables to ensure even cooking.
For best results, let the chicken rest for 5-10 minutes before slicing. Using a rimmed baking sheet prevents juices from spilling, while lining it with parchment paper makes cleanup easier. Choose vegetables of similar size to ensure even cooking, and don't overcrowd the pan as this can lead to steaming rather than roasting.
One-Pot Mediterranean Quinoa
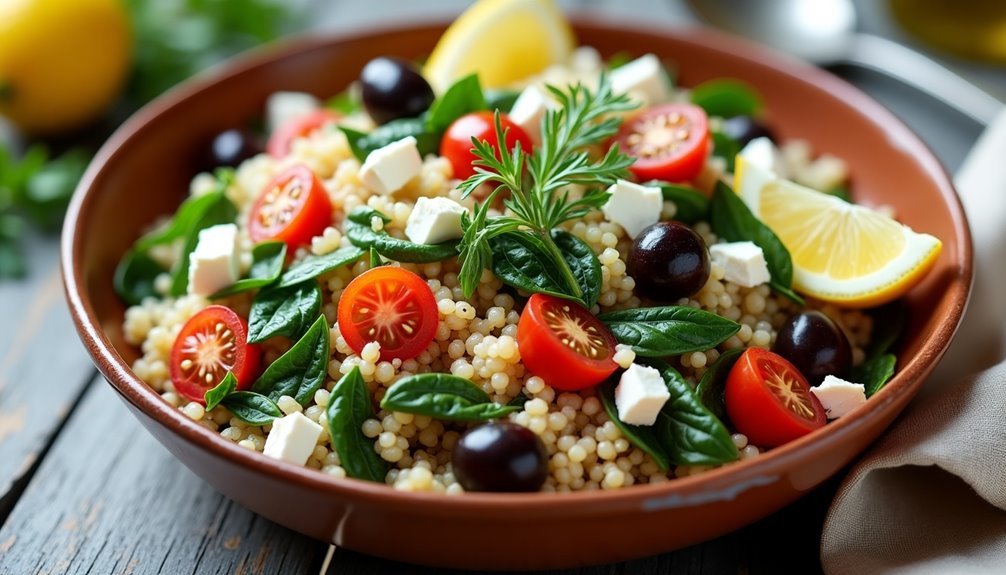
One-Pot Mediterranean Quinoa combines the ancient grain's protein-rich goodness with classic Mediterranean flavors. This wholesome dish brings together the nutty taste of quinoa with sun-dried tomatoes, Kalamata olives, fresh herbs, and crumbled feta cheese, creating a satisfying and nutritious meal that can be prepared with minimal cleanup.
This versatile recipe works perfectly as a main course or as a side dish, and it's equally delicious served hot or cold. The Mediterranean ingredients not only provide amazing flavor but also deliver important nutrients, making this dish a heart-healthy option that aligns with the renowned Mediterranean diet principles.
- 1 cup quinoa, rinsed
- 2 cups vegetable broth
- 1 tablespoon olive oil
- 1 medium onion, diced
- 3 cloves garlic, minced
- 1 cup cherry tomatoes, halved
- ½ cup sun-dried tomatoes, chopped
- ½ cup Kalamata olives, pitted and halved
- 1 cup fresh spinach
- ½ cup crumbled feta cheese
- 2 tablespoons fresh parsley, chopped
- 1 tablespoon fresh oregano
- 1 lemon, juiced
- Salt and pepper to taste
Heat olive oil in a large pot over medium heat. Add onion and garlic, sautéing until translucent. Add rinsed quinoa and toast for 1-2 minutes, stirring frequently. Pour in vegetable broth, bring to a boil, then reduce heat and simmer covered for 15 minutes.
Once quinoa has absorbed the liquid, add cherry tomatoes, sun-dried tomatoes, and olives. Cook for an additional 2-3 minutes. Remove from heat and stir in spinach, letting it wilt naturally. Add lemon juice, herbs, and feta cheese, then season with salt and pepper to taste.
For best results, use pre-rinsed quinoa or rinse thoroughly before cooking to remove the bitter saponin coating. The dish can be stored in an airtight container in the refrigerator for up to 4 days, though the feta cheese is best added fresh when serving. For a vegan version, simply omit the feta cheese or replace it with a plant-based alternative.
20-Minute Teriyaki Salmon Bowl
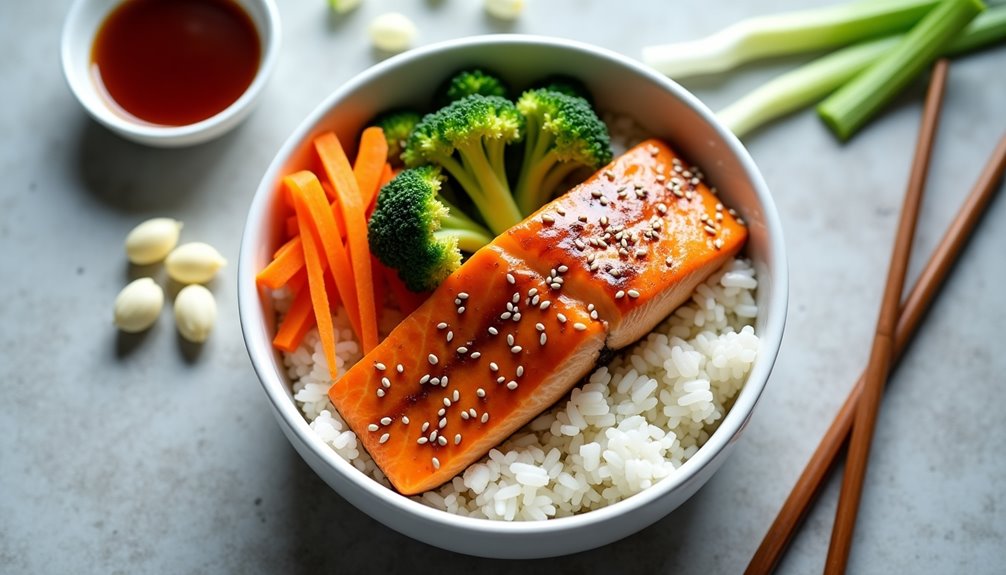
Teriyaki salmon bowls combine the rich flavors of Asian cuisine with the health benefits of omega-3 rich salmon. This quick and satisfying meal features perfectly glazed salmon served over fluffy rice, accompanied by crisp vegetables and a homemade teriyaki sauce that brings everything together.
Perfect for busy weeknights, this 30-minute meal delivers restaurant-quality taste with minimal effort. The combination of sweet and savory teriyaki sauce paired with tender salmon creates a balanced dish that's both nutritious and delicious, while the addition of fresh vegetables adds color, texture, and essential nutrients.
- 4 salmon fillets (6 oz each)
- 2 cups cooked jasmine rice
- 1 cup broccoli florets
- 1 cup carrots, julienned
- 2 green onions, sliced
- 1 tablespoon sesame seeds
- 1/2 cup soy sauce
- 1/4 cup mirin
- 1/4 cup sake
- 2 tablespoons brown sugar
- 1 tablespoon ginger, minced
- 2 cloves garlic, minced
- 1 tablespoon cornstarch
- 2 tablespoons water
Begin by preparing the teriyaki sauce. In a small saucepan, combine soy sauce, mirin, sake, brown sugar, ginger, and garlic. Bring to a simmer over medium heat. Mix cornstarch with water to create a slurry, then whisk into the sauce until thickened. Remove from heat and set aside.
Season salmon fillets with salt and pepper. Heat a large skillet over medium-high heat and cook salmon skin-side up for 4 minutes. Flip and brush with teriyaki sauce, cooking for another 3-4 minutes until the salmon is cooked through and glazed. Meanwhile, steam broccoli and carrots until tender-crisp. Assemble bowls by placing rice as a base, topped with salmon, vegetables, and additional teriyaki sauce. Garnish with green onions and sesame seeds.
For best results, bring salmon to room temperature before cooking and pat dry with paper towels to ensure proper searing. The teriyaki sauce can be made ahead and stored in the refrigerator for up to one week. To achieve the perfect rice texture, rinse it thoroughly before cooking and let it rest for 10 minutes after cooking before fluffing with a fork.
Quick Greek Chickpea Salad
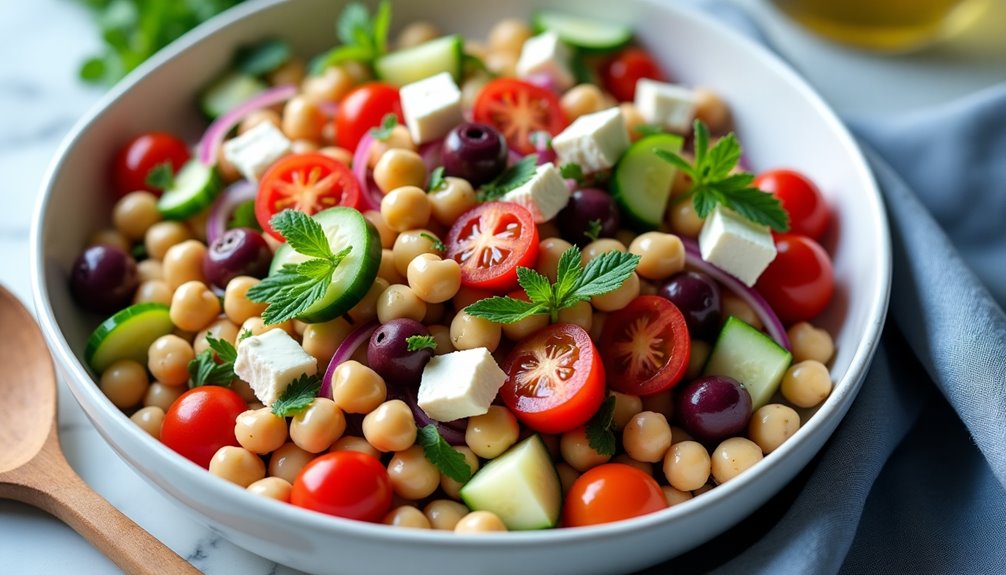
A vibrant Greek chickpea salad combines protein-rich legumes with fresh Mediterranean vegetables and herbs, creating a nutritious and satisfying meal that requires no cooking. This colorful dish serves as a perfect light dinner option or can be prepared in advance for convenient meal prep throughout the week.
The combination of chickpeas, crisp vegetables, and tangy feta cheese, dressed in a zesty lemon-olive oil vinaigrette, delivers authentic Greek flavors while providing essential nutrients. This salad is naturally gluten-free and can be easily modified to accommodate vegan diets by omitting the feta cheese.
- 2 (15 oz) cans chickpeas, drained and rinsed
- 1 English cucumber, diced
- 2 cups cherry tomatoes, halved
- 1 red onion, finely chopped
- 1 red bell pepper, diced
- 1 cup kalamata olives, pitted
- 1 cup crumbled feta cheese
- 1/4 cup fresh parsley, chopped
- 1/4 cup fresh mint, chopped
- 3 tablespoons extra virgin olive oil
- 2 tablespoons lemon juice
- 1 teaspoon dried oregano
- Salt and black pepper to taste
Drain and rinse the chickpeas thoroughly, then add them to a large mixing bowl. Dice the cucumber, halve the tomatoes, chop the red onion, and dice the bell pepper, adding each to the bowl as you go. Add the kalamata olives, crumbled feta cheese, and fresh herbs.
In a small bowl, whisk together the olive oil, lemon juice, dried oregano, salt, and pepper. Pour the dressing over the salad ingredients and toss gently until everything is well combined. Let the salad sit for at least 15 minutes before serving to allow the flavors to meld together.
For best results, chill the salad for at least an hour before serving, and drain any excess liquid that may accumulate at the bottom of the bowl. The salad can be stored in an airtight container in the refrigerator for up to 3 days, though the vegetables will soften slightly over time. If preparing in advance, consider adding the feta cheese and herbs just before serving to maintain their fresh taste and texture.
Shrimp and Broccoli Stir-Fry
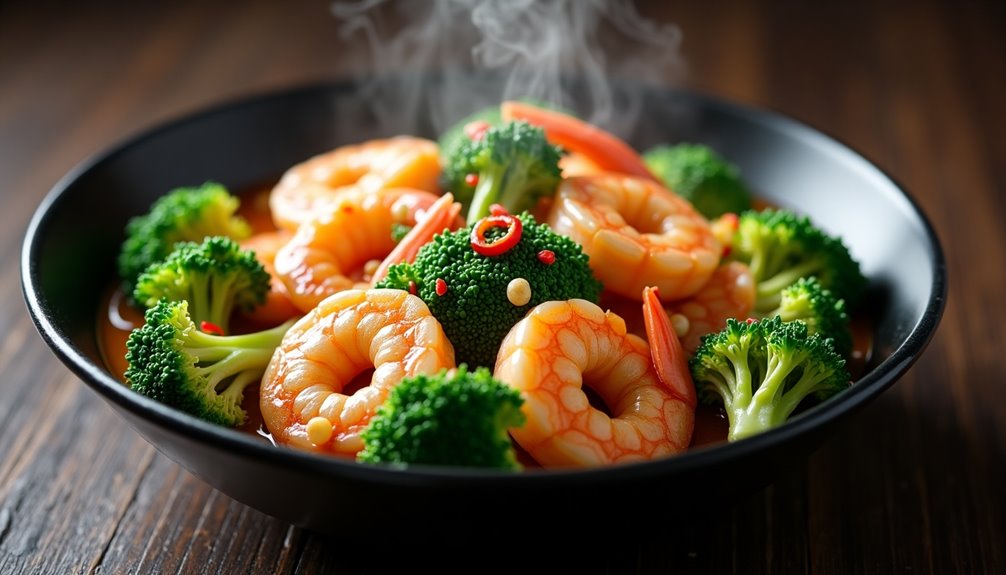
Shrimp and broccoli stir-fry combines lean protein with nutrient-rich vegetables in a quick and satisfying meal that epitomizes healthy dining. This Asian-inspired dish delivers a perfect balance of flavors while keeping calories in check, making it an excellent choice for health-conscious individuals looking for a delicious weeknight dinner option.
The combination of tender shrimp and crisp broccoli florets creates a textural contrast that makes each bite interesting, while the sauce brings together savory and slightly sweet elements. This dish comes together in under 30 minutes, making it perfect for busy schedules without compromising on nutrition or taste.
Ingredients:
- 1 pound large shrimp, peeled and deveined
- 4 cups broccoli florets
- 3 cloves garlic, minced
- 1 tablespoon ginger, minced
- 2 tablespoons low-sodium soy sauce
- 1 tablespoon oyster sauce
- 1/4 cup chicken broth
- 2 tablespoons vegetable oil
- 1 tablespoon cornstarch
- 1/4 teaspoon black pepper
- 1/4 teaspoon red pepper flakes (optional)
Begin by mixing the sauce ingredients in a small bowl: soy sauce, oyster sauce, chicken broth, and cornstarch. Heat oil in a large wok or skillet over medium-high heat. Add garlic and ginger, stir-frying for 30 seconds until fragrant. Add shrimp and cook for 2-3 minutes until they start turning pink.
Add broccoli to the pan and stir-fry for 3-4 minutes until bright green and crisp-tender. Pour the sauce mixture over the shrimp and broccoli, stirring constantly until the sauce thickens and coats everything evenly, about 2 minutes. Season with black pepper and red pepper flakes if desired.
For best results, ensure all ingredients are prepped before starting to cook, as stir-frying moves quickly. The shrimp can be substituted with chicken or tofu for variation, and the sauce can be adjusted to taste by adding more or less soy sauce. Serve immediately while hot to maintain the optimal texture of both the shrimp and broccoli.
Black Bean and Sweet Potato Tacos
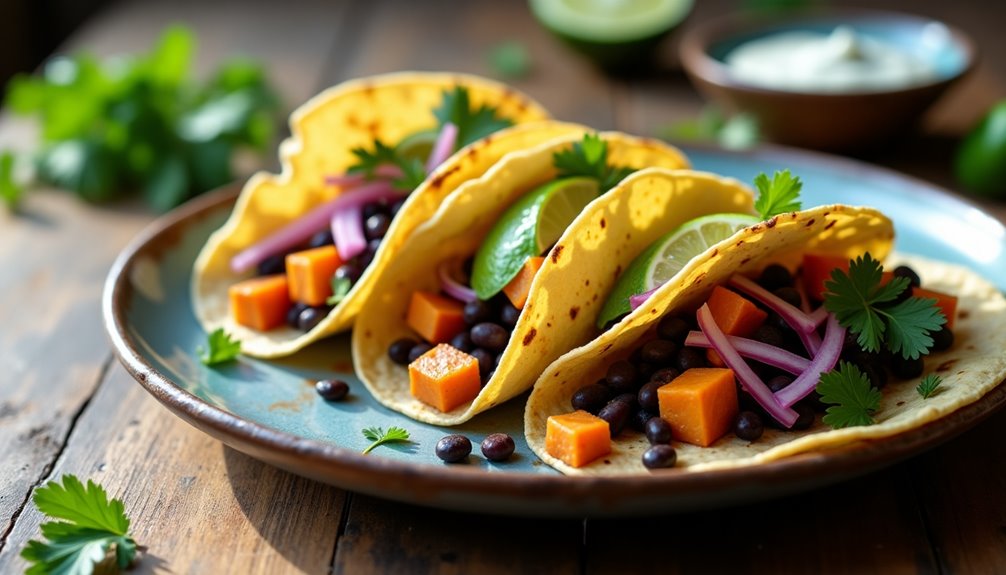
Black bean and sweet potato tacos bring together the earthiness of Latin American cuisine with the natural sweetness of root vegetables. This vegetarian dish offers a perfect balance of protein, complex carbohydrates, and fiber while delivering a burst of flavors and textures in every bite.
The combination of smoky cumin, chili powder, and tender sweet potatoes creates a filling that's both satisfying and nutritious. When paired with black beans and wrapped in warm corn tortillas, these tacos become a complete meal that appeals to both vegetarians and meat-eaters alike.
- 2 medium sweet potatoes, diced
- 2 cans black beans, drained and rinsed
- 12 corn tortillas
- 1 tablespoon olive oil
- 2 teaspoons cumin
- 2 teaspoons chili powder
- 1 teaspoon garlic powder
- 1 teaspoon paprika
- 1/2 teaspoon salt
- 1/4 teaspoon black pepper
- 1 lime
- Optional toppings: diced onions, cilantro, avocado, sour cream
Preheat the oven to 425°F (220°C). Toss diced sweet potatoes with olive oil and half of the spices (cumin, chili powder, garlic powder, paprika, salt, and pepper). Spread on a baking sheet and roast for 25-30 minutes, stirring halfway through, until tender and slightly crispy on the edges.
While the potatoes roast, heat the black beans in a saucepan with remaining spices until warm. Warm the corn tortillas in a dry skillet or directly over a gas flame until slightly charred. Fill each tortilla with a portion of roasted sweet potatoes and seasoned black beans. Top with your choice of garnishes and a squeeze of fresh lime juice.
For best results, dice the sweet potatoes into uniform, small cubes (about 1/2 inch) to ensure even cooking. The tacos can be assembled ahead of time and kept warm in a low-temperature oven, but it's best to warm the tortillas just before serving to maintain their texture. Store leftover filling separately from tortillas in an airtight container for up to 3 days.
Veggie-Packed Turkey Meatballs

Turkey meatballs offer a lean and healthy alternative to traditional beef meatballs while still delivering robust flavor and satisfying texture. This version incorporates finely chopped vegetables, not only boosting the nutritional content but also helping to keep the meatballs moist and tender during cooking.
These veggie-packed turkey meatballs can be served over whole grain pasta, zucchini noodles, or alongside a fresh salad. The hidden vegetables make this dish particularly appealing for picky eaters, and the meatballs can be made in advance and frozen for quick weeknight meals.
Begin by squeezing excess moisture from the grated zucchini using a clean kitchen towel. In a large mixing bowl, combine the ground turkey, drained zucchini, carrots, onion, garlic, breadcrumbs, egg, parsley, oregano, salt, and pepper. Mix gently with your hands until just combined, being careful not to overmix. Form the mixture into 1.5-inch meatballs, placing them on a parchment-lined baking sheet.
Heat olive oil in a large skillet over medium heat. Cook the meatballs in batches, turning occasionally, until golden brown on all sides and cooked through, about 12-15 minutes. Alternatively, bake the meatballs in a preheated 400°F oven for 20-25 minutes, or until they reach an internal temperature of 165°F.
For best results, avoid overcrowding the pan when cooking the meatballs, as this can lead to steaming rather than browning. The meatballs can be made ahead and stored in an airtight container in the refrigerator for up to 3 days, or frozen for up to 3 months. When reheating, add a splash of broth or sauce to keep them moist.
- 1 pound ground turkey
- 1 cup finely grated zucchini
- 1/2 cup finely diced carrots
- 1/2 cup finely diced onion
- 3 cloves garlic, minced
- 1/2 cup whole wheat breadcrumbs
- 1 large egg
- 2 tablespoons fresh parsley, chopped
- 1 teaspoon dried oregano
- 1 teaspoon salt
- 1/2 teaspoon black pepper
- 2 tablespoons olive oil
Asian-Inspired Rice Bowl With Tofu
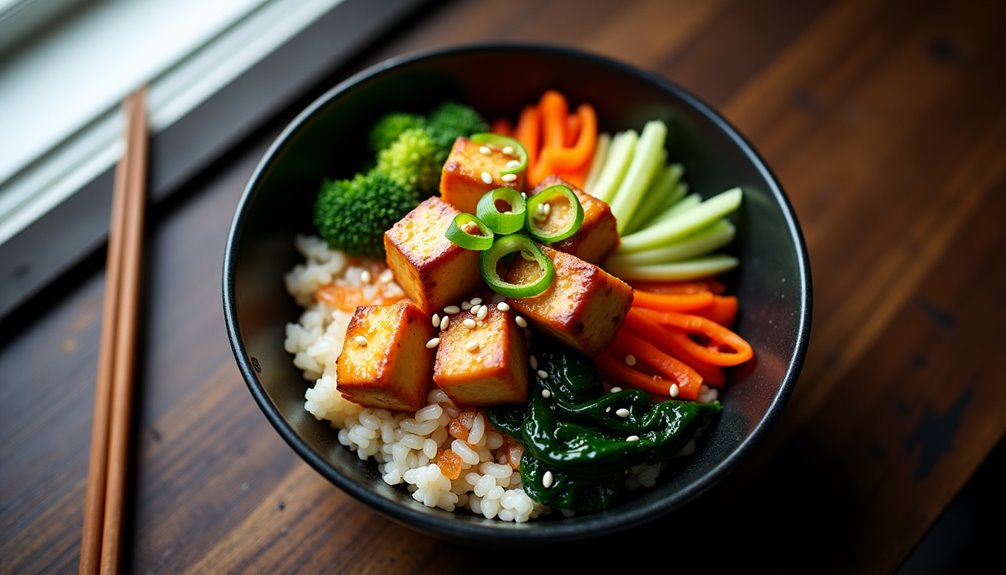
Asian-Inspired Rice Bowl With Tofu combines protein-rich tofu with fresh vegetables and aromatic seasonings, creating a nutritious and satisfying vegetarian meal. The dish features crispy pan-fried tofu, colorful vegetables, and fluffy rice, all brought together with a savory Asian-inspired sauce.
This healthy dinner option isn't only rich in nutrients but also highly customizable, allowing you to adjust the vegetables and seasonings according to your preferences. The combination of textures and flavors makes it an excellent choice for those looking to incorporate more plant-based meals into their diet.
Begin by pressing the tofu between paper towels for 30 minutes to remove excess moisture. Meanwhile, cook the jasmine rice according to package instructions. Cut the pressed tofu into 1-inch cubes and pan-fry in sesame oil over medium-high heat until golden brown on all sides, about 2-3 minutes per side. Remove the tofu and set aside.
In the same pan, sauté the garlic and ginger until fragrant. Add the carrots, broccoli, and bell pepper, cooking until tender-crisp. Add the spinach and cook until wilted. Mix soy sauce and rice vinegar in a small bowl, then add to the vegetables. Return the tofu to the pan and gently toss everything together.
For best results, use extra-firm tofu and ensure it's well-pressed to achieve the crispiest exterior. The vegetables can be prepped in advance to save time, and the sauce can be adjusted with additional seasonings like chili paste or honey for varying levels of heat or sweetness. Store any leftovers in an airtight container in the refrigerator for up to 3 days.
Ingredients:
- 14 oz firm tofu
- 2 cups jasmine rice
- 2 carrots, julienned
- 2 cups broccoli florets
- 1 red bell pepper, sliced
- 2 cups baby spinach
- 3 tablespoons soy sauce
- 2 tablespoons sesame oil
- 1 tablespoon rice vinegar
- 2 cloves garlic, minced
- 1 tablespoon ginger, grated
- 2 green onions, chopped
- Sesame seeds for garnish
Zucchini Noodles With Pesto Chicken
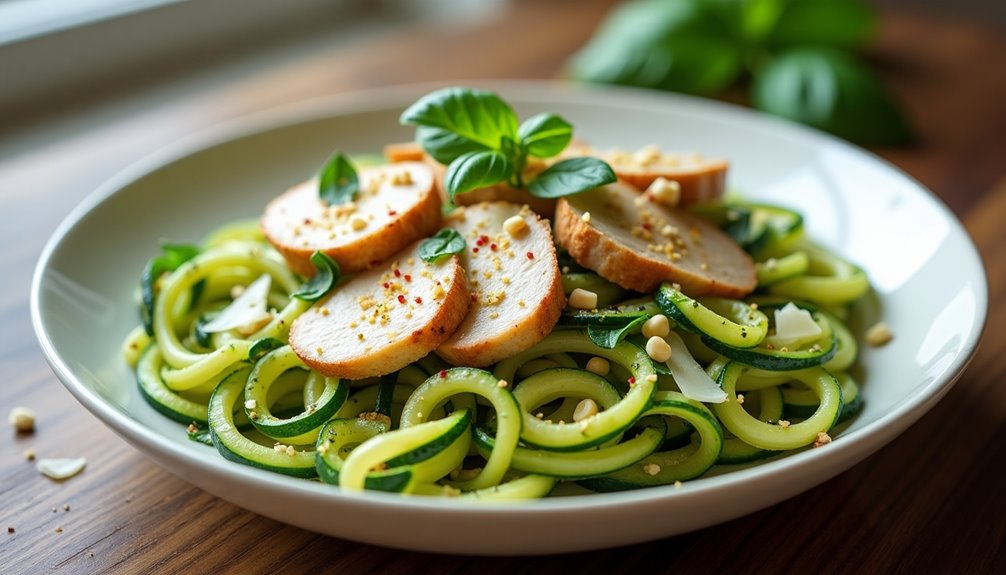
Zucchini noodles, also known as "zoodles," offer a low-carb alternative to traditional pasta while maintaining a satisfying texture and neutral flavor that pairs beautifully with various sauces. This dish combines the freshness of spiralized zucchini with protein-rich chicken and aromatic pesto, creating a balanced meal that's both nutritious and delicious.
The combination of tender chicken and vibrant pesto sauce brings Mediterranean flavors to this light yet filling dish. Perfect for those following a low-carb or gluten-free diet, this meal provides essential nutrients while keeping calories in check, making it an excellent choice for health-conscious individuals.
Ingredients:
- 4 medium zucchini
- 2 boneless, skinless chicken breasts
- 1/2 cup homemade or store-bought pesto
- 3 tablespoons olive oil
- 4 cloves garlic, minced
- 1/2 teaspoon salt
- 1/4 teaspoon black pepper
- 1/4 cup pine nuts (optional)
- 1/4 cup grated Parmesan cheese
- Red pepper flakes (optional)
Using a spiralizer, create zucchini noodles and set them aside. Season chicken breasts with salt and pepper, then cook them in olive oil over medium heat for 6-7 minutes per side until golden brown and cooked through. Remove the chicken and let it rest for 5 minutes before slicing.
In the same pan, add remaining olive oil and minced garlic, sautéing for 30 seconds. Add the zucchini noodles and cook for 2-3 minutes until slightly softened but still crisp. Stir in the pesto sauce and sliced chicken, tossing everything together until well combined and heated through. Top with Parmesan cheese and pine nuts if desired.
To prevent watery zoodles, avoid overcooking the zucchini noodles and consider salting them for 10 minutes before cooking to draw out excess moisture. Pat them dry with paper towels before adding them to the pan. The dish is best served immediately while the noodles are still firm and the sauce is fresh.
Spicy Tuna and Avocado Wrap
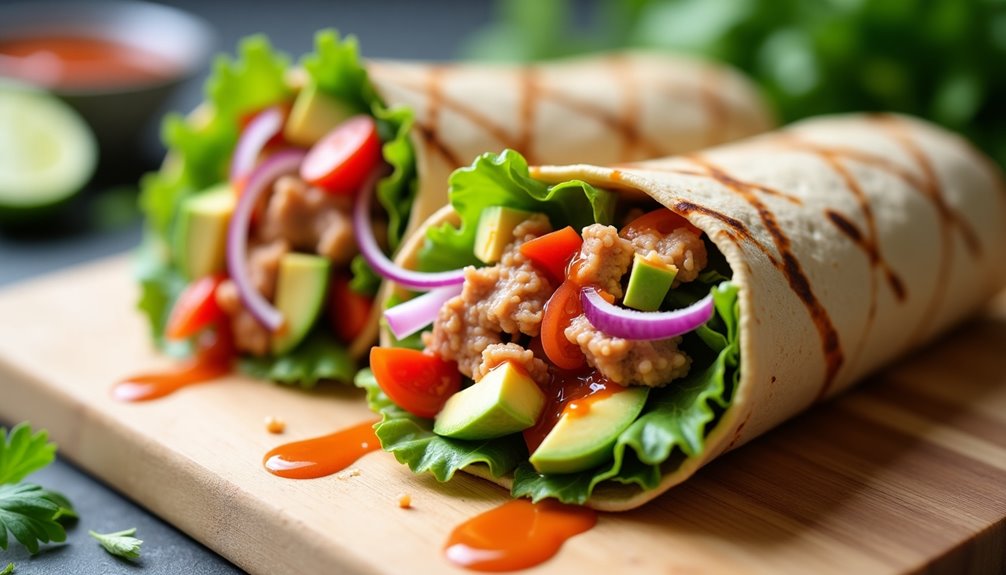
Spicy tuna and avocado wraps offer a perfect balance of protein, healthy fats, and bold flavors while remaining a light yet satisfying dinner option. The combination of lean tuna with creamy avocado creates a nutritious meal that can be prepared quickly, making it ideal for busy weeknight dinners.
This dish brings together the omega-3 fatty acids from tuna with the heart-healthy monounsaturated fats in avocados, while sriracha or hot sauce adds a spicy kick that elevates the overall taste profile. The wrap format makes it portable and customizable, allowing for easy portion control and versatility in ingredients.
Ingredients:
- 2 large whole wheat tortillas
- 2 cans (5oz each) chunk light tuna in water, drained
- 1 ripe avocado, mashed
- 2 tablespoons mayonnaise
- 1-2 tablespoons sriracha sauce
- 1 cup shredded lettuce
- 1/2 cup diced tomatoes
- 1/4 cup diced red onion
- 1 lime, juiced
- Salt and pepper to taste
In a medium bowl, combine the drained tuna with mashed avocado, mayonnaise, and sriracha sauce. Mix well until all ingredients are evenly incorporated. Season the mixture with lime juice, salt, and pepper to taste.
Warm the tortillas slightly to make them more pliable, then lay them flat on a clean surface. Divide the tuna-avocado mixture between the two tortillas, spreading it in the center. Top with shredded lettuce, diced tomatoes, and red onion.
To assemble, fold the bottom edge of each tortilla up about 2 inches, then fold in the sides and roll up tightly from the bottom, ensuring all ingredients stay secure inside. Cut each wrap diagonally before serving.
For best results, use slightly firm avocados as they hold their shape better in the mixture. The wrap can be made ahead and stored in the refrigerator for up to 4 hours, but be sure to squeeze extra lime juice over the avocado to prevent browning. To make the wrap lower in calories, use Greek yogurt instead of mayonnaise and opt for lettuce wraps instead of tortillas.
Easy Vegetable Curry With Brown Rice
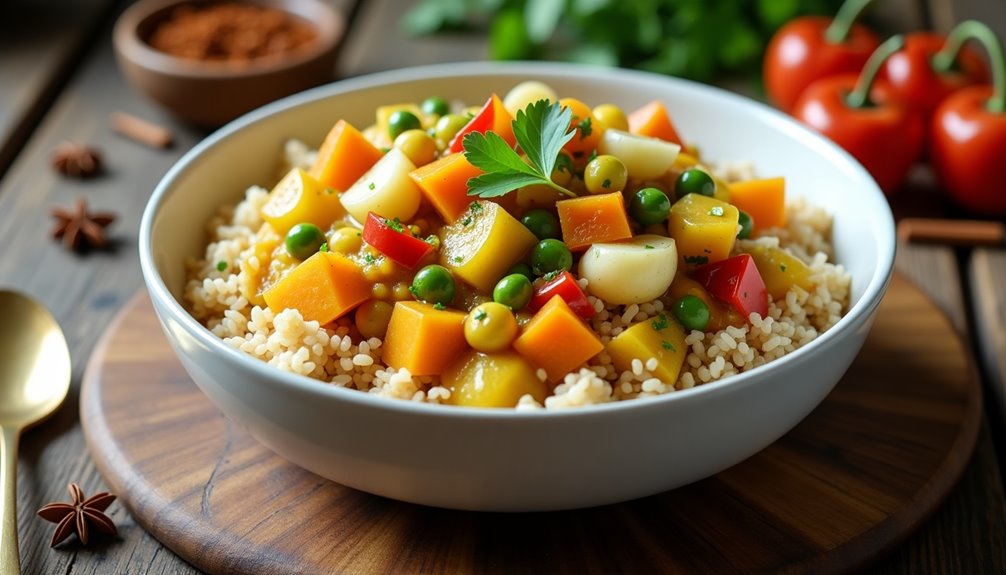
This aromatic vegetable curry paired with nutty brown rice offers a perfect balance of nutrition and comfort. The combination of fresh vegetables, aromatic spices, and coconut milk creates a rich, satisfying meal that's both healthy and flavorful.
The beauty of this recipe lies in its versatility – you can customize the vegetables based on what's in season or available in your kitchen. The brown rice adds a wholesome base, providing complex carbohydrates and fiber while complementing the curry's vibrant flavors.
Ingredients:
- 2 cups brown rice
- 2 tablespoons vegetable oil
- 1 onion, diced
- 3 cloves garlic, minced
- 1 tablespoon ginger, grated
- 2 carrots, sliced
- 1 cauliflower, cut into florets
- 2 potatoes, cubed
- 1 bell pepper, chopped
- 2 tablespoons curry powder
- 1 teaspoon turmeric
- 1 can (400ml) coconut milk
- 2 cups vegetable broth
- 1 cup green peas
- Salt and pepper to taste
- Fresh cilantro for garnish
Start by cooking the brown rice according to package instructions, typically combining 2 cups of rice with 4 cups of water and simmering for 45 minutes. While the rice cooks, heat oil in a large pot over medium heat. Sauté onions until translucent, add garlic and ginger, then stir in the curry powder and turmeric. Add the harder vegetables (carrots and potatoes) first, followed by cauliflower and bell pepper. Pour in coconut milk and vegetable broth, bringing the mixture to a simmer. Cook for 15-20 minutes until vegetables are tender, then add peas and cook for an additional 3 minutes.
For optimal results, wait until the vegetables are nearly tender before adjusting the seasoning with salt and pepper. Once the curry reaches your desired consistency, serve hot over the prepared brown rice and garnish with fresh cilantro. The curry should be thick enough to coat the vegetables but still have enough sauce to soak into the rice.
Expert tip: To enhance the curry's flavor, toast the spices in the oil before adding the vegetables. For meal prep purposes, this curry can be stored in an airtight container in the refrigerator for up to 3 days, and the flavors often improve overnight. If the curry becomes too thick when reheating, simply add a splash of water or coconut milk to reach the desired consistency.
Turkey and Apple Sausage Skillet
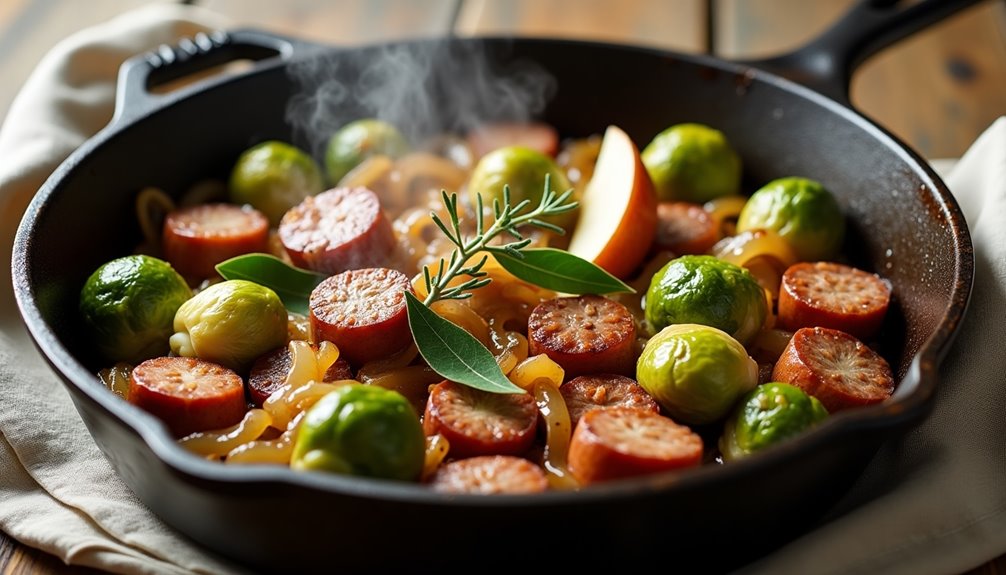
Turkey and apple sausage skillet is a wholesome and flavorful one-pan meal that combines lean protein with the natural sweetness of apples. This hearty dish delivers a perfect balance of savory and sweet flavors while keeping the calorie count reasonable for a healthy dinner option.
The combination of turkey sausage and fresh apples creates a delicious blend of fall-inspired flavors, while adding vegetables makes it a complete meal. This recipe takes less than 30 minutes to prepare, making it ideal for busy weeknight dinners when you want something nutritious without spending hours in the kitchen.
Ingredients:
- 1 pound turkey sausage, casings removed
- 2 medium apples, cored and sliced
- 1 medium onion, sliced
- 2 cups Brussels sprouts, halved
- 2 cloves garlic, minced
- 2 tablespoons olive oil
- 1 tablespoon fresh thyme
- 1 teaspoon fresh sage, chopped
- 1/2 teaspoon salt
- 1/4 teaspoon black pepper
- 1/4 cup chicken broth
- 1 tablespoon apple cider vinegar
Heat olive oil in a large skillet over medium-high heat. Add the turkey sausage, breaking it up with a wooden spoon, and cook until browned, about 5-7 minutes. Remove the sausage and set aside, leaving the drippings in the pan.
Add onions to the same skillet and cook until softened, about 3-4 minutes. Add Brussels sprouts and cook for another 5 minutes until they begin to brown. Stir in garlic, apples, herbs, salt, and pepper. Pour in chicken broth and apple cider vinegar, then return the sausage to the pan. Cover and simmer for 5-7 minutes until the vegetables are tender and the liquid has reduced.
For best results, choose firm apples that hold their shape when cooked, such as Honeycrisp or Granny Smith. Make sure not to overcook the apples as they can become mushy – they should be tender but still maintain their structure. This dish can be stored in an airtight container in the refrigerator for up to 3 days and reheats well in a skillet or microwave.
Mexican-Style Cauliflower Rice Bowl
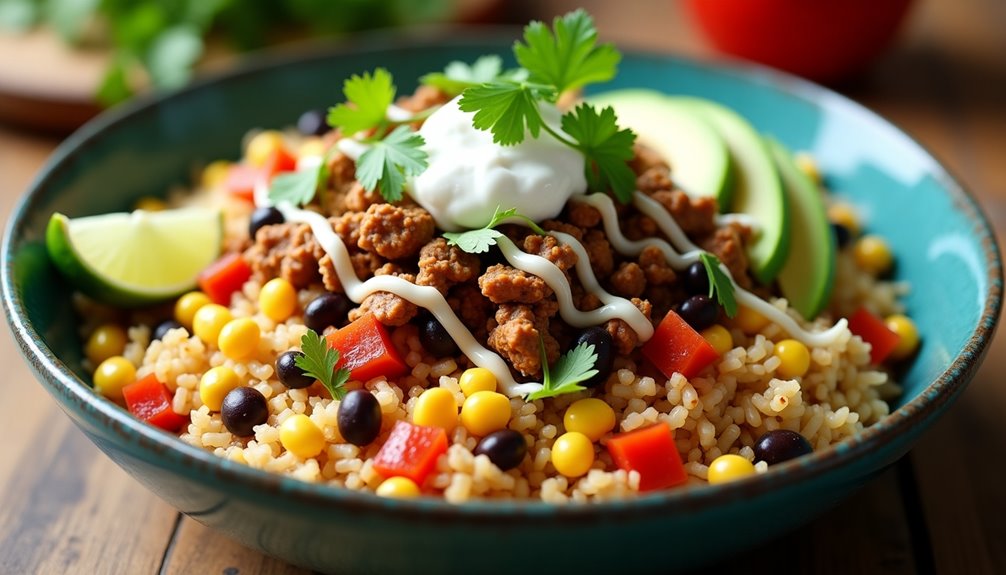
Mexican-Style Cauliflower Rice Bowl offers a low-carb alternative to traditional rice bowls while maintaining the bold, vibrant flavors of Mexican cuisine. This dish combines riced cauliflower with classic Mexican seasonings, creating a satisfying and nutritious meal that's perfect for those watching their carbohydrate intake or simply looking to incorporate more vegetables into their diet.
The versatility of this recipe allows for numerous customizations to suit individual tastes and dietary preferences. Whether you're following a keto diet, eating gluten-free, or just trying to eat healthier, this cauliflower rice bowl delivers a delicious combination of proteins, vegetables, and authentic Mexican flavors without compromising on taste.
Ingredients:
- 1 large head cauliflower
- 1 lb ground turkey or chicken
- 1 red bell pepper, diced
- 1 onion, diced
- 2 cloves garlic, minced
- 2 tbsp olive oil
- 2 tsp chili powder
- 1 tsp ground cumin
- 1 tsp paprika
- 1/2 tsp oregano
- Salt and pepper to taste
- 1 cup black beans, drained and rinsed
- 1 cup corn kernels
- Fresh cilantro for garnish
- Lime wedges for serving
- Optional toppings: avocado, cheese, sour cream
Process the cauliflower in a food processor until it reaches a rice-like consistency. Heat olive oil in a large skillet over medium heat and sauté the onion and bell pepper until softened. Add the minced garlic and ground meat, cooking until the meat is browned. Add the seasonings and stir to combine.
In the same pan, push the meat mixture to one side and add the riced cauliflower to the other side. Cook the cauliflower for 5-7 minutes, stirring occasionally, until it reaches your desired texture. Once the cauliflower is cooked, mix all ingredients together in the pan, including the black beans and corn. Cook for an additional 2-3 minutes until everything is heated through.
Serve in bowls and top with fresh cilantro, lime juice, and your choice of additional toppings.
For best results, avoid overcooking the cauliflower rice as it can become mushy. If preparing the cauliflower rice ahead of time, store it uncooked in an airtight container for up to 3 days. The dish can be made vegetarian by omitting the meat and adding extra beans or plant-based protein alternatives. To prevent excess moisture, make sure to thoroughly drain the beans and corn before adding them to the mixture.
Five-Ingredient Caprese Pasta

Five-Ingredient Caprese Pasta combines the fresh flavors of a classic Caprese salad with satisfying pasta for a quick and wholesome dinner option. This Italian-inspired dish brings together the vibrant tastes of ripe tomatoes, fresh basil, and creamy mozzarella, all tied together with perfectly cooked pasta and high-quality olive oil.
This simple yet elegant meal takes less than 30 minutes to prepare and requires minimal cooking skills, making it perfect for busy weeknights or casual entertaining. The key to this dish's success lies in using the freshest ingredients possible, as each component's natural flavor shines through in this uncomplicated preparation.
- 1 pound pasta (penne or fusilli)
- 16 ounces cherry tomatoes, halved
- 8 ounces fresh mozzarella pearls
- 1 cup fresh basil leaves, torn
- 1/4 cup extra virgin olive oil
- Salt and black pepper to taste
Bring a large pot of generously salted water to a boil and cook the pasta according to package instructions until al dente. While the pasta cooks, halve the cherry tomatoes and tear the basil leaves into bite-sized pieces.
When the pasta is ready, drain it but reserve about 1/2 cup of the cooking water. Return the pasta to the pot and immediately add the halved tomatoes, mozzarella pearls, and torn basil. Drizzle with olive oil and toss gently to combine. If the mixture seems dry, add a small amount of the reserved pasta water to create a light sauce. Season with salt and black pepper to taste, and give everything a final gentle toss.
For best results, serve this dish immediately while the pasta is still warm and the mozzarella is just beginning to melt. The residual heat from the pasta will slightly warm the tomatoes and help release their juices, while also softening the mozzarella to create a creamy texture. Store any leftovers in an airtight container in the refrigerator, though keep in mind that the texture of the mozzarella will change once chilled.
Quick Sesame Ginger Beef Stir-Fry
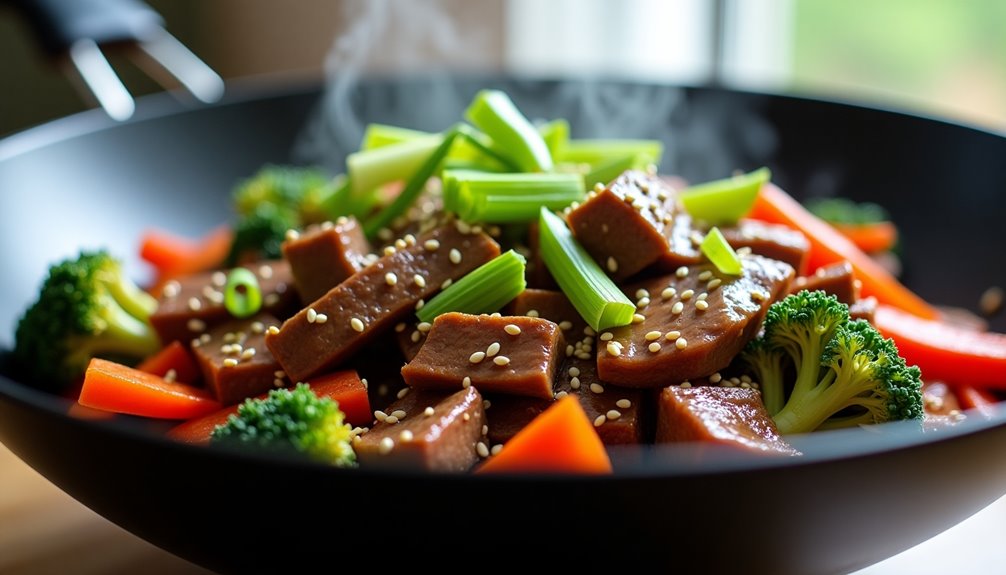
Quick Sesame Ginger Beef Stir-Fry combines tender strips of beef with crisp vegetables in a savory Asian-inspired sauce. This dish perfectly balances the nutty flavor of sesame oil with the zesty kick of fresh ginger, creating a restaurant-quality meal right in your kitchen.
Ready in just 30 minutes, this stir-fry is an excellent choice for busy weeknight dinners while still maintaining the nutrients and flavors of a well-balanced meal. The key to success lies in preparing all ingredients before heating the wok, as the cooking process moves quickly once started.
Ingredients:
- 1 lb flank steak, thinly sliced against the grain
- 3 tablespoons soy sauce
- 2 tablespoons sesame oil
- 2 tablespoons fresh ginger, minced
- 4 cloves garlic, minced
- 1 red bell pepper, sliced
- 2 cups broccoli florets
- 1 carrot, julienned
- 1/2 cup beef broth
- 2 tablespoons cornstarch
- 1 tablespoon honey
- 2 green onions, chopped
- 1 tablespoon toasted sesame seeds
- Salt and pepper to taste
Marinate the sliced beef in 1 tablespoon soy sauce, 1 tablespoon sesame oil, and half of the minced ginger for 15 minutes. Meanwhile, whisk together remaining soy sauce, sesame oil, ginger, beef broth, cornstarch, and honey in a small bowl.
Heat a wok or large skillet over high heat until very hot. Add marinated beef in a single layer and cook for 2-3 minutes until browned. Remove beef and set aside.
Add remaining oil to the wok and stir-fry garlic for 30 seconds. Add vegetables and stir-fry for 3-4 minutes until crisp-tender. Return beef to the wok, pour in the sauce mixture, and cook while stirring until the sauce thickens, about 2 minutes. Top with green onions and sesame seeds before serving.
For best results, slice the beef while it's partially frozen to achieve thin, even strips. Keep vegetables cut to similar sizes to ensure even cooking, and have all ingredients prepped and within reach before starting to cook. The wok or pan should be very hot before adding any ingredients to achieve the characteristic sear of a proper stir-fry.