15 Quick High Protein Meals Dinners
Just like a well-organized kitchen sets you up for cooking success, having a repertoire of quick, protein-packed dinners can transform your weeknight meals from stressful to satisfying. You'll find these 15 high-protein options offer the perfect balance of efficiency and nutrition, with most coming together in under 30 minutes. From sheet pan Greek chicken to sesame-crusted tuna, each recipe delivers at least 25 grams of protein while keeping cleanup minimal. Let's explore how these protein-rich meals can revolutionize your dinner routine.
Sheet Pan Greek Chicken With Roasted Vegetables
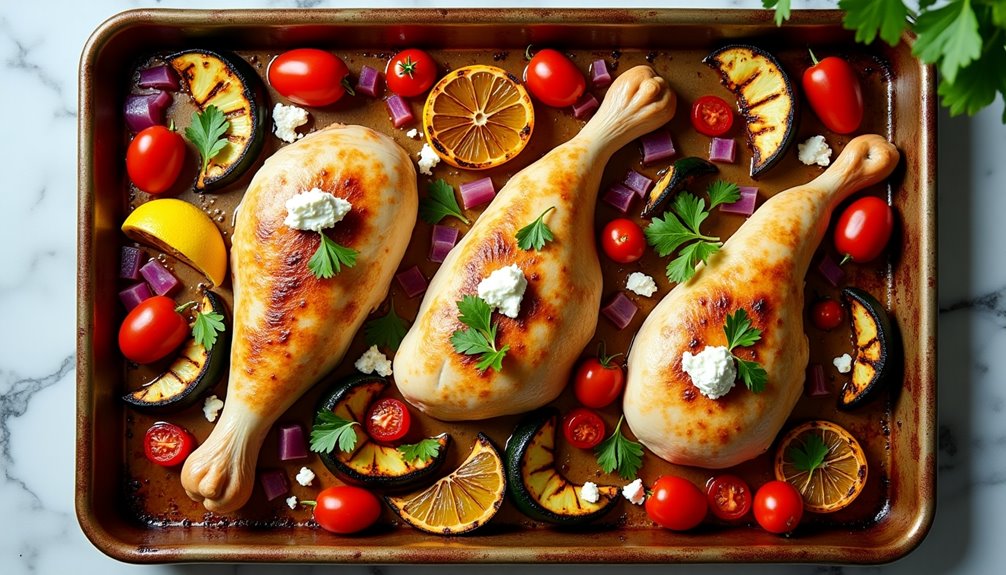
Sheet pan meals are a perfect solution for busy weeknights when you want a nutritious, protein-rich dinner without spending hours in the kitchen. This Greek-inspired chicken dish combines lean protein with colorful Mediterranean vegetables and classic seasonings like oregano, lemon, and garlic.
The beauty of this recipe lies in its simplicity – everything cooks together on one pan, allowing the flavors to meld while the vegetables caramelize and the chicken develops a golden crust. The result is a complete meal that's both satisfying and healthy, providing approximately 35 grams of protein per serving.
- 4 chicken breasts, boneless and skinless
- 2 red bell peppers, chunked
- 1 red onion, wedged
- 2 zucchini, sliced
- 2 cups cherry tomatoes
- 4 tablespoons olive oil
- 4 cloves garlic, minced
- 2 lemons (1 juiced, 1 sliced)
- 2 tablespoons dried oregano
- 1 tablespoon dried basil
- 1 teaspoon salt
- 1/2 teaspoon black pepper
- 1 cup crumbled feta cheese
- Fresh parsley for garnish
Preheat the oven to 400°F (200°C). In a large bowl, combine olive oil, lemon juice, garlic, oregano, basil, salt, and pepper. Place the chicken breasts in the mixture and coat thoroughly. On a large sheet pan, arrange the vegetables and lemon slices, then place the marinated chicken breasts on top. Drizzle any remaining marinade over the vegetables.
Roast for 25-30 minutes, or until the chicken reaches an internal temperature of 165°F (74°C) and the vegetables are tender and lightly charred. During the last 5 minutes of cooking, sprinkle feta cheese over the vegetables and return to the oven until the cheese begins to soften.
For best results, cut the vegetables in similar-sized pieces to ensure even cooking. If your chicken breasts are particularly thick, consider butterflying them or pounding them to an even thickness before cooking. The dish can be prepped ahead by marinating the chicken and chopping the vegetables up to 24 hours in advance, stored separately in the refrigerator.
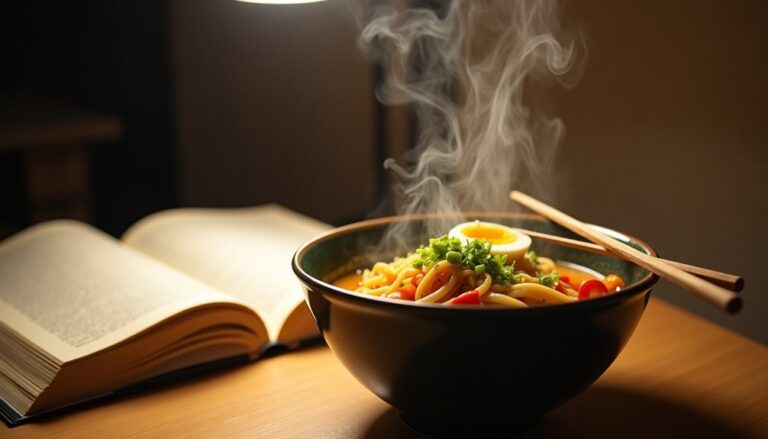
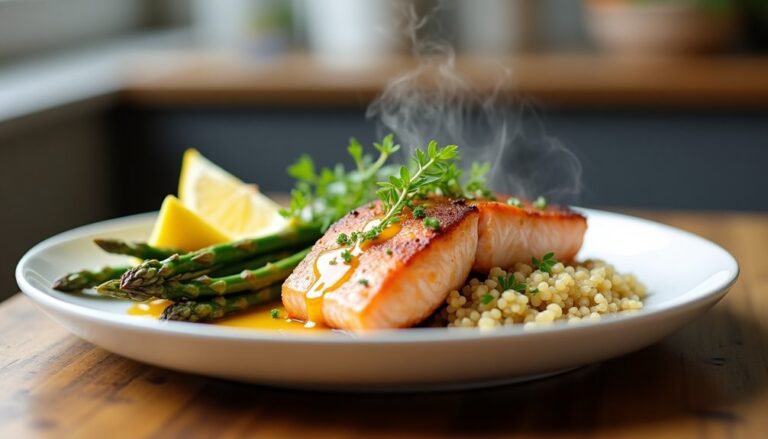
Easy Teriyaki Salmon Bowl
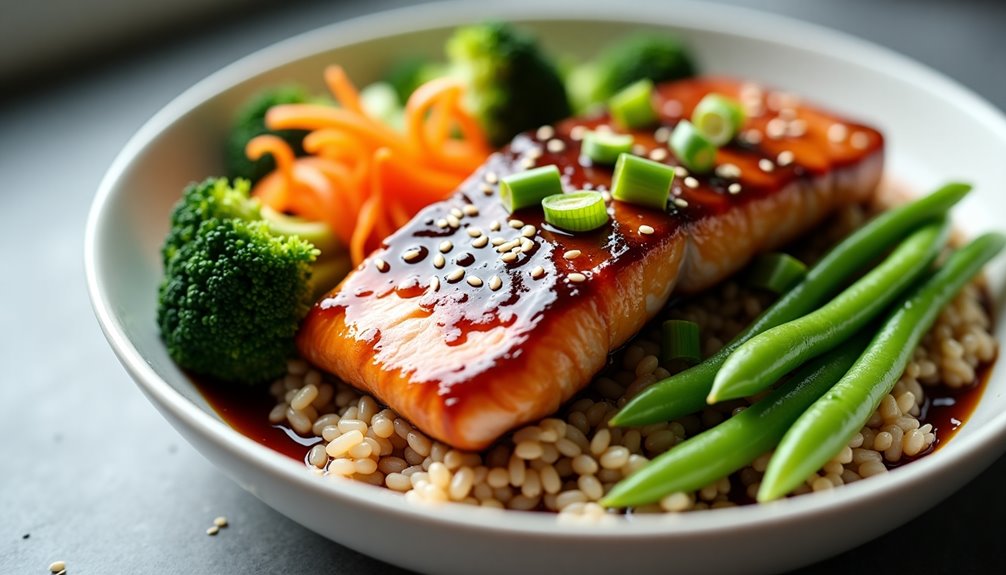
This protein-packed teriyaki salmon bowl combines perfectly cooked fish with nutty brown rice and crisp vegetables, creating a balanced meal that's both nutritious and satisfying. The homemade teriyaki sauce adds a sweet and savory element that elevates the dish beyond a basic fish and rice combination.
The entire meal comes together in under 30 minutes, making it ideal for busy weeknight dinners or meal prep. The recipe is also versatile – you can swap vegetables based on what's available, and the teriyaki sauce works well with other proteins like chicken or tofu.
- 2 salmon fillets (6 oz each)
- 1 cup brown rice
- 2 cups broccoli florets
- 1 carrot, julienned
- 1 cup edamame, shelled
- 2 green onions, sliced
- 1 tablespoon sesame seeds
- ¼ cup soy sauce
- 2 tablespoons mirin
- 2 tablespoons sake
- 2 tablespoons brown sugar
- 1 teaspoon grated ginger
- 2 cloves garlic, minced
- 1 tablespoon cornstarch
- 2 tablespoons water
Start by cooking brown rice according to package instructions. While the rice cooks, prepare the teriyaki sauce by combining soy sauce, mirin, sake, brown sugar, ginger, and garlic in a small saucepan. Bring to a simmer, then add cornstarch mixed with water to thicken.
Steam broccoli and edamame until tender-crisp. Season salmon fillets with salt and pepper, then pan-sear skin-side up for 4 minutes. Flip and cook for another 3-4 minutes, basting with teriyaki sauce during the last minute. Assemble bowls by layering rice, vegetables, and salmon, then drizzle with remaining sauce. Garnish with green onions and sesame seeds.
For best results, bring salmon to room temperature 15 minutes before cooking, and pat dry with paper towels to ensure proper searing. The teriyaki sauce can be made ahead and stored in the refrigerator for up to a week. If the sauce becomes too thick, thin it with a small amount of water.
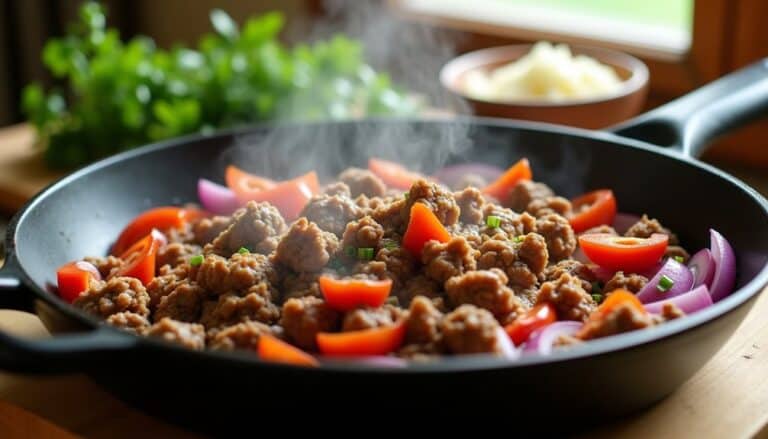
One-Pot Turkey Taco Quinoa
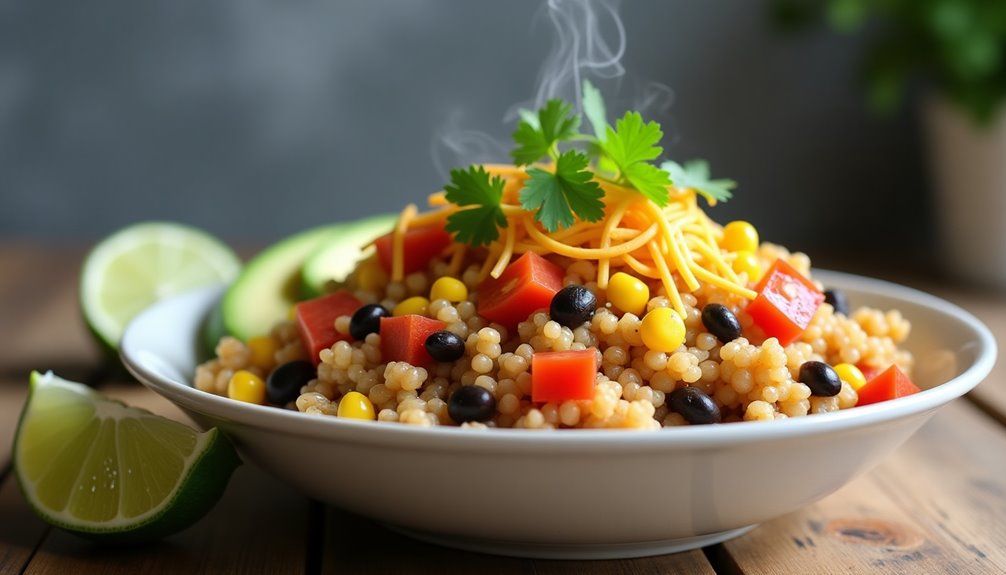
One-Pot Turkey Taco Quinoa combines lean protein with nutrient-rich quinoa in a Mexican-inspired dish that delivers both flavor and nutrition. This satisfying meal provides approximately 30 grams of protein per serving while incorporating vegetables and complex carbohydrates.
This versatile recipe can be prepared in under 30 minutes, making it perfect for busy weeknight dinners. The one-pot cooking method minimizes cleanup while ensuring all ingredients blend together for maximum flavor development.
- 1 pound lean ground turkey
- 1 cup quinoa, rinsed
- 1 can (14.5 oz) diced tomatoes
- 1 can (15 oz) black beans, drained and rinsed
- 1 cup corn (fresh or frozen)
- 2 cups chicken broth
- 1 onion, diced
- 2 cloves garlic, minced
- 2 tablespoons taco seasoning
- 1 bell pepper, diced
- Salt and pepper to taste
- Optional toppings: shredded cheese, cilantro, lime wedges, avocado
Brown the ground turkey in a large pot over medium-high heat, breaking it into small pieces. Once cooked through, add diced onion and garlic, cooking until the onion becomes translucent. Stir in the bell pepper and taco seasoning, allowing the spices to bloom for about 30 seconds.
Add the quinoa, diced tomatoes, black beans, corn, and chicken broth to the pot. Bring the mixture to a boil, then reduce heat to low, cover, and simmer for 15-20 minutes until the quinoa is fully cooked and has absorbed most of the liquid. Let stand for 5 minutes before serving with your choice of toppings.
For best results, avoid stirring the quinoa too frequently while it cooks, as this can make it mushy. The dish can be stored in an airtight container in the refrigerator for up to 4 days, making it excellent for meal prep. For a spicier version, add diced jalapeños or hot sauce to taste.
Black Bean and Sweet Potato Power Bowl
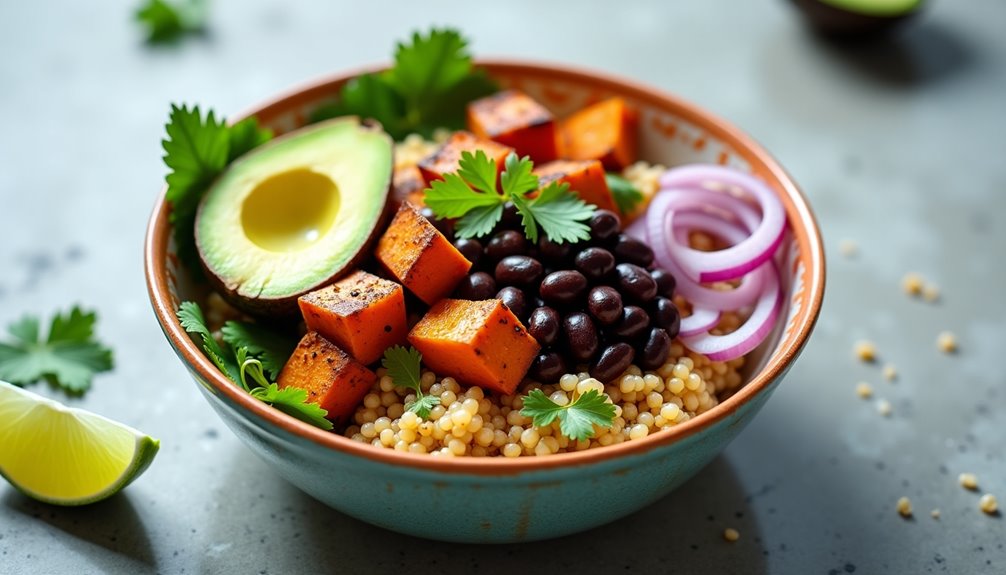
Black Bean and Sweet Potato Power Bowl combines hearty plant-based protein with complex carbohydrates, creating a nutritious and satisfying meal perfect for busy weekdays. The natural sweetness of roasted sweet potatoes complements the earthy black beans, while a variety of toppings adds texture and flavor complexity.
This protein-rich bowl delivers approximately 20 grams of protein per serving and can be prepared in under 30 minutes. The ingredients are affordable and easily accessible, making it an excellent option for meal prep or last-minute dinners. The dish is naturally vegan and gluten-free, though it can be customized with additional protein sources if desired.
- 2 medium sweet potatoes, cubed
- 2 cans black beans, drained and rinsed
- 1 cup quinoa
- 2 cups vegetable broth
- 1 red onion, diced
- 2 cloves garlic, minced
- 2 tablespoons olive oil
- 1 teaspoon cumin
- 1 teaspoon chili powder
- 1 teaspoon paprika
- Salt and pepper to taste
- 1 lime
- Fresh cilantro
- 1 avocado
Preheat the oven to 400°F (200°C). Toss sweet potato cubes with olive oil, cumin, chili powder, and paprika. Spread on a baking sheet and roast for 20-25 minutes until tender.
Meanwhile, rinse quinoa and cook in vegetable broth according to package instructions. In a separate pan, sauté diced onion and garlic until translucent, then add black beans and warm through.
Layer the cooked quinoa in bowls, top with roasted sweet potatoes and seasoned black beans. Garnish with sliced avocado, fresh cilantro, and a squeeze of lime juice. Season with additional salt and pepper to taste.
For optimal meal prep, roast the sweet potatoes and cook the quinoa in advance, storing them separately in airtight containers. The components will stay fresh in the refrigerator for up to 4 days. Reheat the ingredients separately before assembling to maintain their individual textures, and add fresh toppings just before serving.
20-Minute Shrimp Scampi
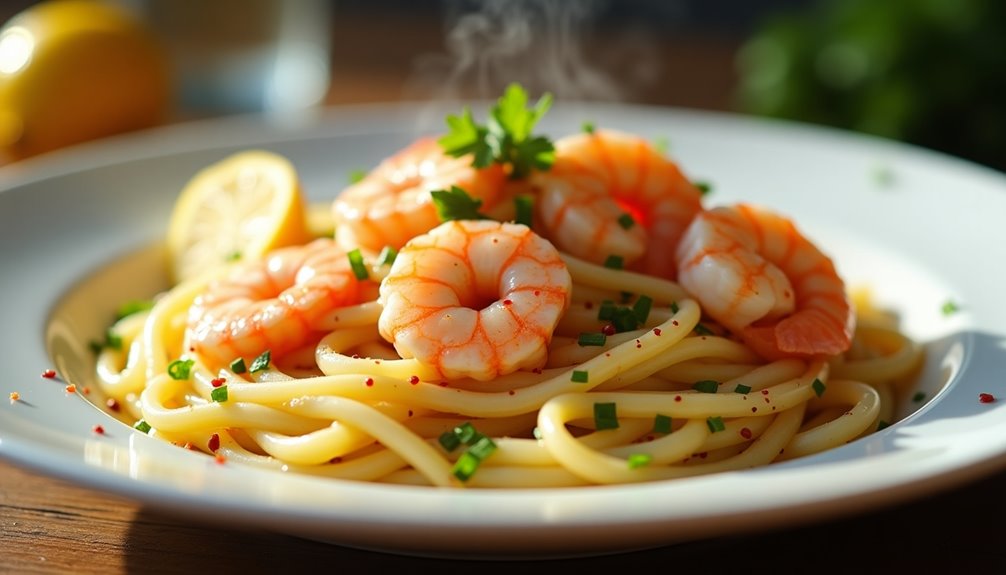
Minute Shrimp Scampi is a classic Italian-American dish that combines succulent shrimp with garlic, butter, and white wine sauce, all served over pasta. This protein-rich meal delivers approximately 20-25 grams of protein per serving while requiring minimal preparation time, making it an excellent choice for busy weeknights.
The key to perfect shrimp scampi lies in not overcooking the shrimp, which can become rubbery when exposed to heat for too long. This recipe uses a quick cooking method that ensures tender, juicy shrimp while developing a flavorful sauce that coats both the seafood and pasta.
- 1 pound large shrimp, peeled and deveined
- 8 ounces linguine or spaghetti
- 4 tablespoons butter
- 4 tablespoons olive oil
- 4 cloves garlic, minced
- 1/4 cup dry white wine
- 1 lemon, juiced
- 1/4 cup fresh parsley, chopped
- 1/4 teaspoon red pepper flakes
- Salt and black pepper to taste
Cook pasta according to package directions until al dente. Meanwhile, heat butter and olive oil in a large skillet over medium-high heat. Add garlic and red pepper flakes, sautéing for 1 minute until fragrant. Add shrimp to the pan in a single layer, cooking for 2-3 minutes per side until pink and opaque. Remove shrimp from the pan and add white wine and lemon juice, simmering for 2 minutes to reduce slightly.
Return shrimp to the pan along with the cooked pasta and parsley. Toss everything together until well combined and heated through. Season with salt and black pepper to taste.
For best results, use fresh shrimp when possible, but frozen shrimp can work well if thawed properly. The cooking liquid should be reduced enough to coat the pasta but still remain somewhat loose. If the sauce becomes too thick, add a small amount of pasta cooking water to achieve the desired consistency. Store leftovers in an airtight container in the refrigerator for up to 2 days.
Grilled Steak and Veggie Skewers

Grilled steak and veggie skewers combine lean protein with colorful vegetables for a satisfying and nutritious meal. The combination of tender meat and charred vegetables creates a perfect balance of flavors while keeping the protein content high and the preparation simple.
This versatile dish can be customized with different vegetables and marinades, making it ideal for meal prep or entertaining. The skewers can be assembled ahead of time and grilled just before serving, offering both convenience and impressive presentation.
Ingredients:
- 1.5 lbs sirloin steak, cut into 1.5-inch cubes
- 2 bell peppers, cut into chunks
- 1 red onion, cut into wedges
- 16 cherry tomatoes
- 16 mushrooms, whole
- 1/4 cup olive oil
- 3 cloves garlic, minced
- 1 tablespoon soy sauce
- 1 tablespoon Worcestershire sauce
- 1 teaspoon black pepper
- 1 teaspoon salt
- 8 wooden or metal skewers
Combine the olive oil, garlic, soy sauce, Worcestershire sauce, black pepper, and salt in a bowl to create the marinade. Place the cubed steak in the marinade and refrigerate for 30 minutes to 2 hours. If using wooden skewers, soak them in water for at least 30 minutes to prevent burning.
Thread the marinated steak pieces onto the skewers, alternating with bell peppers, onion wedges, cherry tomatoes, and mushrooms. Preheat the grill to medium-high heat (around 400°F). Grill the skewers for 12-15 minutes, rotating every 3-4 minutes until the steak reaches desired doneness and the vegetables are tender with slight char marks.
For best results, let the meat come to room temperature before grilling and ensure the grill is properly preheated. Don't overcrowd the skewers, as this can lead to uneven cooking. Keep similar-sized pieces of meat and vegetables together on each skewer to ensure even cooking. The steak can be substituted with chicken or shrimp, but cooking times will need to be adjusted accordingly.
Lemon Garlic Tofu Stir-Fry
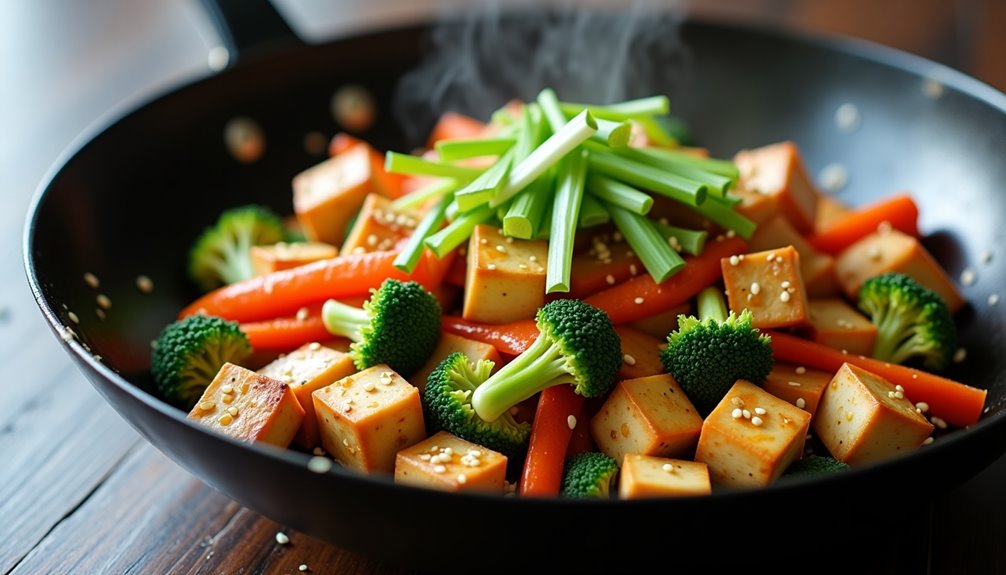
Lemon Garlic Tofu Stir-Fry is a protein-packed vegetarian dish that combines crispy tofu with fresh vegetables in a tangy citrus sauce. The tofu provides approximately 20 grams of protein per serving, making it an excellent choice for those seeking to increase their protein intake while maintaining a plant-based diet.
The key to this recipe's success lies in properly preparing the tofu by pressing it to remove excess moisture, which allows it to become crispy when cooked. The lemon-garlic sauce adds brightness and depth to the dish, while the combination of colorful vegetables provides essential nutrients and varying textures.
Ingredients:
- 1 block (14 oz) firm tofu
- 2 tablespoons cornstarch
- 3 tablespoons vegetable oil
- 4 cloves garlic, minced
- 1 tablespoon ginger, minced
- 1 bell pepper, sliced
- 2 cups broccoli florets
- 2 carrots, julienned
- 2 tablespoons soy sauce
- Juice of 2 lemons
- 1 tablespoon honey
- 1/4 cup vegetable broth
- Salt and pepper to taste
- 2 green onions, chopped
- Sesame seeds for garnish
Press the tofu between paper towels for 30 minutes to remove excess moisture. Cut into 1-inch cubes and coat with cornstarch. Heat oil in a large wok or skillet over medium-high heat. Cook tofu until golden brown on all sides, about 8-10 minutes. Remove and set aside.
In the same pan, sauté garlic and ginger until fragrant, then add vegetables and stir-fry until crisp-tender. Combine soy sauce, lemon juice, honey, and broth in a small bowl. Return tofu to the pan, add the sauce mixture, and cook until the sauce thickens slightly. Season with salt and pepper, garnish with green onions and sesame seeds.
For best results, use extra-firm tofu and don't skip the pressing step, as this is crucial for achieving the desired crispy texture. The dish can be customized with different vegetables based on availability or preference, and the sauce can be adjusted to be more or less tangy by varying the amount of lemon juice. Store any leftovers in an airtight container in the refrigerator for up to three days.
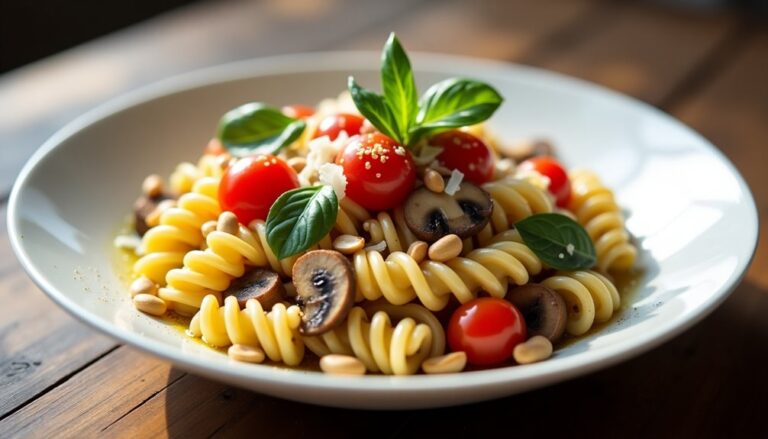
Mediterranean Tuna Pasta
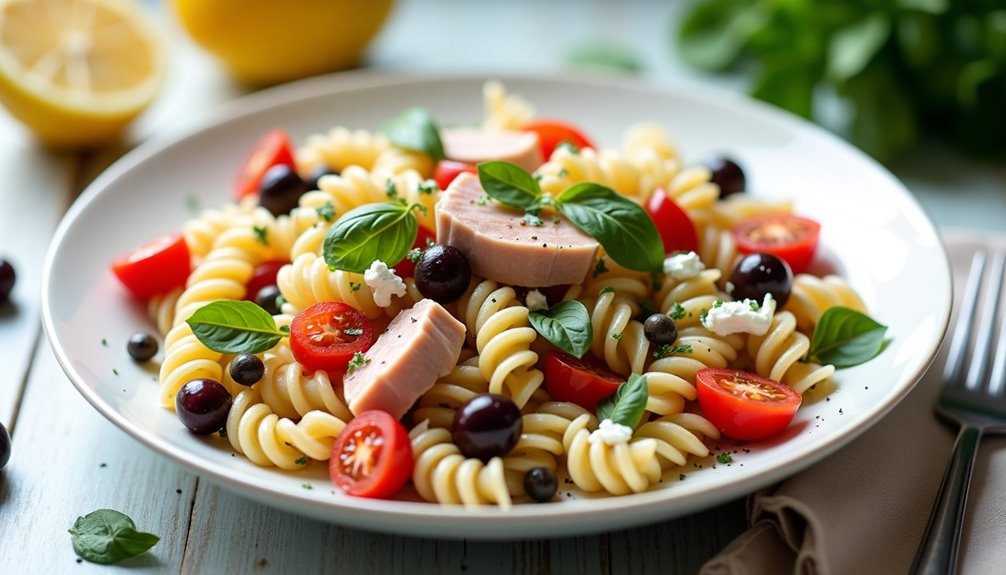
Mediterranean Tuna Pasta combines the heart-healthy benefits of Mediterranean cuisine with a protein-rich twist. This dish brings together the rich flavors of olive oil, garlic, and fresh herbs with the convenience of canned tuna, creating a satisfying meal that can be prepared in under 30 minutes.
The beauty of this recipe lies in its versatility and nutritional value. Packed with protein from the tuna and complemented by fresh vegetables, this pasta dish delivers approximately 25 grams of protein per serving while maintaining the authentic Mediterranean taste profile that has made this cuisine famous worldwide.
Ingredients:
- 8 oz whole grain pasta
- 2 cans (5 oz each) chunk light tuna in water, drained
- 3 tablespoons extra virgin olive oil
- 4 cloves garlic, minced
- 1 pint cherry tomatoes, halved
- 1 cup kalamata olives, pitted and halved
- 2 tablespoons capers, drained
- 1/4 cup fresh basil, chopped
- 1/4 cup fresh parsley, chopped
- 1 lemon, juiced
- 1/2 teaspoon red pepper flakes
- Salt and black pepper to taste
- 1/2 cup crumbled feta cheese
Bring a large pot of salted water to boil and cook pasta according to package instructions until al dente. While the pasta cooks, heat olive oil in a large skillet over medium heat. Add minced garlic and cook until fragrant, about 1 minute. Add cherry tomatoes and cook until they begin to soften, then add tuna, olives, and capers.
Once pasta is done, reserve 1/2 cup of pasta water before draining. Add the cooked pasta to the skillet with the tuna mixture. Toss in fresh herbs, lemon juice, red pepper flakes, salt, and pepper. If the mixture seems dry, add reserved pasta water gradually until desired consistency is reached. Finally, top with crumbled feta cheese just before serving.
For best results, use good quality tuna packed in water rather than oil, as this allows better control over the final taste and texture. The dish can be served hot or at room temperature, making it perfect for meal prep. If preparing in advance, consider adding the fresh herbs and feta cheese just before serving to maintain their fresh flavors and textures.
Spicy Chickpea and Spinach Curry
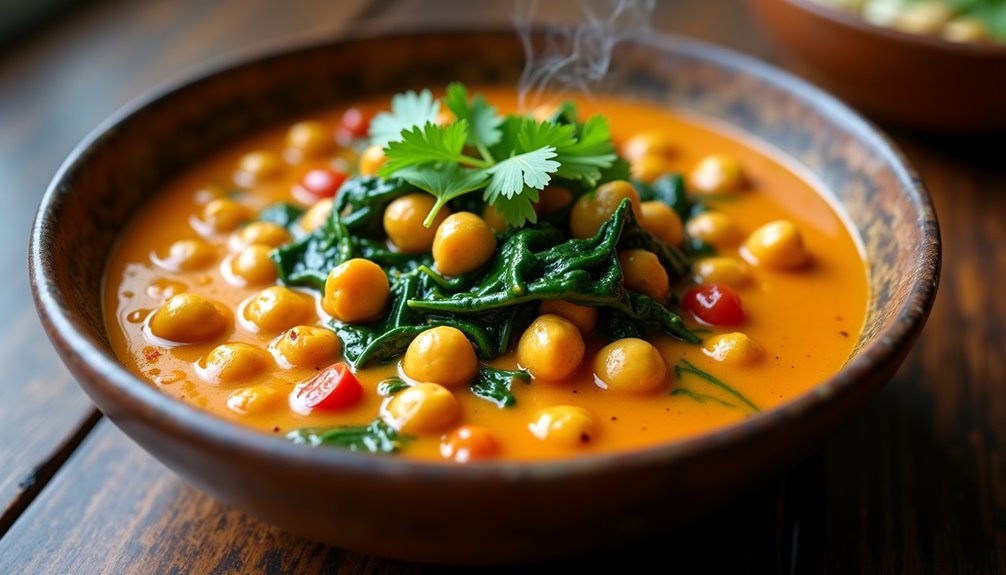
Spicy chickpea and spinach curry offers a protein-rich vegetarian meal that can be prepared in under 30 minutes. The combination of hearty chickpeas and nutrient-dense spinach creates a satisfying dish that's both filling and nutritious, providing approximately 15 grams of protein per serving.
This Indian-inspired curry features a warming blend of spices that complement the mild, nutty flavor of chickpeas while fresh spinach adds color and essential vitamins. The dish works well as a standalone meal served with rice or can be paired with naan bread for a more substantial dinner option.
Ingredients:
- 2 cans chickpeas (15 oz each), drained and rinsed
- 6 cups fresh spinach
- 1 large onion, diced
- 4 garlic cloves, minced
- 1 tablespoon ginger, grated
- 2 tablespoons curry powder
- 1 teaspoon ground cumin
- 1 teaspoon ground coriander
- 1/2 teaspoon red chili flakes
- 1 can diced tomatoes (14 oz)
- 1 cup coconut milk
- 2 tablespoons vegetable oil
- Salt and pepper to taste
- Fresh cilantro for garnish
Heat oil in a large pan over medium heat and sauté onions until translucent. Add garlic and ginger, cooking for another minute until fragrant. Stir in all dry spices and cook for 30 seconds to bloom their flavors. Add chickpeas, diced tomatoes, and coconut milk, then simmer for 15 minutes until the sauce thickens. Fold in the fresh spinach and cook until just wilted, about 2-3 minutes.
For best results, let the curry rest for 5-10 minutes before serving to allow the flavors to develop fully. The spice level can be adjusted by increasing or decreasing the amount of chili flakes, and the consistency can be modified by adding more coconut milk or water if needed. The dish will keep well in the refrigerator for up to 3 days and often tastes even better the next day as the flavors continue to meld together.
Pan-Seared Pork Chops With Apple Slaw
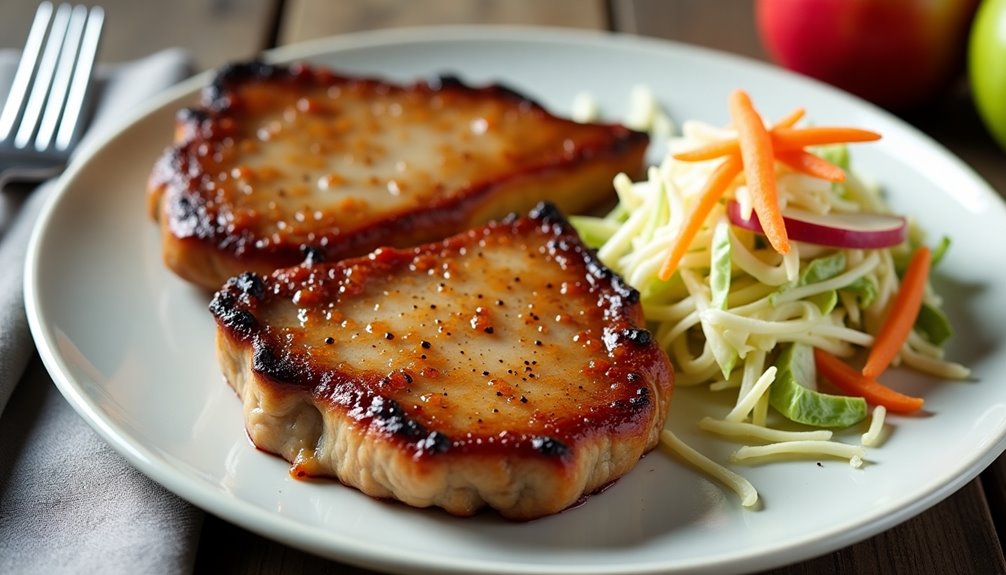
Pan-seared pork chops paired with a crisp apple slaw creates a perfect balance of savory and sweet flavors, while delivering a substantial protein boost to your meal. The tender, juicy pork pairs wonderfully with the fresh, crunchy texture of the slaw, making it an ideal option for a quick yet satisfying dinner.
This recipe combines lean protein with fresh produce, offering both nutritional value and appealing taste. The apple slaw adds a refreshing element to the dish, while the caramelized exterior of the pork chops provides a delicious depth of flavor that makes this meal feel special despite its simple preparation.
Ingredients:
- 4 boneless pork chops (1-inch thick)
- 2 medium apples, julienned
- 2 cups shredded cabbage
- 1 carrot, julienned
- 2 tablespoons olive oil
- 2 tablespoons apple cider vinegar
- 1 tablespoon Dijon mustard
- Salt and pepper to taste
- 1 teaspoon garlic powder
- 1 tablespoon honey
- ¼ cup mayonnaise
Season the pork chops with salt, pepper, and garlic powder. Heat olive oil in a large skillet over medium-high heat. Cook pork chops for 4-5 minutes on each side until golden brown and internal temperature reaches 145°F. Remove from heat and let rest for 5 minutes.
While the pork chops are cooking, prepare the slaw by combining julienned apples, cabbage, and carrots in a large bowl. In a separate small bowl, whisk together mayonnaise, apple cider vinegar, Dijon mustard, and honey. Pour the dressing over the slaw mixture and toss until well combined. Season with salt and pepper to taste.
For best results, allow the pork chops to come to room temperature before cooking and pat them dry with paper towels to ensure proper searing. The slaw can be prepared up to 2 hours in advance and stored in the refrigerator, which will allow the flavors to meld while maintaining the crisp texture of the vegetables and apples. To prevent the apples from browning, toss them in a bit of lemon juice before adding to the slaw.
Buffalo Chicken Lettuce Wraps
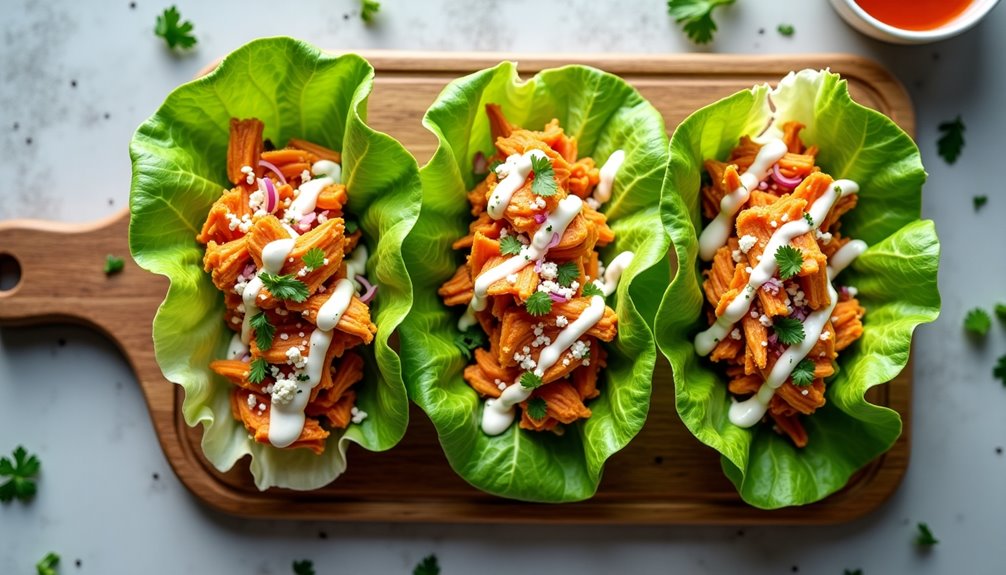
Buffalo chicken lettuce wraps offer a perfect balance of spicy, tangy flavors while keeping the carbs low and protein high. This dish transforms the classic buffalo wing experience into a lighter, fresher meal that's equally satisfying and much easier to eat.
These wraps can be prepared in under 30 minutes and provide an excellent option for meal prep throughout the week. The combination of lean chicken, crisp lettuce, and the signature buffalo sauce creates a protein-rich meal that's both filling and nutritious.
Ingredients:
- 2 lbs ground chicken
- 1/2 cup buffalo sauce
- 1 head iceberg or butter lettuce
- 1/4 cup diced celery
- 1/4 cup diced red onion
- 2 cloves minced garlic
- 1 tbsp olive oil
- 1/2 cup blue cheese crumbles
- Salt and pepper to taste
- Ranch or blue cheese dressing (optional)
Heat olive oil in a large skillet over medium heat. Add ground chicken and break it apart while cooking until no pink remains, approximately 8-10 minutes. Add minced garlic and cook for another minute. Drain any excess liquid from the pan, then stir in the buffalo sauce, ensuring the chicken is evenly coated. Season with salt and pepper to taste.
Separate and wash the lettuce leaves, ensuring they remain intact to form cups. Fill each lettuce cup with the buffalo chicken mixture, then top with diced celery, red onion, and blue cheese crumbles. For added creaminess, drizzle with ranch or blue cheese dressing.
For best results, pat the lettuce leaves completely dry before filling them to prevent the wraps from becoming soggy. The chicken mixture can be made ahead and reheated when needed, but assemble the wraps just before serving to maintain optimal texture and freshness. To adjust the heat level, mix hot buffalo sauce with butter or mild buffalo sauce to achieve desired spiciness.
Quick Tempeh and Broccoli Rice Bowl
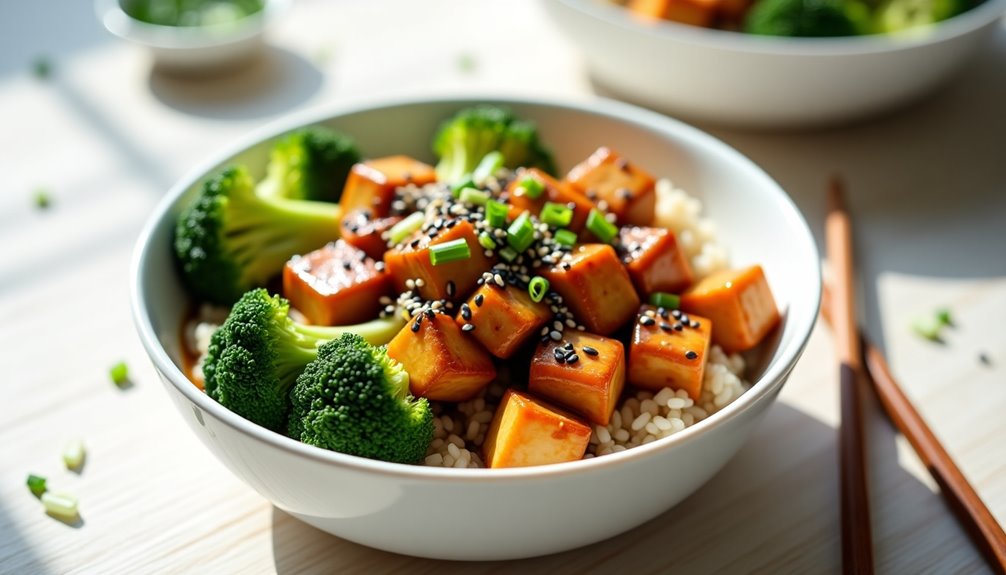
A tempeh and broccoli rice bowl is a protein-packed meal that can be prepared in under 30 minutes, making it perfect for busy weeknights or quick lunch prep. The combination of tempeh's nutty flavor with tender-crisp broccoli creates a satisfying and nutritious dish that delivers approximately 20 grams of protein per serving.
This Asian-inspired bowl features tempeh, a fermented soybean product that provides complete protein along with probiotics. The dish is rounded out with brown rice for complex carbohydrates and steamed broccoli for essential vitamins and minerals, all brought together with a savory sauce that adds depth and umami.
Steam the broccoli until tender-crisp, about 4-5 minutes, and set aside. In a large skillet, heat the neutral oil over medium-high heat and cook the tempeh cubes until golden brown on all sides, approximately 5-7 minutes. While the tempeh cooks, whisk together soy sauce, rice vinegar, sesame oil, garlic, ginger, and maple syrup in a small bowl. Add the sauce to the pan with the tempeh and cook for an additional 2 minutes until the sauce thickens slightly. Serve the tempeh and broccoli over brown rice, garnishing with sesame seeds and green onions.
For best results, press the tempeh between paper towels before cooking to remove excess moisture, which helps it achieve a better sear. The dish can be meal-prepped up to three days in advance, though the broccoli should be slightly undercooked if planning to reheat. Consider adding crushed red pepper flakes or sriracha for extra heat, and adjust the sauce ingredients to taste.
Ingredients:
- 8 oz tempeh, cubed
- 2 cups broccoli florets
- 2 cups cooked brown rice
- 3 tablespoons soy sauce
- 2 tablespoons rice vinegar
- 1 tablespoon sesame oil
- 2 cloves garlic, minced
- 1 tablespoon ginger, grated
- 1 tablespoon maple syrup
- 2 tablespoons neutral cooking oil
- Sesame seeds for garnish
- Green onions, sliced
Five-Spice Turkey Meatballs
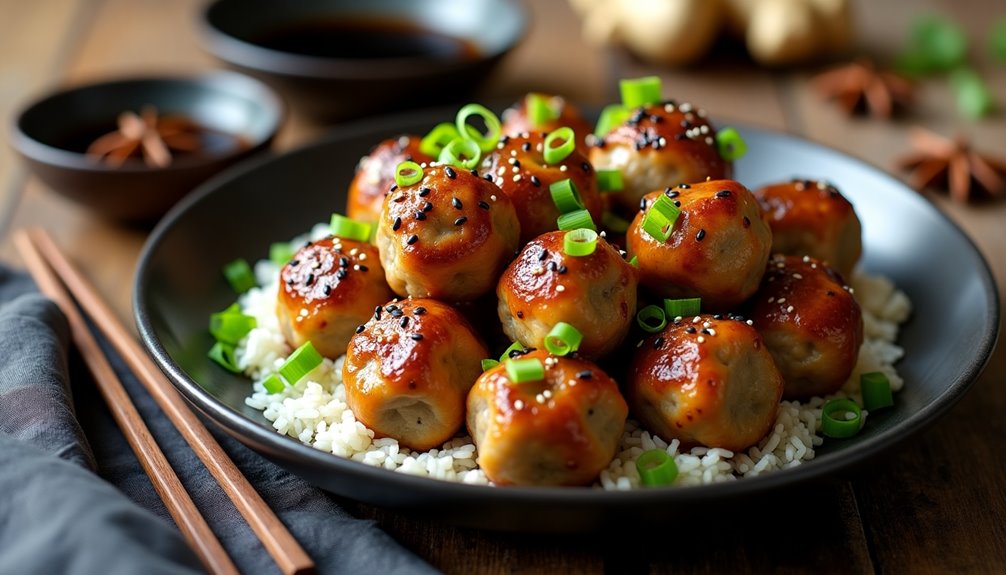
Five-spice turkey meatballs are a delicious and protein-rich dish that combines lean ground turkey with the aromatic flavors of Chinese five-spice powder. This unique blend of spices typically includes star anise, cloves, Chinese cinnamon, Sichuan pepper, and fennel seeds, creating a complex flavor profile that elevates these meatballs beyond the ordinary.
The beauty of these meatballs lies in their versatility – they can be served over rice, noodles, or vegetables, making them perfect for meal prep or quick weeknight dinners. The addition of traditional Asian ingredients like soy sauce and ginger helps create a perfect balance of savory and aromatic elements while keeping the meat moist and flavorful.
Ingredients:
- 1 pound ground turkey
- 1 large egg
- 1/2 cup panko breadcrumbs
- 2 cloves garlic, minced
- 1 tablespoon ginger, grated
- 2 green onions, finely chopped
- 1 tablespoon soy sauce
- 1 teaspoon Chinese five-spice powder
- 1/2 teaspoon salt
- 1/4 teaspoon black pepper
- 2 tablespoons vegetable oil for cooking
In a large bowl, combine ground turkey, egg, panko breadcrumbs, garlic, ginger, green onions, soy sauce, five-spice powder, salt, and pepper. Mix gently with your hands until just combined, being careful not to overmix. Form the mixture into golf ball-sized meatballs, approximately 1.5 inches in diameter.
Heat vegetable oil in a large skillet over medium heat. Once hot, add the meatballs and cook for 12-15 minutes, turning occasionally to ensure even browning on all sides. The meatballs should reach an internal temperature of 165°F (74°C). Work in batches if necessary to avoid overcrowding the pan.
For best results, avoid overworking the meat mixture as this can lead to tough meatballs. If the mixture feels too wet, add more breadcrumbs one tablespoon at a time. The meatballs can be made ahead and frozen raw or cooked for up to three months. When reheating, steam or microwave them with a bit of water to maintain moisture.
Sesame-Crusted Ahi Tuna Steaks
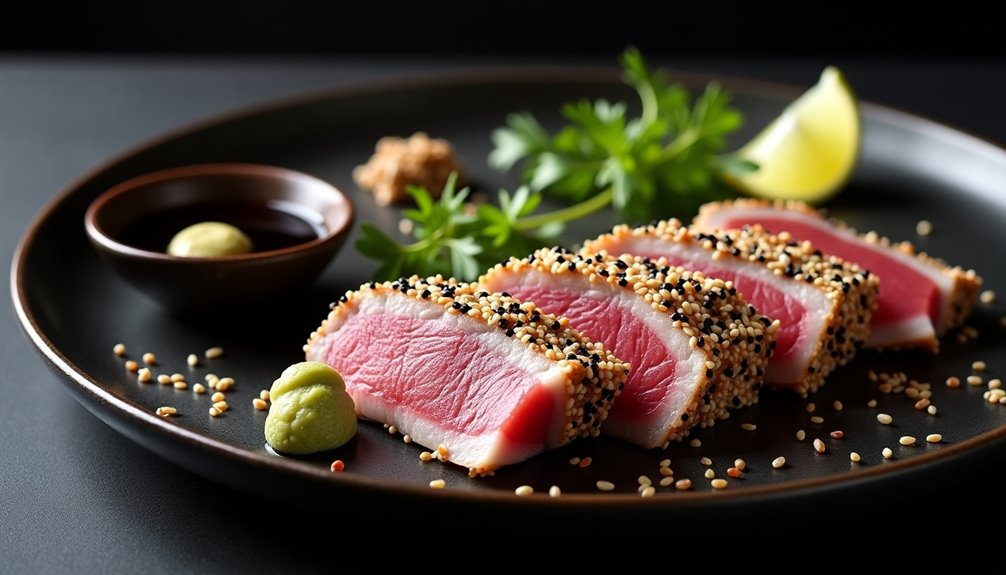
Sesame-crusted ahi tuna steaks deliver a restaurant-quality meal in just minutes, combining the rich flavor of fresh tuna with the nutty crunch of sesame seeds. This dish represents the perfect balance of protein and texture while remaining remarkably simple to prepare.
The key to this dish lies in the quality of the tuna and achieving the perfect sear, which leaves the outside crispy and golden while maintaining a rare to medium-rare center. When properly executed, the tuna remains tender and moist, with the sesame crust providing a delightful textural contrast.
- 2 sushi-grade ahi tuna steaks (6-8 oz each)
- 1/4 cup white sesame seeds
- 1/4 cup black sesame seeds
- 2 tablespoons soy sauce
- 1 tablespoon sesame oil
- 1 tablespoon vegetable oil
- 1 teaspoon wasabi paste
- 1/2 teaspoon sea salt
- 1/4 teaspoon black pepper
Pat the tuna steaks dry with paper towels and brush them lightly with soy sauce and sesame oil. Mix the white and black sesame seeds on a plate and press each side of the tuna steaks into the mixture, ensuring an even coating. Heat vegetable oil in a heavy-bottomed skillet over high heat until almost smoking.
Sear the tuna for 60-90 seconds on each side for rare, or 2 minutes per side for medium-rare. The sesame seeds should turn golden brown, creating a crispy crust while the center remains pink. Remove from heat and let rest for 2-3 minutes before slicing against the grain into 1/2-inch thick pieces.
For best results, ensure the tuna is completely thawed and at room temperature before cooking. The oil should be very hot to achieve a proper sear without overcooking the center. If the tuna is overcooked, it becomes dry and loses its delicate flavor, so err on the side of less cooking time rather than more. Store-bought wasabi paste can be mixed with additional soy sauce to create a dipping sauce.
Black Pepper Cottage Cheese Power Plate
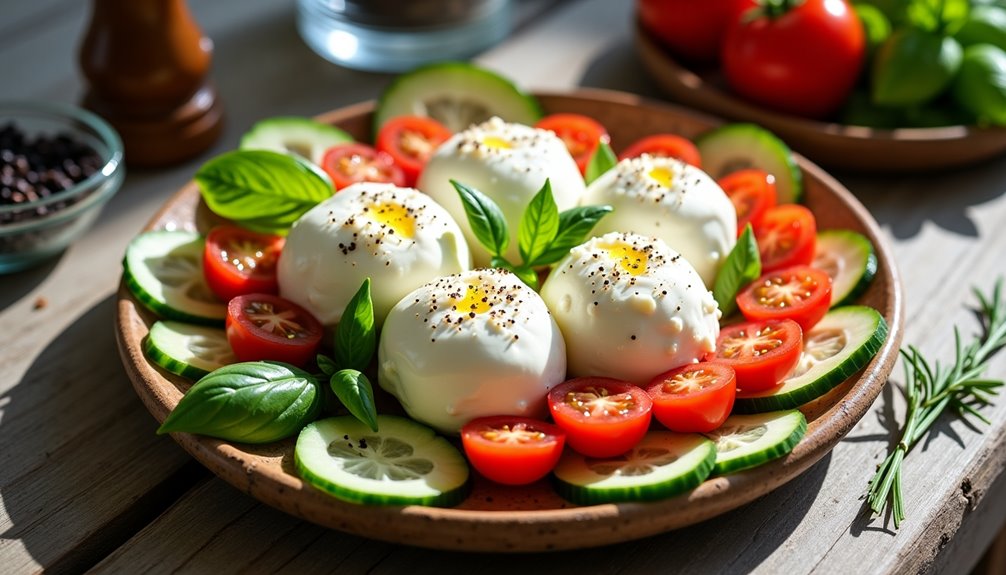
Black pepper cottage cheese brings a delightful twist to a protein-rich staple, transforming it from a basic dairy product into a satisfying and flavorful meal. This power plate combines creamy cottage cheese with fresh vegetables and a generous dash of cracked black pepper, creating a balanced dish that's both nutritious and quick to prepare.
While traditionally seen as a breakfast food, this versatile dish works perfectly for lunch or a light dinner, especially when you need a protein boost without spending much time in the kitchen. The combination of protein-rich cottage cheese, crisp vegetables, and aromatic black pepper creates a meal that's not only filling but also helps maintain steady energy levels throughout the day.
Ingredients:
- 1 cup full-fat cottage cheese
- 1/2 teaspoon freshly cracked black pepper
- 1 cup cherry tomatoes, halved
- 1 cucumber, sliced
- 2 tablespoons extra virgin olive oil
- 1/4 cup fresh herbs (basil, chives, or parsley)
- Salt to taste
- Optional: whole grain crackers or toast points
Place the cottage cheese in the center of a serving plate or bowl. Drizzle with olive oil and season generously with freshly cracked black pepper and a pinch of salt. Arrange the halved cherry tomatoes and cucumber slices around the cottage cheese, creating a colorful border. Finish by sprinkling fresh herbs over the entire dish.
For best results, use full-fat cottage cheese as it provides better texture and satiety. Let the cottage cheese sit at room temperature for about 10 minutes before serving to enhance its flavors, and always crack the black pepper fresh rather than using pre-ground pepper. The dish can be customized by adding different vegetables or serving it with whole grain crackers for extra crunch.