15 Quick Postpartum Meals
You're about to discover a collection of postpartum meals that'll transform your early parenting experience. As a new mom, you'll need quick, nutritious options that you can prepare with minimal effort and often just one free hand. From lactation-boosting overnight oats to freezer-ready protein meals, these 15 recipes prioritize your recovery and energy needs. Let's explore how these carefully curated dishes will help you thrive during those precious first weeks with your newborn.
Overnight Oats With Lactation-Boosting Seeds

Overnight oats have become a go-to breakfast option for busy parents, especially those navigating the challenges of postpartum life. This simple yet nutritious meal can be prepared the night before, ensuring a ready-to-eat breakfast during those early morning feeding sessions.
For nursing mothers, this version of overnight oats incorporates specific ingredients known to support milk production. Flaxseeds, chia seeds, and oats contain compounds that may help boost lactation, while providing essential nutrients like fiber, protein, and healthy fats.
- 1 cup rolled oats
- 1¼ cups milk of choice
- 2 tablespoons ground flaxseeds
- 1 tablespoon chia seeds
- 1 tablespoon maple syrup or honey
- ½ teaspoon vanilla extract
- ¼ teaspoon cinnamon
- Pinch of salt
- Optional toppings: fresh fruit, nuts, or nut butter
In a mason jar or container with a lid, combine the rolled oats, milk, ground flaxseeds, and chia seeds. Add the maple syrup, vanilla extract, cinnamon, and salt. Stir well to ensure all ingredients are thoroughly mixed. Seal the container and refrigerate overnight or for at least 6 hours.
The next morning, give the oats a good stir. If the mixture is too thick, add a splash of milk to reach your desired consistency. Top with your choice of fresh fruits, nuts, or nut butter before serving.
This recipe can be doubled or tripled to make multiple portions at once. Store unused portions in the refrigerator for up to 3 days. For best results, grind the flaxseeds just before use to preserve their nutritional benefits, and avoid adding toppings until ready to serve to maintain their freshness and texture.
One-Handed Energy Protein Balls

Energy protein balls are a perfect postpartum snack, offering new mothers a quick burst of energy and essential nutrients during those exhausting early days of parenthood. These no-bake treats are specifically designed to be eaten with one hand while holding a baby, making them ideal for nursing sessions or when multitasking.
These protein-packed bites combine natural ingredients that support lactation, provide sustained energy, and offer healthy fats crucial for postpartum recovery. The combination of oats, nuts, and dates creates a balanced snack that helps maintain stable blood sugar levels while providing the calories needed for milk production and recovery.
- 1 cup old-fashioned oats
- 1/2 cup natural peanut butter
- 1/3 cup honey
- 1/4 cup ground flaxseed
- 1/4 cup chia seeds
- 1/3 cup mini dark chocolate chips
- 1 cup pitted dates
- 1/2 cup chopped almonds
- 1 scoop vanilla protein powder
- 1 teaspoon vanilla extract
Add the dates to a food processor and pulse until finely chopped. In a large bowl, combine the processed dates with oats, peanut butter, honey, flaxseed, chia seeds, protein powder, and vanilla extract. Mix thoroughly until all ingredients are well combined. If the mixture seems too dry, add a tablespoon of water or extra honey. If too wet, add more oats until the desired consistency is reached.
Roll the mixture into 1-inch balls using your hands. Place the formed balls on a parchment-lined baking sheet and refrigerate for at least 30 minutes to set. Store in an airtight container in the refrigerator for up to two weeks.
For best results, slightly wet your hands before rolling the balls to prevent sticking. These protein balls can be customized by substituting different nuts, seeds, or dried fruits based on preference. If the mixture is too sticky to roll, refrigerate it for 15-20 minutes before forming the balls. Consider making a double batch and freezing some for later use, as they can last up to three months in the freezer.
Make-Ahead Breakfast Sandwiches

Make-ahead breakfast sandwiches are a lifesaver for new parents navigating the demanding postpartum period. These hearty, portable meals provide essential nutrients and can be quickly reheated with one hand while holding a baby, making them perfect for sleep-deprived mornings.
These sandwiches freeze beautifully for up to three months and can be customized based on dietary preferences and available ingredients. The basic recipe yields six sandwiches, but can easily be doubled or tripled to stock up for those challenging early weeks of parenthood.
- 6 English muffins, split
- 6 large eggs
- 6 slices cheese (cheddar, American, or Swiss)
- 6 slices Canadian bacon or regular bacon
- 2 tablespoons butter
- 1/2 teaspoon salt
- 1/4 teaspoon black pepper
- Parchment paper for wrapping
- Aluminum foil
Toast the English muffins until lightly golden. Meanwhile, crack eggs into greased muffin tins or egg rings on a griddle, breaking the yolks and seasoning with salt and pepper. Cook until the whites are set and yolks are done to your preference. If using regular bacon, cook until crispy; Canadian bacon only needs to be lightly browned.
Assemble the sandwiches by layering cheese and meat on the bottom half of each English muffin, topped with an egg patty and the remaining muffin half. Let cool completely before wrapping individually in parchment paper and then aluminum foil. Place wrapped sandwiches in a freezer bag and freeze.
For best results, thaw frozen sandwiches in the refrigerator overnight. When reheating, remove foil but keep parchment paper, and microwave for 1-1.5 minutes or until heated through. For a crispier texture, unwrap completely and toast in a toaster oven for 2-3 minutes after microwaving. Avoid overheating as this can make the eggs rubber and the English muffins tough.
Nutrient-Dense Smoothie Packs

Nutrient-rich smoothie packs are a lifesaver for new mothers who need quick, healthy meals during the demanding postpartum period. These ready-to-blend frozen packages provide essential vitamins, minerals, and calories that support recovery and milk production while requiring minimal preparation time.
These customizable smoothie packs can be prepared in advance and stored in the freezer for up to three months. Each pack contains a balanced mix of fruits, vegetables, and protein-rich ingredients that can be blended with your choice of liquid base when needed, making them perfect for one-handed consumption while caring for a newborn.
Ingredients:
- 1 cup spinach or kale
- 1 banana, sliced
- 1 cup mixed berries
- 1/2 cup mango chunks
- 1 tablespoon chia seeds
- 1 tablespoon ground flaxseed
- 2 tablespoons rolled oats
- 1 scoop protein powder
- 1 tablespoon peanut or almond butter
- Freezer-safe bags or containers
- Liquid base (milk, plant-based milk, or coconut water)
To prepare the smoothie packs, divide all ingredients except the liquid base among individual freezer-safe bags or containers. Layer the ingredients with harder frozen fruits at the bottom and softer items like protein powder and nut butter on top. Remove as much air as possible from the bags before sealing, then label with the date and contents.
When ready to consume, empty one pack into a blender and add 1-1.5 cups of your chosen liquid base. Blend until smooth, adding more liquid if needed to reach desired consistency. For extra creaminess, you can add half an avocado or a dollop of yogurt before blending.
For best results, store smoothie packs flat in the freezer to prevent clumping and make them easier to break apart when blending. Avoid adding fresh citrus fruits to the freezer packs as they can become bitter; instead, add fresh lemon or lime juice just before blending if desired. If using greens, slightly massage them before freezing to break down the fiber and achieve a smoother texture.
Quick-Assembly Greek Yogurt Bowls

Greek yogurt bowls are a perfect postpartum meal, combining protein-rich dairy with customizable toppings for essential nutrients during recovery. They require minimal preparation time and can be assembled in minutes, making them ideal for new parents who need quick, nutritious options between feedings and caretaking duties.
The versatility of Greek yogurt bowls allows for endless variations to prevent meal fatigue, while consistently delivering calcium, probiotics, and protein. These bowls can be prepared in advance or assembled on demand, offering both convenience and fresh flavors that can be adjusted based on seasonal ingredients and personal preferences.
Ingredients:
- 1 cup plain Greek yogurt
- 1 tablespoon honey
- 1/4 cup granola
- 1/4 cup mixed berries
- 1 tablespoon chia seeds
- 1 tablespoon sliced almonds
- 1/2 banana, sliced
- 1 teaspoon vanilla extract
- Pinch of cinnamon
- Optional: 1 tablespoon pumpkin seeds
Start by selecting a wide, shallow bowl and adding the Greek yogurt as the base. Drizzle with honey and vanilla extract, then gently stir to combine. This creates a sweet, creamy foundation for the toppings while maintaining the yogurt's thick consistency.
Layer the toppings in sections around the bowl, starting with the granola, then adding the berries, sliced banana, and nuts. Sprinkle chia seeds and cinnamon across the top. The layering approach not only creates an appealing presentation but also allows you to control portion sizes of each ingredient.
For best results, store toppings separately from the yogurt base if preparing components in advance. The granola and nuts will maintain their crunch, and fresh fruit will stay firm when added just before eating. Consider preparing individual portions of dry toppings in small containers or bags for quick assembly throughout the week, and keep cut fruit in airtight containers in the refrigerator for up to two days.
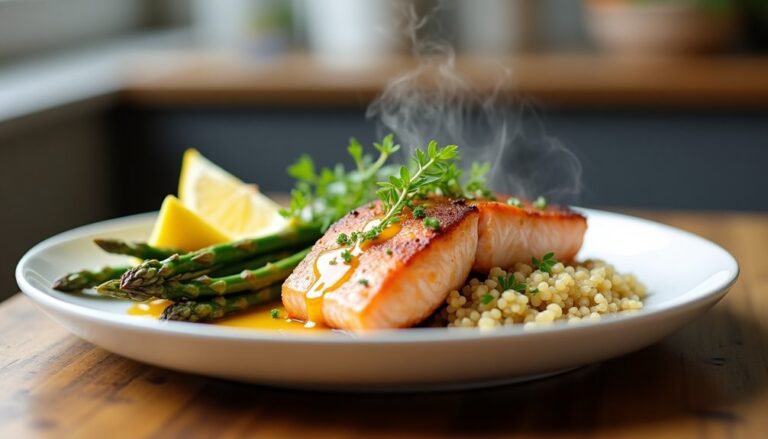
Sheet Pan Salmon and Vegetables

Sheet pan dinners are a lifesaver for new parents, combining easy preparation with minimal cleanup. This salmon and vegetable combination delivers essential nutrients, including omega-3 fatty acids, protein, and various vitamins and minerals that support postpartum recovery and breastfeeding.
This recipe is designed to provide a complete meal that can be prepared in under 30 minutes, making it perfect for those busy early days of parenthood. The vegetables can be varied based on what's available, and the entire meal can be portioned and refrigerated for quick reheating later.
Ingredients:
- 4 salmon fillets (6 oz each)
- 2 cups broccoli florets
- 2 cups baby potatoes, halved
- 2 bell peppers, sliced
- 1 red onion, cut into wedges
- 3 tablespoons olive oil
- 2 tablespoons lemon juice
- 4 garlic cloves, minced
- 1 teaspoon dried herbs (thyme or rosemary)
- 1 teaspoon paprika
- Salt and pepper to taste
- Lemon wedges for serving
Preheat the oven to 400°F (200°C). Toss the potatoes with olive oil, salt, and pepper, and arrange them on a large sheet pan. Roast for 15 minutes. Meanwhile, season the salmon fillets with salt, pepper, paprika, and garlic. In a bowl, toss the remaining vegetables with olive oil, herbs, salt, and pepper.
Add the seasoned vegetables to the sheet pan with the partially cooked potatoes, arranging them in a single layer. Place the salmon fillets on top of the vegetables, drizzle with lemon juice, and continue roasting for 12-15 minutes, or until the salmon is cooked through and the vegetables are tender.
For best results, cut the vegetables into similarly sized pieces to ensure even cooking. The salmon can be cooked to different levels of doneness – check for flakiness with a fork at the thickest part. If meal prepping, slightly undercook the salmon as it will continue cooking when reheated. Store portions in airtight containers in the refrigerator for up to 3 days.
Five-Minute Avocado Toast Variations

Avocado toast has become a postpartum staple due to its perfect combination of healthy fats, fiber, and easy preparation. For new mothers who need quick, nutritious meals while caring for their newborns, these variations offer both convenience and essential nutrients that support recovery and breastfeeding.
These five-minute variations transform the basic avocado toast into satisfying meals that can be customized based on available ingredients and specific nutritional needs. The protein-rich toppings and wholesome ingredients provide sustained energy throughout the day, while the simple preparation ensures minimal time away from baby care duties.
- 2 slices whole grain bread
- 1 ripe avocado
- Salt and pepper to taste
- 1/4 lemon
- Optional toppings:
- 2 soft-boiled eggs
- Cherry tomatoes
- Red pepper flakes
- Everything bagel seasoning
- Microgreens
- Smoked salmon
- Crumbled feta cheese
Toast the bread slices until golden brown. While the bread is toasting, cut the avocado in half, remove the pit, and scoop the flesh into a bowl. Mash the avocado with a fork until it reaches desired consistency, then add a squeeze of lemon juice, salt, and pepper to taste. Spread the mashed avocado generously on the toasted bread slices.
For variations, top with any combination of the suggested ingredients: halved cherry tomatoes and soft-boiled eggs for a protein-rich option; smoked salmon and microgreens for omega-3 fatty acids; or everything bagel seasoning and crumbled feta for a Mediterranean twist. Each variation takes no more than five minutes to prepare, making them perfect for quick meals between feeding sessions.
To maintain freshness and prevent browning, only cut and mash the avocado right before serving. If preparing multiple slices, the addition of lemon juice helps prevent oxidation. Store unused avocado halves with the pit intact and wrapped tightly in plastic wrap in the refrigerator for next time.
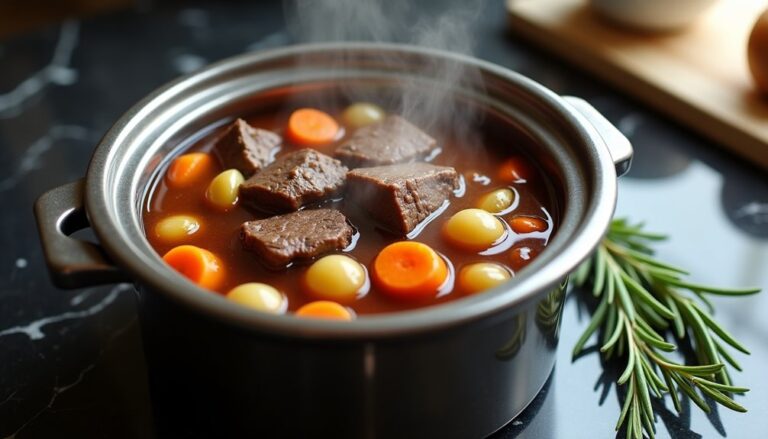
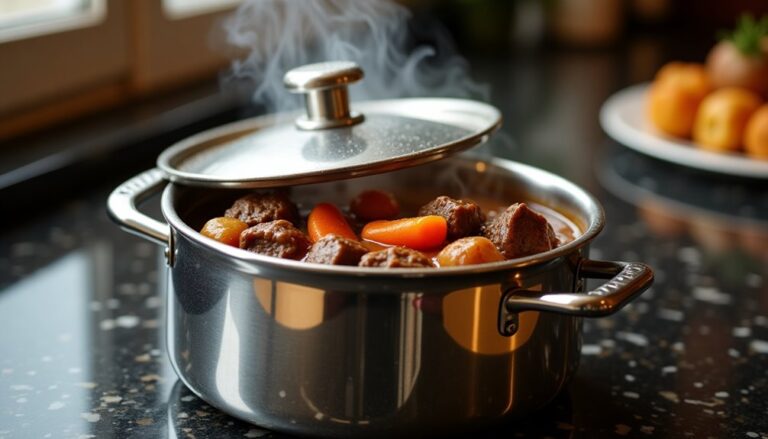
Instant Pot Bone Broth Soup

Bone broth soup made in an Instant Pot is a nutrient-dense powerhouse that's particularly beneficial for postpartum recovery. Rich in collagen, minerals, and amino acids, this healing broth helps repair tissues, supports milk production, and provides essential nutrients that new mothers need during their recovery period.
Traditional bone broth typically requires 12-24 hours of simmering, but the Instant Pot reduces this time significantly while still extracting maximum nutrients from the bones. This version creates a rich, flavorful base that can be enjoyed on its own or used as a foundation for other postpartum meals.
- 2-3 lbs mixed bones (beef, chicken, or pork)
- 2 carrots, roughly chopped
- 2 celery stalks, roughly chopped
- 1 onion, quartered
- 4 garlic cloves, smashed
- 2 bay leaves
- 1 tablespoon apple cider vinegar
- 1 tablespoon peppercorns
- 8-10 cups water
- 1 teaspoon salt
- 2 sprigs fresh thyme
- 1 chunk fresh ginger (optional)
Place the bones in the Instant Pot and roast using the 'Sauté' function until they begin to brown, about 5-7 minutes. Add the remaining ingredients and fill with water until you reach the maximum fill line, ensuring bones are covered. Close the lid and set valve to sealing position. Cook on high pressure for 120 minutes, followed by a natural pressure release.
Once the pressure has released, strain the broth through a fine-mesh strainer into a large bowl or container. Let it cool slightly before refrigerating. Once chilled, remove the solidified fat layer from the top if desired, though this fat can be beneficial for postpartum recovery.
For best results, blanch the bones in boiling water for 10-15 minutes before starting the recipe to remove impurities. This will result in a clearer broth. The broth can be stored in the refrigerator for up to 5 days or frozen for up to 6 months. If the broth gels when chilled, this is a good sign indicating high collagen content.
No-Cook Mediterranean Platter

A Mediterranean platter is an ideal postpartum meal option as it requires no cooking and offers a variety of nutrient-dense foods that support recovery and lactation. The combination of proteins, healthy fats, and complex carbohydrates provides sustained energy throughout the day, while the abundance of fresh vegetables delivers essential vitamins and minerals.
This no-cook platter can be assembled in minutes and customized based on preferences and available ingredients. It's perfect for grazing throughout the day and can be easily prepared by family members or friends supporting a new mother. The components can be stored separately in the refrigerator and assembled as needed.
- Hummus (store-bought or homemade)
- Mixed olives
- Grape tomatoes
- Persian cucumbers
- Bell peppers, sliced
- Pita bread
- Mixed nuts (almonds, walnuts)
- Feta cheese
- Fresh herbs (parsley, mint)
- Greek yogurt
- Honey
- Extra virgin olive oil
- Za'atar seasoning (optional)
- Baba ganoush (optional)
- Stuffed grape leaves (optional)
Arrange a large serving platter or board with a small bowl of hummus in the center. Place Greek yogurt in another small bowl and drizzle with honey and olive oil. Arrange the vegetables, olives, and stuffed grape leaves around the bowls. Add chunks of feta cheese and scatter nuts across the platter. Fill any gaps with fresh herbs for garnish. Serve with pita bread on the side and sprinkle za'atar over the hummus if desired.
When preparing this platter, consider food safety and freshness as a priority. Store all components in airtight containers in the refrigerator and assemble only what'll be eaten within 2-3 hours. If preparing in advance for a new mother, pre-cut vegetables can be stored in water to maintain crispness, and all components should be packed separately for easy assembly.
Three-Ingredient Slow Cooker Meals

When you're navigating the postpartum period, simplicity in meal preparation becomes essential. This three-ingredient slow cooker chicken dish delivers maximum flavor with minimal effort, making it perfect for new parents who need quick, nutritious meals.
The beauty of this recipe lies in its versatility. The finished chicken can be used in tacos, burritos, rice bowls, or even as a topping for salads, providing multiple meal options from a single cooking session.
Ingredients:
- 2 pounds boneless, skinless chicken breasts
- 16 oz jar of your favorite salsa
- 1 packet (1.25 oz) taco seasoning
Place the chicken breasts in the bottom of the slow cooker. Sprinkle the taco seasoning evenly over the chicken, then pour the salsa on top, ensuring the chicken is well-coated. Cook on low for 6-8 hours or on high for 3-4 hours, until the chicken is tender enough to shred with two forks. Once done, shred the chicken directly in the slow cooker and let it absorb the remaining sauce for an additional 15-20 minutes before serving.
For best results, avoid opening the slow cooker lid during cooking as this releases essential heat and moisture. Choose a chunky-style salsa for better texture, and if the mixture seems too watery after shredding, leave the lid off for the final 15 minutes of cooking to allow excess liquid to evaporate.
Mason Jar Salads for the Week

Mason jar salads are a perfect solution for busy postpartum mothers who need quick, nutritious meals throughout the week. These portable, prep-ahead meals stay fresh for up to 5 days when properly layered and stored in the refrigerator, making them an ideal option for new parents who've limited time for meal preparation.
The key to a successful mason jar salad lies in the layering technique, which keeps ingredients crisp and prevents soggy lettuce. Starting with the dressing at the bottom and ending with the leafy greens at the top creates a barrier that maintains the integrity of each ingredient until you're ready to eat.
Ingredients:
- 5 32-oz wide-mouth mason jars
- 1 cup balsamic vinaigrette
- 2 cups cherry tomatoes, halved
- 2 cups cucumber, diced
- 2 cups carrots, shredded
- 2 cups chickpeas, drained and rinsed
- 1 cup red onion, thinly sliced
- 1 cup crumbled feta cheese
- 2 cups quinoa, cooked and cooled
- 5 cups mixed salad greens
- 1 cup sunflower seeds
Start by placing 3-4 tablespoons of balsamic vinaigrette at the bottom of each mason jar. Layer the hardy vegetables first: tomatoes, cucumber, carrots, and chickpeas. These ingredients act as a barrier between the dressing and the more delicate ingredients. Continue layering with red onion, feta cheese, and quinoa. Finally, add the mixed greens and top with sunflower seeds.
Seal the jars tightly and store them in the refrigerator. When ready to eat, shake the jar vigorously to distribute the dressing, then empty the contents into a bowl. If the salad doesn't mix well enough after shaking, use a fork to toss the ingredients together.
Storage tip: Keep the mason jars upright in the refrigerator and ensure the lids are tightly sealed. If adding avocado to your salad, either add it just before eating or toss the pieces in lemon juice before layering to prevent browning. For maximum freshness, consume within 5 days of preparation.
Easy Freezer Burritos

These customizable burritos can be made in large batches and stored for up to three months in the freezer. The key to successful freezer burritos is avoiding ingredients that become watery when thawed, such as fresh tomatoes or lettuce, and instead focusing on hearty fillings that maintain their texture.
Ingredients:
- 12 large flour tortillas
- 3 cups cooked rice
- 2 cans black beans, drained and rinsed
- 1 pound ground beef or turkey
- 2 cups shredded cheese
- 1 onion, diced
- 2 bell peppers, diced
- 2 tablespoons taco seasoning
- 1 cup corn (frozen or canned)
- Salt and pepper to taste
- 1 tablespoon cooking oil
Cook the rice according to package instructions. While the rice cooks, heat oil in a large skillet over medium heat and sauté the diced onions and peppers until softened. Add the ground meat and taco seasoning, cooking until the meat is fully browned. Stir in the black beans and corn, heating until warmed through. In a large bowl, combine the meat mixture with the cooked rice.
To assemble, warm tortillas slightly to make them more pliable. Place about 1 cup of the filling mixture in the center of each tortilla, top with shredded cheese, and fold the sides in before rolling tightly from bottom to top. Wrap each burrito individually in foil, then place in freezer bags.
For best results, allow burritos to cool completely before freezing to prevent ice crystals from forming. When reheating, remove foil and wrap burrito in a paper towel, then microwave for 2-3 minutes, flipping halfway through. For a crispier texture, remove from microwave and finish in a pan over medium heat for 1-2 minutes per side.
One-Pan Rice and Protein Bowls

One-Pan Rice and Protein Bowls are the perfect solution for new parents who need quick, nutritious meals during the postpartum period. This versatile dish combines protein, carbohydrates, and vegetables in a single pan, minimizing cleanup while maximizing nutrition and flavor.
These bowls can be customized based on available ingredients and personal preferences, making them an ideal choice for meal prep or last-minute dinners. The combination of lean protein, whole grains, and vegetables provides essential nutrients that support recovery and energy levels for nursing mothers.
Ingredients:
- 2 cups brown rice
- 1 pound chicken breast, diced
- 2 cups mixed vegetables (broccoli, carrots, bell peppers)
- 4 cups chicken broth
- 2 tablespoons olive oil
- 2 cloves garlic, minced
- 1 onion, diced
- 1 teaspoon paprika
- 1 teaspoon cumin
- Salt and pepper to taste
- Optional toppings: avocado, sesame seeds, green onions
Heat olive oil in a large, deep skillet over medium heat. Add diced chicken and season with salt, pepper, paprika, and cumin. Once the chicken is browned, add garlic and onion, cooking until fragrant. Add rice and stir to coat with oil and seasonings. Pour in chicken broth and bring to a boil, then reduce heat to low. Add vegetables on top, cover, and simmer for 20-25 minutes until rice is tender and liquid is absorbed.
For best results, let the dish rest for 5-10 minutes after cooking before serving. This allows the rice to absorb any remaining moisture and makes the texture perfect. The dish can be portioned into containers and refrigerated for up to 3 days, making it an excellent meal prep option for busy new parents.
Five-Minute Nourishing Snack Plates

Five-minute nourishing snack plates are the perfect solution for new mothers who need quick, nutritious food during the demanding postpartum period. These plates require minimal preparation while providing essential nutrients to support recovery and breastfeeding needs.
The beauty of these snack plates lies in their versatility and simplicity. They can be assembled in minutes using pre-prepared ingredients and require no cooking, making them ideal for when the baby is napping or during those brief moments of quiet between feedings.
Ingredients:
- 2 hard-boiled eggs
- 1 cup mixed nuts (almonds, walnuts, cashews)
- 1 cup baby carrots
- 1 apple, sliced
- 2 ounces cheese cubes
- 4 whole-grain crackers
- 2 tablespoons hummus
- Handful of fresh berries
- 1 tablespoon nut butter
Assembly Instructions:
Section a large plate into quarters. Place the hard-boiled eggs in one section, arranging the cheese cubes alongside them. Fill another section with the mixed nuts and berries. Add the sliced apple and baby carrots to the third section, accompanied by the hummus for dipping. Complete the plate with whole-grain crackers spread with nut butter in the remaining section.
Additional Tips:
Prep several hard-boiled eggs and cut vegetables at the beginning of the week to make assembly even faster. Store pre-portioned nuts and crackers in small containers, and keep cheese pre-cubed in the refrigerator. This advance preparation ensures you can quickly assemble a plate even when operating on minimal sleep or with one hand while holding the baby.
Healing Postpartum Recovery Drinks

A nutrient-rich recovery drink is essential for new mothers during the postpartum period, as it helps replenish vital nutrients lost during childbirth and supports milk production for breastfeeding. This warming, mineral-rich drink combines traditional healing ingredients that have been used for centuries to aid in postpartum recovery.
The key ingredients in this recovery drink work together to provide iron, calcium, and essential vitamins while promoting tissue healing and reducing inflammation. Dates offer natural sweetness and iron, while ginger aids digestion and reduces inflammation. The addition of turmeric and cinnamon helps balance hormones and supports the immune system.
Ingredients:
- 2 cups water
- 3 Medjool dates, pitted
- 1-inch piece fresh ginger, peeled
- 1/2 teaspoon ground turmeric
- 1/4 teaspoon ground cinnamon
- 1 tablespoon coconut oil
- 1 cup coconut milk
- 1 tablespoon honey (optional)
- Pinch of black pepper
Bring water to a gentle simmer in a small saucepan. Add dates, ginger, turmeric, and cinnamon. Reduce heat to low and let simmer for 10 minutes. Remove from heat and strain the liquid into a blender. Add coconut oil, coconut milk, honey (if using), and black pepper. Blend until smooth and frothy.
The drink can be served warm or chilled, depending on preference. To store, keep refrigerated for up to 3 days and reheat gently when ready to consume. Make a larger batch and store in mason jars for easy access throughout the week.
For best results, prepare this drink with fresh, high-quality ingredients. The black pepper increases turmeric absorption, while the fat from coconut oil helps with the absorption of fat-soluble vitamins. Avoid using processed sweeteners and opt for natural sweeteners like dates or honey. If you're sensitive to certain spices, start with smaller amounts and adjust to taste.