Simple Cream Cheese Mints Recipe
Did you know that over 70% of home bakers love creating simple desserts that impress guests? Cream cheese mints are your secret weapon for effortless entertaining. These delicate, pillowy confections transform basic ingredients into elegant treats that'll have everyone asking for your recipe. Whether you're planning a bridal shower, holiday gathering, or just craving a sweet nibble, these mints promise culinary magic with minimal effort. Intrigued by the promise of a foolproof dessert that looks professionally crafted? Let's uncover the surprisingly simple technique.
Recipe Highlights
- Soften cream cheese at room temperature and beat smoothly using an electric mixer for 2-3 minutes until glossy and even-textured.
- Gradually incorporate 4 cups of powdered sugar in 1/2-cup increments, mixing on low speed and scraping bowl sides until thick and workable.
- Add peppermint extract to taste and optional food coloring for customization, ensuring a consistent and flavorful mint mixture.
- Shape the mixture into small balls or use molds, then roll in additional powdered sugar to create a professional, elegant finish.
- Refrigerate mints between layers of wax paper in an airtight container, where they will remain fresh for up to two weeks.
History
Although cream cheese mints might seem like a modern confectionery trend, their roots stretch deeper into culinary tradition than many realize.
These delicate treats emerged from Southern social gatherings in the mid-20th century, where homemade candies were essential for weddings, baby showers, and church potlucks. You'll find their origins deeply connected to community gatherings and family recipes passed down through generations.
Key historical highlights include:
- 1950s: First documented cream cheese mint recipes
- Popularized by home economics cookbooks
- Typically prepared for special occasion buffets
- Represented hospitality and culinary craftsmanship
These mints weren't just desserts; they were symbolic gestures of warmth and welcome.
Crafted carefully by home cooks, they represented a tradition of elegant, handmade confections that transformed simple ingredients into memorable culinary experiences.
Recipe
Cream cheese mints are a delightful confection that brings elegance and sweetness to any special occasion. These delicate, melt-in-your-mouth treats are surprisingly simple to prepare, requiring no baking and minimal culinary skill.
Perfect for weddings, showers, or holiday gatherings, these homemade mints offer a refreshing burst of peppermint flavor paired with the rich, smooth texture of cream cheese. Their versatility allows for easy customization with different colors and flavors to suit any event's theme.
Ingredients:
- 8 oz cream cheese, softened
- 4 cups powdered sugar
- 1/2 teaspoon peppermint extract
- 3 drops food coloring (optional)
- 1/4 cup granulated sugar (for coating)
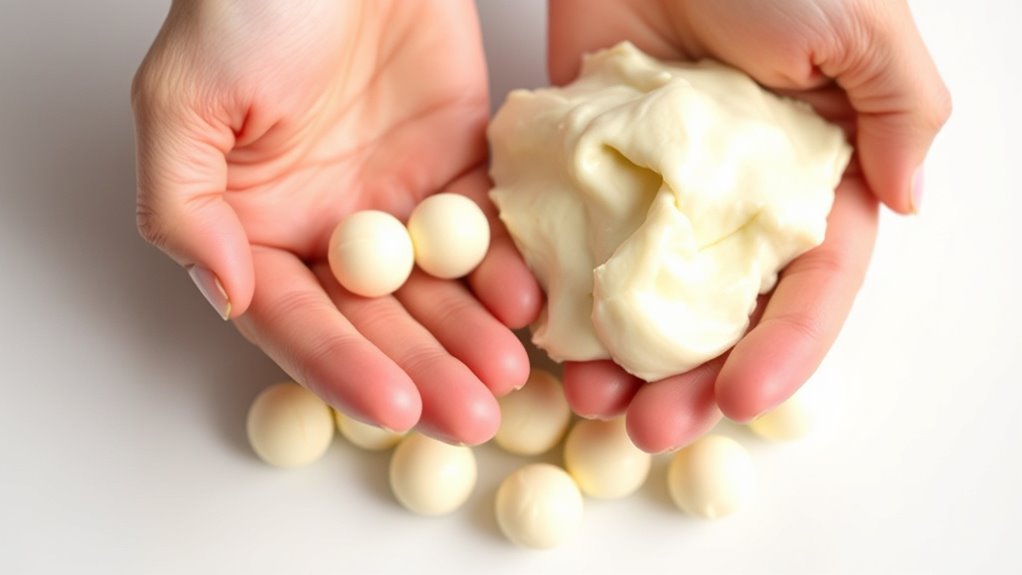
Begin by ensuring the cream cheese is completely softened at room temperature. In a large mixing bowl, beat the cream cheese until smooth and creamy. Gradually add the powdered sugar, mixing until a firm, pliable dough forms. Incorporate the peppermint extract and food coloring, stirring until the color is evenly distributed.
Roll the mint mixture into small, uniform balls, each about 1 inch in diameter. Roll each ball in granulated sugar to create a light, sweet coating. Place the coated mints on wax paper and gently press with a fork to create a decorative pattern. Allow the mints to dry at room temperature for approximately 2 hours, which will help them set and develop a slight crust.
When preparing cream cheese mints, it's crucial to work in a cool, dry environment. Humid conditions can prevent the mints from setting properly, so avoid making them on particularly damp days.
Store the finished mints in an airtight container between layers of wax paper in the refrigerator, where they'll keep fresh for up to two weeks.
Cooking Steps
Start by beating your softened cream cheese until it's completely smooth, creating a creamy base for your mints.
Gradually incorporate the powdered sugar, mixing until a firm dough forms, then add a splash of peppermint extract to infuse that classic refreshing flavor.
Roll the mixture into small, uniform balls, then coat each one in granulated sugar and press with a fork to create a delightful textured finish.
Step 1. Beat Cream Cheese Smooth
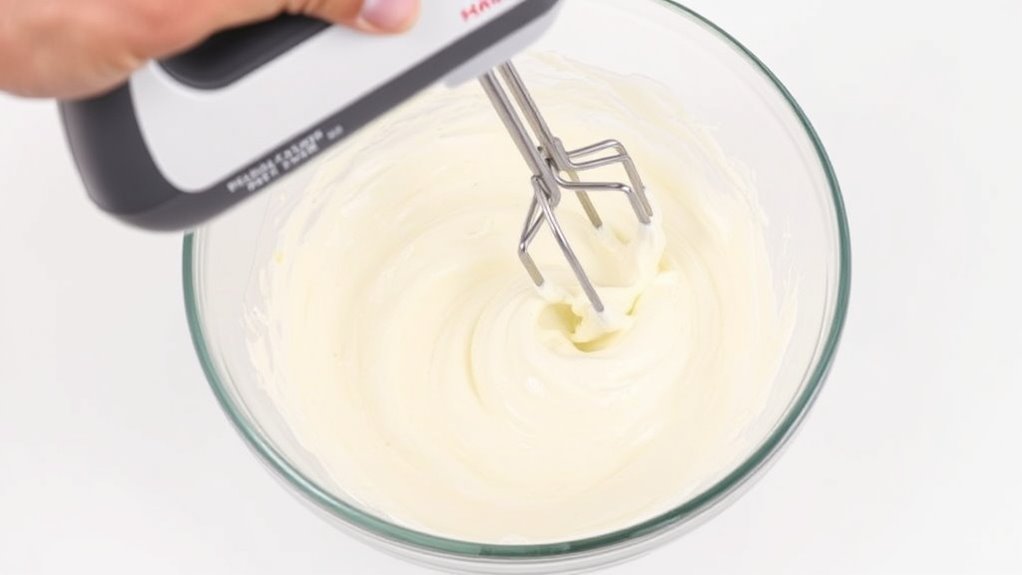
Grab your electric mixer and prepare to transform that block of cream cheese into a silky-smooth base for your delectable mints. Soften the cream cheese at room temperature for about 30 minutes, ensuring it's pliable but not melted.
Position the mixer's beaters at a medium speed, working methodically to break down any lumps and create a uniform texture.
Key beating techniques:
- Start at the bowl's edges, gradually moving toward the center
- Use consistent, gentle strokes
- Beat for 2-3 minutes until completely smooth
- Watch for a glossy, spreadable consistency
Press the mixer against the cream cheese's surface, rotating the bowl to incorporate every bit. Your goal: a velvety foundation that'll seamlessly blend with powdered sugar, creating mint perfection.
Stop mixing when the texture resembles soft, even cream.
Step 2. Add Powdered Sugar Gradually
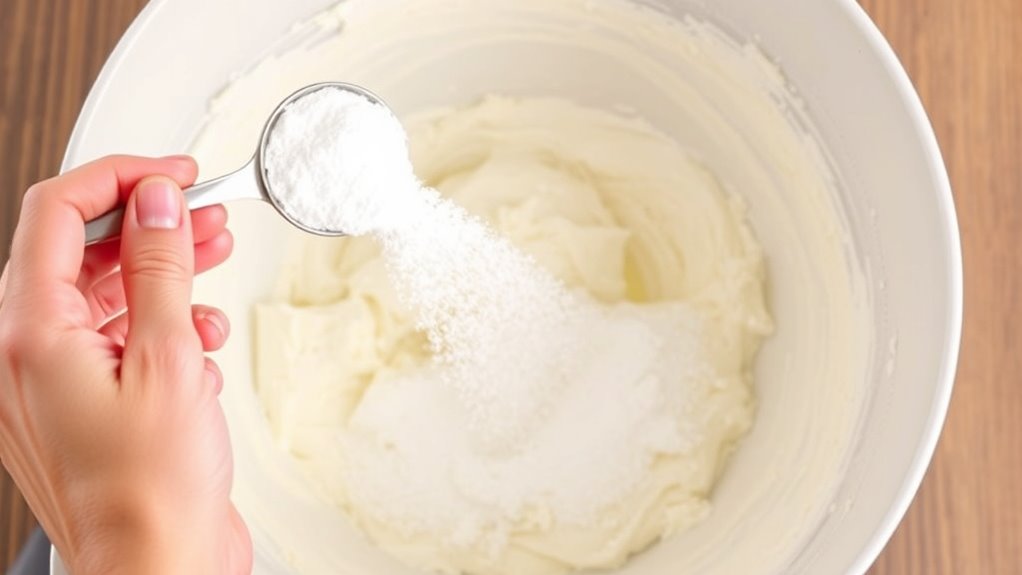
When incorporating powdered sugar into your cream cheese mixture, you'll want to add it gradually to achieve the perfect mint dough consistency. Start by measuring out 4 cups of powdered sugar, then begin adding it in 1/2-cup increments to your softened cream cheese.
Key techniques for smooth integration:
- Use an electric mixer on low speed
- Pause and scrape down bowl sides
- Mix until no white streaks remain
- Watch for dough becoming thick and workable
Your goal is a firm, non-sticky texture that holds its shape when rolled. If the mixture seems too wet, add a bit more powdered sugar; if too dry, incorporate a tiny splash of milk.
The ideal consistency will feel like a smooth, pliable dough that can be easily shaped into small balls without crumbling.
Step 3. Add Peppermint Extract
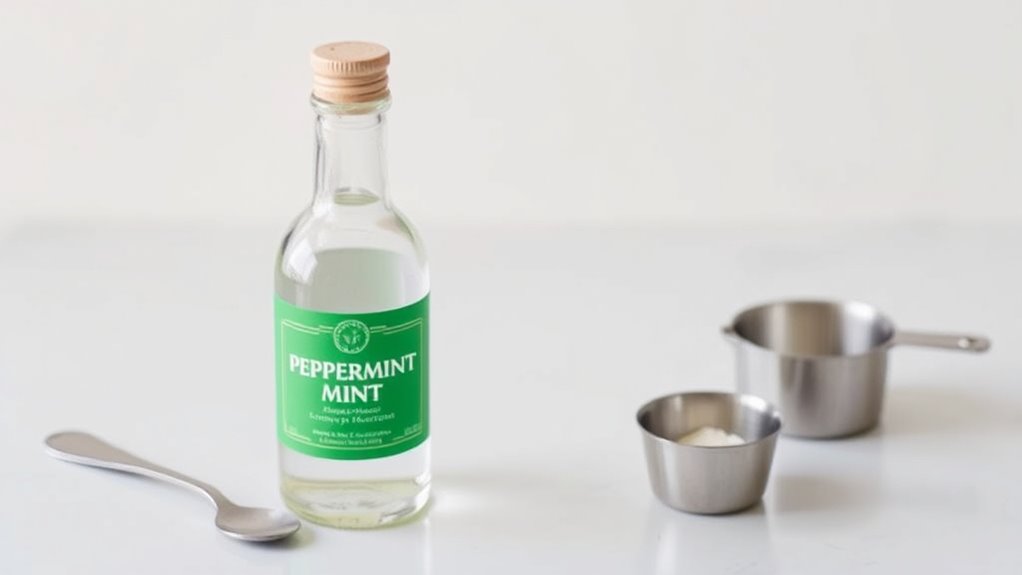
One-half teaspoon of peppermint extract will transform your cream cheese mint mixture from bland to brilliantly refreshing. Carefully measure the extract, ensuring you use exactly 1/2 teaspoon for optimal flavor balance.
Gently pour the extract into your cream cheese and powdered sugar mixture, stirring slowly to distribute the minty essence evenly throughout the dough.
Key mint-making tips:
- Add extract after sugar incorporation
- Stir thoroughly but gently
- Taste and adjust if needed
- Use pure peppermint extract for best results
Watch for visual cues as you mix: the dough should become slightly glossy and develop a soft, pale mint color. The peppermint extract not only provides flavor but also contributes a subtle aromatic quality that elevates these simple mints from ordinary to extraordinary.
Mix until the extract is completely integrated into the cream cheese base.
Step 4. Roll Into Small Balls
After integrating the peppermint extract uniformly, you'll want to prepare your workspace for shaping the mint dough. Lightly dust your work surface with powdered sugar to prevent sticking, and have a sheet of wax paper nearby for placing your finished mints.
Using clean hands, pinch off small portions of the dough, approximately 1 teaspoon in size. Gently roll each portion between your palms, creating smooth, consistent balls about 3/4-inch in diameter.
Maintain light, even pressure to ensure uniform shape. Immediately roll each ball in granulated sugar, coating completely. This not only adds a delightful texture but also prevents the mints from becoming too sticky.
Place the sugar-coated balls on wax paper, spacing them slightly apart to allow for drying and setting.
Step 5. Coat With Granulated Sugar
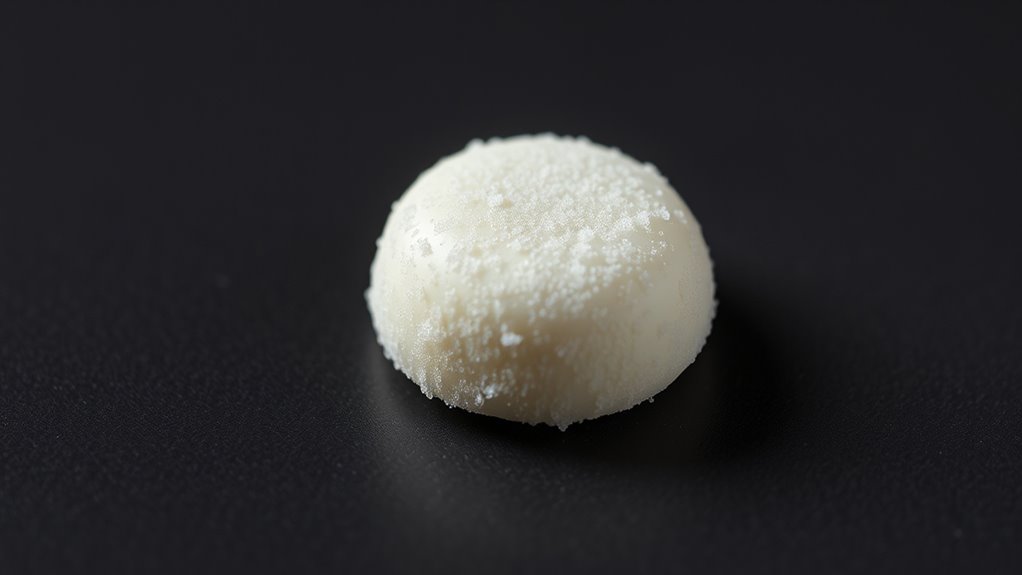
Sprinkle granulated sugar onto a shallow dish, creating an even coating that will transform your cream cheese mint balls into sparkling, sweet confections.
You'll want to roll each mint ball gently through the sugar, ensuring a complete and uniform coverage that adds both texture and sweetness. Tap off any excess sugar to prevent clumping, which can make your mints look uneven or messy.
Key coating tips:
- Use a fork to help roll and coat mints evenly
- Ensure sugar layer is light but consistent
- Rotate the ball to cover all surfaces completely
The granulated sugar not only enhances flavor but also creates a delightful crystalline exterior that gives these mints their signature crunch and elegant finish.
Work carefully and deliberately for professional-looking results.
Final Thoughts
Whether you're hosting a bridal shower or simply craving a sweet treat, these cream cheese mints will become your go-to homemade candy recipe.
You'll love how versatile and simple these mints are, perfect for customizing to any event or color scheme. When preparing, remember that precision matters: softened cream cheese creates the smoothest texture, and careful sugar coating ensures a professional finish.
Your homemade mints can elevate dessert tables, serve as delightful party favors, or become a cherished family recipe. Store them carefully in the refrigerator, layered between wax paper, to maintain their delicate texture and refreshing flavor.
With practice, you'll master these elegant, melt-in-your-mouth confections that look professionally crafted but come straight from your kitchen.