12 Sports Mom Dinners Quick Meals
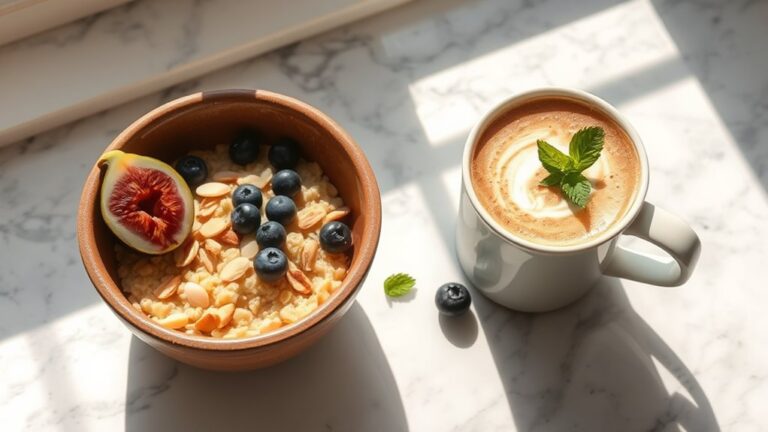
Did you know that young athletes need up to 500 more calories per day than their non-athletic peers? As a sports mom, you're juggling practices, games, and the critical task of fueling your young athlete with proper nutrition. You'll find that these 12 quick dinner solutions combine the perfect balance of proteins, carbs, and healthy fats while fitting into your busy schedule. Let's explore how you can transform your weeknight dinner routine into a championship-worthy meal plan.
Sheet Pan Chicken and Rainbow Veggies
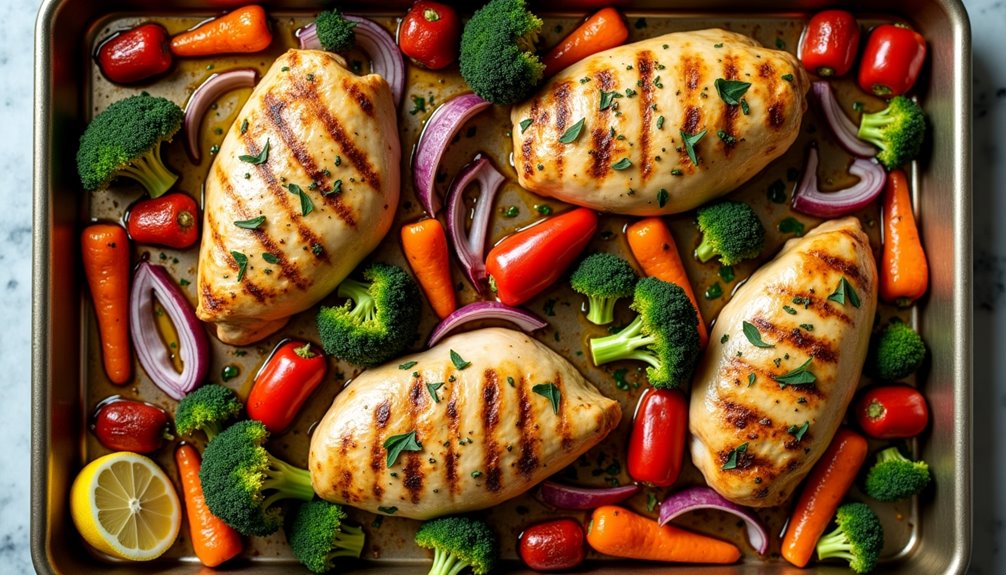
Sheet pan meals have revolutionized weeknight dinners for busy sports families, combining easy preparation with minimal cleanup. This colorful and nutritious dish features tender chicken breasts alongside a medley of vibrant vegetables that roast to perfection on a single pan.
The beauty of this recipe lies in its versatility – you can easily swap vegetables based on what's in season or your family's preferences. The key to success is cutting the vegetables in similar sizes to ensure even cooking, while the chicken remains juicy thanks to a simple seasoning blend.
Ingredients:
- 4 boneless, skinless chicken breasts
- 2 cups broccoli florets
- 2 red bell peppers, sliced
- 2 cups baby carrots
- 1 red onion, cut into wedges
- 3 tablespoons olive oil
- 2 teaspoons garlic powder
- 2 teaspoons paprika
- 1 teaspoon dried oregano
- 1 teaspoon salt
- 1/2 teaspoon black pepper
- 1 lemon
Preheat the oven to 425°F and line a large sheet pan with parchment paper. In a small bowl, combine garlic powder, paprika, oregano, salt, and pepper. Place chicken breasts on one side of the sheet pan and drizzle with 1 tablespoon olive oil, then season with half of the spice mixture. Arrange vegetables on the remaining space, drizzle with remaining olive oil, and sprinkle with the rest of the seasonings.
Roast for 20-25 minutes, until chicken reaches an internal temperature of 165°F and vegetables are tender-crisp. During the last 5 minutes of cooking, squeeze half a lemon over the entire pan. Let rest for 5 minutes before serving.
For best results, bring chicken to room temperature 15 minutes before cooking, and ensure vegetables are cut to similar sizes for even roasting. If using larger chicken breasts, consider butterflying them to maintain consistent cooking time with the vegetables. The sheet pan should be large enough to avoid overcrowding, as this can lead to steaming rather than roasting.
15-Minute Protein-Packed Pasta Bowl
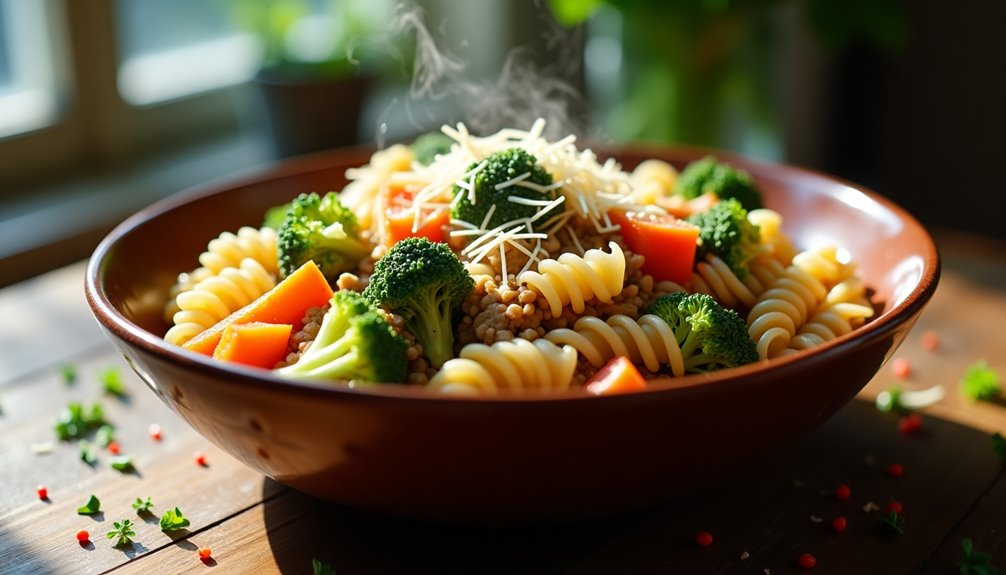
Protein-packed pasta bowls are a lifesaver for busy sports moms who need to feed their active children nutritious meals between practices and games. This quick and satisfying dish combines lean protein, complex carbohydrates, and vegetables in a single bowl that can be customized based on available ingredients and preferences.
The beauty of this recipe lies in its versatility and efficiency – it can be prepared in under 20 minutes while providing the essential nutrients young athletes need to maintain their energy levels. The combination of protein from chicken or turkey, whole grain pasta, and colorful vegetables creates a balanced meal that fuels performance and supports recovery.
Ingredients:
- 8 oz whole grain pasta
- 1 lb ground turkey or chicken
- 2 cups mixed vegetables (broccoli, carrots, peas)
- 2 cloves garlic, minced
- 1 tablespoon olive oil
- 1/4 cup grated Parmesan cheese
- 1 tablespoon Italian seasoning
- Salt and pepper to taste
- 1/4 cup low-sodium chicken broth
- Optional: red pepper flakes
Cook pasta according to package directions in salted water. While pasta cooks, heat olive oil in a large skillet over medium heat and add ground meat, breaking it up with a spatula. Once meat is nearly cooked through, add garlic, vegetables, and seasonings. Cook until vegetables are tender-crisp and meat is fully cooked. Add chicken broth to create a light sauce, then combine with drained pasta and top with Parmesan cheese.
For best results, slightly undercook the pasta as it will continue to cook when combined with the hot meat and vegetables. The dish can be stored in an airtight container for up to three days in the refrigerator, making it perfect for meal prep. To add variety, experiment with different protein sources, pasta shapes, and vegetable combinations while maintaining the same basic cooking method.
Make-Ahead Turkey Taco Casserole
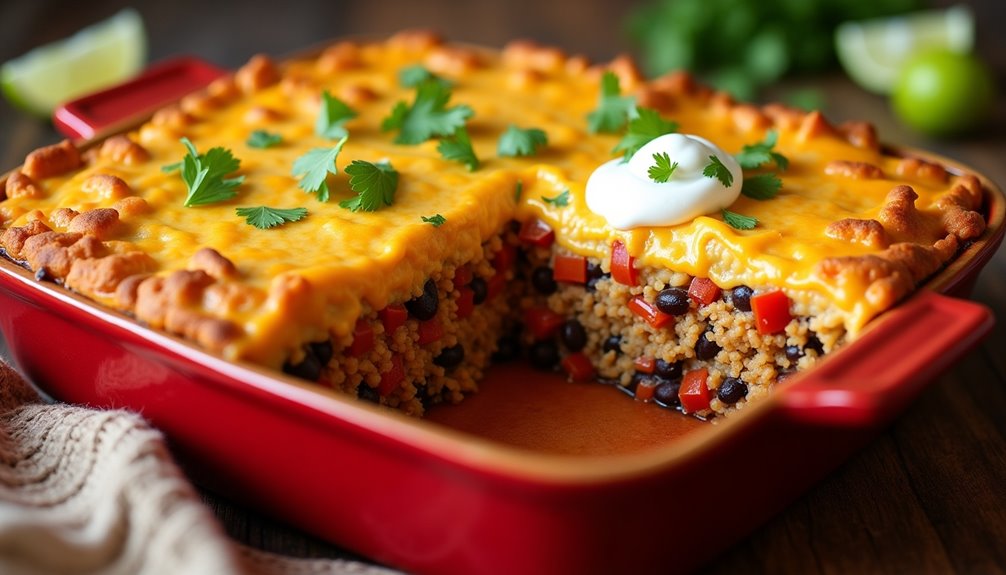
Turkey Taco Casserole is a protein-packed, crowd-pleasing dish that combines the beloved flavors of traditional tacos with the convenience of a make-ahead casserole. Perfect for busy sports families, this recipe can be assembled up to 24 hours before baking, making it an ideal option for those hectic game-day evenings.
This hearty casserole features layers of seasoned ground turkey, Mexican-style rice, fresh vegetables, and melted cheese, all topped with crushed tortilla chips for the perfect crunch. The dish delivers the satisfaction of tacos without the mess of individual assembly, and leftovers can be easily reheated for quick lunches or dinners throughout the week.
- 2 lbs lean ground turkey
- 2 cups cooked rice
- 1 packet taco seasoning
- 1 can black beans, drained and rinsed
- 1 can diced tomatoes
- 1 bell pepper, diced
- 1 onion, diced
- 2 cups shredded Mexican cheese blend
- 2 cups crushed tortilla chips
- 1 cup sour cream
- 2 cloves garlic, minced
- 2 tablespoons olive oil
- Salt and pepper to taste
Heat olive oil in a large skillet over medium heat. Add ground turkey and cook until browned, breaking it up into small pieces. Add garlic, onion, and bell pepper, cooking until vegetables are softened. Stir in taco seasoning, diced tomatoes, and black beans. Let simmer for 5 minutes. In a 9×13 baking dish, layer half the rice, followed by half the meat mixture and half the cheese. Repeat layers, finishing with cheese on top. When ready to bake, preheat oven to 375°F and cook for 25-30 minutes until bubbly. Top with crushed tortilla chips during the last 5 minutes of baking.
For best results, allow the casserole to rest for 10-15 minutes before serving. The dish can be stored in the refrigerator for up to 3 days, though the tortilla chips should only be added just before serving to maintain their crunch. When reheating individual portions, microwave until hot and top with fresh chips for optimal texture.
One-Pot Mediterranean Quinoa
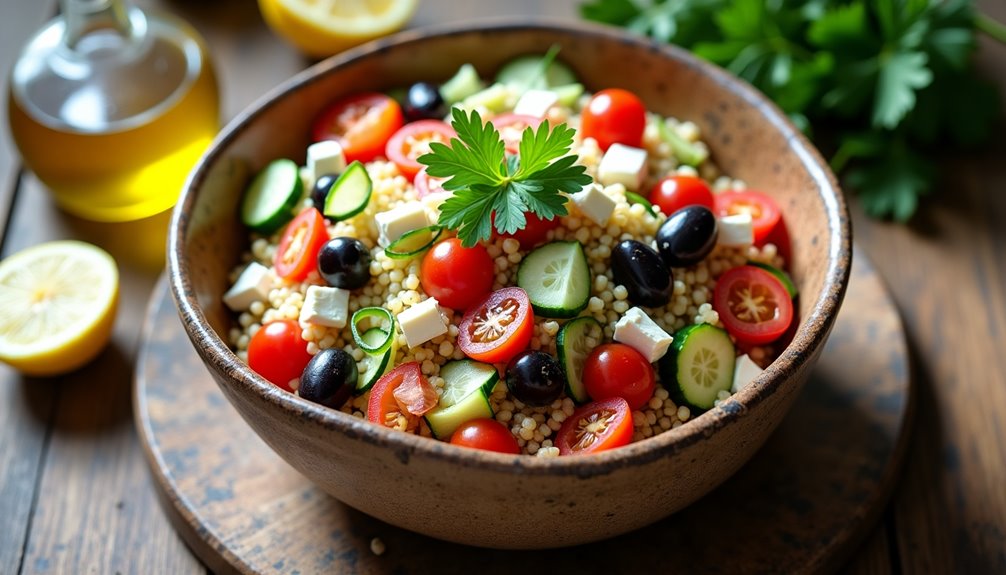
One-Pot Mediterranean Quinoa combines the protein-rich ancient grain with vibrant Mediterranean flavors, creating a wholesome and satisfying meal perfect for busy sports families. The dish incorporates colorful vegetables, tangy feta cheese, and heart-healthy olive oil, making it both nutritious and delicious.
This versatile recipe can be served hot or cold, making it ideal for make-ahead meals or post-practice dinners. It's also an excellent source of complex carbohydrates and protein, providing sustained energy for young athletes.
- 1½ cups quinoa, rinsed
- 3 cups vegetable broth
- 1 red bell pepper, diced
- 1 cucumber, diced
- 1 cup cherry tomatoes, halved
- ½ red onion, finely chopped
- ½ cup kalamata olives, pitted and halved
- ½ cup crumbled feta cheese
- 3 tablespoons extra virgin olive oil
- 2 tablespoons lemon juice
- 2 cloves garlic, minced
- 1 teaspoon dried oregano
- Salt and black pepper to taste
- ¼ cup fresh parsley, chopped
Add quinoa and vegetable broth to a large pot. Bring to a boil, then reduce heat to low, cover, and simmer for 15-20 minutes until liquid is absorbed and quinoa is tender. Remove from heat and let stand, covered, for 5 minutes. Fluff with a fork and let cool slightly.
While the quinoa is still warm, add olive oil, lemon juice, garlic, and oregano, stirring to combine. Mix in the diced vegetables, olives, and feta cheese. Season with salt and black pepper to taste, and garnish with fresh parsley.
For best results, let the dish rest for at least 15 minutes before serving to allow flavors to meld. Store leftovers in an airtight container in the refrigerator for up to 3 days. The quinoa can be cooked in advance and stored separately until ready to combine with other ingredients. If the dish seems dry after refrigeration, refresh with a drizzle of olive oil and a squeeze of lemon juice.
Quick Teriyaki Rice Bowl
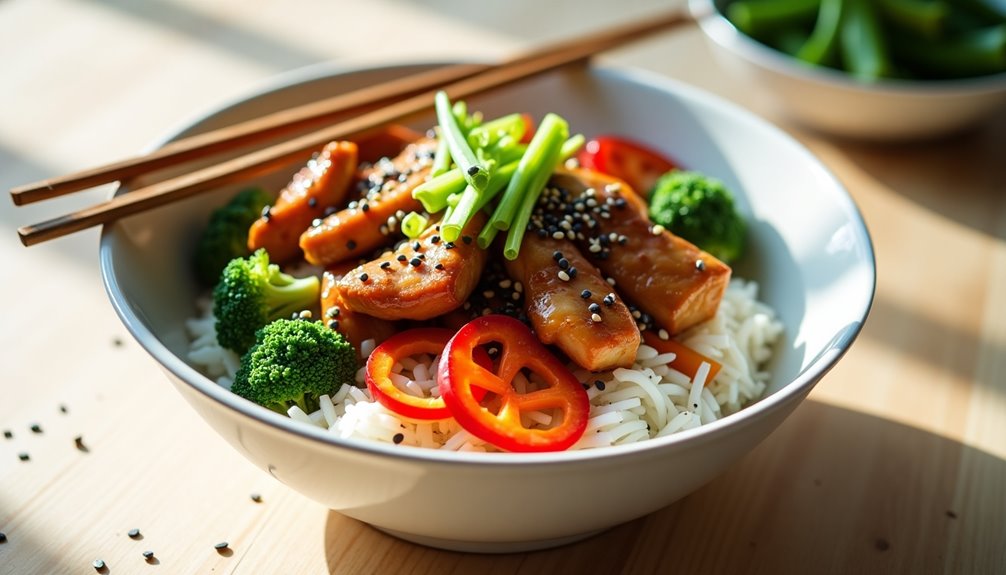
Every busy sports mom knows the value of a quick and satisfying dinner that can be prepared between practices and games. The Teriyaki Rice Bowl is a perfect solution, combining lean protein, vegetables, and filling rice in a sweet-savory sauce that appeals to both adults and children.
This versatile dish can be customized based on whatever vegetables you have on hand and can be made with chicken, beef, or tofu. The homemade teriyaki sauce comes together in minutes and tastes far better than store-bought versions, while still maintaining the convenience needed for hectic weeknight meals.
- 2 cups jasmine rice
- 1 pound chicken breast, cut into bite-sized pieces
- 2 cups broccoli florets
- 1 red bell pepper, sliced
- 1 cup carrots, julienned
- 4 tablespoons soy sauce
- 3 tablespoons brown sugar
- 2 tablespoons mirin
- 1 tablespoon cornstarch
- 2 cloves garlic, minced
- 1 tablespoon ginger, grated
- 2 tablespoons vegetable oil
- Sesame seeds for garnish
- Green onions, chopped
Cook rice according to package instructions. While rice cooks, whisk together soy sauce, brown sugar, mirin, and cornstarch in a small bowl. Heat oil in a large skillet over medium-high heat, add chicken and cook until golden brown. Remove chicken and set aside. In the same pan, stir-fry vegetables until crisp-tender, about 3-4 minutes. Return chicken to pan, add sauce mixture and cook until sauce thickens, about 2 minutes.
The key to success with this dish is proper preparation. Have all ingredients measured and cut before starting to cook, as the actual cooking process moves quickly. The sauce can be made ahead of time and stored in the refrigerator for up to a week, making weeknight assembly even faster. For best results, don't overcrowd the pan when cooking the chicken or vegetables, as this will lead to steaming rather than the desired caramelization.
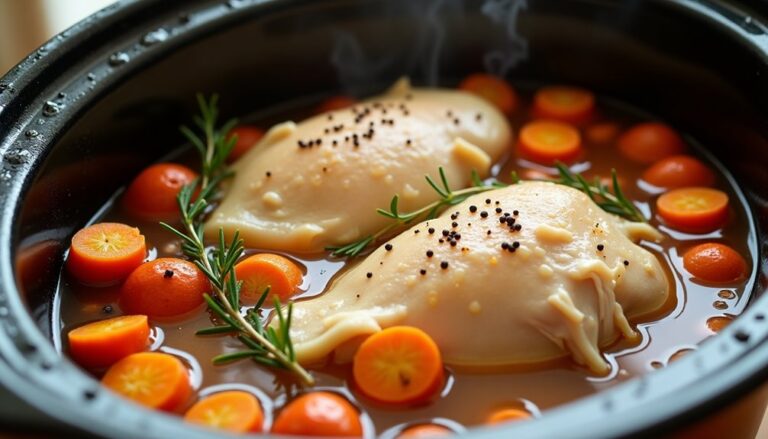
5-Ingredient Slow Cooker Chili
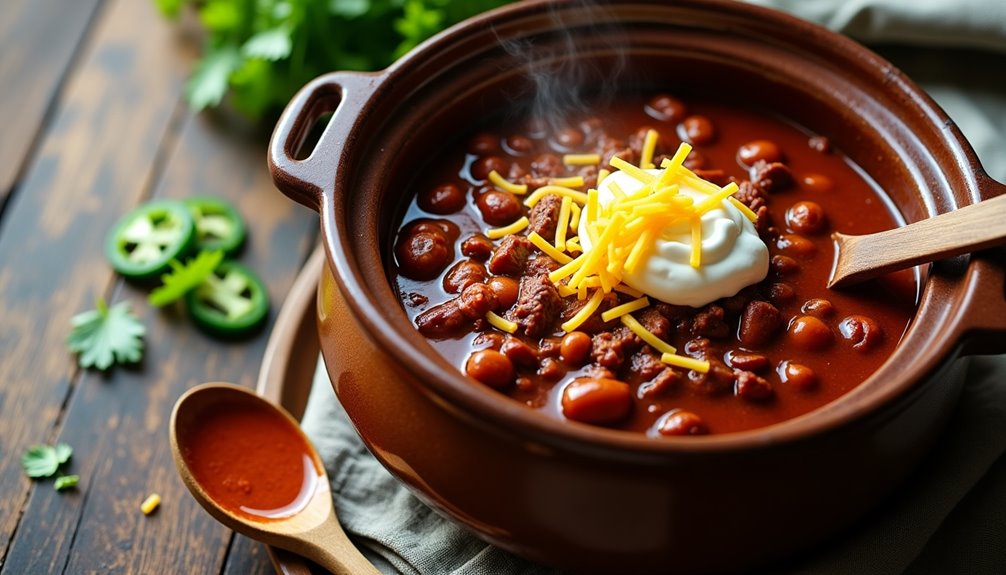
This hearty slow cooker chili recipe takes the complexity out of traditional chili making by using just three main ingredients. Perfect for busy sports moms who need to feed a hungry family after practice or games, this recipe delivers rich, satisfying flavor without requiring endless chopping or preparation time.
The beauty of this recipe lies in its simplicity and the slow cooking process, which allows the flavors to develop and meld together over several hours. While traditional chili recipes often call for numerous spices and ingredients, this version proves that sometimes less is more, especially when you're short on time but still want to serve a wholesome, homemade meal.
- 2 lbs ground beef
- 2 (15 oz) cans diced tomatoes
- 2 (15 oz) cans kidney beans
- 1 packet chili seasoning mix
- Salt and pepper to taste
Brown the ground beef in a large skillet over medium-high heat, breaking it up into small pieces as it cooks. Drain any excess fat. Transfer the browned meat to your slow cooker and add the undrained diced tomatoes, drained and rinsed kidney beans, and the packet of chili seasoning mix. Stir all ingredients together until well combined.
Cover and cook on low for 6-8 hours or on high for 3-4 hours. During the last hour of cooking, taste and adjust the seasoning with salt and pepper as needed. The chili will thicken slightly as it cooks, creating the perfect consistency for serving.
For best results, avoid lifting the slow cooker lid during cooking as this releases heat and can extend cooking time. The chili can be stored in an airtight container in the refrigerator for up to 4 days, and it often tastes even better the next day as the flavors continue to develop. If the chili becomes too thick during storage, simply add a small amount of beef broth when reheating.
Grab-and-Go Burrito Wraps
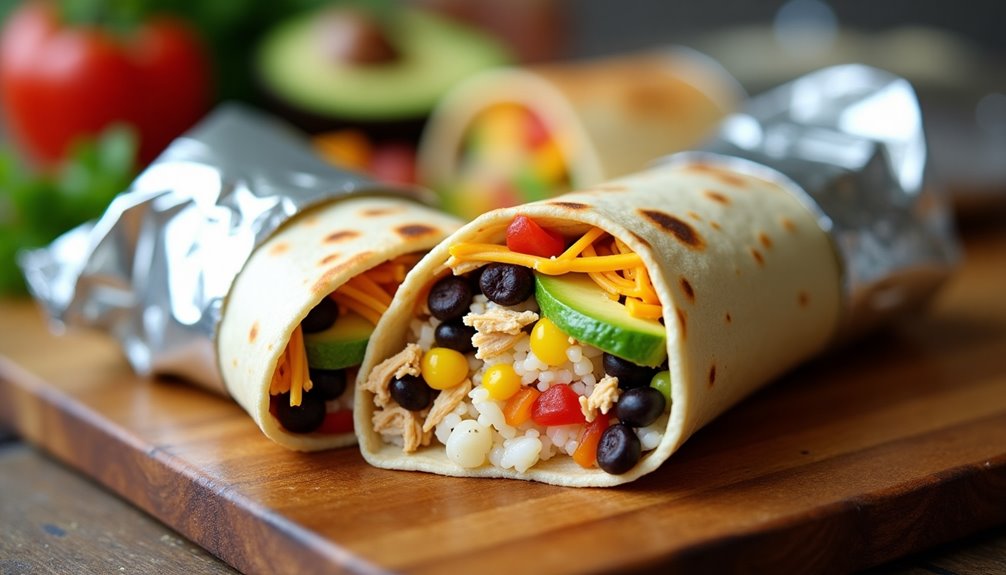
These easy-to-make burrito wraps are perfect for busy sports moms who need to feed their active kids between practices and games. The portable nature of these wraps makes them ideal for eating on the bleachers or in the car, while still providing essential nutrients for young athletes.
The beauty of these grab-and-go burrito wraps lies in their versatility and make-ahead potential. They can be prepared in bulk during weekend meal prep, wrapped individually, and stored in the refrigerator or freezer until needed. The wraps stay fresh and tasty, whether served hot or cold.
- Large flour tortillas (10-inch)
- 2 cups cooked rice
- 2 cans black beans, drained and rinsed
- 2 cups shredded rotisserie chicken
- 2 cups shredded Mexican cheese blend
- 1 cup corn kernels
- 1 red bell pepper, diced
- 1 cup pico de gallo
- 2 avocados, sliced
- Sour cream
- Hot sauce (optional)
- Aluminum foil for wrapping
Start by warming the tortillas slightly to make them more pliable. Layer the ingredients in the center of each tortilla, beginning with rice and beans as the base. Add the shredded chicken, cheese, corn, and bell peppers. Top with pico de gallo, avocado slices, and a dollop of sour cream. Add hot sauce if desired.
To wrap, fold the bottom edge up and over the filling about 2 inches. Then fold in the sides toward the center. While holding the sides in place, tightly roll the burrito from the bottom up, ensuring all ingredients are secured inside. Wrap each burrito individually in aluminum foil, twisting the ends to seal.
For best results, allow the wrapped burritos to cool completely before storing in the refrigerator or freezer. The foil can be partially unwrapped and used as a holder while eating, keeping hands clean and ingredients contained. When reheating frozen burritos, remove the foil and microwave for 2-3 minutes, or keep the foil on and warm in a 350°F oven for 15-20 minutes.
Energy-Boosting Breakfast for Dinner
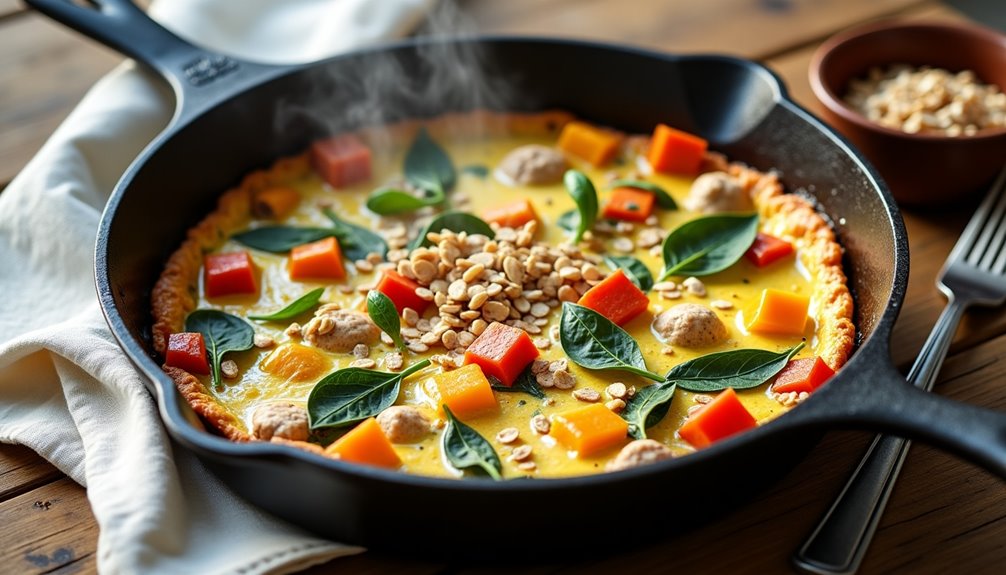
Energy-Boosting Breakfast for Dinner transforms the morning meal into a satisfying evening feast that provides sustained energy for active families. This versatile dish combines protein-rich eggs, wholesome vegetables, and complex carbohydrates to create a balanced meal that both parents and young athletes will appreciate.
The beauty of this recipe lies in its adaptability – you can adjust portions and ingredients based on your family's preferences while maintaining its nutritional benefits. The combination of protein, healthy fats, and carbohydrates helps replenish energy stores after practice or games, making it an ideal post-activity dinner option.
Ingredients:
- 8 large eggs
- 1 cup sweet potatoes, diced
- 1 red bell pepper, chopped
- 1 cup spinach leaves
- 1/2 cup mushrooms, sliced
- 1/4 cup milk
- 2 tablespoons olive oil
- 1 cup rolled oats
- 2 tablespoons maple syrup
- 1 teaspoon salt
- 1/2 teaspoon black pepper
- 1/4 teaspoon paprika
- Fresh herbs (optional)
Begin by preheating the oven to 375°F (190°C). In a large oven-safe skillet, heat olive oil over medium heat and sauté sweet potatoes for 7-8 minutes until they begin to soften. Add bell peppers and mushrooms, cooking for an additional 5 minutes. Stir in spinach and allow it to wilt.
While the vegetables cook, whisk together eggs, milk, salt, pepper, and paprika in a large bowl. In a separate pan, toast the rolled oats until lightly golden, then drizzle with maple syrup. Pour the egg mixture over the vegetables in the skillet, reduce heat to medium-low, and cook until the edges begin to set. Transfer the skillet to the preheated oven and bake for 10-12 minutes until the eggs are fully set. Sprinkle the sweetened oats over portions when serving.
For best results, dice sweet potatoes into uniform, small pieces to ensure even cooking. The dish can be prepared in advance up to the point of adding the eggs, making it perfect for busy weeknights. Store leftovers in an airtight container for up to three days, though the oat topping should be stored separately to maintain its crunch.
Game Day Loaded Sweet Potatoes
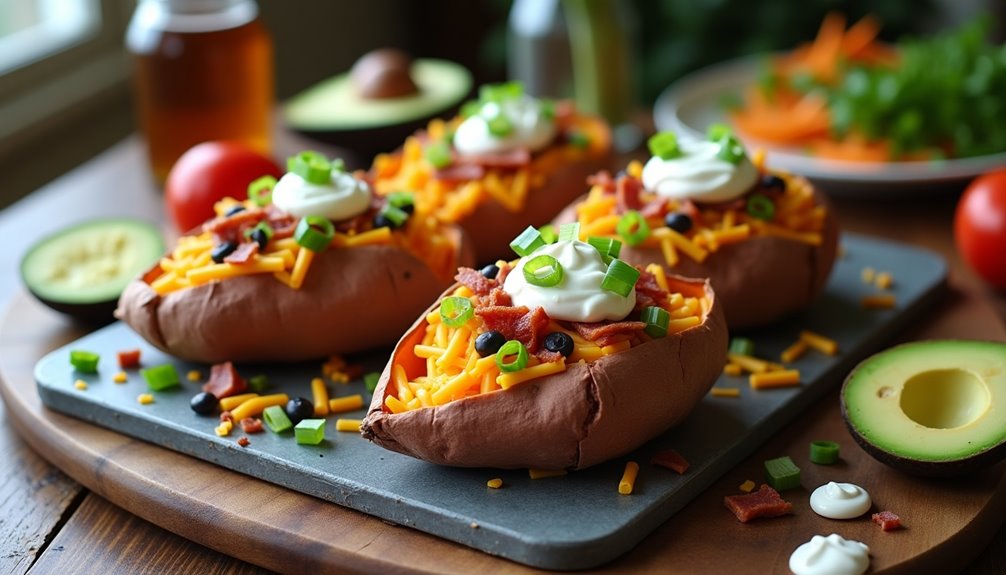
Game day loaded sweet potatoes offer a nutritious twist on the classic loaded baked potato. These vibrant orange powerhouses are packed with vitamins and minerals, making them an excellent choice for young athletes who need sustained energy during their sporting events.
Perfect for busy sports moms, this recipe can be prepared in advance and reheated when needed. The combination of sweet and savory toppings creates a satisfying meal that both parents and kids will enjoy, while providing the complex carbohydrates and proteins necessary for athletic performance.
- 4 medium sweet potatoes
- 1/2 cup sour cream
- 4 slices bacon, cooked and crumbled
- 1/2 cup shredded cheddar cheese
- 2 green onions, finely chopped
- 1/4 cup black beans, drained and rinsed
- 1 tablespoon olive oil
- Salt and pepper to taste
- Optional: diced avocado, jalapeños, or cilantro
Preheat the oven to 400°F (200°C). Wash the sweet potatoes thoroughly and pat them dry. Rub the potatoes with olive oil and pierce several times with a fork. Place them on a baking sheet lined with foil and bake for 45-60 minutes, or until tender when pierced with a knife.
Once the potatoes are done, let them cool slightly before cutting them lengthwise. Gently fluff the inside with a fork and season with salt and pepper. Top each potato with a generous portion of sour cream, cheese, bacon, black beans, and green onions. Return to the oven for 5 minutes to melt the cheese.
For best results, choose sweet potatoes of similar size to ensure even cooking times. These can be partially prepared up to a day in advance – simply bake the potatoes, store them in the refrigerator, and reheat with toppings when ready to serve. If preparing for a crowd, consider setting up a topping bar so everyone can customize their potato.
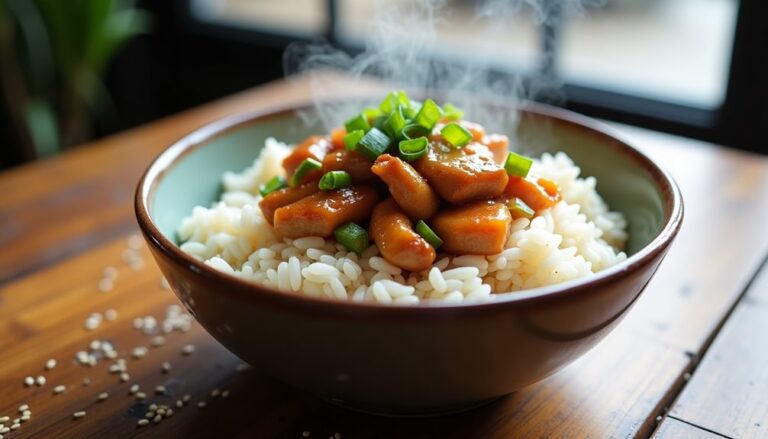
Power-Packed Stir Fry Express
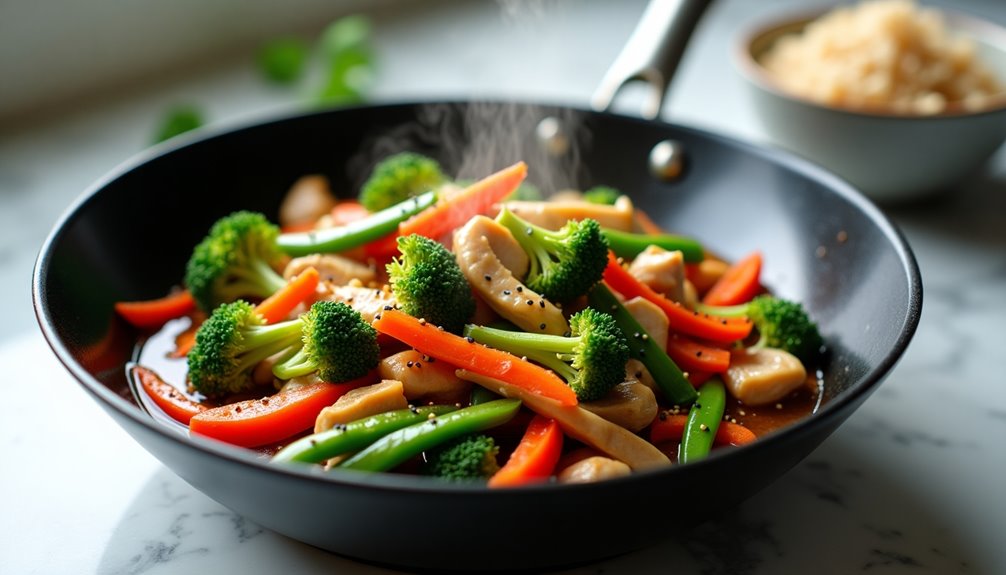
Power-Packed Stir Fry Express is the ultimate solution for busy sports moms who need to feed their active athletes a nutritious meal between practices and games. This quick-cooking dish combines lean proteins with colorful vegetables and complex carbohydrates to provide sustained energy for growing athletes.
This versatile stir fry can be customized based on your family's preferences and what's available in your refrigerator. The key is maintaining the balance of protein, vegetables, and carbohydrates while using a flavorful sauce that brings everything together.
- 1 lb lean chicken breast, cut into strips
- 2 cups broccoli florets
- 1 red bell pepper, sliced
- 2 carrots, julienned
- 1 cup snap peas
- 2 cups brown rice, cooked
- 3 tablespoons vegetable oil
- 3 cloves garlic, minced
- 1 tablespoon ginger, grated
- 1/4 cup low-sodium soy sauce
- 2 tablespoons cornstarch
- 1/4 cup water
- 1 tablespoon sesame oil
- Salt and pepper to taste
Start by preparing the sauce: mix soy sauce, water, and cornstarch in a small bowl until smooth. Heat vegetable oil in a large wok or skillet over medium-high heat. Add chicken strips and cook until golden brown, about 5-6 minutes. Remove chicken and set aside.
Return the wok to heat and add garlic and ginger. Stir-fry for 30 seconds until fragrant. Add vegetables in order of cooking time: carrots first, followed by broccoli, bell peppers, and snap peas. Stir-fry for 3-4 minutes until vegetables are crisp-tender. Return chicken to the wok, add the sauce mixture, and cook until the sauce thickens, about 2 minutes. Finish with sesame oil and serve over brown rice.
For best results, prep all ingredients before heating the wok, as stir-frying moves quickly once started. Keep vegetables similar in size for even cooking, and don't overcrowd the pan – cook in batches if necessary to maintain high heat and prevent steaming. The dish can be made ahead and reheated, though the vegetables will be slightly softer.
Team Night Pizza Boats

Pizza boats are a crowd-pleasing dinner option that transforms ordinary French bread into a vessel of cheesy, saucy goodness. Perfect for feeding hungry athletes after practice or games, these customizable treats allow each person to choose their favorite toppings while maintaining the beloved flavors of traditional pizza.
This recipe serves 8-10 people and can be prepared in advance, making it ideal for busy sports families. The hollow bread boats hold more toppings than regular pizza, ensuring satisfied appetites, while the crispy exterior adds a delightful crunch that kids and adults alike will love.
Ingredients:
- 4 large French bread loaves
- 2 cups marinara sauce
- 4 cups shredded mozzarella cheese
- 1 cup grated parmesan cheese
- 2 tablespoons olive oil
- 2 teaspoons Italian seasoning
- 1 teaspoon garlic powder
- Optional toppings: pepperoni, cooked sausage, mushrooms, bell peppers, onions, olives
Preheat the oven to 375°F. Cut each French bread loaf in half lengthwise and hollow out the center, leaving about a 1/2-inch border of bread. Brush the inside of each boat with olive oil and sprinkle with garlic powder and Italian seasoning. Spread marinara sauce evenly in each boat, then layer with mozzarella cheese and desired toppings.
Place the boats on a large baking sheet and top with parmesan cheese. Bake for 15-20 minutes until the cheese is melted and bubbly, and the edges of the bread are golden brown. Let cool for 5 minutes before slicing into portions.
For best results, don't completely hollow out the bread – leaving some soft interior helps absorb the sauce and prevents sogginess. The hollowed-out bread can be saved to make breadcrumbs or croutons. If preparing in advance, assemble the boats but wait to bake until just before serving, and consider wrapping the bottom of the boats in foil to make them easier to hold and eat.
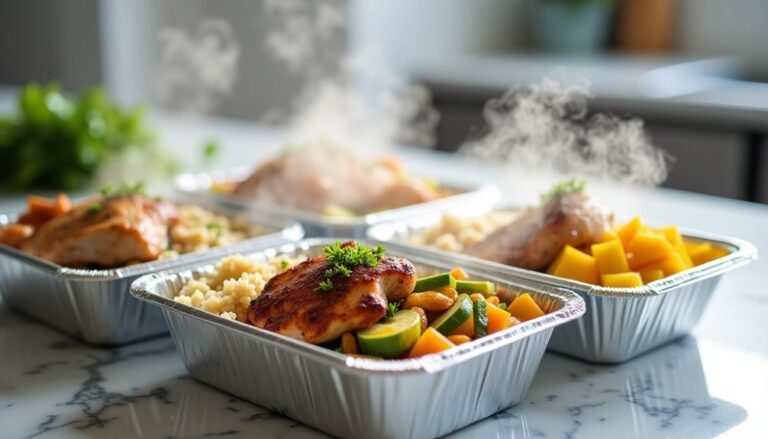
Winning Weekend Meal Prep Plan
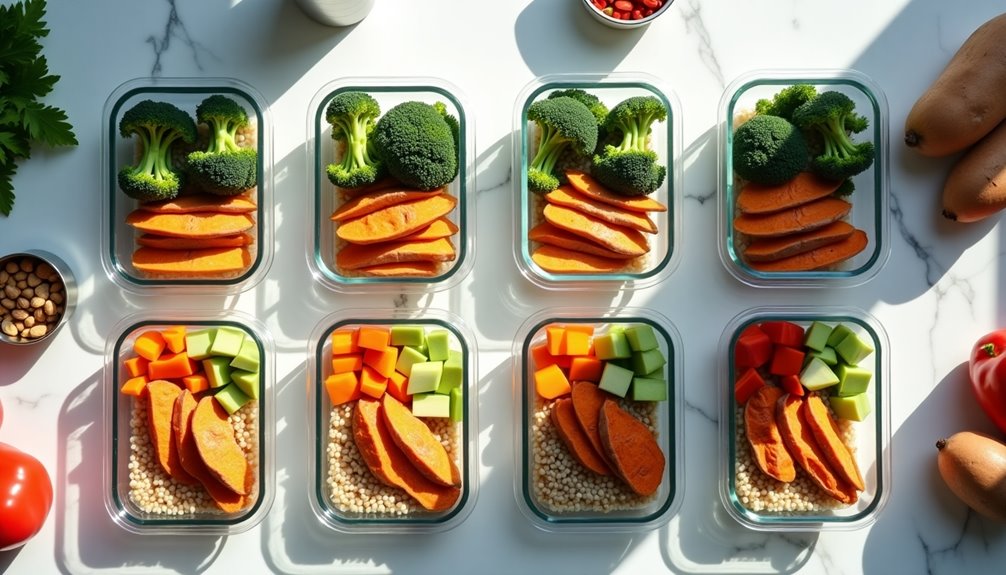
Meal prepping for busy sports weekends is essential for keeping young athletes fueled and families organized. This comprehensive plan helps you prepare multiple nutritious meals in advance, saving precious time during hectic game days and tournaments.
This winning weekend meal prep strategy focuses on creating versatile protein options, pre-portioned vegetables, and easy-to-pack sides that can be mixed and matched throughout the weekend. The plan is designed to feed a family of four for an entire sports weekend, with options for both cold and reheatable meals.
- 3 lbs chicken breast
- 2 lbs lean ground turkey
- 2 cups brown rice
- 4 sweet potatoes
- 2 lbs mixed vegetables (broccoli, carrots, snap peas)
- 1 lb pasta
- 12 eggs
- 2 cups quinoa
- Olive oil
- Salt and pepper
- Mixed herbs and seasonings
- Storage containers
Start by cooking all proteins simultaneously. Season chicken breasts with herbs and bake at 375°F for 25-30 minutes while browning the ground turkey on the stovetop. Meanwhile, cook rice and quinoa according to package instructions. Roast sweet potatoes and vegetables on separate baking sheets at the same temperature as the chicken, typically 20-25 minutes for vegetables and 45 minutes for sweet potatoes.
Once proteins are cooked, slice chicken into portions and divide ground turkey into meal-sized amounts. Package proteins with corresponding sides in microwave-safe containers. Hard boil eggs and store separately. Keep cold items separate from those that will need reheating.
For best results, store prepped meals in high-quality, airtight containers and label with contents and dates. Proteins will stay fresh for 3-4 days when properly refrigerated. Consider freezing portions that won't be eaten within that timeframe. Always pack hot foods and cold foods in separate containers with appropriate ice packs or insulation for game-day transport.