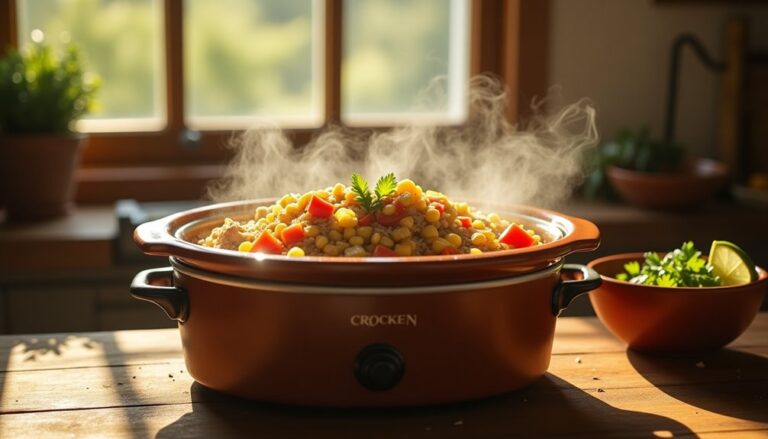
12 Easy Discard Recipes
You've just tossed another bunch of carrot tops into your compost bin, but those vibrant greens could've transformed into a zesty pesto for your pasta tonight. In your kitchen, what you consider "scraps" often holds untapped culinary potential. From turning stale bread into decadent puddings to crafting crispy potato peel chips, these 12 discard recipes will change how you view kitchen waste. Let's explore how your everyday food scraps can become tomorrow's creative dishes.
Carrot Top Pesto Magic

This carrot top pesto recipe transforms what would typically be compost material into a versatile condiment that can be spread on sandwiches, tossed with pasta, or used as a dip for vegetables. The combination of fresh carrot tops with classic pesto ingredients creates a balanced flavor profile that's both familiar and intriguingly different.
- 2 cups packed carrot tops, stems removed
- 1/2 cup fresh basil leaves
- 1/2 cup pine nuts
- 2 cloves garlic
- 1/2 cup extra virgin olive oil
- 1/2 cup grated Parmesan cheese
- 1 tablespoon lemon juice
- 1/2 teaspoon salt
- 1/4 teaspoon black pepper
Begin by thoroughly washing the carrot tops to remove any dirt or debris, then dry them completely using a salad spinner or clean kitchen towels. Toast the pine nuts in a dry skillet over medium heat until golden brown, about 3-5 minutes, watching carefully to prevent burning. Let them cool before proceeding.
Add the cleaned carrot tops, basil, toasted pine nuts, and garlic to a food processor. Pulse until coarsely chopped. With the processor running, slowly drizzle in the olive oil until the mixture becomes smooth. Add the Parmesan cheese, lemon juice, salt, and pepper, then process until well combined, scraping down the sides as needed.
For best results, store this pesto in an airtight container with a thin layer of olive oil on top to prevent oxidation. The pesto will keep in the refrigerator for up to one week, or it can be frozen in ice cube trays for up to three months. When using frozen pesto, thaw only what you need and keep the rest frozen to maintain freshness and flavor.
Broccoli Stem Stir-Fry
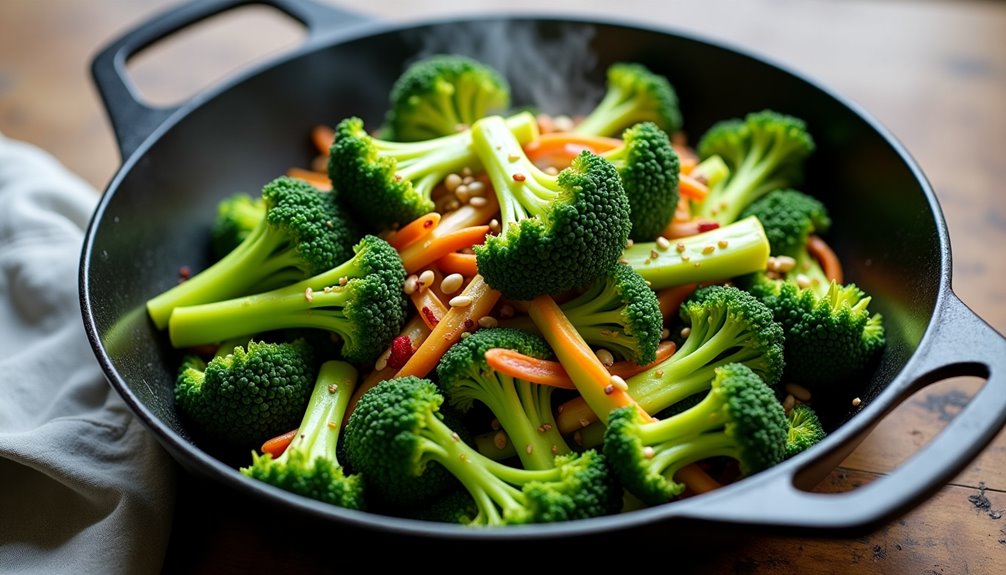
Don't toss those broccoli stems! While many cooks discard the thick stalks after using the florets, broccoli stems aren't only edible but also delicious and nutritious. When properly prepared, they offer a tender-crisp texture and mild, sweet flavor that works perfectly in stir-fries.
This quick and simple stir-fry transforms often-discarded broccoli stems into a delightful side dish or main course. The key is to peel the tough outer layer of the stems and slice them thinly, allowing them to cook quickly while retaining their crunch.
- 4 large broccoli stems, peeled and sliced diagonally
- 2 tablespoons vegetable oil
- 3 cloves garlic, minced
- 1-inch piece ginger, julienned
- 2 tablespoons soy sauce
- 1 teaspoon sesame oil
- 1/4 cup water
- Salt and pepper to taste
- Optional: red pepper flakes, sesame seeds
Heat vegetable oil in a large wok or skillet over medium-high heat. Add garlic and ginger, stir-frying for 30 seconds until fragrant. Add the sliced broccoli stems and stir-fry for 2-3 minutes, keeping them moving constantly.
Add water and cover the pan for 2 minutes to steam the stems until they're tender-crisp. Remove the lid, add soy sauce and sesame oil, then continue stir-frying until the liquid has mostly evaporated and the stems are glossy. Season with salt and pepper to taste.
For best results, slice the broccoli stems on a diagonal about 1/8-inch thick to ensure quick, even cooking. If the outer layer of the stem feels particularly tough or fibrous, use a vegetable peeler to remove it completely before slicing. The stems can be prepared up to a day in advance and stored in an airtight container in the refrigerator.
Citrus Peel Candied Treats

Candied citrus peels transform what would typically be discarded into delectable treats that balance sweet and bitter flavors. This traditional confection has been enjoyed for centuries and makes an excellent garnish for desserts, a unique addition to baked goods, or a sophisticated stand-alone candy.
These crystallized citrus treats can be made from various citrus fruits, including oranges, lemons, grapefruits, or limes. The process involves removing the bitter pith, blanching the peels, and then slowly cooking them in sugar syrup until they become translucent and tender.
- 4 large oranges (or other citrus fruits)
- 2 cups granulated sugar
- 1 cup water
- 1/2 cup additional sugar for coating
- Pinch of salt
- Optional: 2 tablespoons light corn syrup
Cut citrus fruits into quarters and carefully remove the peels with pith intact. Slice the peels into thin strips (about 1/4 inch wide). Place the strips in a large pot of cold water and bring to a boil. Drain and repeat this process two more times to remove bitterness.
In a separate saucepan, combine sugar, water, and salt, bringing the mixture to a simmer. Add the blanched peels and reduce heat to low. Cook for 1-2 hours, or until peels become translucent and tender. Remove peels with a slotted spoon and roll them in additional sugar. Place on a wire rack to dry for 24-48 hours.
For best results, store the candied peels in an airtight container between layers of parchment paper. They'll keep for up to three months at room temperature or six months if refrigerated. The leftover sugar syrup can be saved and used to flavor beverages or other desserts.
Bread Pudding Revival

This revival version maintains the soul-warming essence of traditional bread pudding while incorporating modern touches. The combination of custard-soaked bread, warm spices, and a rich bourbon sauce creates a dessert that's both humble and sophisticated.
Ingredients:
- 6 cups day-old bread, cubed
- 4 large eggs
- 2 cups whole milk
- 1 cup heavy cream
- 1 cup granulated sugar
- 2 teaspoons vanilla extract
- 1 teaspoon ground cinnamon
- 1/4 teaspoon ground nutmeg
- 1/4 teaspoon salt
- 1/2 cup raisins (optional)
- 1/4 cup melted butter
For the Bourbon Sauce:
- 1/2 cup butter
- 1 cup sugar
- 1/4 cup bourbon
- 1 egg, beaten
- 2 tablespoons water
Preheat the oven to 350°F (175°C) and butter a 9×13-inch baking dish. In a large bowl, whisk together eggs, milk, cream, sugar, vanilla, and spices. Add bread cubes and let them soak for 15-20 minutes, occasionally pressing down to ensure even absorption. Transfer the mixture to the prepared baking dish and drizzle with melted butter.
Bake for 45-50 minutes until the pudding is set and golden brown on top. While the pudding bakes, prepare the bourbon sauce by melting butter in a saucepan, adding sugar and bourbon, then slowly whisking in the beaten egg and water until thickened. Pour the warm sauce over individual servings.
For best results, use bread that's at least a day old, as fresh bread can become too mushy. Brioche, challah, or French bread work exceptionally well. The pudding can be made ahead and reheated, though the bourbon sauce should be made just before serving. If the top browns too quickly during baking, cover with foil to prevent burning.
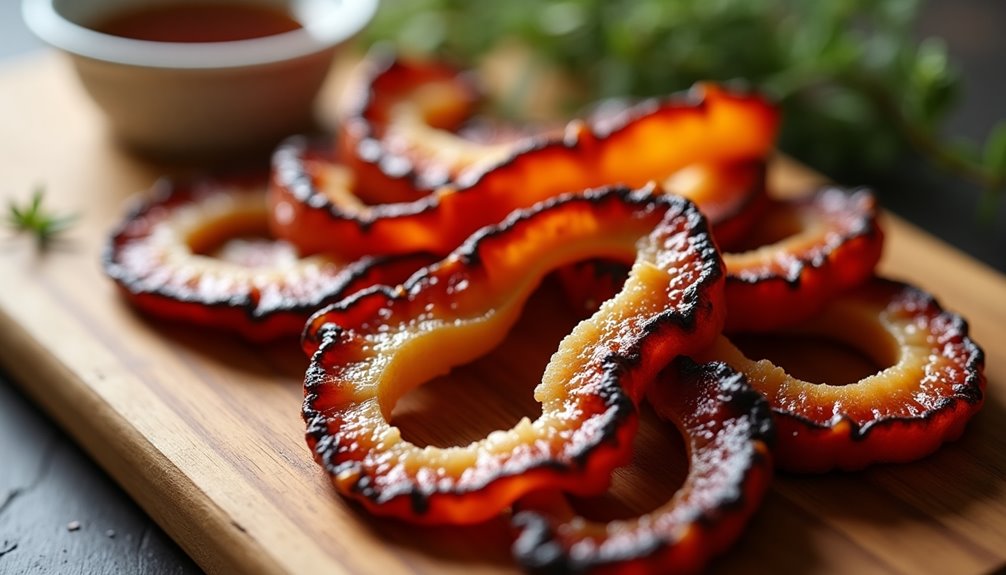
Potato Peel Crisps

Potato Peel Crisps transform what's typically thrown away into a delicious, crispy snack that rivals store-bought potato chips. This resourceful recipe helps reduce food waste while creating a nutritious treat packed with fiber and minerals found in potato skins.
The key to successful potato peel crisps lies in removing just the right amount of peel – not too thick to be chewy, but not too thin to fall apart. These crisps can be seasoned with various spices and herbs, making them versatile for different taste preferences.
Clean the potato peels thoroughly and pat them completely dry with paper towels. Toss the peels with olive oil and seasonings until evenly coated. Spread them in a single layer on a baking sheet lined with parchment paper, ensuring they don't overlap. Bake at 400°F (200°C) for 15-20 minutes, turning halfway through, until the peels are golden brown and crispy.
For best results, use fresh, firm potatoes and peel them just before making the crisps. Store any leftovers in an airtight container for up to 2 days, though they're best enjoyed immediately after cooking. If they lose their crispiness, they can be re-crisped in the oven for a few minutes at 350°F (175°C).
Ingredients:
- Peels from 4-5 large potatoes
- 2 tablespoons olive oil
- 1/2 teaspoon salt
- 1/4 teaspoon black pepper
- Optional seasonings (paprika, garlic powder, rosemary)
Watermelon Rind Pickles
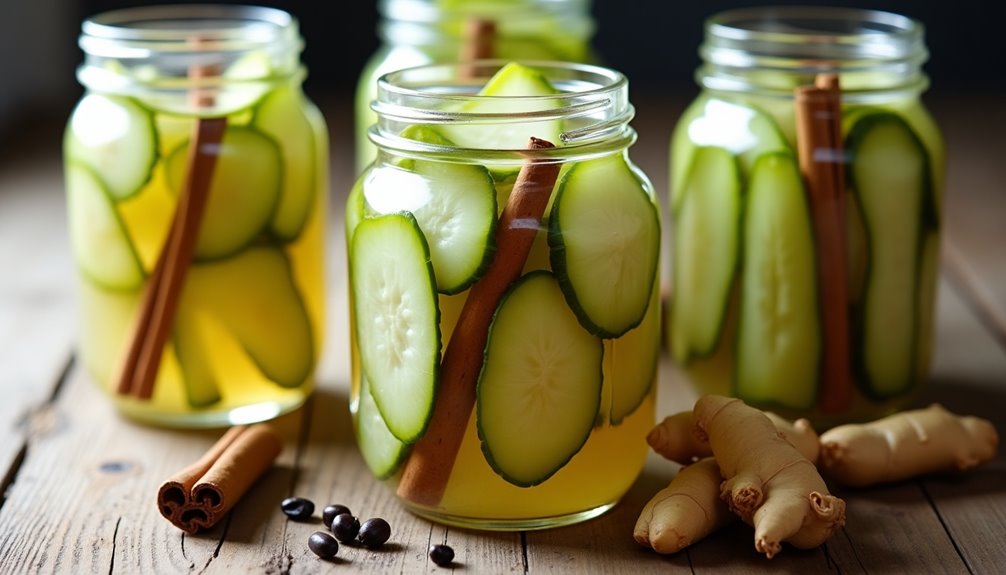
Watermelon Rind Pickles are a traditional Southern delicacy that transforms what would typically be discarded into a delightful sweet and tangy condiment. The white portion of watermelon rind, often overlooked, contains beneficial nutrients and can be preserved through pickling to extend its usefulness long after watermelon season has passed.
The key to successful watermelon rind pickles lies in proper preparation of the rind itself. The tough green outer skin must be removed, and the sweet pink flesh should be cut away, leaving only the white portion. This white rind is then cut into manageable pieces and treated with a salt brine before being transformed into pickles through a vinegar-based pickling solution.
- 8 cups watermelon rind, green skin removed
- 4 cups white vinegar
- 4 cups water
- 3 cups granulated sugar
- 2 tablespoons kosher salt
- 6 cinnamon sticks
- 1 tablespoon whole cloves
- 1 tablespoon whole allspice
- 1 tablespoon mustard seeds
- 2 pieces fresh ginger, sliced
- 1/4 cup pickling salt (for brine)
Cut the prepared watermelon rind into 1-inch cubes or 2-inch strips. Create a brine by dissolving pickling salt in cold water and submerge the rind pieces for 12 hours or overnight. After brining, drain and rinse the watermelon rind thoroughly.
In a large pot, combine vinegar, water, sugar, and spices. Bring the mixture to a boil, then reduce heat and simmer for 5 minutes to blend flavors. Add the drained watermelon rind to the pickling liquid and simmer until the rind becomes translucent and tender, typically 45-60 minutes. Pack the hot rind pieces into sterilized jars, leaving 1/4-inch headspace. Pour the hot pickling liquid over the rind, making sure to distribute the spices evenly among the jars. Process in a boiling water bath for 10 minutes to seal.
For best results, use only the firmest watermelon rind and ensure all pink flesh is removed, as it can lead to mushy pickles. The pickles should be allowed to cure for at least 2 weeks before eating to develop their full flavor. Store unopened jars in a cool, dark place for up to one year, and refrigerate after opening.
Coffee Ground Chocolate Truffles

This no-bake dessert combines rich dark chocolate with the subtle bitterness of coffee grounds, creating an elegant truffle that's perfect for coffee lovers. The grounds add a slight crunch and intensify the chocolate's depth, making these truffles an sophisticated treat that's surprisingly simple to prepare.
- 8 oz dark chocolate, finely chopped
- 1/2 cup heavy cream
- 2 tablespoons used coffee grounds (dried)
- 1 tablespoon butter, softened
- 1/4 teaspoon vanilla extract
- 1/4 cup cocoa powder for coating
- 1/4 cup finely ground coffee for coating (optional)
Place the chopped chocolate in a heat-safe bowl. Heat the heavy cream until just beginning to simmer, then pour over the chocolate. Let stand for 2 minutes, then stir until smooth. Add the butter, vanilla extract, and coffee grounds, stirring until well combined. Refrigerate the mixture for 2-3 hours or until firm enough to handle.
Using a small spoon or melon baller, scoop out portions of the chocolate mixture and roll into 1-inch balls. Roll each truffle in cocoa powder or ground coffee to coat. Place the finished truffles in an airtight container and refrigerate until ready to serve.
For best results, use coffee grounds that have been thoroughly dried to prevent any moisture from affecting the chocolate's texture. The truffles can be stored in the refrigerator for up to two weeks, but should be served at room temperature for the best flavor and texture. If the mixture becomes too soft while rolling, return it to the refrigerator for 15-20 minutes before continuing.
Apple Core Jelly

Apple cores, often destined for the compost bin, contain natural pectin and subtle flavors that can be transformed into a delightful, pale amber jelly. This recipe helps reduce food waste while creating a versatile spread that pairs beautifully with toast, scones, or cheese.
Making jelly from apple cores and peels is a traditional preservation technique that dates back generations. The process extracts both flavor and pectin from parts of the apple that would otherwise be discarded, resulting in a sustainable and economical homemade preserve.
Ingredients:
- 8 cups apple cores and peels (about 8-10 apples)
- 4 cups water
- 2 tablespoons lemon juice
- 3 cups granulated sugar
- 1/4 teaspoon butter (optional, to reduce foaming)
Place apple cores and peels in a large pot with water and lemon juice. Bring to a boil, then reduce heat and simmer for 20-25 minutes until the cores are very soft. Strain the liquid through a fine-mesh sieve or cheesecloth, then return the strained juice to a clean pot. Add sugar and butter, if using. Bring the mixture to a rolling boil, stirring constantly, and cook until it reaches 220°F (104°C) on a candy thermometer, or until a small amount dropped on a cold plate wrinkles when pushed with your finger.
Pour the hot jelly into sterilized jars, leaving 1/4-inch headspace. Process in a water bath canner for 10 minutes for long-term storage, or refrigerate for immediate use.
Extra Tips: Testing for doneness is crucial – if the jelly hasn't reached the proper temperature, it won't set properly. Consider using a candy thermometer for accuracy. If the jelly becomes too firm after cooling, it can be reheated with a small amount of water. For clearer jelly, avoid pressing or squeezing the apple cores when straining, as this can make the final product cloudy.
Herb Stem Chimichurri
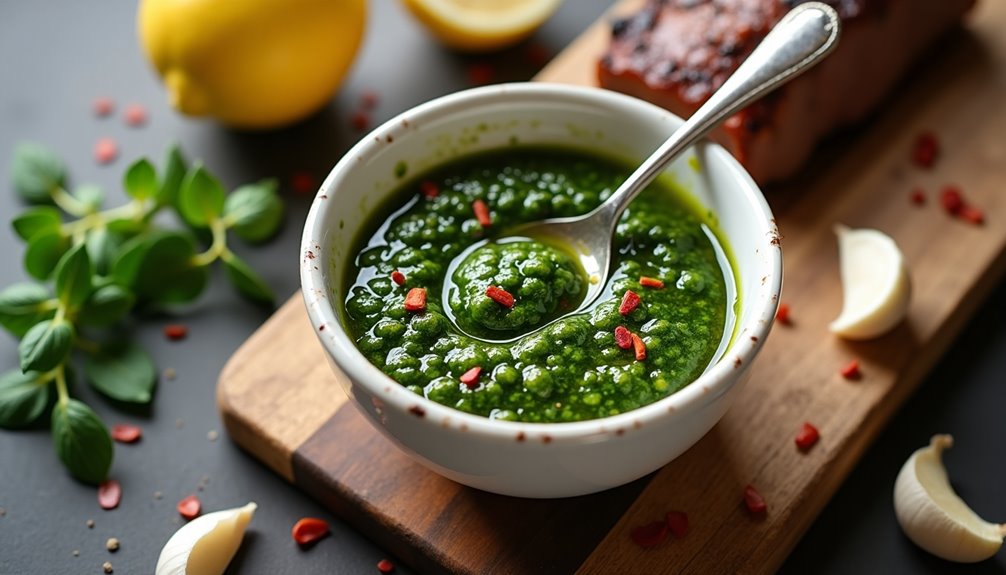
Herb stems often end up in the compost bin or trash, but these flavor-packed parts of herbs can be transformed into a vibrant and delicious chimichurri sauce. This recipe specifically targets the stems from parsley, cilantro, and other herbs that typically get discarded during cooking, turning what would be waste into a versatile condiment.
Traditional chimichurri, an Argentinian sauce, is made primarily with herb leaves, but this variation celebrates the stems, which contain just as much flavor as the leaves. The stems are finely chopped and combined with garlic, olive oil, vinegar, and red pepper flakes to create a bold, fresh sauce that pairs perfectly with grilled meats, roasted vegetables, or as a marinade.
- 1 cup mixed herb stems (parsley, cilantro, oregano)
- 4 garlic cloves
- 1/2 cup olive oil
- 2 tablespoons red wine vinegar
- 1 teaspoon red pepper flakes
- 1/2 teaspoon salt
- 1/4 teaspoon black pepper
- 1 tablespoon lemon juice
Finely chop the herb stems into tiny pieces, ensuring they're cut as small as possible to avoid any stringy texture in the final sauce. Mince the garlic cloves and combine them with the chopped stems in a bowl. Add the olive oil, red wine vinegar, red pepper flakes, salt, and black pepper, stirring well to combine all ingredients.
Let the mixture sit at room temperature for at least 30 minutes to allow the flavors to meld together. Just before serving, stir in the lemon juice to brighten the flavors. The sauce can be used immediately or stored in an airtight container in the refrigerator.
When selecting herb stems for this recipe, ensure they're fresh and firm, not wilted or discolored. The sauce can be made ahead and stored for up to 5 days in the refrigerator, though the olive oil may solidify when chilled – simply bring to room temperature before using. Adjust the amount of red pepper flakes and garlic to suit your taste preferences.
Banana Peel "Bacon"
Banana peel "bacon" has become an innovative way to reduce food waste while creating a surprisingly tasty meat alternative. When properly prepared, the peels transform into crispy, smoky strips that can complement various dishes, from sandwiches to salads.
While it may sound unusual, banana peels contain significant nutritional value, including fiber, potassium, and antioxidants. The key to successful banana peel bacon lies in selecting slightly underripe bananas and properly seasoning the peels to achieve that coveted umami flavor.
- 4 banana peels (from slightly underripe bananas)
- 2 tablespoons soy sauce
- 1 tablespoon olive oil
- 1 teaspoon maple syrup
- 1 teaspoon liquid smoke
- 1 teaspoon garlic powder
- 1 teaspoon smoked paprika
- 1/2 teaspoon black pepper
- Sea salt to taste
Wash the banana peels thoroughly and scrape off the white pith using a spoon. Cut each peel lengthwise into long strips approximately 2-3 inches wide. Place the strips in a shallow dish and combine all marinade ingredients in a bowl. Pour the marinade over the peels, ensuring each strip is well-coated. Let them marinate for at least 30 minutes or overnight for better flavor absorption.
Preheat your oven to 375°F (190°C) or prepare a large skillet over medium heat. For oven preparation, arrange the strips on a lined baking sheet and bake for 7-10 minutes on each side until crispy and slightly charred. If using a skillet, cook the strips for 2-3 minutes on each side until they achieve desired crispiness.
For best results, store leftover banana peel bacon in an airtight container in the refrigerator for up to 3 days. The texture may soften during storage, but you can quickly crisp them up in a skillet or under the broiler for a few seconds. Always ensure the bananas used are organic to avoid any pesticide residue, and adjust the seasoning quantities to match your preferred level of smokiness and saltiness.
Vegetable Stock From Scraps
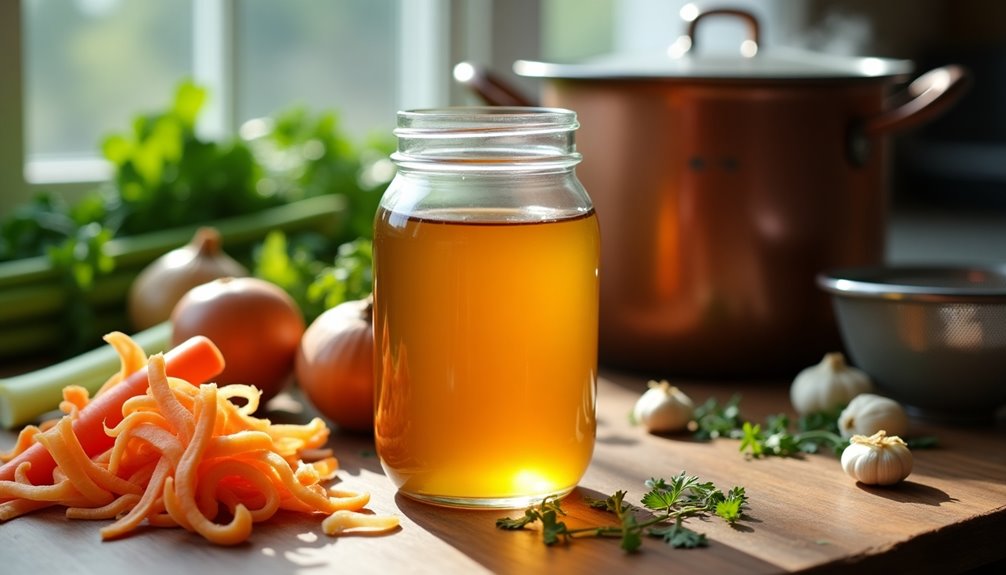
Making vegetable stock from kitchen scraps isn't only economical but also environmentally conscious, turning what would typically be waste into a flavorful cooking essential. By saving vegetable trimmings over time, you can create a rich and versatile stock that serves as a foundation for soups, sauces, and other dishes.
This zero-waste approach to stock making allows you to utilize parts of vegetables that would otherwise be discarded, such as onion skins, carrot tops, celery leaves, mushroom stems, and herb stems. The key is to collect and freeze these scraps until you have enough to make a full batch of stock, typically about 4-6 cups of vegetable pieces.
- Vegetable scraps (4-6 cups)
- Onion peels and ends
- Carrot peels and tops
- Celery leaves and ends
- Mushroom stems
- Garlic skins and ends
- Herb stems (parsley, thyme, rosemary)
- Leek tops
- 2 bay leaves
- 1 tablespoon black peppercorns
- 8-10 cups water
- 1 tablespoon salt
Place all collected vegetable scraps in a large stockpot and cover with cold water, ensuring there's enough water to submerge all ingredients completely. Add the bay leaves, peppercorns, and salt. Bring the mixture to a boil over high heat, then reduce to a gentle simmer. Let the stock simmer uncovered for 45-60 minutes, occasionally skimming any foam that rises to the surface.
Once the stock has developed a rich flavor, strain it through a fine-mesh sieve, removing all solid pieces. Let it cool before transferring to storage containers.
When collecting scraps for stock, avoid using bitter vegetables like cabbage or brussels sprouts, as they can overpower the flavor. Store scraps in a freezer bag until ready to use, and remember that darker colored vegetable scraps, like onion skins, will result in a darker colored stock. The finished stock can be refrigerated for up to a week or frozen for up to six months.
Aquafaba Meringue Cookies
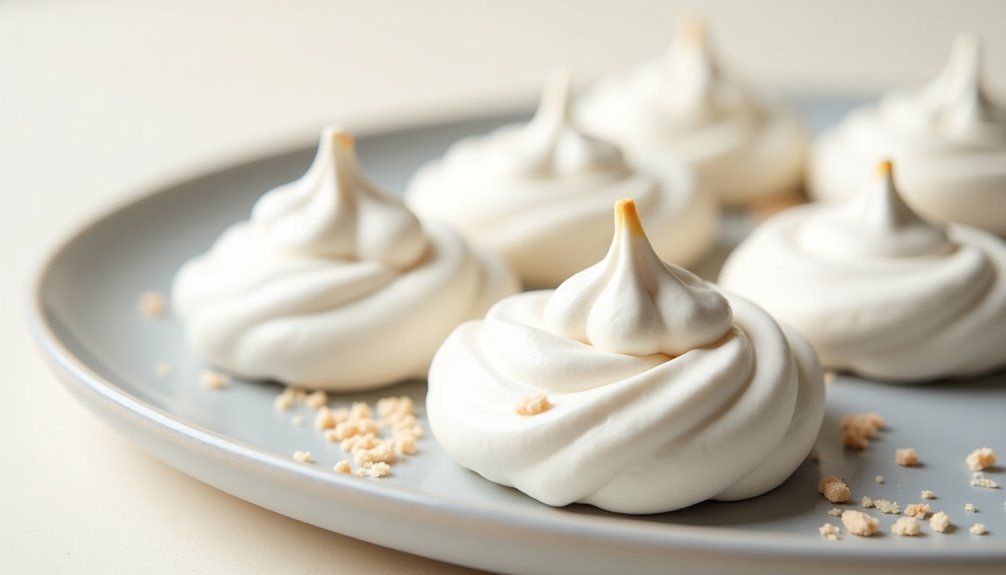
Aquafaba meringue cookies are a revolutionary vegan alternative to traditional egg white meringues. These light, airy, and crispy treats make use of the liquid from canned chickpeas, known as aquafaba, which whips up remarkably similar to egg whites and creates the same delicate texture that meringue lovers crave.
The magic of aquafaba lies in its protein content and molecular structure, which allows it to trap air bubbles and create a stable foam. When combined with sugar and baked at a low temperature, these proteins set into a crispy exterior while maintaining a slightly chewy center, making them perfect for both vegans and those with egg allergies.
- Liquid from 1 can of chickpeas (aquafaba) – approximately 3/4 cup
- 1 cup granulated sugar
- 1/4 teaspoon cream of tartar
- 1 teaspoon vanilla extract
- Pinch of salt
Drain the chickpeas and collect the aquafaba in a large, clean bowl. Using an electric mixer, beat the aquafaba and cream of tartar on high speed until soft peaks form, typically 5-7 minutes. Gradually add the sugar, about a tablespoon at a time, while continuing to beat. Once all sugar is incorporated, add vanilla extract and salt, then continue beating until stiff, glossy peaks form and the mixture feels smooth between your fingers with no sugar grains.
Preheat the oven to 250°F (120°C) and line two baking sheets with parchment paper. Pipe or spoon the meringue mixture onto the prepared sheets, leaving about 1 inch between each cookie. Place in the oven and bake for 1.5 to 2 hours, or until the meringues are dry to the touch and can be easily lifted from the parchment paper.
For best results, use room temperature aquafaba and ensure all equipment is completely free from any grease or oil, as this can prevent proper whipping. Store the finished cookies in an airtight container in a dry place, and consume within 3-4 days. Avoid making these on humid days as moisture can affect their texture and stability.