15 Easy Light Dinner Recipes
Many home cooks don't realize that light dinners can actually be more flavorful than their heavier counterparts, especially when you know the right ingredient combinations. You'll find that fresh herbs, citrus, and seasonal vegetables create layers of taste without weighing you down. From Mediterranean-inspired quinoa bowls to zesty Thai lettuce wraps, these 15 recipes will transform your weeknight routine. Let's explore how you can make these nutritious dishes work for your busy schedule while still impressing your family or guests.
Mediterranean Quinoa Salad Bowl
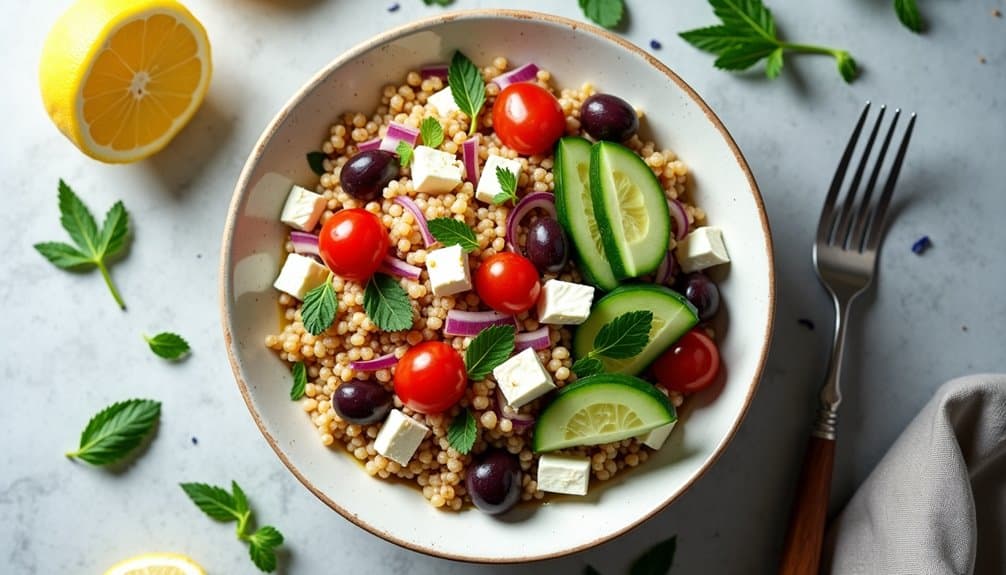
Mediterranean Quinoa Salad Bowl is a refreshing and nutritious meal that combines the protein-rich qualities of quinoa with classic Mediterranean ingredients. The dish features a vibrant mix of fresh vegetables, herbs, and a zesty lemon dressing that brings all the flavors together.
This light yet satisfying bowl can be served warm or cold, making it perfect for meal prep or easy weeknight dinners. The combination of wholesome ingredients provides a good balance of protein, fiber, and healthy fats, while staying true to the Mediterranean diet principles.
Ingredients:
- 1 cup quinoa
- 2 cups water
- 1 cucumber, diced
- 2 cups cherry tomatoes, halved
- 1 red onion, finely chopped
- 1 cup kalamata olives, pitted
- 1 cup crumbled feta cheese
- 1/4 cup fresh parsley, chopped
- 1/4 cup fresh mint, chopped
- 1/3 cup extra virgin olive oil
- 2 lemons, juiced
- 2 cloves garlic, minced
- 1 teaspoon dried oregano
- Salt and pepper to taste
Rinse quinoa thoroughly under cold water. In a medium saucepan, combine quinoa with water and bring to a boil. Reduce heat to low, cover, and simmer for 15-20 minutes until water is absorbed and quinoa is fluffy. Let cool for 10 minutes.
In a large bowl, combine the cooled quinoa with cucumber, tomatoes, red onion, olives, and herbs. In a separate small bowl, whisk together olive oil, lemon juice, garlic, oregano, salt, and pepper. Pour the dressing over the quinoa mixture and toss gently to combine. Top with crumbled feta cheese just before serving.
For best results, allow the salad to rest for at least 30 minutes before serving to let the flavors meld together. The dish can be stored in an airtight container in the refrigerator for up to 3 days, though it's best to add the feta cheese just before serving. For meal prep, keep the dressing separate and combine when ready to eat to maintain the optimal texture of the ingredients.
Grilled Lemon Herb Chicken Skewers

Grilled Lemon Herb Chicken Skewers bring Mediterranean flavors to your dinner table with minimal effort and maximum taste. The combination of bright citrus, aromatic herbs, and tender chicken creates a light yet satisfying meal perfect for warm evenings or any time you want a healthier dinner option.
These skewers can be prepared ahead of time, making them ideal for busy weeknights or casual entertaining. The marinade infuses the chicken with flavor while keeping it moist during grilling, and the charred edges add a delicious smoky element to each bite.
Ingredients:
- 2 pounds boneless, skinless chicken breasts, cut into 1-inch cubes
- 3 lemons (2 for juice, 1 for slicing)
- 4 tablespoons olive oil
- 4 cloves garlic, minced
- 2 tablespoons fresh oregano, chopped
- 2 tablespoons fresh thyme leaves
- 1 tablespoon fresh rosemary, chopped
- 1 teaspoon salt
- 1/2 teaspoon black pepper
- 8-10 wooden skewers
Combine the lemon juice, olive oil, garlic, herbs, salt, and pepper in a large bowl. Add the chicken cubes and toss to coat evenly. Cover and refrigerate for 2-4 hours, allowing the flavors to penetrate the meat. While the chicken marinates, soak wooden skewers in water for at least 30 minutes to prevent burning.
Thread the marinated chicken pieces onto the skewers, leaving small spaces between each piece to ensure even cooking. Preheat your grill to medium-high heat. Grill the skewers for 12-15 minutes, turning every 3-4 minutes, until the chicken is cooked through and shows nice grill marks on all sides. For added flavor, grill lemon slices alongside the skewers and serve them as a garnish.
For best results, bring the chicken to room temperature 20 minutes before grilling, and avoid overcrowding the skewers. If cooking indoors, these can be prepared under the broiler or on a grill pan. The leftover chicken can be stored in an airtight container for up to 3 days and makes excellent additions to salads or grain bowls.
Zucchini Noodle Stir-Fry
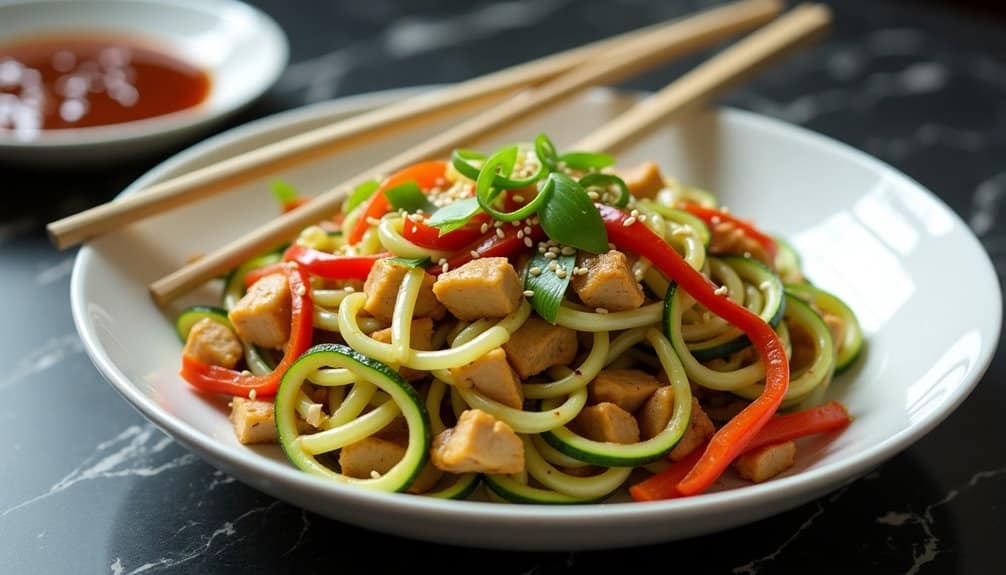
Zucchini noodles, also known as "zoodles," have become a popular low-carb alternative to traditional pasta, offering a light and nutritious base for various dishes. This quick and healthy stir-fry combines the freshness of spiralized zucchini with colorful vegetables and lean protein for a satisfying weeknight dinner.
This Asian-inspired dish comes together in under 30 minutes and requires minimal preparation, making it perfect for busy evenings when you want something nutritious without spending hours in the kitchen. The zucchini noodles maintain a slight crunch while absorbing the savory sauce, creating a delightful texture contrast with the other ingredients.
Ingredients:
- 4 medium zucchini, spiralized
- 1 lb chicken breast, cut into bite-sized pieces
- 2 bell peppers, sliced
- 2 carrots, julienned
- 3 cloves garlic, minced
- 1 tablespoon ginger, grated
- 3 tablespoons soy sauce
- 1 tablespoon sesame oil
- 2 tablespoons vegetable oil
- 1 tablespoon cornstarch
- 1/4 cup water
- Salt and pepper to taste
- Green onions for garnish
- Sesame seeds for garnish
Heat vegetable oil in a large wok or skillet over medium-high heat. Season chicken with salt and pepper, then cook until golden brown and cooked through, about 5-7 minutes. Remove chicken and set aside. In the same pan, add sesame oil, garlic, and ginger, stir-frying for 30 seconds until fragrant. Add bell peppers and carrots, cooking for 3-4 minutes until slightly tender.
Mix cornstarch with water and soy sauce in a small bowl. Return chicken to the pan, add the sauce mixture, and stir to combine. Add zucchini noodles last, cooking for just 2-3 minutes until they're slightly softened but still retain some crunch. Garnish with green onions and sesame seeds before serving.
Extra Tips: To prevent watery zucchini noodles, avoid overcooking them and consider patting them dry with paper towels after spiralizing. If you're meal prepping, keep the zucchini noodles separate from the sauce and other ingredients until ready to serve, as they can release moisture over time. For variation, try different proteins like shrimp or tofu, or add other vegetables like mushrooms or snap peas.
Thai-Style Shrimp Lettuce Wraps
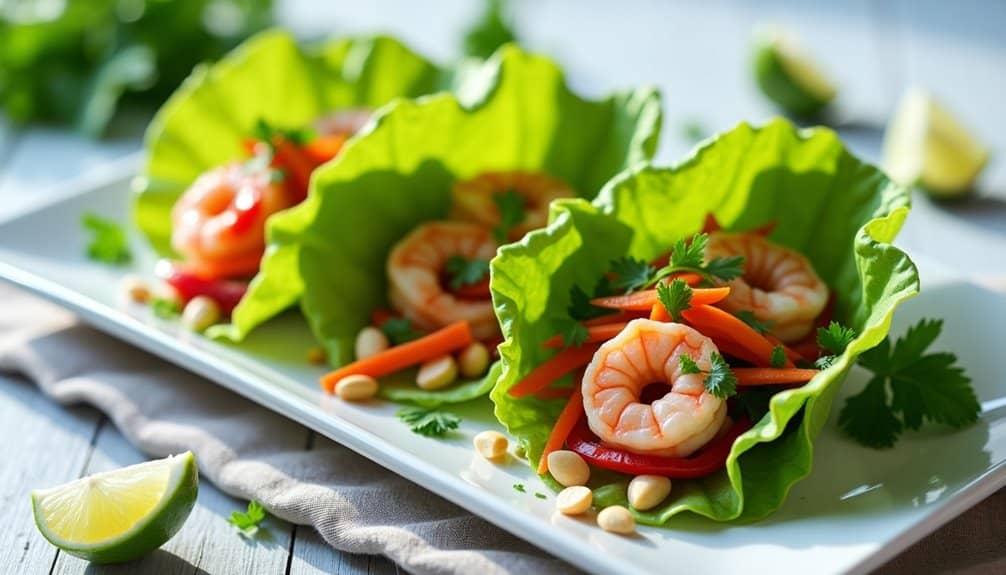
Thai-Style Shrimp Lettuce Wraps deliver a burst of authentic Southeast Asian flavors while keeping the meal light and refreshing. The combination of succulent shrimp, aromatic herbs, and crunchy vegetables wrapped in crisp lettuce leaves creates a perfect balance of textures and tastes.
This dish is an excellent choice for warm evenings when you want something substantial yet not heavy. The preparation is straightforward, and most components can be made ahead of time, making it an ideal choice for both casual family dinners and entertaining guests.
Ingredients:
- 1 pound medium shrimp, peeled and deveined
- 2 tablespoons vegetable oil
- 3 cloves garlic, minced
- 1 tablespoon ginger, grated
- 2 tablespoons fish sauce
- 2 tablespoons lime juice
- 1 tablespoon brown sugar
- 1 red bell pepper, finely diced
- 2 carrots, julienned
- 4 green onions, thinly sliced
- 1/2 cup fresh mint leaves
- 1/2 cup fresh cilantro leaves
- 1/4 cup roasted peanuts, chopped
- 1 head Boston or butter lettuce, leaves separated
- 2 Thai chilies, finely chopped (optional)
Heat oil in a large skillet over medium-high heat. Add garlic and ginger, cooking until fragrant, about 30 seconds. Add shrimp and cook until pink and just cooked through, approximately 3-4 minutes. In a small bowl, whisk together fish sauce, lime juice, and brown sugar, then add to the shrimp. Remove from heat and let cool slightly.
In a large bowl, combine the cooked shrimp mixture with bell pepper, carrots, green onions, mint, and cilantro. Gently toss to combine. To serve, spoon the shrimp mixture into individual lettuce leaves and top with chopped peanuts and Thai chilies if desired.
For best results, wash and dry the lettuce leaves thoroughly in advance and store them wrapped in paper towels in the refrigerator. This prevents excess moisture and ensures crisp wraps. The filling can be served warm or at room temperature, but avoid assembling the wraps too far in advance as the lettuce may become wilted.
Sheet Pan Salmon With Roasted Vegetables
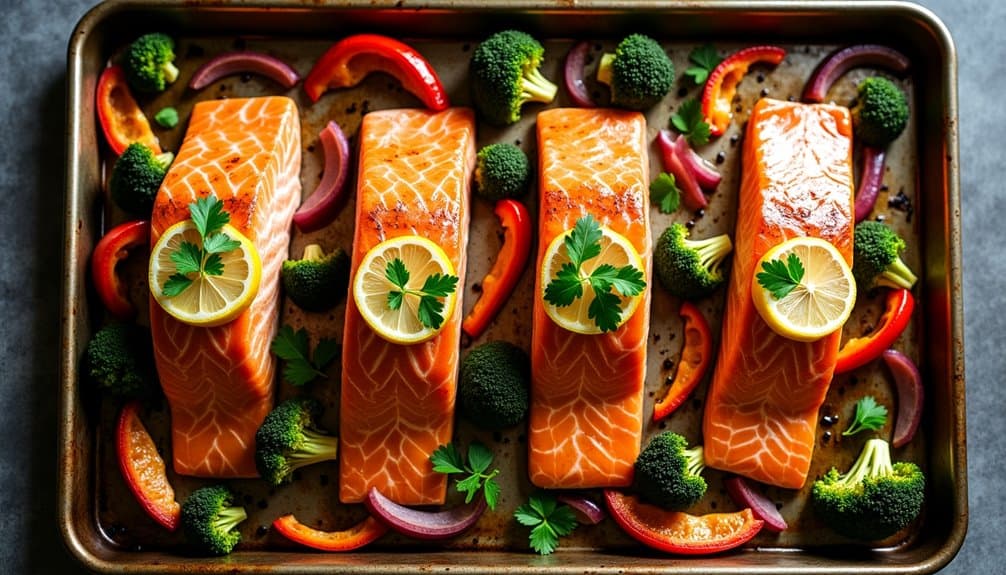
Sheet pan dinners are the ultimate solution for busy weeknight meals, combining easy preparation with minimal cleanup. This salmon and roasted vegetable combination delivers a perfect balance of protein and nutrients while requiring little hands-on cooking time.
This recipe serves four people and features perfectly cooked salmon fillets alongside colorful, seasoned vegetables that cook together on a single sheet pan. The natural oils from the salmon help flavor the vegetables, while the high-heat roasting creates a delicious caramelization on both the fish and vegetables.
Ingredients:
- 4 salmon fillets (6 oz each)
- 2 cups broccoli florets
- 2 cups Brussels sprouts, halved
- 1 red bell pepper, sliced
- 1 medium red onion, cut into wedges
- 3 tablespoons olive oil
- 4 cloves garlic, minced
- 1 lemon
- 1 teaspoon dried thyme
- 1 teaspoon paprika
- Salt and black pepper to taste
- Fresh parsley for garnish
Preheat the oven to 400°F (200°C). Toss the vegetables with 2 tablespoons olive oil, half the minced garlic, salt, and pepper on a large sheet pan. Spread them in a single layer and roast for 10 minutes. Meanwhile, pat the salmon fillets dry and rub with remaining olive oil, garlic, thyme, and paprika. After the vegetables have roasted, push them to the sides of the pan and place the salmon in the center. Add lemon slices on top of the salmon.
Return the pan to the oven and cook for an additional 12-15 minutes, until the salmon is cooked through and flakes easily with a fork, and the vegetables are tender and lightly charred. The internal temperature of the salmon should reach 145°F (63°C).
For best results, ensure your sheet pan is large enough to avoid overcrowding, which can lead to steaming rather than roasting. If making this dish ahead of time, cut the vegetables in advance but wait to season and cook the salmon until just before serving to maintain its moisture and texture. The cooking time may vary slightly depending on the thickness of your salmon fillets and your preferred level of doneness.
Greek Chickpea and Cucumber Salad
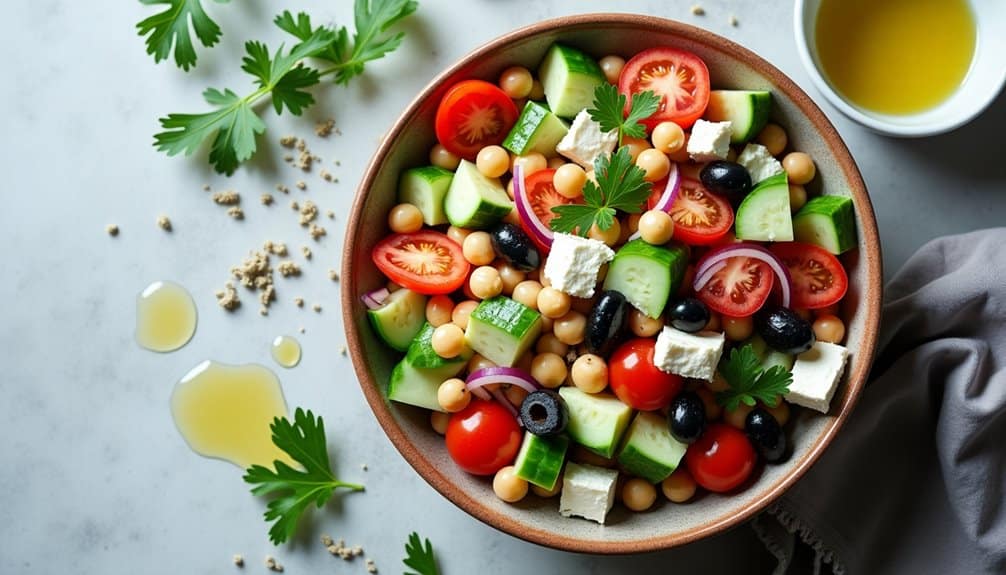
A refreshing and protein-rich Greek chickpea and cucumber salad combines the best of Mediterranean flavors with hearty legumes. This light yet satisfying dish works perfectly as a main course for warm summer evenings or as a substantial side dish year-round.
This no-cook recipe takes just minutes to prepare and can be made ahead of time, allowing the flavors to meld together. The combination of crisp vegetables, creamy chickpeas, and tangy feta creates a balanced texture profile while delivering essential nutrients and staying light on calories.
Ingredients:
- 2 (15 oz) cans chickpeas, drained and rinsed
- 2 medium cucumbers, diced
- 1 red onion, thinly sliced
- 2 cups cherry tomatoes, halved
- 1 cup crumbled feta cheese
- 1/2 cup Kalamata olives, pitted
- 1/4 cup extra virgin olive oil
- 2 tablespoons red wine vinegar
- 1 lemon, juiced
- 2 cloves garlic, minced
- 1 tablespoon dried oregano
- Salt and black pepper to taste
- 1/4 cup fresh parsley, chopped
Drain and rinse the chickpeas thoroughly, then add them to a large mixing bowl. Dice the cucumbers, slice the onions, and halve the tomatoes, adding them to the bowl with the chickpeas. In a separate small bowl, whisk together the olive oil, red wine vinegar, lemon juice, minced garlic, oregano, salt, and pepper until well combined.
Pour the dressing over the vegetable mixture and toss gently to coat evenly. Add the crumbled feta cheese, Kalamata olives, and fresh parsley. Toss once more carefully to combine all ingredients without breaking down the feta too much. Let the salad rest for at least 15 minutes before serving to allow flavors to develop.
For best results, slice the red onion very thinly and soak in cold water for 10 minutes before adding to the salad to reduce its sharp bite. The salad can be stored in an airtight container in the refrigerator for up to 3 days, though the cucumbers may release excess water over time. If making ahead, consider adding the feta cheese just before serving to maintain its texture.
Turkey Taco Stuffed Bell Peppers
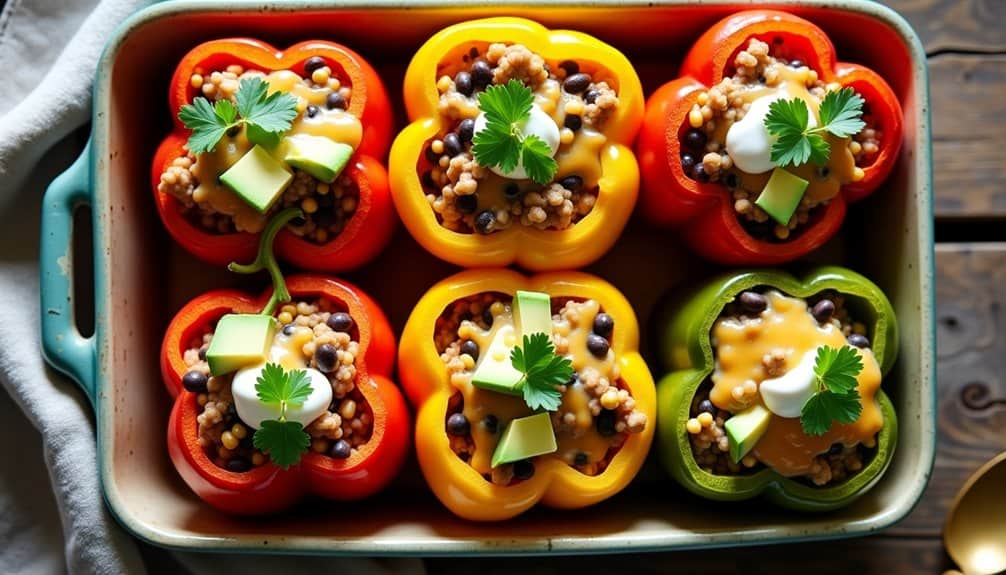
Turkey Taco Stuffed Bell Peppers are a healthier twist on traditional Mexican tacos, combining lean ground turkey with classic taco seasonings and fresh vegetables. This protein-packed dish delivers all the flavors of your favorite tacos while cutting down on carbohydrates by using bell peppers as the vessel instead of tortillas.
The versatility of this recipe allows for easy customization based on dietary preferences and available ingredients. The bell peppers provide a natural, colorful container that becomes tender when baked, while still maintaining enough structure to hold the flavorful filling. This dish works perfectly for meal prep and can be made ahead of time.
- 6 large bell peppers (any color)
- 1 pound lean ground turkey
- 1 cup cooked rice
- 1 can (15 oz) black beans, drained and rinsed
- 1 cup corn kernels
- 1 medium onion, diced
- 2 cloves garlic, minced
- 1 packet taco seasoning
- 1 cup shredded Mexican cheese blend
- 1 can (14 oz) diced tomatoes
- Salt and pepper to taste
- 2 tablespoons olive oil
- Optional toppings: sour cream, avocado, cilantro
Preheat the oven to 375°F (190°C). Cut the bell peppers in half lengthwise and remove the seeds and membranes. Place them in a baking dish, cut side up. In a large skillet, heat olive oil over medium heat and cook the diced onions until translucent. Add ground turkey and garlic, breaking up the meat while it cooks. Once the turkey is nearly cooked through, add the taco seasoning, diced tomatoes, black beans, and corn. Simmer for 5 minutes, then stir in the cooked rice.
Fill each pepper half with the turkey mixture and top with shredded cheese. Cover the baking dish with foil and bake for 30-35 minutes. Remove the foil and bake for an additional 5-10 minutes until the cheese is golden and bubbly, and the peppers are tender.
For best results, choose bell peppers that can stand upright on their own and are similar in size for even cooking. The peppers can be pre-baked for 10 minutes before stuffing if you prefer them softer, and any leftover filling can be frozen for future use or served over rice as a separate meal. To prevent the bottom from becoming too watery, consider placing a layer of paper towels under the peppers in the baking dish.
Asian-Inspired Sesame Soba Noodles
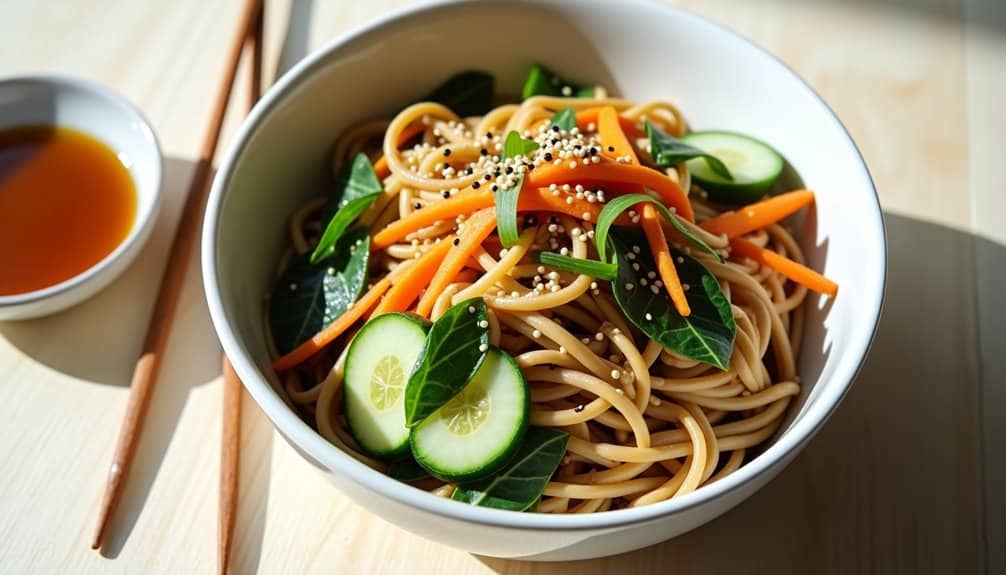
Asian-Inspired Sesame Soba Noodles perfectly captures the balance between simplicity and flavor that defines East Asian cuisine. This light yet satisfying dish combines the nutty warmth of buckwheat noodles with a savory sesame sauce, creating an ideal option for a quick weeknight dinner.
The versatility of this recipe allows for endless customization with various vegetables and proteins while maintaining its core essence. The dish can be served either warm or chilled, making it suitable for any season, and the leftovers often taste even better the next day as the flavors continue to develop.
- 8 oz buckwheat soba noodles
- 3 tablespoons sesame oil
- 2 tablespoons soy sauce
- 1 tablespoon rice vinegar
- 1 tablespoon honey
- 2 cloves garlic, minced
- 1 tablespoon ginger, grated
- 2 green onions, sliced
- 1 tablespoon toasted sesame seeds
- 1 cup shredded carrots
- 1 cucumber, julienned
- 2 cups baby spinach
Cook soba noodles according to package instructions until al dente, typically 4-5 minutes. While the noodles cook, whisk together sesame oil, soy sauce, rice vinegar, honey, garlic, and ginger in a large bowl. Drain the noodles and rinse under cold water to stop the cooking process and prevent them from becoming sticky.
Toss the cooled noodles with the prepared sauce until well coated. Add the vegetables and mix gently to combine. Garnish with green onions and toasted sesame seeds before serving.
For best results, allow the dish to rest for 10-15 minutes before serving to let the flavors meld. The noodles can become sticky if left too long, so if making ahead, reserve some of the sauce to refresh the dish before serving. Store any leftovers in an airtight container in the refrigerator for up to 3 days.
Spinach and Feta Frittata

Spinach and Feta Frittata is a versatile Mediterranean-inspired dish that combines the richness of eggs with the earthiness of fresh spinach and the tangy saltiness of feta cheese. This protein-packed meal works perfectly for breakfast, lunch, or dinner, and can be served hot or at room temperature.
This light yet satisfying dish takes only 20 minutes to prepare and cook, making it an ideal choice for busy weeknights. The frittata can be customized with various vegetables and cheeses, but the classic combination of spinach and feta creates a balanced flavor profile that has stood the test of time.
- 8 large eggs
- 1/4 cup milk
- 2 cups fresh spinach, roughly chopped
- 1 cup crumbled feta cheese
- 1 small onion, diced
- 2 cloves garlic, minced
- 2 tablespoons olive oil
- 1/2 teaspoon salt
- 1/4 teaspoon black pepper
- 1/4 teaspoon dried oregano
Preheat the oven to 375°F (190°C). In a large bowl, whisk together eggs, milk, salt, pepper, and oregano until well combined. Heat olive oil in a 10-inch oven-safe skillet over medium heat. Sauté onions until translucent, about 3-4 minutes, then add garlic and cook for another minute. Add spinach and cook until wilted, approximately 2 minutes.
Pour the egg mixture into the skillet over the vegetables, then sprinkle crumbled feta cheese evenly across the top. Cook on the stovetop for 3-4 minutes until the edges start to set, then transfer the skillet to the preheated oven. Bake for 10-12 minutes, or until the eggs are fully set and the top is lightly golden.
For best results, use a well-seasoned cast-iron skillet or non-stick oven-safe pan to prevent sticking. The frittata can be stored in an airtight container in the refrigerator for up to 3 days and reheated gently in the microwave or served at room temperature. For a crispier top, switch the oven to broil for the final minute of cooking, watching carefully to prevent burning.
Cilantro Lime Cauliflower Rice Bowl
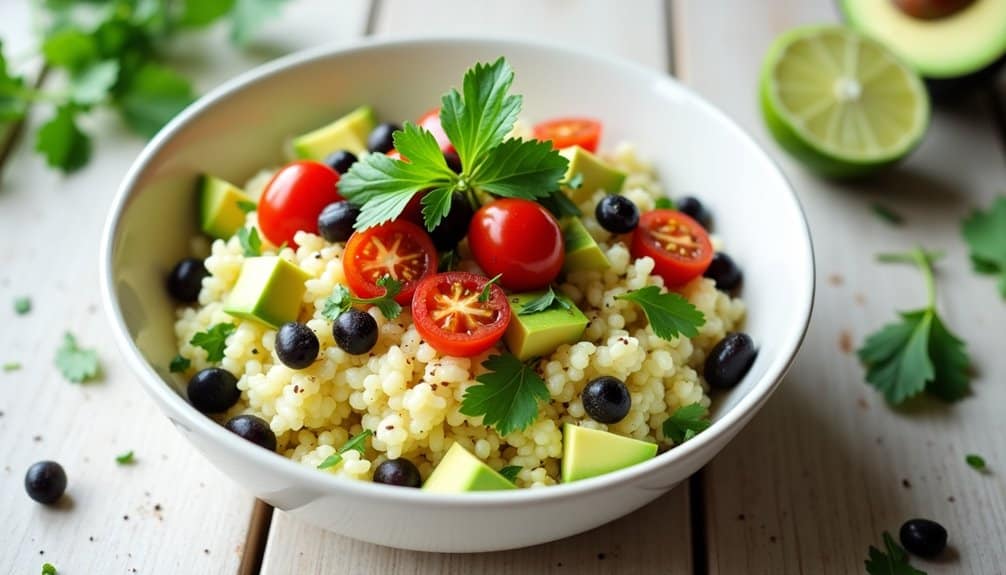
A vibrant and healthy alternative to traditional rice bowls, this cilantro lime cauliflower rice bowl delivers fresh flavors while keeping carbs low. The combination of zesty lime, fresh cilantro, and perfectly seasoned cauliflower creates a satisfying base for a light yet filling dinner.
This versatile dish can be customized with various toppings and protein options, making it perfect for both vegetarians and meat-eaters. The cauliflower rice provides a nutrient-rich foundation that absorbs the bright citrus and herb flavors while maintaining a pleasant, rice-like texture.
Ingredients:
- 1 large head cauliflower
- 2 tablespoons olive oil
- 3 cloves garlic, minced
- 1 lime, juiced and zested
- 1/2 cup fresh cilantro, chopped
- 1/2 teaspoon sea salt
- 1/4 teaspoon black pepper
- 1/4 teaspoon ground cumin
- 1 small onion, diced
- Optional toppings: black beans, corn, avocado, cherry tomatoes, grilled chicken
Cut the cauliflower into florets and pulse in a food processor until it reaches a rice-like consistency. Heat olive oil in a large skillet over medium heat, add diced onion and garlic, and sauté until translucent. Add the cauliflower rice to the skillet and cook for 5-7 minutes, stirring occasionally. Season with salt, pepper, and cumin. Remove from heat and stir in lime juice, zest, and fresh cilantro.
For optimal texture, avoid overcooking the cauliflower rice as it can become mushy. The cauliflower should be tender but still maintain a slight crunch. Store any leftovers in an airtight container in the refrigerator for up to 3 days, and reheat gently to maintain the best texture.
Teriyaki Tofu With Snap Peas
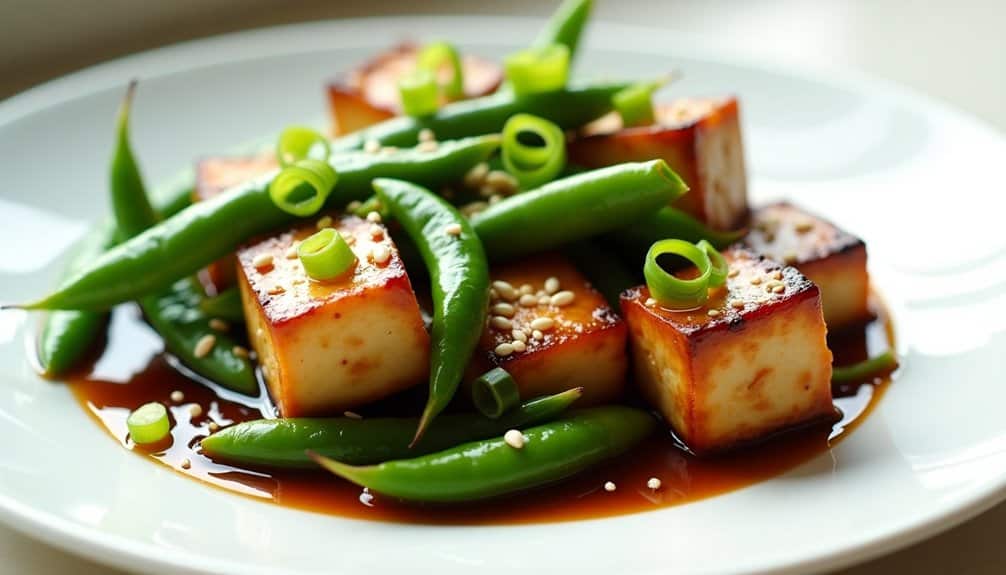
A quick and nutritious vegetarian dish that combines the protein-rich goodness of tofu with the crisp freshness of snap peas. The teriyaki sauce adds a perfect balance of sweet and savory flavors, making this dish both satisfying and light.
This recipe takes just 20 minutes to prepare and cook, making it ideal for busy weeknight dinners. The key to success lies in properly pressing the tofu to remove excess moisture and achieving the right level of caramelization when cooking.
- 14 oz firm tofu, pressed and cubed
- 2 cups fresh snap peas
- 3/4 cup teriyaki sauce
- 2 tablespoons vegetable oil
- 2 cloves garlic, minced
- 1 thumb-sized piece ginger, grated
- 2 green onions, sliced
- 1 tablespoon sesame seeds
- Salt and pepper to taste
Press the tofu between paper towels for 15-20 minutes to remove excess moisture. Cut into 1-inch cubes and season with salt and pepper. Heat oil in a large skillet over medium-high heat. Add tofu cubes and cook until golden brown on all sides, about 8-10 minutes. Remove tofu and set aside.
In the same pan, add garlic and ginger, sautéing for 30 seconds until fragrant. Add snap peas and stir-fry for 2-3 minutes until bright green but still crisp. Return tofu to the pan, pour in teriyaki sauce, and cook for an additional 2-3 minutes until the sauce thickens and coats everything evenly. Garnish with sliced green onions and sesame seeds before serving.
For best results, use homemade teriyaki sauce or a high-quality store-bought version. Avoid overcooking the snap peas to maintain their crunch, and make sure the tofu is well-pressed – this crucial step ensures it will properly absorb the flavors and achieve a better texture when cooked.
Blackened Fish Tacos With Slaw
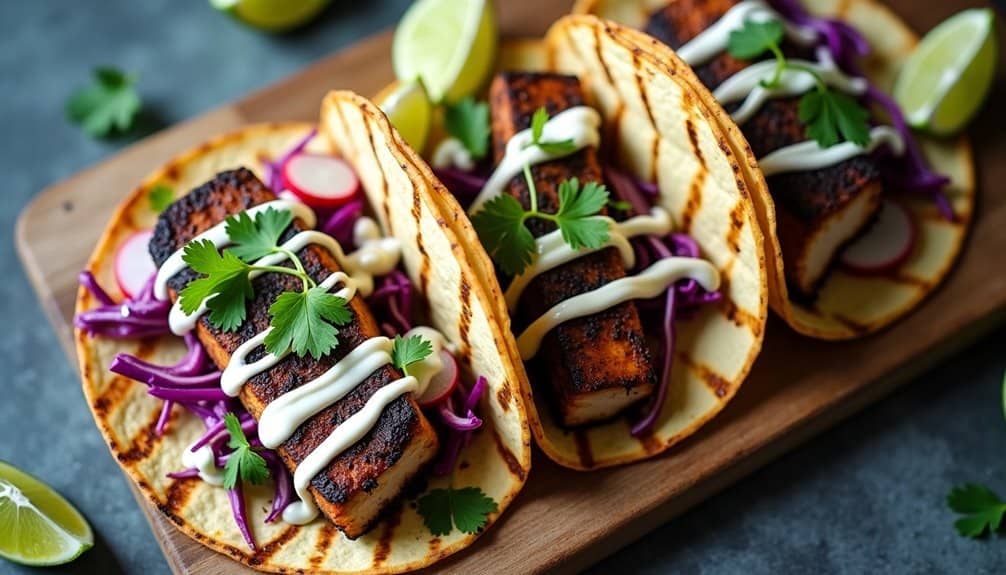
Blackened fish tacos combine the smoky, spicy flavors of Cajun-style seasoning with the fresh, crisp texture of homemade slaw, all wrapped in warm tortillas. This Mexican-fusion dish delivers a perfect balance of heat and coolness, making it an ideal choice for a light yet satisfying dinner.
The key to excellent blackened fish tacos lies in properly seasoning the fish and achieving the right level of char without overcooking the protein. The accompanying slaw adds a crucial element of crunch and helps cut through the spiciness of the blackened seasoning, while also providing a refreshing contrast in temperature.
Ingredients:
- 1 pound firm white fish (cod, halibut, or mahi-mahi)
- 2 tablespoons blackening seasoning
- 8-10 corn tortillas
- 2 tablespoons olive oil
- 4 cups shredded cabbage
- 1 cup shredded carrots
- 1/4 cup mayonnaise
- 2 tablespoons lime juice
- 1 tablespoon honey
- 1/2 teaspoon salt
- 1/4 teaspoon black pepper
- Fresh cilantro for garnish
- Lime wedges for serving
Begin by preparing the slaw: mix shredded cabbage and carrots in a large bowl. Whisk together mayonnaise, lime juice, honey, salt, and pepper in a separate bowl. Pour the dressing over the vegetables and toss well. Refrigerate while preparing the fish.
Pat the fish dry with paper towels and coat evenly with blackening seasoning. Heat olive oil in a heavy-bottomed skillet over medium-high heat until almost smoking. Cook the fish for 3-4 minutes per side until blackened and cooked through.
Warm the tortillas in a dry skillet or directly over a gas flame until slightly charred. Break the cooked fish into large chunks and divide among the tortillas. Top each taco with a generous portion of slaw, fresh cilantro, and a squeeze of lime juice.
For best results, ensure your pan is very hot before adding the fish, as this creates the characteristic blackened crust. Avoid moving the fish too much while cooking to prevent breaking. If serving a crowd, keep the tortillas warm by wrapping them in foil and placing them in a low-temperature oven until ready to serve. The slaw can be made up to 4 hours in advance for better flavor development.
Rainbow Buddha Bowl With Tahini Dressing

A Rainbow Buddha Bowl is a vibrant, nutrient-rich meal that combines colorful vegetables, grains, and protein-packed ingredients, all unified by a creamy tahini dressing. This versatile dish can be customized based on seasonal produce and personal preferences, making it perfect for using up various vegetables in your refrigerator.
The key to a successful Buddha Bowl lies in the balance of textures and flavors, from crunchy raw vegetables to tender roasted ones, complemented by the nutty warmth of tahini dressing. This light yet satisfying meal is ideal for health-conscious diners and those looking for a plant-based dinner option.
Ingredients:
- 2 cups cooked quinoa
- 2 cups mixed salad greens
- 1 medium sweet potato, cubed
- 1 cup chickpeas, drained and rinsed
- 1 cup purple cabbage, shredded
- 1 carrot, julienned
- 1 avocado, sliced
- 1 cup cherry tomatoes, halved
- 1/4 cup tahini
- 2 tablespoons lemon juice
- 1 clove garlic, minced
- 3-4 tablespoons warm water
- Salt and pepper to taste
- 2 tablespoons olive oil
- 1 teaspoon cumin
- 1/2 teaspoon paprika
Begin by preheating the oven to 400°F (200°C). Toss the cubed sweet potato with olive oil, cumin, and paprika, then roast for 20-25 minutes until tender. Meanwhile, prepare the tahini dressing by whisking together tahini, lemon juice, minced garlic, warm water, salt, and pepper until smooth and creamy.
Assemble the bowls by creating a base of quinoa and mixed greens. Arrange the roasted sweet potato, chickpeas, purple cabbage, julienned carrots, avocado slices, and cherry tomatoes in separate sections around the bowl. Drizzle generously with the tahini dressing just before serving.
For best results, prep the vegetables and cook the quinoa in advance. The tahini dressing can be made ahead and stored in the refrigerator for up to five days, though you may need to thin it with additional warm water before serving. If packing for lunch, keep the dressing separate and add it just before eating to maintain the crispness of the vegetables.
Garlic Shrimp and Asparagus Pasta

Garlic shrimp and asparagus pasta is a perfect light dinner option that combines lean protein with fresh vegetables and complex carbohydrates. The dish takes advantage of quick-cooking shrimp and tender asparagus, making it an ideal choice for busy weeknights when you want something nutritious but don't want to spend hours in the kitchen.
The combination of garlic, lemon, and white wine creates a delicate sauce that coats the pasta without feeling heavy. This Mediterranean-inspired dish is both elegant and simple, allowing the natural flavors of the ingredients to shine through while keeping the calorie count reasonable.
Ingredients:
- 8 oz whole wheat pasta
- 1 lb large shrimp, peeled and deveined
- 1 bunch asparagus, trimmed and cut into 2-inch pieces
- 6 cloves garlic, minced
- 3 tablespoons olive oil
- 1/2 cup dry white wine
- 1 lemon, juiced and zested
- 1/2 teaspoon red pepper flakes
- Salt and black pepper to taste
- 1/4 cup fresh parsley, chopped
- 1/4 cup grated Parmesan cheese
Cook pasta according to package directions in salted water. While the pasta cooks, heat olive oil in a large skillet over medium heat. Add garlic and red pepper flakes, cooking until fragrant, about 1 minute. Add shrimp and cook until they begin to turn pink, then add asparagus and white wine. Continue cooking until the asparagus is tender-crisp and the shrimp are fully cooked, about 3-4 minutes.
Drain the pasta, reserving 1/2 cup of pasta water. Add the pasta to the skillet with the shrimp and asparagus, tossing to combine. Add lemon juice, zest, and Parmesan cheese. If the mixture seems dry, add some reserved pasta water. Season with salt and pepper, and garnish with fresh parsley before serving.
For best results, avoid overcooking the shrimp and asparagus – both should remain tender but not mushy. The shrimp should be pink and slightly curled, while the asparagus should maintain a bright green color and slight crunch. The dish can be made ahead and reheated, though it's best served immediately to maintain the optimal texture of both the seafood and vegetables.
Vietnamese Rice Paper Rolls
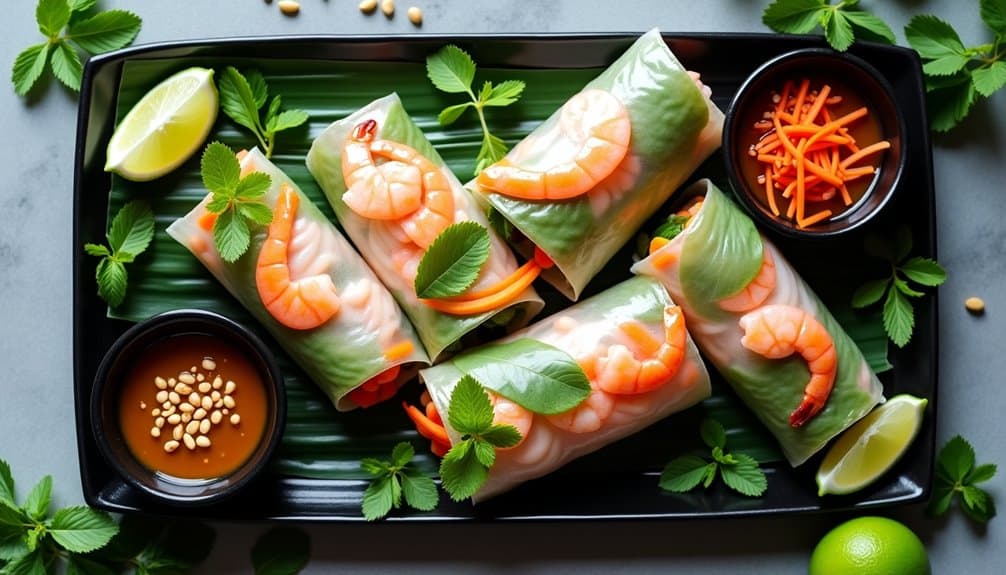
Traditional Vietnamese rice paper rolls typically feature a combination of shrimp, pork, or tofu, along with rice vermicelli noodles, fresh herbs, and vegetables. The rolls are served with a rich hoisin-peanut dipping sauce or nước chấm, a classic Vietnamese dipping sauce made with fish sauce, lime juice, and chili.
Ingredients:
- 12 rice paper wrappers
- 200g rice vermicelli noodles
- 12 large cooked shrimp, halved lengthwise
- 2 carrots, julienned
- 1 cucumber, julienned
- 2 cups bean sprouts
- 1 bunch fresh mint leaves
- 1 bunch fresh cilantro
- 1 bunch Thai basil
- 1 head lettuce, separated into leaves
- 1/2 cup roasted peanuts, crushed
- Warm water for dipping rice paper
Prepare the rice vermicelli according to package instructions, then drain and let cool. Fill a large bowl with warm water. Dip one rice paper wrapper into the water for 2-3 seconds until it starts to soften, then lay it flat on a clean, damp kitchen towel. Place a few pieces of lettuce in the lower third of the rice paper, followed by a small portion of noodles, vegetables, herbs, and two shrimp halves. Fold the bottom edge over the filling, then fold in the sides and roll tightly to the top, similar to wrapping a burrito.
For the best rice paper rolls, avoid overfilling and ensure all ingredients are well-drained to prevent the wrapper from becoming too wet and tearing. Keep the prepared rolls separated and covered with a damp cloth until serving. They can be made a few hours in advance but are best enjoyed fresh, as the rice paper can become tough when refrigerated.