Halloween Monster Burgers Recipe
When Halloween approaches and creativity calls, culinary adventure beckons. You'll transform ordinary burger night into a spine-tingling feast of monster-themed deliciousness. These playful burgers aren't just a meal—they're an interactive experience that'll spark imagination and appetite. By using simple ingredients and clever decorating techniques, you'll craft edible creatures that are as fun to make as they are to eat. Curious about how to turn ground beef into ghoulish masterpieces?
Recipe Highlights
- Use high-quality 80/20 ground beef and form patties with a small dimple to create juicy, evenly-cooked hamburger bases for monster designs.
- Create monster faces using creative toppings like olive slice "eyes", cheese slice "mouths", and strategically placed condiments to craft unique expressions.
- Grill beef patties to 160°F internal temperature, ensuring food safety while maintaining burger flavor and providing a warm surface for topping placement.
- Encourage family participation by allowing kids to design their own monster burger faces, transforming mealtime into a playful Halloween-themed experience.
- Select Halloween-themed plates and platter arrangements to enhance the monster burger presentation, making the dining experience visually engaging and festive.
History
Although Halloween-themed food has been popular for decades, Monster Burgers represent a playful modern twist on classic burger presentation.
You'll find these creative culinary designs emerged from home cooks' desire to make mealtime more entertaining for children. Food stylists and creative parents began experimenting with simple ingredient transformations in the late 1990s and early 2000s, using cheese, olives, and condiments to craft expressive burger faces.
The trend quickly spread through cooking blogs, social media platforms, and family recipe websites.
You can trace Monster Burgers' popularity to:
- Pinterest food styling trends
- Growing interest in interactive meal presentations
- Increased social media sharing of creative food designs
These playful burgers became a fun way to engage kids during holiday meals, turning ordinary dinnertime into a memorable experience.
Recipe
Halloween Monster Burgers transform an ordinary meal into a festive celebration of spooky creativity. These playful burgers combine classic hamburger ingredients with imaginative decoration, turning dinner into an interactive and entertaining experience for all ages.
Perfect for Halloween parties or family dinners, these Monster Burgers allow cooks to unleash their artistic side by crafting expressive monster faces using simple ingredients like cheese, olives, and condiments. Each burger becomes a unique edible masterpiece that delights both children and adults.
Ingredients:
- 1 1/2 pounds ground beef (80/20 lean)
- 6 hamburger buns
- 6 slices cheese
- 1 can black olives
- Mayonnaise
- Salt and pepper
- Optional: additional condiments
Preheat grill or skillet to medium-high heat. Form ground beef into six equal patties, each about 1/3 pound, and season generously with salt and pepper. Create a slight indentation in the center of each patty to prevent bulging during cooking.
Cook burgers for 4-5 minutes per side, depending on desired doneness. During the last minute of cooking, place a slice of cheese on each patty and allow it to melt. Toast hamburger buns until golden brown and slightly crisp. Once burgers are cooked, transfer them to the buns and let rest for a moment.
To create monster faces, cut cheese and olives into various shapes for eyes, mouths, and other facial features. Spread mayonnaise on the buns as a base, then artfully arrange the cheese and olive pieces to craft unique monster expressions. Experiment with different shapes and placements to make each burger uniquely terrifying and delightful.
When preparing Monster Burgers, keep olive pieces relatively large to prevent them from falling off during serving, and consider having extra ingredients on hand for creative experimentation.
For best results, slightly undercook the burgers initially, as they'll continue cooking while the cheese melts, and keep a lid nearby to trap heat and help cheese melt more quickly if needed.
Cooking Steps
You'll start by shaping your ground beef into uniform 1/3 pound patties, seasoning them generously with salt and pepper for maximum flavor.
Next, grill or pan-fry the patties to your preferred level of doneness, carefully melting slices of cheese on top during the final minute of cooking to create a perfectly melted topping.
Once your burger patties are cooked and the cheese is beautifully melted, toast your hamburger buns to a golden brown, preparing them for the most important step: transforming your burgers into spooky monster faces with strategically placed olive eyes and cheese mouth details.
Step 1. Prepare Ground Beef Patties
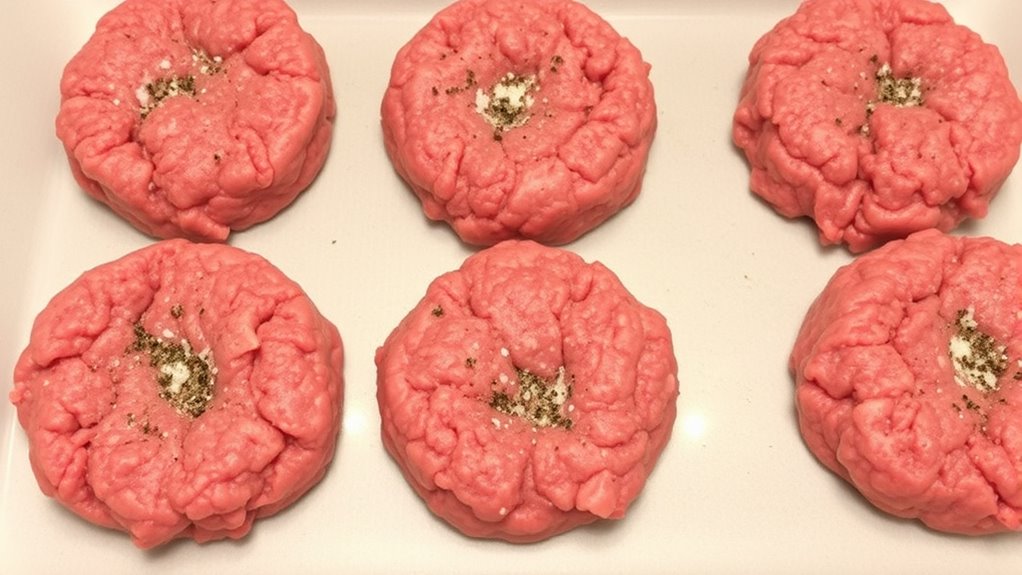
A classic Halloween Monster Burger starts with perfectly prepared ground beef patties, transforming your ordinary burger into a spooky culinary creation. Choose high-quality 80/20 ground beef for the juiciest results, which provides an ideal fat-to-lean ratio.
Gently form 1/3 pound patties, handling the meat minimally to prevent tough textures. Create a small dimple in the center of each patty to prevent bulging during cooking, ensuring even thickness.
Key patty preparation tips:
- Season generously with salt and pepper
- Keep patties cold until cooking
- Use clean hands for shaping
- Avoid overworking the meat
- Make uniform thickness (about ½-inch)
Press the center slightly thinner than the edges, which helps the burger cook evenly and maintain a professional, restaurant-quality appearance for your Halloween monster masterpiece.
Step 2. Grill Patties to Desired Doneness
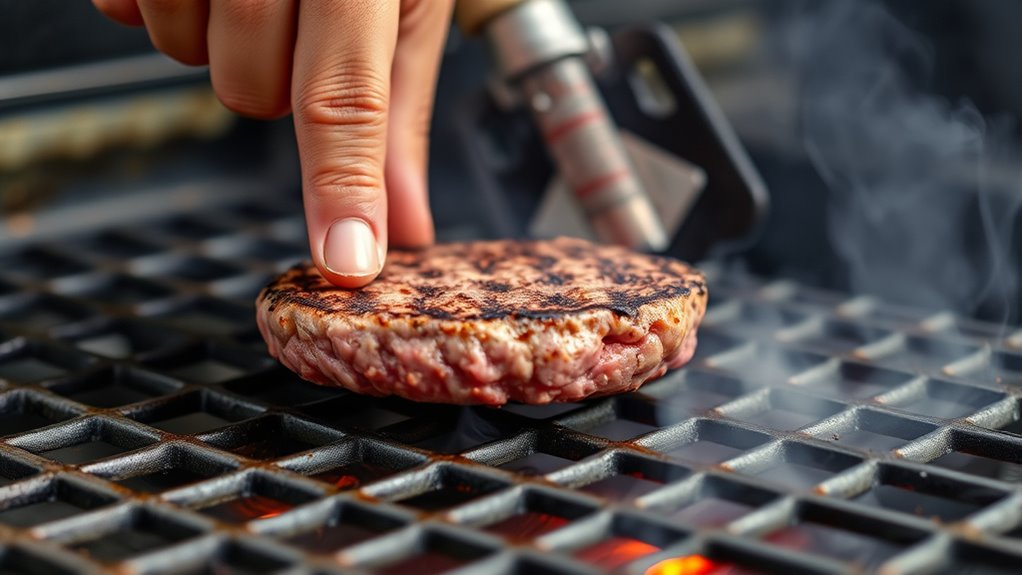
Fire up the grill to medium-high heat, creating the perfect searing environment for transforming those carefully shaped patties into juicy, monster-worthy burgers.
Position the patties carefully on the grates, ensuring even cooking and those coveted grill marks. Cook for 4-5 minutes on the first side, watching for:
- Surface browning
- Slight meat juice emergence
- Edges turning opaque
Flip the burgers using a sturdy spatula, applying gentle pressure. Cook an additional 3-4 minutes for medium doneness, adjusting time based on thickness and desired internal temperature.
Pro tip: Use a meat thermometer to confirm 160°F for food safety. For melted cheese, place slices during the final minute of cooking, allowing them to drape dramatically over the patties.
Cover briefly with a grill lid to accelerate melting and trap heat, creating perfectly prepared monster burger foundations.
Step 3. Melt Cheese on Patties
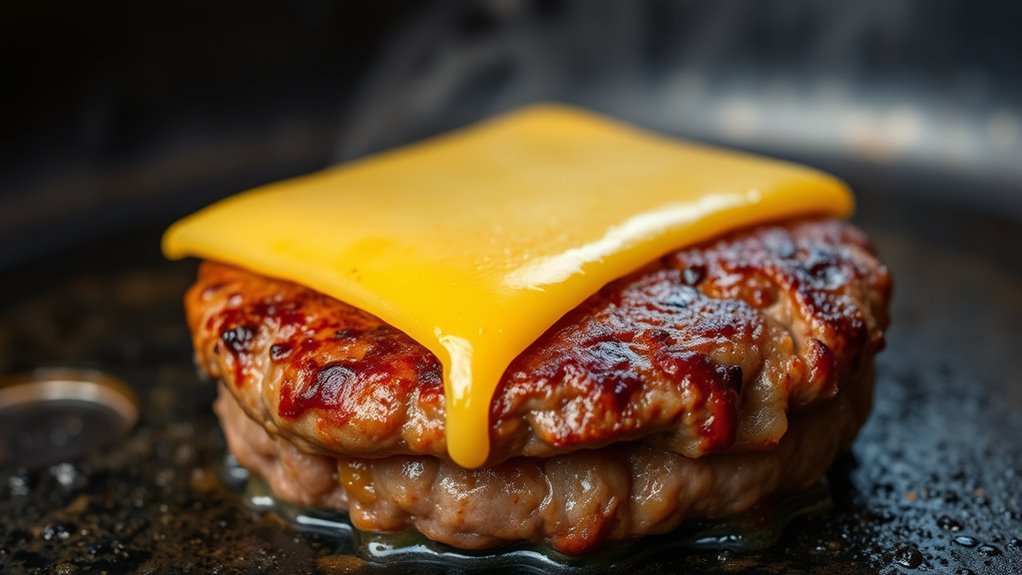
After achieving those perfect grill marks and ensuring your patties are cooked to juicy perfection, it's time to crown each burger with melted cheese that'll make your Monster Burgers truly come alive.
Place a slice of cheese directly on top of each hot patty during the final minute of cooking, allowing it to soften and drape dramatically over the meat's surface.
Pro tips for optimal melting:
- Use medium-low heat
- Cover the pan with a lid to trap steam
- Select cheeses with good melting properties like cheddar or American
- Keep cheese slice centered on the patty
Watch for telltale signs of perfect cheese melt: slight bubbling edges, glossy sheen, and soft, cascading texture.
Remove from heat just as the cheese begins to stretch and become translucent, ensuring a smooth, creamy topping for your spooky Halloween creation.
Step 4. Toast Bun Surfaces Golden
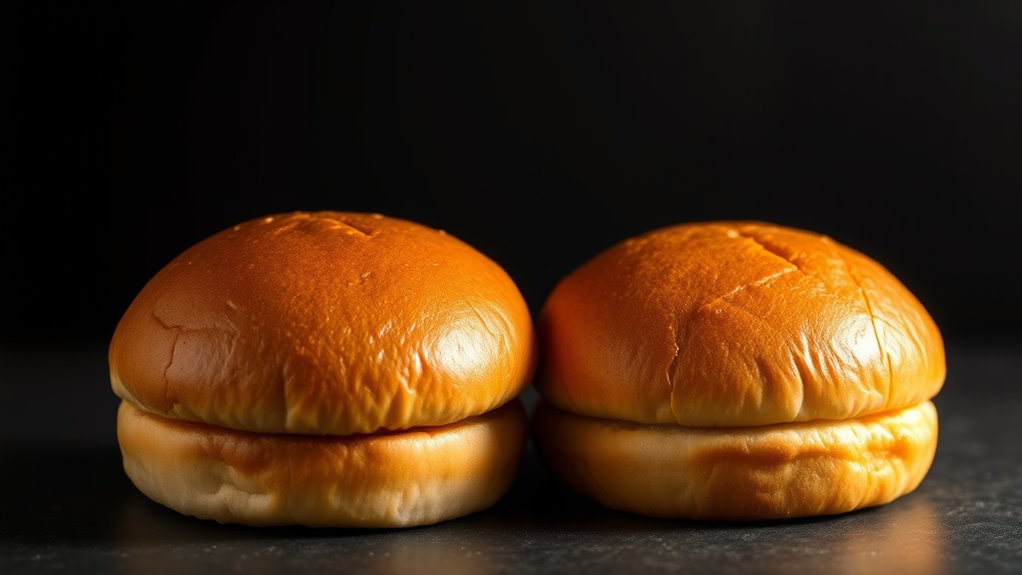
Golden-brown horizons await your hamburger buns, transforming them from pale bread to crispy perfection.
Select a skillet or griddle and set it to medium heat, ensuring an even toasting surface. Lightly butter both interior sides of your hamburger buns to enhance flavor and promote even browning.
Place buns cut-side down, pressing gently to maximize contact with the heated surface. Watch carefully for color development:
- 30-45 seconds for light golden hue
- 45-60 seconds for deeper amber tone
- Avoid burning by monitoring closely
Listen for a subtle sizzling sound, which indicates proper heat engagement.
When edges look crisp and center appears uniformly golden, remove buns immediately. The goal: a crunchy exterior that provides textural contrast to your juicy Monster Burger patty, creating a sensory Halloween dining experience.
Step 5. Assemble Monster Face Creatively
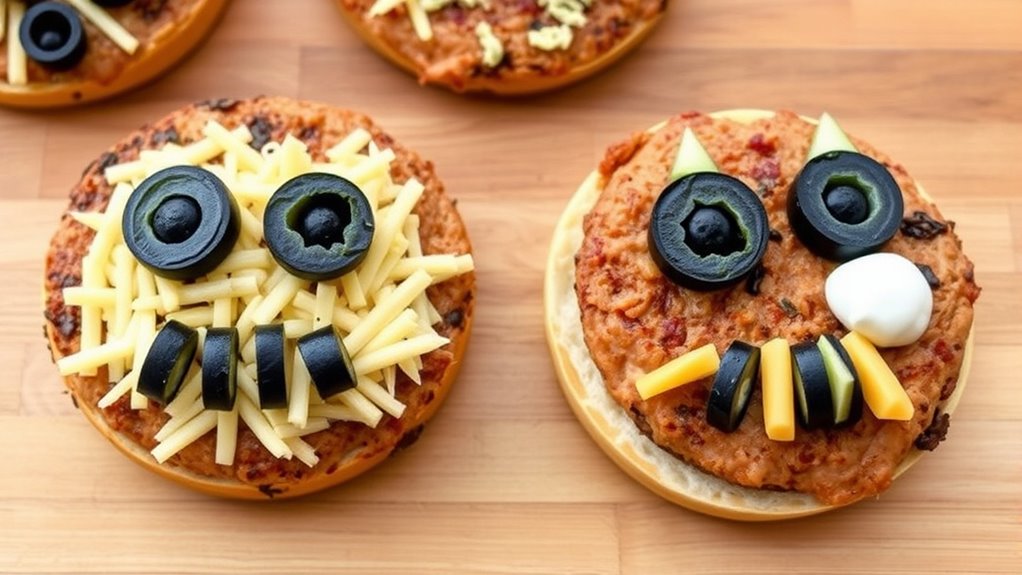
Though Halloween Monster Burgers might seem intimidating, transforming your patties into spooky characters is surprisingly simple and fun.
Begin by carefully placing sliced cheese on your burger, creating a base for facial features. Cut black olives into varied shapes: circles for eyes, triangles for teeth, or crescents for mouths. Position these pieces strategically on the melted cheese, experimenting with different expressions to capture a playful, monstrous look.
Key assembly tips:
- Use mayonnaise as "glue" to help olive pieces stick
- Vary olive sizes for more dynamic facial details
- Create asymmetrical expressions for added character
- Ensure olive pieces are large enough to remain visible
Press olive pieces gently into the warm cheese to secure them. Your monster burger is now ready to frighten and delight!
Final Thoughts
While Halloween Monster Burgers might seem like a complex culinary project, you'll find they're surprisingly simple to create. With just a few strategic ingredients and basic cooking skills, you can transform an ordinary burger into a festive, memorable meal.
The key is experimenting with cheese placement, olive shapes, and creative facial expressions that'll delight your family and guests.
Practice makes perfect when crafting these playful burgers. Don't stress about creating the most elaborate monster face; even simple designs can spark joy and Halloween spirit.
Consider involving kids in the assembly process, letting them design their own monster expressions. Remember, the goal is fun, flavor, and creating lasting memories around the dinner table.